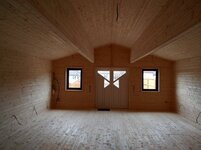
Roof insulation goes in today, so the 'build' is almost complete, just floor and windows+doors to fit, so should be done by Friday, a total of 17 days!cheers looking fab !!! so is the insulation to go into the roof space yet ?
Kev
Monday is the electric fit out, so by this time next week it should be complete, hardest part will be giving it a week or so for dust to settle, then coerce pin-heads (with beer and pizza) to come along and help move & set-up the pins...
Then replace the lawn!!
")


")