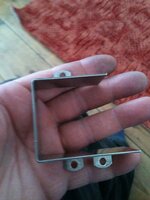
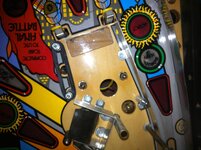
TBH when I reassembled it, I didn't put a sleeve on either - since the ball can't come into contact with either. Both posts are identical and they're only for there the vertical habit rail to sit on. Cheers Geoff
Pinball info
You are using an out of date browser. It may not display this or other websites correctly.
You should upgrade or use an alternative browser.
You should upgrade or use an alternative browser.
Complete The Shadow Shop Log
- Thread starter RudeDogg1
- Start date
Think I've found the mini kicker fault. I just finished rebuilding the last of the coils so thought I'd start the battlefield strip down. About 5 inches down from the cable join I redid in amongst the small loom the brown cable is broke in half
Been busy last couple days finished rebuilding all coils and mini pf. Hopefully fixed my mini kicker. Made new coil wrappers because mine when abit ****ty when cleaned the brown ones went white.
View attachment 1590
Replaced one of the slingshot plungers it was abit worn and the link had a lot of play.
View attachment 1591
Gave the inside of the cab a quick spray because it had a couple scrapes because one of them tube tubular nuts that hold the pf brackets hasn't been attached all the time it's been here. Replaced the leg bolt plates half of them were stripped and all had nuts welded on (think one of its owners owned a welder I've found a few welded parts). Also replaced the 2 wood strips from the back they were all chewed. Just need to find some of them plastic discs to put on them if anyone knows where to get em.
I noticed something odd I think at some stage someone has attempted a re decal of the back box. The battered side the decal is thin like on the cab and poorly touched up. The good side is really thick as if it has the backing on still but hasn't.
View attachment 1592
Battered side
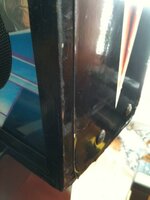
Better side (thick)
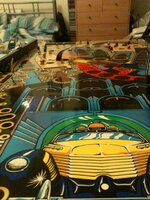
Started on the pf given it a foam and a novus 2. Under all the filth she's in good nick got a lovely shine before I've even waxed it. Can you use novus 3 on the pf? There's a ball track I can't shift.
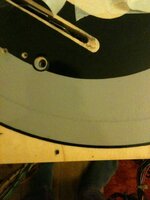
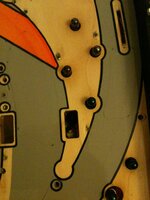
Should I keep these 2 mylars?
View attachment 1590
Replaced one of the slingshot plungers it was abit worn and the link had a lot of play.
View attachment 1591
Gave the inside of the cab a quick spray because it had a couple scrapes because one of them tube tubular nuts that hold the pf brackets hasn't been attached all the time it's been here. Replaced the leg bolt plates half of them were stripped and all had nuts welded on (think one of its owners owned a welder I've found a few welded parts). Also replaced the 2 wood strips from the back they were all chewed. Just need to find some of them plastic discs to put on them if anyone knows where to get em.
I noticed something odd I think at some stage someone has attempted a re decal of the back box. The battered side the decal is thin like on the cab and poorly touched up. The good side is really thick as if it has the backing on still but hasn't.
View attachment 1592
Battered side

Better side (thick)
Started on the pf given it a foam and a novus 2. Under all the filth she's in good nick got a lovely shine before I've even waxed it. Can you use novus 3 on the pf? There's a ball track I can't shift.

Should I keep these 2 mylars?


Great work, that has a lovely shine.
My personal opinion on the mylars is to leave them where they are still working and don't annoy me. I left them in the CFTBL top bumpers because they are barely seen and will still protect the playfield. Yours look at the top and hidden so why worry about them.
The same with the ball tracks, if rubbing harder will wear the paint then you have done enough and it is looking very clean.
Not sure why some of you pictures appear and clickable attachements though....
great job Rudi
Great work, that has a lovely shine.
My personal opinion on the mylars is to leave them where they are still working and don't annoy me. I left them in the CFTBL top bumpers because they are barely seen and will still protect the playfield. Yours look at the top and hidden so why worry about them.
The same with the ball tracks, if rubbing harder will wear the paint then you have done enough and it is looking very clean.
Not sure why some of you pictures appear and clickable attachements though....
Yes that is strange can someone give Paul the link to this thread please? I'm on tapatalk so can't give a link
Sanctum repair has started pics will follow when I've completed that part
Going abit slow here at the mo while I wait for parts. Cleaned the underside and inserts. Started repopulating the underside as far as I can (can't put the taller stuff on else I can't flip it safely).
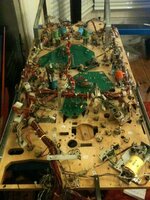
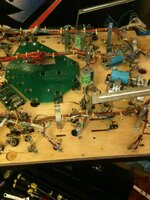
I remembered seeing a connector that needed re crimping because I could see wire strands poking out the top. Well they were worse than I thought and quite a lazy hack IMO.
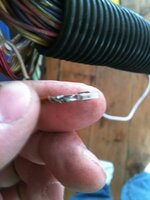
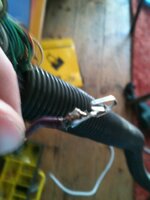
Half half ****d crimped and half soldered.
Also re decaled the diverters

Before after
Also does anyone know of anyone in the uk that stocks the diverter crank arms and roll pins? I can get them from Germany but they ain't overly cheap


I remembered seeing a connector that needed re crimping because I could see wire strands poking out the top. Well they were worse than I thought and quite a lazy hack IMO.


Half half ****d crimped and half soldered.
Also re decaled the diverters

Before after
Also does anyone know of anyone in the uk that stocks the diverter crank arms and roll pins? I can get them from Germany but they ain't overly cheap
View attachment 1708
Just took the crank arms off yeah their ruined lol one is and one has started to go
also does anyone know what type of screw is ment to be used to screw the phurbas on?
Just took the crank arms off yeah their ruined lol one is and one has started to go
also does anyone know what type of screw is ment to be used to screw the phurbas on?
Attachments
Mine was like the worst one of yours before I welded it up. I haven't looked at the other one. Would I be right in guessing that the worn one is the left phurba? That would seem logical as its used a lot more than the right one due to the Skillshot selection.
no its the right one but seeing as the left ramp has been welded at some point I wouldn't be surprised if they just swapped the crank over
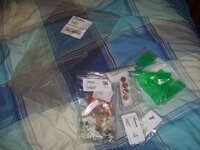
I receive a lil parcel from marcos yesterday
The last couple nights Ive been working on my first mod.
So.... She arrived with a very poor quality scanned and applied decal.
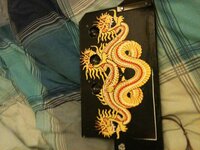
It had to go.
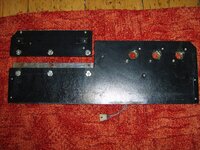
Ive been trying to find this stuff for ages. I didn't want the crappy paper stuff or the rubbish over priced decal I wanted realistic, textured and 3d. I eventually found it on a uk site called my tiny world called handmade brick cladding its £12.99 a sheet 23 x 13".
After being glued and trimmed up.
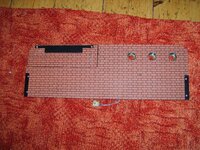
The finished product im quite chuffed with it.
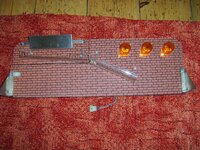
Also installed all the insert led's while the pf was still flipped already found a couple mistakes in the coin taker kit short 1 yellow 44 and 3 red 555 so far. Ill be on to marcos once ive fitted them all and turned it on to check they all work. Which leds is it that only work one way? Now just got to wait for my last few parts crank arms, plastics, ramp flaps. Got my waterslide paper today so hopefully ill finish the sanctum tomoz pics to follow

The last couple nights Ive been working on my first mod.
So.... She arrived with a very poor quality scanned and applied decal.

It had to go.

Ive been trying to find this stuff for ages. I didn't want the crappy paper stuff or the rubbish over priced decal I wanted realistic, textured and 3d. I eventually found it on a uk site called my tiny world called handmade brick cladding its £12.99 a sheet 23 x 13".
After being glued and trimmed up.

The finished product im quite chuffed with it.

Also installed all the insert led's while the pf was still flipped already found a couple mistakes in the coin taker kit short 1 yellow 44 and 3 red 555 so far. Ill be on to marcos once ive fitted them all and turned it on to check they all work. Which leds is it that only work one way? Now just got to wait for my last few parts crank arms, plastics, ramp flaps. Got my waterslide paper today so hopefully ill finish the sanctum tomoz pics to follow
The 555's I use from PH only work one way, no big deal, just rotate them. I'd have thought more expensive ones like coin takers should work either way, maybe not though.
Just finished my sanctum repair, bit annoyed the grey turned out a lil paler but its 100% better than it was. This is what I did
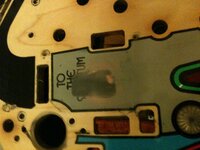
This is what it was like under the worn out overlay. Someone had attempted to use a dark grey filler dunno what it was but it was rock hard took me an age to get it level. Even that had a couple holes in which you can see I hit with a little filler to start with.
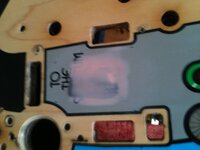
Next fill and sand.
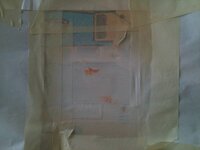
A white base coat and filled any blemishes.
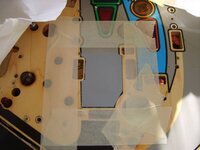
Hit it with some grey making sure when I masked the area I masked off a fraction of the outline so id have a guide to lay down my custom made waterslide. Followed by a light clear to lay the waterslide transfer on.
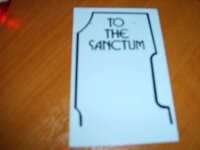
Heres my clear waterslide transfer all ready to go.
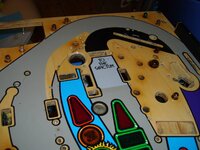
Transfer layed down and a quick blast of clear to seal. I will be mylaring it to once cured. for some reason the flash makes it look an even worse match. As you can see from the phone pic its a pretty much exact match to the rear loop.
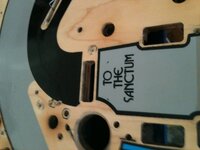

This is what it was like under the worn out overlay. Someone had attempted to use a dark grey filler dunno what it was but it was rock hard took me an age to get it level. Even that had a couple holes in which you can see I hit with a little filler to start with.

Next fill and sand.

A white base coat and filled any blemishes.

Hit it with some grey making sure when I masked the area I masked off a fraction of the outline so id have a guide to lay down my custom made waterslide. Followed by a light clear to lay the waterslide transfer on.

Heres my clear waterslide transfer all ready to go.

Transfer layed down and a quick blast of clear to seal. I will be mylaring it to once cured. for some reason the flash makes it look an even worse match. As you can see from the phone pic its a pretty much exact match to the rear loop.

Great work fair play to you.
Thanks for the break down in the pictures. We like pictures.
Show us the final when the mylar is down, it might darken it a tad too.
Show us the final when the mylar is down, it might darken it a tad too.
No probs I will get one tonight
I was hoping there would of been more interest in my shop log..... I'll carry on anyway.
Mylared the sanctum and where the ramp flaps sit and gave the p/f 4 coats of guitar wax. Pics to follow
Mylared the sanctum and where the ramp flaps sit and gave the p/f 4 coats of guitar wax. Pics to follow
Rudi, look at any shop log and you will see that some people are interested in the work but few get a large number of actual related posts. We don't post them for comments, we do it to inspire other people, to help others see how things are done and to record the work so we can look back on the development later.
We also do it so we have a more awesome machine at the end of the process.
We also do it so we have a more awesome machine at the end of the process.
Don't take the lack of posts as people not being interested. I'm reading it and finding it fascinating stuff, but as a newbie to Pinball I don't really have much to say other than 'awesome work'. 
Edit: Haha, beaten to it by Calimori
Edit: Haha, beaten to it by Calimori
K aslong as I'm not wasting me time posting it tis all lol
I check here about 10 times a day for updates and inspiration 
that's a hole protector dude
Been scratching my head for about half an hour can't see it in any of my pics
Was there something on your head that caused your fingertips to go black?
thanks ron I figured it out about 10 mins ago.
Dose anyone have a spare 1/4" hex 50 mm long machine screw and matching T- nut like this that are used in these that I can rem the name of
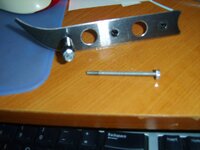
also does anyone know where to get the plastic spacers? only need a couple and cant find any anywhere.
My last cry for help I can not find anywhere is the 2 right side fittings for the gun grip nowhere on earth seems to stock the original ones. So I tried this one http://www.marcospecialties.com/pinball-parts/02-4547 which was to short so was going to try this one http://www.marcospecialties.com/pinball-parts/02-4546 because its longer but no one has that in stock either. Does anyone have any of these I will pay
also does anyone know where to get the plastic spacers? only need a couple and cant find any anywhere.
I might have some in my box of cr*p , I mean spares ....... I'll have a look
I might have some gun fastenings as well
I might have some in my box of cr*p , I mean spares ....... I'll have a look
I might have some gun fastenings as well
that would be awesome ty
Last couple days I've got pretty far underside repopulated, upper repopulated minus the plastics, ramps and wireforms. New plastic set due Monday also awaiting ramp flaps and getting the wireforms rechromed. The pf is back in the cab and connected. And all working no faults at all at the mo. all lights working (apart from rings and red flashers as not connected atm). Mini kicker now kicking. Not done a switch test yet but then it's not picked up any faults. Only issues so far is one of the small bayonet sockets on the bf needs replacing the bulb is really loose in it and only lights if jiggled also there's a similar prob with one of the 555 black plastic connectors on the bf it works if I pressing ur as soon as I lower the battle field it goes out. Is this a simple case of replace?


