What's new
Pinball info

Register a free account today to become a member! Once signed in, you'll be able to participate on this site by adding your own topics and posts, as well as connect with other members through your own private inbox!

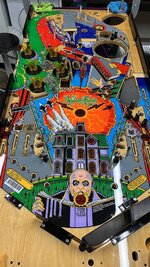
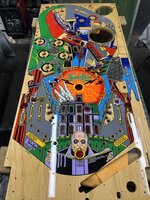
Complete The Addams Family(s) Restoration

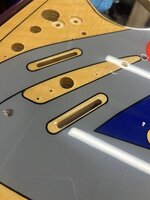
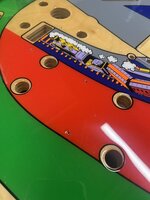
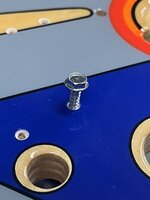
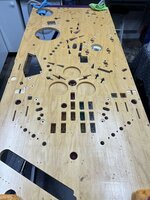
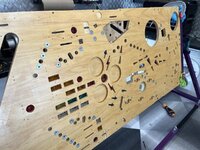
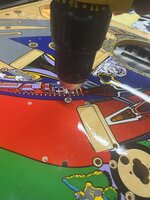
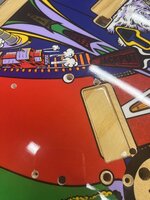
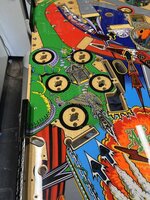
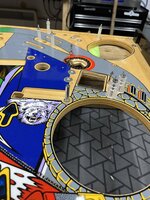
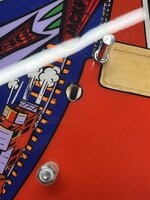
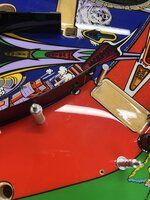
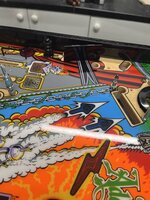
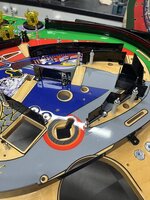
I needed to crack on with the playfields and as one of them has a Ron Kruzman re-finished clear coat, there’s a few extra steps to take in order to avoid chipping the clear when drilling out the holes and dimples on the top side.
The thickness of the clear he applies is a lot different from the standard finish of repro playfields.

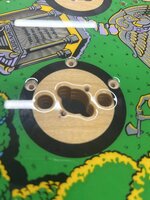
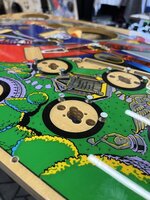
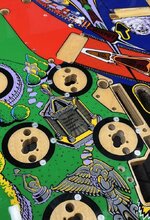
Due to thickness of the clear he uses, it builds up and flows into the holes and dimples. 7BF2F4F7-7679-4E95-9512-5FE664311B9D.jpegE5720F71-F506-4B01-9665-1677C364011E.jpeg
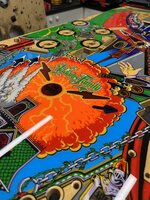
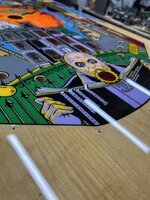
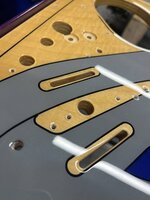
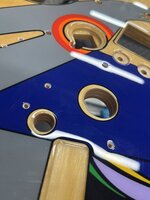
0DFB3DC0-8A55-4D9D-ACA7-DCDC5A4A3C0D.jpeg9E1F2395-17C0-477B-AAAD-95E73DB75A24.jpegE01566F1-C3BB-4FAC-9AE2-8D12908A9F71.jpeg
If I was to take a small drill bit and attempt to open these up, as soon as the drill starts to spin, it would catch the clear and chip it, or could cause ghosting. This can also happen on a CPR or Mirco PF, but on this one, it would definitely happen.
To get round this, I used a kit that he supplies.
F225F091-F71E-4DBF-AAFB-AF48552D67A7.jpeg
The kit includes grinding bits that won’t catch and chip the clear, but will sand/grind it away instead. The basic concept is to open the holes out and then re-seal them to stop any future chipping or lifting to the clear. I believe this is something that happens on some repro playfields and even on newly released titles and will only get worse unless you stick some mylar on it to try and stop it spreading.

I used 2 of the grinding tools from the kit as well as a hand countersink tool, however there are loads of different ways I’ve seen people do this using this mini kit on Pinside.
CAEDA4D0-0810-4034-858D-C8E1CFDA4951.jpeg
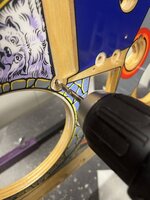
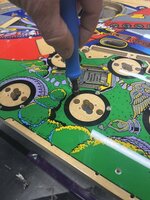
First step I did was to use the pointed tool to start opening up the dimples.
B55517F4-4FF8-42D7-866E-5BF5B3A6B7E3.jpeg
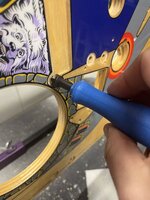
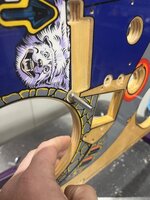
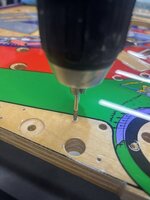
This opened the dimples up slightly. I then followed up with the oval bit until the opening was larger than the screw threads. This will stop the threads of the screws catching the clear and potentially lifting the clear coat.
784B49B6-0899-4C3C-A1C7-F7591B984C41.jpeg5F0C7FF3-B369-426A-80B6-7DF6AD399738.jpegC55C6BE0-AC9E-4436-8F45-DE0AABBAD756.jpegCDE74C1D-5FDC-49E0-9BBC-7394607AF98D.jpegOnce the hole is opened up enough, I moved to the drill bit. Ron includes a nice drill gauge set which comes in handy for much more than this job.
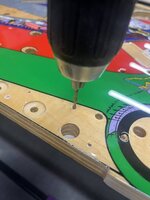
Once the bit is selected, I run the drill through to the required depth.
22E5AF23-40E2-4ABE-BA87-53E6D87608C8.jpeg
The final and most important stage is to re-seal the holes. Because the clear has been removed, each hole is now an area that could chip or cause ghosting from vibration or impact of the ball.

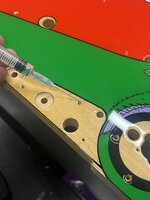
To re-seal the holes I used watered down super glue that comes with the kit.
Ron includes syringes to put the glue into the holes.
FABF1848-E1BB-40CF-A1B5-2EA2C667579B.jpeg
They work great and gives precise control, as to be honest I was ****ting myself when doing this as I didn’t was super glue going all over the playfield.
I just added a drop to each hole or until the white turns clear which locks the clear coat back down.
C3AA39D1-FE3D-4DAF-AEB1-6888CC08F839.jpeg
86FB31E2-CED0-4B2A-A58E-14284EB51DE3.jpeg
25BE846E-E392-4402-9292-F9C6422CD383.jpeg
Next job is to open up all the holes for the posts and do the same to the CPR PF.
 
Last edited:
I needed to crack on with the playfields and as one of them has a Ron Kruzman re-finished clear coat, there’s a few extra steps to take in order to avoid chipping the clear when drilling out the holes and dimples on the top side.
The thickness of the clear he applies is a lot different from the standard finish of repro playfields.

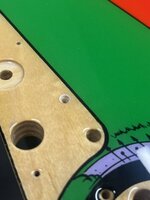
Due to thickness of the clear he uses, it builds up and flows into the holes and dimples. View attachment 186767View attachment 186768
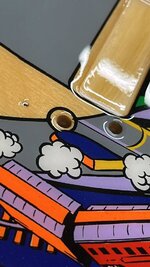
View attachment 186769View attachment 186770View attachment 186771
If I was to take a small drill bit and attempt to open these up, as soon as the drill starts to spin, it would catch the clear and chip it, or could cause ghosting. This can also happen on a CPR or Mirco PF, but on this one, it would definitely happen.
To get round this, I used a kit that he supplies.
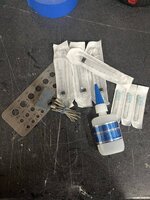
View attachment 186781
The kit includes grinding bits that won’t catch and chip the clear, but will sand/grind it away instead. The basic concept is to open the holes out and then re-seal them to stop any future chipping or lifting to the clear. I believe this is something that happens on some repro playfields and even on newly released titles and will only get worse unless you stick some mylar on it to try and stop it spreading.

I used 2 of the grinding tools from the kit as well as a hand countersink tool, however there are loads of different ways I’ve seen people do this using this mini kit on Pinside.
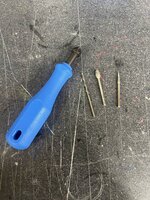
View attachment 186773
First step I did was to use the pointed tool to start opening up the dimples.
View attachment 186777
This opened the dimples up slightly. I then followed up with the oval bit until the opening was larger than the screw threads. This will stop the threads of the screws catching the clear and potentially lifting the clear coat.
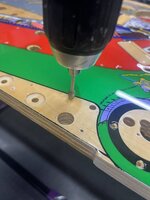
View attachment 186776View attachment 186783View attachment 186784View attachment 186782Once the hole is opened up enough, I moved to the drill bit. Ron includes a nice drill gauge set which comes in handy for much more than this job.
Once the bit is selected, I run the drill through to the required depth.
View attachment 186778
The final and most important stage is to re-seal the holes. Because the clear has been removed, each hole is now an area that could chip or cause ghosting from vibration or impact of the ball.

To re-seal the holes I used watered down super glue that comes with the kit.
Ron includes syringes to put the glue into the holes.
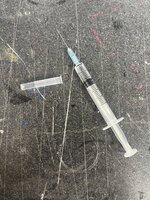
View attachment 186774
They work great and gives precise control, as to be honest I was ****ting myself when doing this as I didn’t was super glue going all over the playfield.
I just added a drop to each hole or until the white turns clear which locks the clear coat back down.
View attachment 186779
View attachment 186780
View attachment 186785
Next job is to open up all the holes for the posts and do the same to the CPR PF.
Jez man how long did that take you?? cracking looking playfield that tho!

Cheers

kev
 
Jez man how long did that take you?? cracking looking playfield that tho!

Cheers

kev
Thanks Kev. It took me just over an hour to do, however I was taking it slow as I didn’t want to cause any chips or problems further down the line.

It was definitely worth taking the time to do it though imo, as the worst thing that could happen is that I finish the rebuild and then notice ghosting/lifting to clear after a few games 😮
 
The final stage in prepping the playfields was to open up all the holes for the posts, pop bumpers as well drilling all the dimples on the back.

I started by checking each post hole to check fitment.
339369C0-5FDC-44AD-8BB3-6B3671757034.jpeg
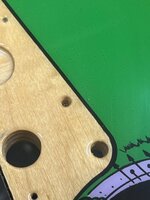
I then drilled them out and used my hand countersink tool. I then locked it all back down with the glue as before.
FE6C9D13-BA64-456A-8EA0-2E9E9A0585B0.jpeg09EFF600-C222-47CB-B5E2-38D677452774.jpegB4740BAF-E878-4884-A909-965754E5F23D.jpeg
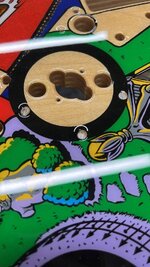
I was abit more cautious when it came to the pop bumpers as the holes were completely blocked with clear 😮
AC2A506A-9273-4C47-84D9-52FEDBB1B6AE.jpeg
For these I used the pointy dremel tool to grind away at the clear and to re-open the holes for the pop bumper nails, followed by the countersinking the holes.
ACE7B39F-A545-459C-82DC-EC3C844AAFE2.jpeg1CD74A25-8EF8-4B1B-BC48-BD6AF16C6484.jpeg
I also noticed as well a couple of areas where excess clear had run down into cut outs, so I had to remove that.
8E987C45-A227-4DD3-A0EF-B2C21804F577.jpeg
E8ED2816-7F56-4F89-97C9-66BBDEC746D8.jpeg90A8BA93-2F42-4234-9C01-C7521AE14F44.jpeg
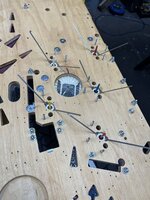
Drilling out the dimples on the rear was next. IMO when drilling dimples it’s better to check the alignment before going gung-ho with the drill as your only regret it later when you realise nothing lines up.

I would say that 25% of them needed re-positioning slightly on both playfields. Some were massively off.
If I followed the dimples for the flipper mechs for example, I would of had major alignment problems 😮EC195776-2235-43A6-84AA-F7C28B2B9C70.jpeg
This was the same with most of the mechs and scoops.
32733DAB-4A7D-4B7F-9B14-01D0AF295E6C.jpeg
It was definitely worth checking every first as it will save me a ton of time when I start to fit everything back on the playfields.
3A69FDED-4F20-4F60-BED2-BEA7EF33A529.jpeg
Next job on the PF’s is to install the t-nuts and pop bumper screws.
 
Last edited:
I got the t-nuts fitted on both playfields and installed the pop bumper screws.
1F5896D7-D8C2-422C-AABB-E015DE8C2389.jpegDD5879E4-CD66-44FF-8F6C-13BF3639F6E5.jpeg
489CC9CC-A89E-4B38-8F8E-F33FC73E1A44.jpeg
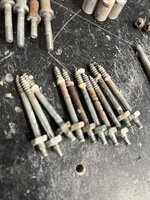
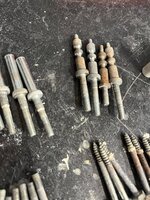
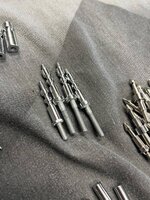
At this stage I thought it’s time to get the tumbler going as I’ll be installing all the posts and pop bumpers next.
Most of the metal had seen better days, and had quite a lot of surface rust and oxidation.
0D729842-DE9A-4509-BABA-45444E7ED4D6.jpeg
904D1AB6-179A-4EB8-834D-9863A7CBC512.jpeg208935AF-E179-473D-9289-7A93ED1556D2.jpeg
6D1B8155-E7A5-4CE2-B7E6-CAD579C0D7D1.jpeg
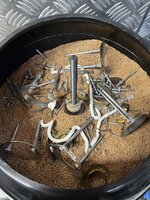
So I chucked everything in my tumbler with a good dollop of autosol and left it to run for 2 days.
26F4A559-F423-439D-A8FC-53B4678CF115.jpeg
I checked on it after a couple of days but decided to leave it running for another day and I’m glad I did as everything came out looking great.
2CC9B972-83A5-4827-A4E1-E1F809CB1017.jpegFA2E946C-F714-4781-8933-7404F7B90BA4.jpeg35AB354A-0837-4447-A728-3E7B9CC9DD85.jpegF6D8F70B-E150-4817-8EF2-63391E491FBB.jpeg740C6DBC-EC48-4C94-9161-CB6DF1BC25FC.jpeg
Next up I’ll start to fit the posts and pop bumper lamp sockets. But I’ve also noticed a couple of holes completely missing on the top side of the CPR playfield so I’ll have to drill these as well.
 
Last edited:
I got the t-nuts fitted on both playfields and installed the pop bumper screws.
View attachment 187309View attachment 187310
View attachment 187344
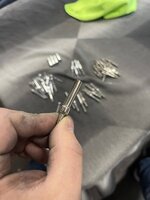
At this stage I thought it’s time to get the tumbler going as I’ll be installing all the posts and pop bumpers next.
Most of the metal had seen better days, and had quite a lot of surface rust and oxidation.
View attachment 187312
View attachment 187313View attachment 187314
View attachment 187316
So I chucked everything in my tumbler with a good dollop of autosol and left it to run for 2 days.
View attachment 187317
I checked on it after a couple of days but decided to leave it running for another day and I’m glad I did as everything came out looking great.
View attachment 187318View attachment 187319View attachment 187320View attachment 187321View attachment 187322
Next up I’ll start to fit the posts and pop bumper lamp sockets. But I’ve also noticed a couple of holes completely missing on the top side of the CPR playfield so I’ll have to drill these as well.
nice one Ant, that's how it should be done - no dirty metal going back on your shiny new playfields!!!
 
nice one Ant, that's how it should be done - no dirty metal going back on your shiny new playfields!!!
Cheers mate. I really thought 2 days in the tumbler running constantly would have polished them up, but some of the posts weren’t looking as good as the others when I checked, but running it for an extra day definitely made the difference.
 
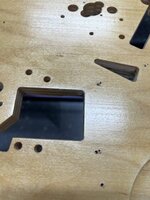
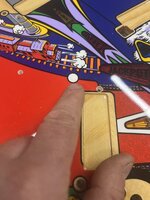
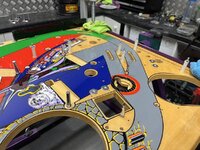
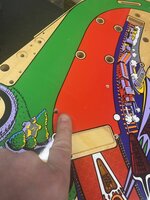
I needed to tackle a couple of missing holes on the cpr playfield which I had noticed when prepping it. Both of them were on the red section at the upper left corner of the PF.
The first one that was missing was on the left side:-
BC4992CE-3247-4278-ABF7-ACB8079BF187.jpeg
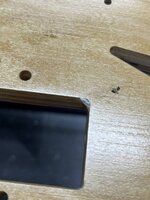
If you looked in certain lights you could faintly see a tiny mark under the artwork where I think they marked it but didn’t actually drill the hole during the manufacturing process.
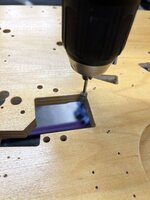
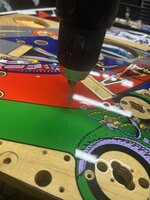
I used the same tool as before and slowly removed the clear so that I could drill all the way through without any damage.
27CA8078-4B0B-467D-9F9E-287592485A01.jpeg
80E7D150-0E15-4742-860E-B6A2F35F0814.jpeg
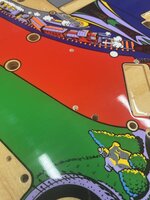
The second one was on the right and more obvious and again luckily I could just about see a mark where it needed to go. I was a little hesitant at first as it looked off centre to the artwork but when I lined up the metal rail it was spot on 👍🏻2952A0DC-247E-4657-86FF-53DC43167D79.jpeg69690337-1AC9-4B37-B915-FF08E2C3B47A.jpegFB6DAA8A-C479-4CE5-86D7-E746D76DEC43.jpeg
 
I needed to tackle a couple of missing holes on the cpr playfield which I had noticed when prepping it. Both of them were on the red section at the upper left corner of the PF.
The first one that was missing was on the left side:-
View attachment 187395
If you looked in certain lights you could faintly see a tiny mark under the artwork where I think they marked it but didn’t actually drill the hole during the manufacturing process.
I used the same tool as before and slowly removed the clear so that I could drill all the way through without any damage.
View attachment 187388
View attachment 187394
The second one was on the right and more obvious and again luckily I could just about see a mark where it needed to go. I was a little hesitant at first as it looked off centre to the artwork but when I lined up the metal rail it was spot on 👍🏻View attachment 187391View attachment 187392View attachment 187393
I'm having flashbacks!
🤣
Can you get PTSD from missing holes?
 
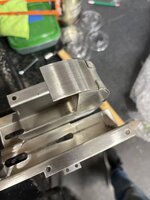
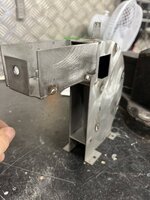
I’m sure most that own or have owned a TAF, know that the scoops get a battering and are usually broken.

I had already fixed the ones from my game before I got them powder coated but needed to sort the ones on the other Addams.

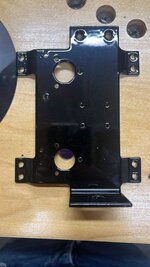
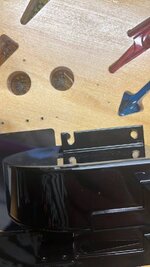
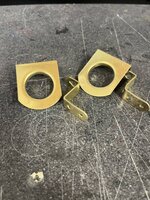
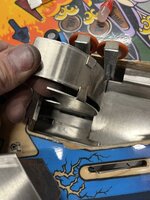
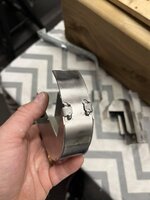
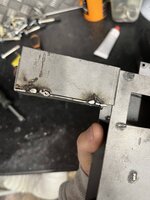
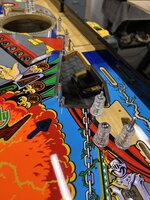
When I removed the chair and plastics above the swamp, I could clearly see that the original spot welds were broken.
D82DD6D9-B86A-4994-804F-7AECFD946043.jpeg
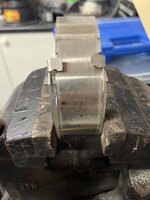
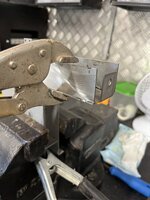
This was simple enough to fix. I just clamped it in the vice and added some spot welds to the tabs. The swamp scoop got the same treatment.
34C1F7EA-E13F-4000-82B6-412C0758E742.jpegA3A52999-0FBB-4AF5-A913-631E9CAFD7FA.jpeg46AE4300-1BF1-490C-8B45-3BB7422D9A18.jpeg
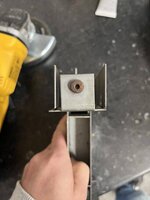
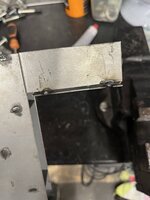
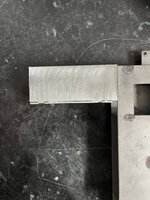
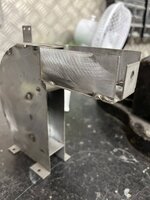
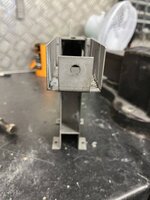
The larger one for the Thing mech however, looked like it had been repaired, albeit poorly at some point.
D865D419-0A44-4E6B-B032-984AC8FDCA7F.jpegEC4FD88D-234A-4D4D-87A8-7CC6A08F060D.jpeg
3226ECB0-7000-40FD-ADB6-D0C80B0A5385.jpeg
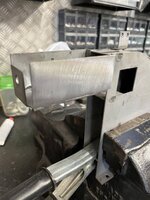
In order to fix this I ground down the old welds and repositioned the side that was wonky.
9BE48265-B22D-4934-938D-D4D4182B0F90.jpegDB7BE86C-AB05-43A5-82C1-29DA7DB2C6B2.jpeg
CAA2FB49-3298-4FFB-B4DF-5F5E8A968F1C.jpeg
Once all the metal was cleaned up, I added a couple tack welds to either side, so that this job should never need doing again.
F47046CC-B82F-483F-B08C-D01A3A6D8692.jpegC4546A17-5A86-4AB1-B59B-E9AA4D25D00E.jpeg1C1FD8DB-226D-4F72-B341-058C50C201B4.jpeg
 
Before I start on the underside of the playfield, I wanted to get the first layer on top of the PF installed.

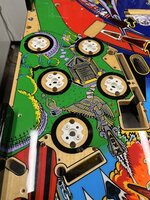
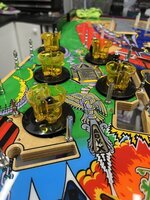
First job was to work on the pop bumpers. To stick with the black theme I’m going for, I painted the heads of the nails black, before fitting yellow bodies with black skirts.
29CCDC1D-364C-4207-9DFE-1F890D9E5E94.jpeg83B52D1E-6550-4C2E-8BC1-97748FD6AFB3.jpeg009D5404-B20C-466C-889F-476BB6791C85.jpeg
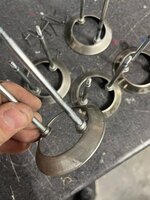
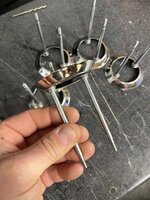
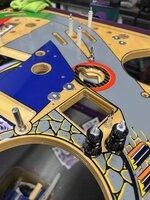
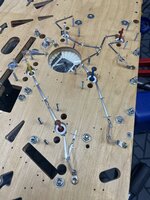
Next job was install all the metal posts as well as black star posts.
7946889F-AF3C-49FE-A53C-C718CA654E4E.jpegE64F8771-5517-4A69-B4DA-ECE940196E98.jpeg
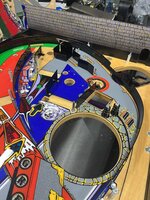
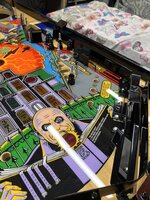
Also installed a new carbon fibre Cliffy projector around the skill shot scoop.
516FD9DC-56E3-4284-AC69-47DCD5987891.jpeg
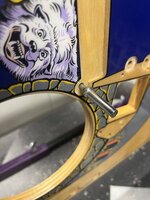
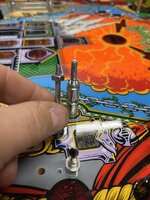
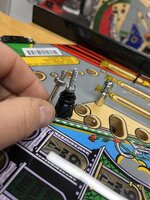
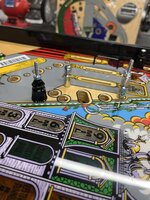
An issue that I come across on my T2 was when I fitted plastic protectors to the sling shots. The problem I had, was due to the extra thickness of the protectors underneath the plastics, there wasn’t enough thread on the posts for a nut to lock them in place.
You can just about screw one on, but only by a thread or 2, and I think with the vibration of the game, these might come off.

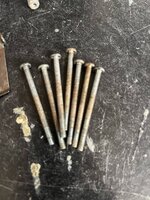
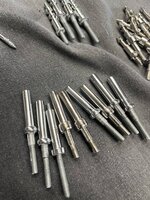
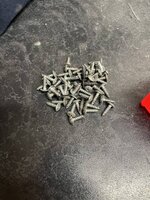
So to avoid this issue on both these Addams, Ive replaced the standard posts with slightly longer ones, so that there will now be enough thread to easily fit the locking nuts.
16AF3070-2055-42C5-B5E1-82CC1F91541B.jpeg997062CC-A867-409B-BDDC-E44A1669000D.jpegE40A5413-8602-455C-A112-AC807193AF57.jpeg
Last job was to staple the pop bumper lamp holder legs into place and solder in new diodes.
79585D64-8073-410F-9672-DD9CFB48930A.jpeg
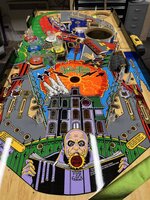
The topside on my Addams is starting to come together now, so I’ll do the same on the other playfield before installing some of the metal guides and then move onto the underside.
C820B3C3-541B-4CB0-A37E-FBBF5E9AC165.jpeg
 
Last edited:
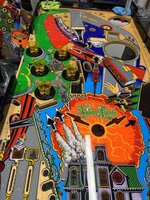
Spent some time working on the CPR playfield. I installed the pop bumper bodies/skirts, posts and a full Cliffy set to the top side.
F8F322B6-330C-4078-851B-4A601DDF22B3.jpeg
E667AC49-680E-453D-94E2-BC8C7906944B.jpegBEB62AD8-AE77-4E25-8954-94019B124A48.jpeg0F245B1C-E875-4418-B4E3-C1E075F9B18E.jpeg9E182F03-4EC4-42DD-B5D2-1179F52DEF23.jpeg
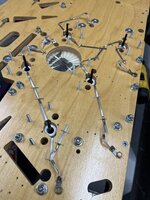
Unlike my playfield, there’s not much more I can install on the top side of this one as all the rails and metal work is currently at the polishers, so I’m going to concentrate on the underside until I get it all back.

So I made a start and stapled the lamp holder legs for the pop bumpers in place as well.
4A8DD8AC-2B90-49E6-9AC7-D869550A3716.jpegB3881C55-108E-4AA5-93B4-BFA6813691B0.jpeg
I think next I’ll fit some more guides to my Addams and then start on the harnesses and underside rebuild on both.
 
Spent some time working on the CPR playfield. I installed the pop bumper bodies/skirts, posts and a full Cliffy set to the top side.
View attachment 188278
View attachment 188279View attachment 188280View attachment 188281View attachment 188282
Unlike my playfield, there’s not much more I can install on the top side of this one as all the rails and metal work is currently at the polishers, so I’m going to concentrate on the underside until I get it all back.

So I made a start and stapled the lamp holder legs for the pop bumpers in place as well.
View attachment 188284View attachment 188285
I think next I’ll fit some more guides to my Addams and then start on the harnesses and underside rebuild on both.
Very Tidy Ant.
 
Remind me Ant what is the colour them for the 2nd addams ?

Cheers

kev
That one is going to be more traditional with zinc plated mechs etc. All the metal on the playfield will be mirror polished and the armour will be chromed. 👍🏻
 
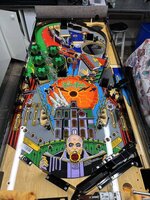
Ive now fitted more parts back to the top side of my Addams so it’s starting to come together now.

I wasn’t happy with how the screws for the metal guides came out after being tumbled so ended up polishing them up with the bench polishing wheel.
05C77DA3-DE64-415C-A5EB-89E48D2E3F03.jpeg44E130EC-DB47-4FCD-9829-36383BC7DD2C.jpeg
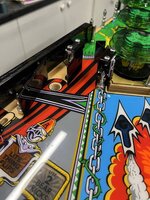
Next job, was to modify one of the bolt holes for left train guide. If I was to use the hole that was already there, the fitment of the guide wasn’t great and didn’t match the same position on the original playfield.
54C1F676-D2BA-4BBF-9AFF-BBE1B7B9F95E.jpeg
So you have to slot the hole so that the guide can be moved up and into the correct position. From what I’ve read, this seems to be quite common on new playfields.
D7E653B1-E58A-48CF-A7F3-D139B646F623.jpeg26983F67-6960-449B-B0B2-33867D195247.jpeg
Once that one was done, all the others lined up perfectly.
A7D1ECA3-3F86-415C-915B-6D66E840309F.jpeg56197443-D348-435A-994C-051930B1FDA8.jpeg3B2706EA-DE6C-47D9-8015-98A272D885C8.jpeg
910E74EB-0B7C-4211-94DC-92DB99E0B070.jpeg
D183EB0C-5B2A-4A51-8EC5-5BF85314F393.jpeg
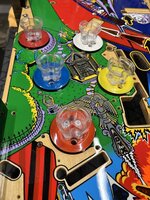
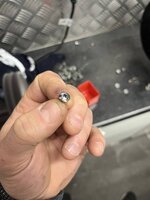
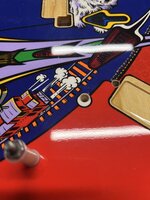
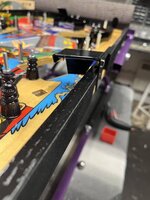
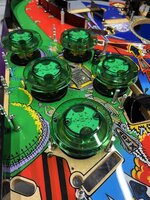
Last job of the day was to fit the new green pop bumper caps with black screws and Comet led discs to match the cemetery, as well as new “Thing Flips” optos.
B0FD673D-11F6-4FCB-8557-8835B60EF500.jpeg
49087C56-3E04-4594-8277-32C19788F7B6.jpeg
63667B8F-F0C0-4EBE-85A8-1723FF3B200B.jpeg
I’ll crack on with the wire harnesses and underside on both next. The mechs on my games have been powder coated donate ready to go. However the mechs on the other game were quite rusty so will need re-zinc platings before I can start the rebuild on that one.

I’m also picking up all the metal work from platers later this week for the other Addams and I’ve got some time off over Christmas so the plan is to get the top side of that one done as well as the cabinet decals on both.
 
Last edited:
Ive not fitted more parts back to the top side of my Addams so it’s starting to come together now.

I wasn’t happy with how the screws for the metal guides came out after being tumbled so ended up polishing them up with the bench polishing wheel.
View attachment 188858View attachment 188867
Next job, was to modify one of the bolt holes for left train guide. If I was to use the hole that was already there, the fitment of the guide wasn’t great and didn’t match the same position on the original playfield.
View attachment 188859
So you have to slot the hole so thar the guide can be moved up and into the correct position. From what I’ve read, this seems to be quite common on new playfields.
View attachment 188861View attachment 188860

Once that one was done, all the others lined up perfectly.
View attachment 188863View attachment 188871View attachment 188870


View attachment 188873
Last job of the day was to fit the new green pop bumper caps with Comet led discs to match the cemetery on the PF as well as new “Thing Flips” optos.
View attachment 188866
View attachment 188865
I’ll crack on with the wire harnesses on both as well as the cabinet decals.
Looking great with the black, love it.
 
Really like the cemetery area mate, those green pop bumper caps look excellent
Cheers mate. The playfield is so bright, i wanted the pop bumpers to blend in a-bit more so that it doesn’t take away from the PF artwork, which is why I went with the green.
 
Looking great with the black, love it.
Thanks Alan. As you know, it was a gamble going all black and completely different from standard, but the more parts I start to put back on, I can finally start to envision what it will end up looking like. 👍🏻
 
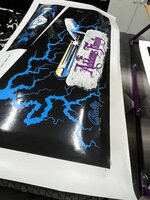
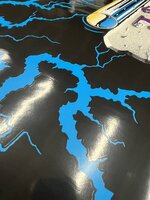
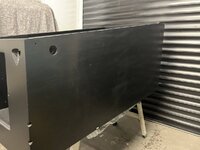
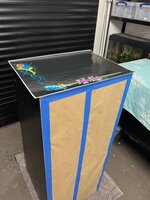
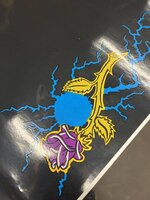
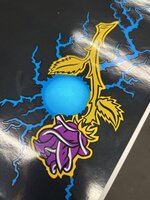
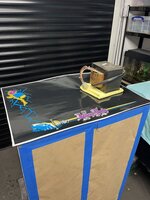
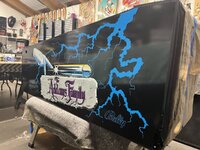
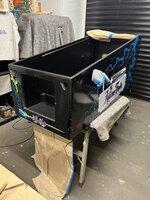
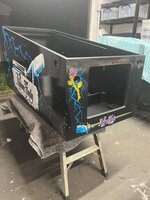
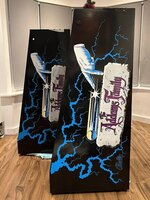
I decided to take a break from the playfields and get the decals fitted. I tracked down a place in the US that sold licensed silk screened decals for TAF. The quality of these were spot on.
7919EC6F-84D2-40CD-B76C-15D9732D3283.jpegDD97F2D1-1532-4237-BF99-A6764B7E8485.jpeg
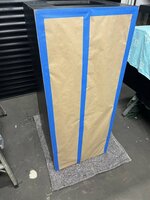
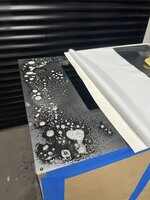
I prefer to install decals via the wet method, so the first job was to mask up the underside to stop the mdf coming into to contact with the solution causing potential swelling to the wood.
8E1145E4-53D0-406A-AD9C-0D89A5FE31D0.jpeg
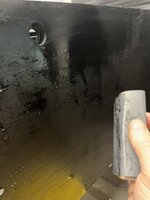
I wet sanded the cabinet with 1200 grit to remove any slight marks or specs in the paint so it has a super smooth finish and to avoid any slight imperfection showing through the decals.
ACFCEF7B-0B77-4C1F-8210-C051E53E8948.jpeg8855162F-5001-49F5-B391-C0F4750E1797.jpegCAEA6B91-07FA-45B2-9C2D-970C868C7214.jpeg52BBA298-4AA2-4C26-8152-44BE9B79796D.jpeg
CAEA6B91-07FA-45B2-9C2D-970C868C7214.jpeg
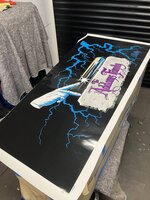
I started with the coin door decal before doing the sides. When aligning the coin door decal you have to make sure it lines up with the start button hole whilst also making sure the Addams Family text at the bottom doesn't get covered at all by the frame of the coin door. I used a torch to help centre the decal with the hole for the start button.
BE421594-6C7B-4941-9110-47F513318E27.jpeg
D13A835D-495E-43F1-BBF0-08184356FFB6.jpeg
4B7A1C75-AB5F-42B0-BB3B-FFC52781E3F3.jpeg
Once I was happy I weighed it down and applied some application fluid before sticking the decal down.
97C39A30-AA84-44BD-936D-78571A74268F.jpeg2FB3A810-A476-490F-BCD6-C78A4D20D5A5.jpeg
AC5F34CA-834E-403E-9F53-4FC3B8F5A19C.jpeg
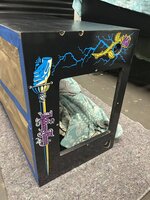
I then cut approx 2-3mm off around the entire edge and completely removed the decal from under the leg protectors. Once that was done the sides got the same treatment. I then had to do it all again with the other cabinet 👍🏻
39A8F29E-0DD8-43EB-A6DD-EC4475CF4B9B.jpeg
520FE554-4977-43CE-B384-5D5BA3A48A79.jpeg
C0EFE5C3-08A2-48AA-923E-95396F92C6F5.jpegB1C34D49-0328-439A-87DF-20C26A1A520F.jpeg
495D2C8B-8033-4C54-A2B7-585B8C83CB05.jpeg
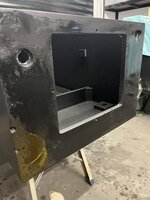
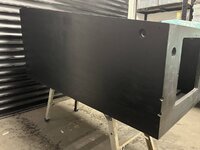
I know painting the entire cabinet takes a-bit more time in the prep stage, but imo it’s worth it as it gives a super smooth look to the finished cabinet when the decals are applied. Back boxes are next.
 
Last edited:
I decided to take a break from the playfields and get the decals fitted. I tracked down a place in the US that sold licensed silk screened decals for TAF. The quality of these were spot on.
View attachment 189451View attachment 189452
I prefer to install decals via the wet method, so the first job was to mask up the underside to stop the mdf coming into to contact with the solution causing potential swelling to the wood.
View attachment 189456
I wet sanded the cabinet with 1200 grit to remove any slight marks or specs in the paint so it has a super smooth finish and to avoid any slight imperfection showing through the decals.
View attachment 189457View attachment 189458View attachment 189459View attachment 189460
View attachment 189459
I started with the coin door decal before doing the sides. When aligning the coin door decal you have to make sure it lines up with the start button hole whilst also making sure the Addams Family text at the bottom doesn't get covered at all by the frame of the coin door. I used a torch to help centre the decal with the hole for the start button.
View attachment 189462
View attachment 189466
View attachment 189464
Once I was happy I weighed it down and applied some application fluid before sticking the decal down.
View attachment 189463View attachment 189465
View attachment 189467
I then cut approx 2-3mm off around the entire edge and completely removed the decal from under the leg protectors. Once that was done the sides got the same treatment. I then had to do it all again with the other cabinet 👍🏻
View attachment 189476
View attachment 189469
View attachment 189470View attachment 189471
View attachment 189453
I know painting the entire cabinet takes a-bit more time in the prep stage, but imo it’s worth it as it gives a super smooth look to the finished cabinet when the decals are applied. Back boxes are next.
TAF has been promoted to the house, out of the cold into the warm. Anyone thinking decals is a quick job, you spend more time checking, double checking then put the kettle to come back and check again. After an hour lol let’s go for it.

Perfect
 
TAF has been promoted to the house, out of the cold into the warm.
Yeah, everything has moved into the house temporarily while I add more insulation and fit new flooring to the garage over the Christmas period. My missus is not happy 😬

Over the last couple of weeks it was just too cold in the evening to want to work down there and the heaters took ages to warm the room.

The roof is done and I’ve built a stud wall with 100mm insulation to block the main garage roller door. Walls and flooring are next, but it’s made a big difference already.
My garage/games room is the same, it was too cold to play or do anything down there.
 
Back
Top Bottom