Very smart and tidyThe last part that I needed to restore for the cabinets were the transformers.
One of them had alot of surface rust so took a lot longer than I expected to get it back to bare metal.
View attachment 191641View attachment 191642View attachment 191643
First thing I did was to mask up all the wires and crack out the wire wheel, my drill and remove all the old paint and rust.
View attachment 191638View attachment 191636
View attachment 191637
They then had 2 coats of grey primer applied.
View attachment 191639
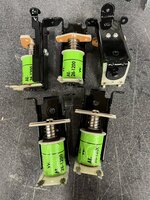
Once dry they received 3 coats of satin black which I then left to dry for a few days in order for the paint to harden.
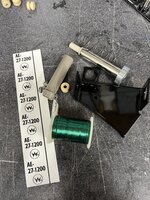
I then added new warranty labels to both them.
View attachment 191640
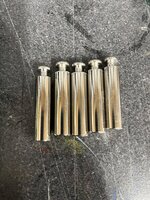
Final job was to assemble them with their powder coated brackets, spacers and polished bolts. The spacers for my transformer didn’t escape the purple dye either
I then added braiding to the wiring on both of them.
View attachment 191646
View attachment 191648
View attachment 191644View attachment 191645
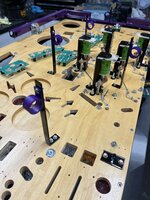
Next job to tackle is rebuilding the underside of both playfields.
Pinball info
You are using an out of date browser. It may not display this or other websites correctly.
You should upgrade or use an alternative browser.
You should upgrade or use an alternative browser.
Complete The Addams Family(s) Restoration
- Thread starter Ant-H
- Start date
insane!!!!
Possibly the wrong forum there gonzoIt's definitely sexy time again
Possibly the wrong forum there gonzoya pervie
Whoops . . . that will teach me to have multiple windows open on the pc
Back to the playfields  . The plan is to fit the light boards and mechs first on each playfield , followed by each one of the 3 harnesses.
All the light boards for both games were filthy dirty and needed a good clean before re-installing them.
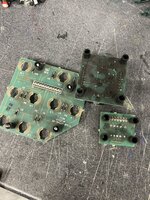
So I gave them a bath in the ultra sonic cleaner. I let them completely dry out before re-flowing the solder on all the contacts.
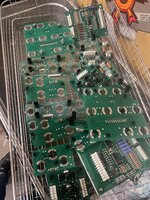
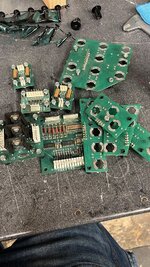
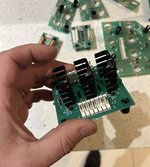
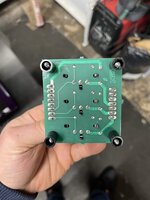
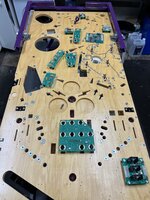
Definitely a worth while doing this as they’ve come out like new.
Next job I thought I’d start was one that I find incredibly boring and laborious. Desoldering every switch and then soldering on new ones.
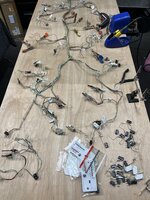
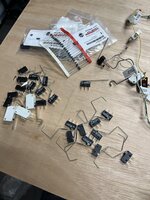
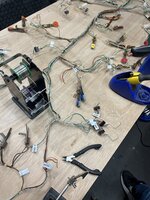
I also changed out the yellowed rock hard insulation tubing as well.
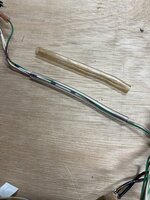
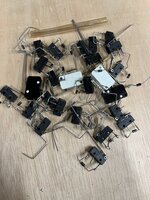
I couldn’t muster up the motivation to do it all again with the other switch harness straight after so I’ll do that this weekend. If I have time I’ll also rebuild the mechs as well.
I may try out the zinc plating as well as I’ll need that done so that I can rebuild the mechs for other Addams.
All the light boards for both games were filthy dirty and needed a good clean before re-installing them.

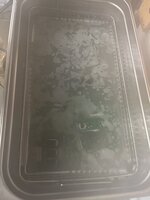
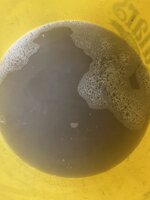
So I gave them a bath in the ultra sonic cleaner. I let them completely dry out before re-flowing the solder on all the contacts.


Definitely a worth while doing this as they’ve come out like new.
Next job I thought I’d start was one that I find incredibly boring and laborious. Desoldering every switch and then soldering on new ones.


I also changed out the yellowed rock hard insulation tubing as well.


I couldn’t muster up the motivation to do it all again with the other switch harness straight after so I’ll do that this weekend. If I have time I’ll also rebuild the mechs as well.
I may try out the zinc plating as well as I’ll need that done so that I can rebuild the mechs for other Addams.
Last edited:
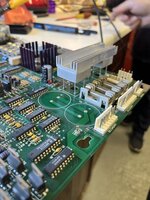
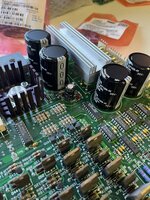
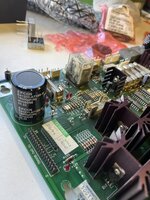
I didn’t get round to starting the zinc plating this past weekend as I popped round to see @Happypin who helped do a full cap replacement on my driver board.
First job was to change the rectifiers with newer one with longer legs so that it gets more airflow.
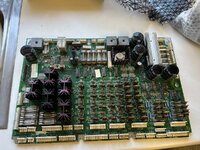

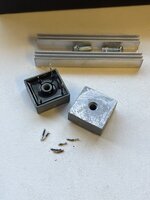
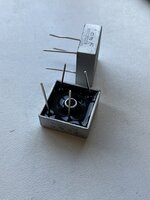
Next up was to change all the 30 year old bulging caps.
Again a big thanks to Alan @Happypin and Alfie for taking the time on Saturday and having me over
First job was to change the rectifiers with newer one with longer legs so that it gets more airflow.


Next up was to change all the 30 year old bulging caps.


Again a big thanks to Alan @Happypin and Alfie for taking the time on Saturday and having me over
Last edited:
Yesterday I also made some good progress and rebuilt all the mechs on my TAF.
Before
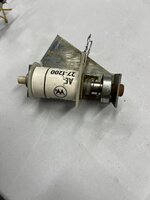
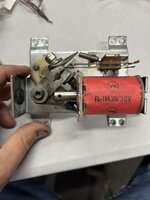
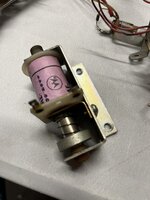
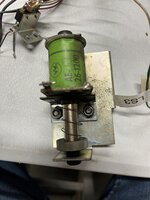
All coils were tested and cleaned in the ultra sonic cleaner before leaving for a couple of weeks to dry in a warm place. I fitted new coil wrappers and new parts like sleeves/grommets etc. However the plungers and screws were polished up before re-fitting.
The first ones I did were the 5 pop bumpers.
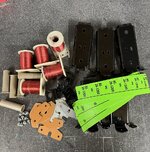
I then started on all the others.
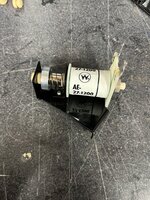
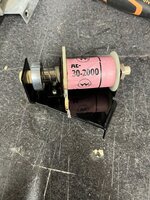
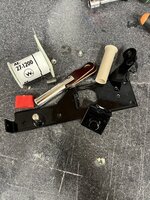
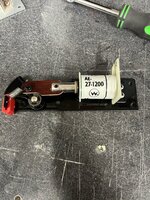
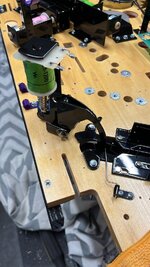
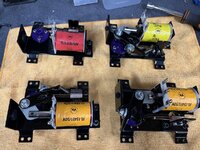
The last ones I did were the 4 flipper mechs. These were the only coils I replaced as the originals had seen better days. The standard flipper rebuild kit was also used.
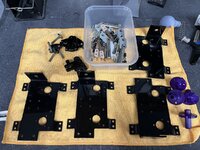
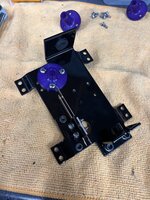
Final job was to get them all screwed into place. I also re-fitted the 3 magnets and the trough as well as the swamp and chair scoops, so that that I could get the correct alignment for the coil mechs.
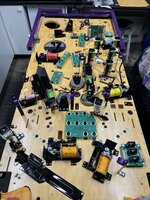
Next up I can start putting the switch harness back on this one and also change over all the switches on the other game.
I’ll also attempt the zinc plating
Before


All coils were tested and cleaned in the ultra sonic cleaner before leaving for a couple of weeks to dry in a warm place. I fitted new coil wrappers and new parts like sleeves/grommets etc. However the plungers and screws were polished up before re-fitting.
The first ones I did were the 5 pop bumpers.


I then started on all the others.


The last ones I did were the 4 flipper mechs. These were the only coils I replaced as the originals had seen better days. The standard flipper rebuild kit was also used.


Final job was to get them all screwed into place. I also re-fitted the 3 magnets and the trough as well as the swamp and chair scoops, so that that I could get the correct alignment for the coil mechs.

Next up I can start putting the switch harness back on this one and also change over all the switches on the other game.
I’ll also attempt the zinc plating
Last edited:
Your welcome Ant anytimeI didn’t get round to starting the zinc plating this past weekend as I popped round to see @Happypin who helped do a full cap replacement on my driver board.
First job was to change the rectifiers with newer one with longer legs so that it gets more airflow.
View attachment 191962View attachment 191963View attachment 191964View attachment 191965View attachment 191966
Next up was to change all the 30 year old bulging caps.
View attachment 191967View attachment 191968
Again a big thanks to Alan @Happypin and Alfie for taking the time on Saturday and having me over
Gorgeous mate!!!!!Yesterday I also made some good progress and rebuilt all the mechs on my TAF.
Before
View attachment 191969View attachment 191970View attachment 191971View attachment 191972
All coils were tested and cleaned in the ultra sonic cleaner before leaving for a couple of weeks to dry in a warm place. I fitted new coil wrappers and new parts like sleeves/grommets etc. However the plungers and screws were polished up before re-fitting.
The first ones I did were the 5 pop bumpers.
View attachment 191973View attachment 191974View attachment 191975View attachment 191976
I then started on all the others.
View attachment 191977View attachment 191978View attachment 191979View attachment 191980View attachment 191981View attachment 191983
The last ones I did were the 4 flipper mechs. These were the only coils I replaced as the originals had seen better days. The standard flipper rebuild kit was also used.
View attachment 191982View attachment 191984View attachment 191986
Final job was to get them all screwed into place. I also re-fitted the 3 magnets and the trough as well as the swamp and chair scoops, so that that I could get the correct alignment for the coil mechs.
View attachment 191985
Next up I can start putting the switch harness back on this one and also change over all the switches on the other game.
I’ll also attempt the zinc plating
On the second TAF that I’m restoring, all the mechs/metal work were quite rusty, so the owner wanted it all to be re-plated so it would be nice and shiny again.
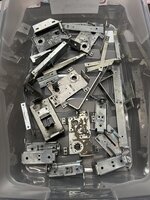
Unfortunately there isn’t any local zinc platers near me anymore and the quotes I was getting were extremely high imo. Plus my biggest concern was if any parts were to go missing in the process, I couldn't easily drive down to them to chase them up.
So I thought I’d give it a go myself
 . After quite a-bit of research, I assembled all parts and chemicals needed to do the job.
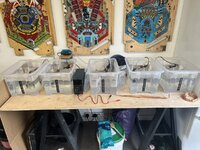
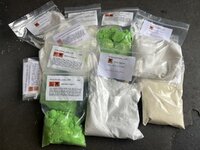
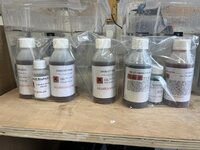
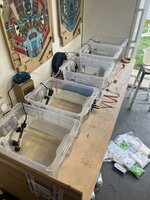
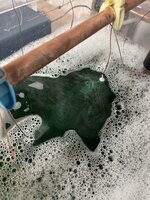
First job, was the night before I placed all the mechs etc into a tub of white vinegar. Approximately 12 hours later all the old rust and zinc plating had been completely removed. However it’s important to leave everything submerged as if removed, within 30 minutes they would start rusting. Everything would get another clean/degrease during the plating process.
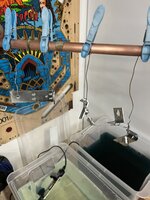
Next up I added the various chemicals to the specific tubs and heated them up.
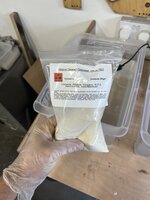
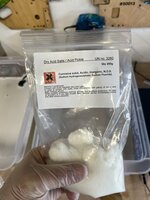
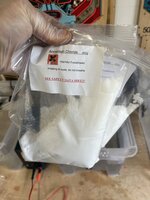
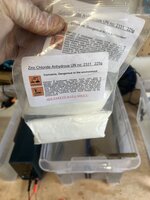
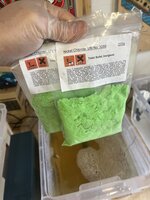
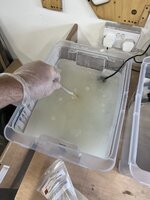
I decided to do a zinc and nickel mix as from my research, you get a nicer finish.
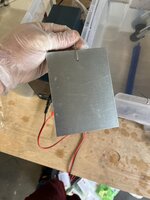
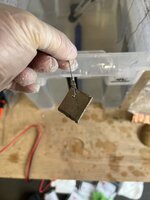
After a couple of hours to leave everything to heat up, I plated few test pieces to how they came out……………..**** was the answer to that!
After some head scratching , I figured out that I had the amperage set to low, so the zinc/nickel wasn’t really transferring to the parts. I also wasn’t moving the items from side to side when dipped in the clear passivate solution. Once I got the amperage spot on, I started on all TAF parts.
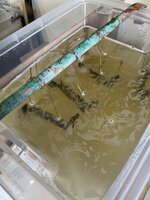
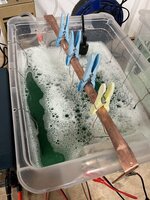
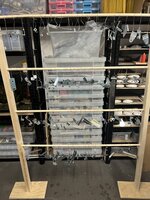
Once out of the final dip, I used an heat gun to start the drying process. However after a couple of hours I realised that I was running out of room to hang everything up to to dry, so I quickly knocked up a couple of drying racks.
The whole process took me the whole weekend as I did every single parts and obviously was doing it all in small batches. There is another zinc plating method called barrel plating, in which everything get plated together. However the finish isn’t as good imo.
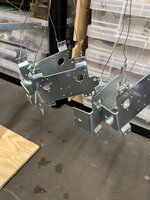
Overall I’m well pleased with how it’s all come out. All the parts are now nice and shiny again and ready to be rebuilt.
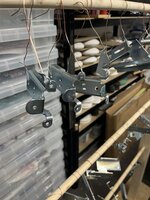
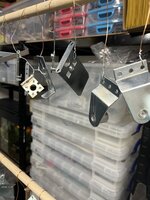
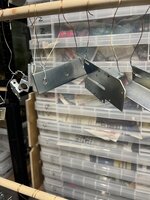
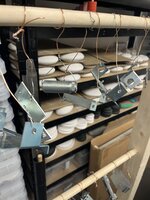
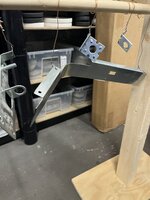

Unfortunately there isn’t any local zinc platers near me anymore and the quotes I was getting were extremely high imo. Plus my biggest concern was if any parts were to go missing in the process, I couldn't easily drive down to them to chase them up.
So I thought I’d give it a go myself


First job, was the night before I placed all the mechs etc into a tub of white vinegar. Approximately 12 hours later all the old rust and zinc plating had been completely removed. However it’s important to leave everything submerged as if removed, within 30 minutes they would start rusting. Everything would get another clean/degrease during the plating process.
Next up I added the various chemicals to the specific tubs and heated them up.


I decided to do a zinc and nickel mix as from my research, you get a nicer finish.


After a couple of hours to leave everything to heat up, I plated few test pieces to how they came out……………..**** was the answer to that!
After some head scratching


Once out of the final dip, I used an heat gun to start the drying process. However after a couple of hours I realised that I was running out of room to hang everything up to to dry, so I quickly knocked up a couple of drying racks.

The whole process took me the whole weekend as I did every single parts and obviously was doing it all in small batches. There is another zinc plating method called barrel plating, in which everything get plated together. However the finish isn’t as good imo.
Overall I’m well pleased with how it’s all come out. All the parts are now nice and shiny again and ready to be rebuilt.


Last edited:
Bobbdobalina
Site Supporter
Just wow!! Hats off for even attempting this, let alone succeeding 
If I were to attempt this, there would of been a small mushroom cloud over a house in Nottingham right now!!
If I were to attempt this, there would of been a small mushroom cloud over a house in Nottingham right now!!
That's excellent! I think I'd be going around my house and plating everything I could find 
Makes me want to watch Breaking Bad again that for some reason 
Inspirational stuff. Well done.
Inspirational stuff. Well done.
This is just insane!
It would take me a whole weekend just to knock up that drying rack. And then it would probably collapse after the first few things were hung on it!
It would take me a whole weekend just to knock up that drying rack. And then it would probably collapse after the first few things were hung on it!
Last edited:
Thanks mate. The whole process is a real science to get right. You have to get the amperage spot on, otherwise the finished result comes out terrible.Just wow!! Hats off for even attempting this, let alone succeeding
If I were to attempt this, there would have been a small mushroom cloud over a house in Nottingham right now!!
Also the cleaner and shinier the parts are at the start. will reflect in the final results. So I gave everything a quick polish before dipping in the first tank.
Basically if you try to plate something that looks dull or slightly rusty, your still have a part that’s dull and rusty at the end.
It was a long weekend, but worth it in the end.
It’s funny you say that, as my son has been rewatching breaking bad, and when he came in to see what I was doing, he was like WTF.Makes me want to watch Breaking Bad again that for some reason
Inspirational stuff. Well done.
As I was proper suited up, with the white boiler suit, mask and rubber gloves
Trust me Phil, when I realised I was running out of space to hang the parts, I was proper flapping at the time and the rack I made up was wobbly as hell.This is just insane!
It would take me a whole weekend just to know up that drying rack. And it would collapse after the first few things were hung on it!
The one thing I underestimated was the amount of space need to hung all the parts to dry.
Amazing - can I send you a bucket full of rusty parts?
Crackling job as always mate - I did the zinc nickel plating and it does take a bit to get right but results are great when you doOn the second TAF that I’m restoring, all the mechs/metal work were quite rusty, so the owner wanted it all to be re-plated so it would be nice and shiny again.
View attachment 192548
Unfortunately there isn’t any local zinc platers near me anymore and the quotes I was getting were extremely high imo. Plus my biggest concern was if any parts were to go missing in the process, I couldn't easily drive down to them to chase them up.
So I thought I’d give it a go myself. After quite a-bit of research, I assembled all parts and chemicals needed to do the job.
View attachment 192520View attachment 192518View attachment 192517
View attachment 192522
First job, was the night before I placed all the mechs etc into a tub of white vinegar. Approximately 12 hours later all the old rust and zinc plating had been completely removed. However it’s important to leave everything submerged as if removed, within 30 minutes they would start rusting. Everything would get another clean/degrease during the plating process.
Next up I added the various chemicals to the specific tubs and heated them up.
View attachment 192519View attachment 192524View attachment 192527View attachment 192529View attachment 192533
View attachment 192521
I decided to do a zinc and nickel mix as from my research, you get a nicer finish.
View attachment 192526View attachment 192528
After a couple of hours to leave everything to heat up, I plated few test pieces to how they came out……………..**** was the answer to that!
After some head scratching, I figured out that I had the amperage set to low, so the zinc/nickel wasn’t really transferring to the parts. I also wasn’t moving the items from side to side when dipped in the clear passivate solution. Once I got the amperage spot on, I started on all TAF parts.View attachment 192538View attachment 192540View attachment 192543
View attachment 192542
Once out of the final dip, I used an heat gun to start the drying process. However after a couple of hours I realised that I was running out of room to hang everything up to to dry, so I quickly knocked up a couple of drying racks.
View attachment 192544
The whole process took me the whole weekend as I did every single parts and obviously was doing it all in small batches. There is another zinc plating method called barrel plating, in which everything get plated together. However the finish isn’t as good imo.
Overall I’m well pleased with how it’s all come out. All the parts are now nice and shiny again and ready to be rebuilt.
View attachment 192549View attachment 192545View attachment 192550View attachment 192551View attachment 192552View attachment 192553
Thanks mate. It was very frustrating at first. The plating was really patchy and had a grainy finish.Crackling job as always mate - I did the zinc nickel plating and it does take a bit to get right but results are great when you do
But the amount of amps is the key to it working successfully.
Also because I was doing all different shapes and sizes, I needed to keep increasing then decreasing the power depending of the size of the part I intended to plate. As you said, when you get it right the results are spot on.
Trust me mate, if I had the space to permanently store all the tubs and chemicals, I’d happily do some for you.Amazing - can I send you a bucket full of rusty parts?
I’ve had to pack it all away as the gear needed to do it takes up quite a bit of space which is something I’m lacking.
Outstanding mate, your commitment to perfection is inspiring
The newly plated mechs are now fully dried so I could start rebuilding everything and get it installed on the playfield.
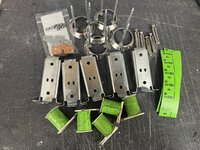
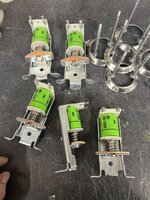
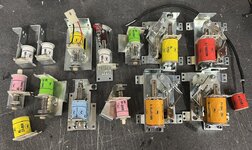
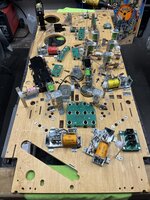
My plan has always been to keep each build neck and neck, so that they are basically at the same stage of restoration. So after I had installed everything on this game, I jumped back onto mine for the next step, which was the Thing mech.
The casing for the motor was quite dirty so I cleaned it with some alcohol before polishing it up.
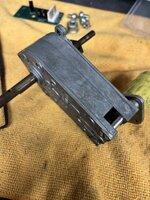
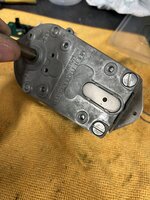
After an hour or so or polishing it started to look pretty good.
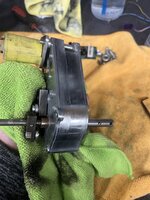
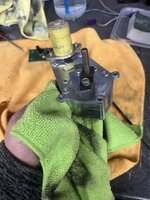
Next up I re-installed the mounting bracket and opto board.
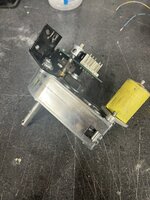
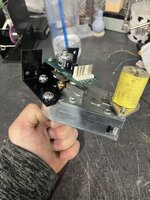
After that I needed to fit the Thing himself along with the magnet.
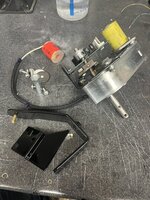
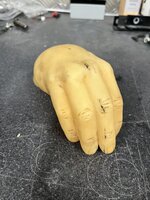
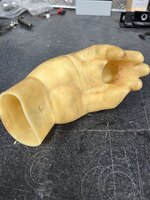
Late last year, I sent Thing off to @RudeDogg1 to spruce him up abit as from the photos above, it had seen better days.
The finished results looks amazing. Thanks again mate
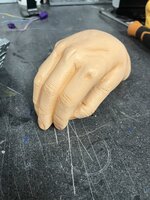
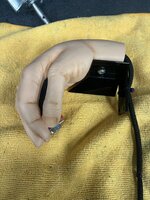
Last job was to fit the entire mech back to the playfield.
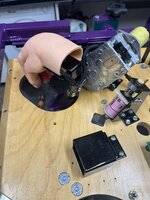
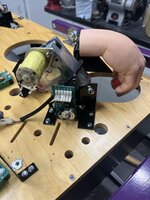
The plan is to re-install the switch harness next and then do it all again on the other game.


My plan has always been to keep each build neck and neck, so that they are basically at the same stage of restoration. So after I had installed everything on this game, I jumped back onto mine for the next step, which was the Thing mech.
The casing for the motor was quite dirty so I cleaned it with some alcohol before polishing it up.


After an hour or so or polishing it started to look pretty good.


Next up I re-installed the mounting bracket and opto board.


After that I needed to fit the Thing himself along with the magnet.


Late last year, I sent Thing off to @RudeDogg1 to spruce him up abit as from the photos above, it had seen better days.
The finished results looks amazing. Thanks again mate


Last job was to fit the entire mech back to the playfield.


The plan is to re-install the switch harness next and then do it all again on the other game.
Thanks mate, I appreciate it.Outstanding mate, your commitment to perfection is inspiring
Not sure my wife would call it a commitment though. She has another name she likes to call it when she catches me staring at the game for 20 minutes
Ant, I thought yours was all black but I'm seeing a ix of plain and black or did you just powder coat some of the bits on the 2nd one as well ?
Cheers Dave, I appreciate it@Ant-H - constantly surprised and very impressed at what you are doing! Thats great stuff!
I think I’ve said before, that I love pottering about down the garage working on pins in my spare time as a way to unwind, especially if I’ve had a busy day at work. Stick the radio on and I’m good to go.Mate I wish I have an ounce of your enthusiasm, bottle it and sell it.
I have a Taxi playfield swap to do, I keep coming up with excuses not to start it
Last edited:
