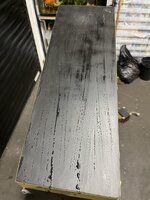
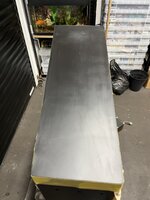
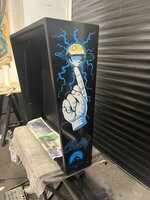
And as you know with mine, I’m the flip side, in the height of the summer it’s like an oven in there.My garage/games room is the same, it was too cold to play or do anything down there.
Pinball info
You are using an out of date browser. It may not display this or other websites correctly.
You should upgrade or use an alternative browser.
You should upgrade or use an alternative browser.
Complete The Addams Family(s) Restoration
- Thread starter Ant-H
- Start date
The coin door decal on the first one, took me well over an hour to get it right. I just couldn’t centre both the text at the bottom and the starter button.TAF has been promoted to the house, out of the cold into the warm. Anyone thinking decals is a quick job, you spend more time checking, double checking then put the kettle to come back and check again. After an hour lol let’s go for it.
Perfect
The second one however took me literally 30 seconds, I couldn’t believe it. I placed the decal on the cabinet, eye balled it up and when I checked the alignment, it was spot on. It was such a contrast to the other one
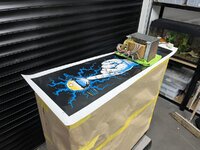
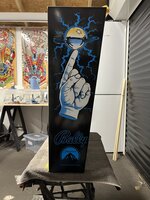
Cracking job mate looking fab love the playfield with the black steel and green pops - cant wait to see it fired up!!Back boxes have now both had new decals fitted. I did the exact same process as with the main cabinets.
View attachment 189536View attachment 189537View attachment 189535View attachment 189538View attachment 189540
Next job on these will be screen printing the warning text. Ill also fit the new art blades, then sort out all the cabinet hardware/grounding braid.
Cheers
Kev
Like glass pal …. There’s refurbs then there’s these works of art! Great job palBack boxes have now both had new decals fitted. I did the exact same process as with the main cabinets.
View attachment 189536View attachment 189537View attachment 189535View attachment 189538View attachment 189540
Next job on these will be screen printing the warning text. Ill also fit the new art blades, then sort out all the cabinet hardware/grounding braid.
I’ve been working on improving the workshop over Christmas, so I didn’t get loads done. However I did install the art blades on both games.
The art blades on my game had to be cut and modified to fit due to the channels that I had routed in the sides of the cabinet to house the Pin Stadiums.
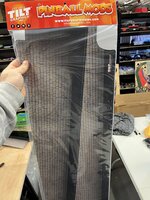
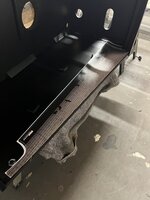
After measuring and triple checking the measurements, I cut 10mm from both Art Blades. This could have been a lot easier and quicker if I had just cut straight from the top edge, however that would mean the top would be missing some of the artwork, which I know would bug me.

So I made it difficult for myself and left a thin 5mm strip so that the blade was still in one piece with no joins.
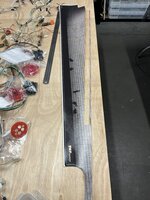
I also had to recut the round holes for the back box hinge bolts on both sets of art blades as these were out and didn’t line up with the holes in the cabinet.
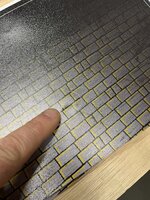
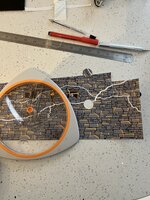
Once this was done it was a simple case of lining them up and sticking them down.
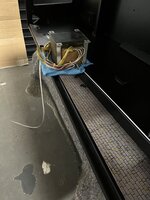
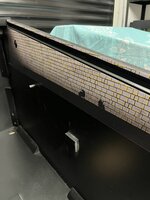
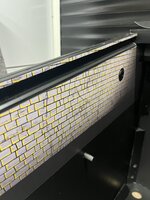
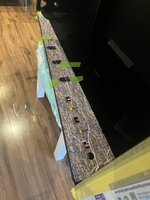
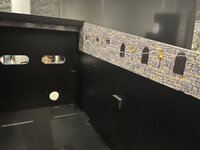
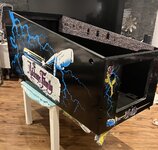
The art blades on my game had to be cut and modified to fit due to the channels that I had routed in the sides of the cabinet to house the Pin Stadiums.


After measuring and triple checking the measurements, I cut 10mm from both Art Blades. This could have been a lot easier and quicker if I had just cut straight from the top edge, however that would mean the top would be missing some of the artwork, which I know would bug me.
So I made it difficult for myself and left a thin 5mm strip so that the blade was still in one piece with no joins.

I also had to recut the round holes for the back box hinge bolts on both sets of art blades as these were out and didn’t line up with the holes in the cabinet.


Once this was done it was a simple case of lining them up and sticking them down.


On my T2 build, I dyed all the cable clips and cable ties red to match the theme.
Much to my wife’s odd looks, I cracked out the saucepan again in the kitchen and started boiling up the dye. I went with purple this time.
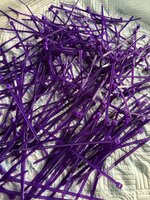
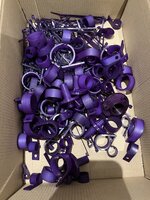
I think these should really stand out against the black. This time I decided to do all the connectors on the harness as well.
For some reason, as I was stood over the hob, my wife was shaking her head and suggested I seek help

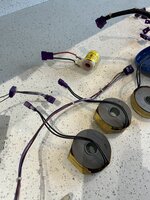
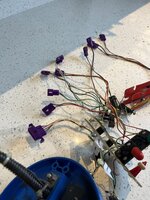
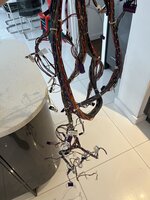
Much to my wife’s odd looks, I cracked out the saucepan again in the kitchen and started boiling up the dye. I went with purple this time.


I think these should really stand out against the black. This time I decided to do all the connectors on the harness as well.
For some reason, as I was stood over the hob, my wife was shaking her head and suggested I seek help


I did consider doing this but decided against it as there’s no real need to. The dye is for plastic only, so does nothing to metal. However it doesn’t work with all types of plastic.Did you unpin all the connectors to dye the housings?
In the end I just dipped each connector in the boiling dye, just enough to cover it for 15-20 seconds in order to get the shade of purple I was after. Any longer and they would have gone really dark, close to black.
I just hung it all up to dry like I did after it was cleaned in the ultra sonic cleaner.
Last edited:
Before I start re-fitting parts back into the cabinets and both back boxes, I thought I’d get the screen printing done.
I really enjoy doing the screen printing itself but I’m not keen on the clean up after each use, as it can be quite messy.
This needs to be done pretty quickly as the ink starts to dry immediately. If some of the ink drys in the lettering on the screen, any future prints will be flawed. So having everything to hand and ready is the key.
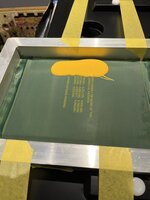
For some reason I like to start with the back box. After a wipe over with a tack cloth to remove any dust, I laid the screen in place and measured its position.
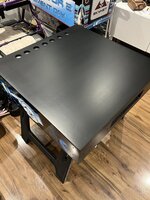
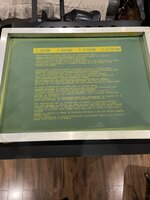
After checking all the measurements a few times, and once I was finally happy
 , I loaded some ink onto the screen. This ink is the exact shade that was used originally on these games and is not easy to obtain, unless you live in the US, which is a pain in the ****.
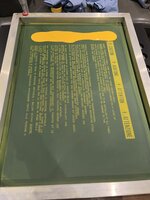
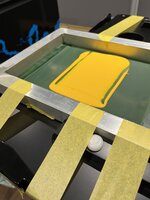
I then use the spreader to “flood” the screen with the ink, without putting any pressure on it.
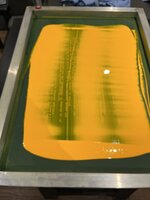
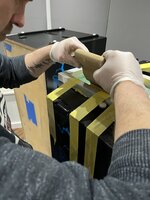
Its then a case of doing it again but this time pushing down at a 45 degree angle so the screen touch’s the wood.
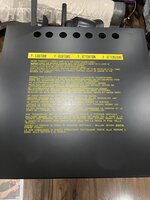
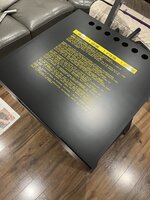
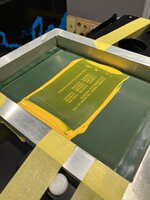
Once both back boxes were done, it’s pretty much the same process for the cabinet, but a lot smaller. Again I had to clean everything between each print.
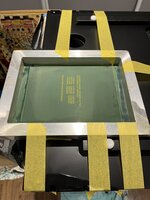
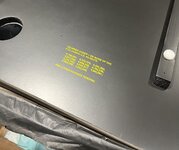
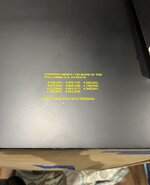
Once fully dry I’ll start stapling new earth braiding in place and refit all the internal parts
I really enjoy doing the screen printing itself but I’m not keen on the clean up after each use, as it can be quite messy.
This needs to be done pretty quickly as the ink starts to dry immediately. If some of the ink drys in the lettering on the screen, any future prints will be flawed. So having everything to hand and ready is the key.
For some reason I like to start with the back box. After a wipe over with a tack cloth to remove any dust, I laid the screen in place and measured its position.


After checking all the measurements a few times, and once I was finally happy

I then use the spreader to “flood” the screen with the ink, without putting any pressure on it.

Its then a case of doing it again but this time pushing down at a 45 degree angle so the screen touch’s the wood.


Once both back boxes were done, it’s pretty much the same process for the cabinet, but a lot smaller. Again I had to clean everything between each print.


Once fully dry I’ll start stapling new earth braiding in place and refit all the internal parts
Last edited:
Did you have the wife take an action shot of you palBefore I start re-fitting parts back into the cabinets and both back boxes, I thought I’d get the screen printing done.
I really enjoy doing the screen printing itself but I’m not keen on the clean up after each use, as it can be quite messy.
This needs to be done pretty quickly as the ink starts to dry immediately. If some of the ink drys in the lettering on the screen, any future prints will be flawed. So having everything to hand and ready is the key.
For some reason I like to start with the back box. After a wipe over with a tack cloth to remove any dust, I laid the screen in place and measured its position.
View attachment 190951View attachment 190952
After checking all the measurements a few times, and once I was finally happy, I loaded some ink onto the screen. This ink is the exact shade that was used originally on these games and is not easy to obtain, unless you live in the US, which is a pain in the ****.
View attachment 190953
I then use the spreader to “flood” the screen with the ink, without putting any pressure on it.
View attachment 190954
Its then a case of doing it again but this time pushing down at a 45 degree angle so the screen touch’s the wood.
View attachment 190955View attachment 190956
Once both back boxes were done, it’s pretty much the same process for the cabinet, but a lot smaller. Again I had to clean everything between each print.
View attachment 190957View attachment 190958View attachment 190959View attachment 190960View attachment 190961
View attachment 190966View attachment 190967
Once fully dry I’ll start stapling new earth braiding in place and refit all the internal parts
Just beautiful beautiful work 
Are you keeping a tally of hours spent?
Are you keeping a tally of hours spent?
No chris but his wife is lmaoJust beautiful beautiful work
Are you keeping a tally of hours spent?
Yeah, I couldn’t use my phone because of the gloves so I asked her to take a quick photo of the cabinet after, but she thought my “concentration” face was funny so took one as I was screening itDid you have the wife take an action shot of you pal
Just beautiful beautiful work
Are you keeping a tally of hours spent?
with my T2, I didn’t, which really regret not doing. So for both these games, I make sure I write down any time I work either of them.No chris but his wife is lmao
I got the yellow ink from a supplier in the UK who imported in from the US. Took me ages finding a company that could get it. I got it a couple of years so I’ll see if I can find the details for you.@Ant-H Which paint did you use in the end for the backbox? Was it the stuff from the US, or similar shade from here? Wouldnt mind getting hold of some
Cheers
A job I did before Christmas was to test all the coils from both games and give them a good clean in the ultra sonic cleaner, before letting them dry out for a good few weeks. I’ll fit new coil wrappers to them when I rebuild each mech.
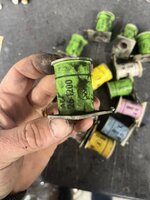
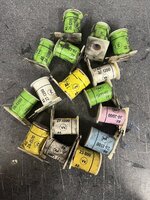
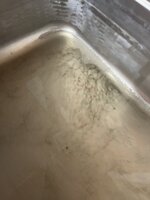
They tested all ok, but on a couple of the flipper coils, the sleeves couldn’t be removed so I’ll just fit new coils to all the flippers for good measure.
Both cabinets are now basically complete, with only the transformers to re-fit.
First job I did was to rebuild the knocker and power boxes for both games.

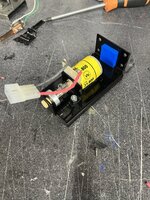
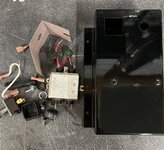
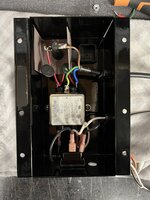
Next up was to fit the leg mounts, power box, tilt bob mechanism and new earthing braid.
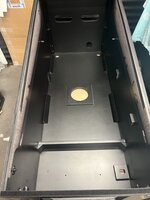
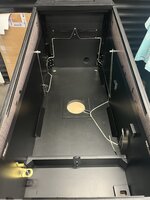
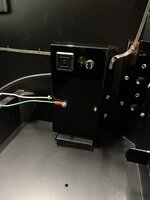
Then I could finally start to fit some of my newly dyed plastics along with the knocker.
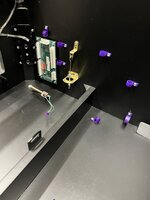
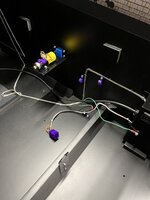
Im well pleased with the purple as it looks completely different when next to a black surface as the colour really pops.
When it comes to the playfield support arm, I was never really keen on the way they are secured to side of the cabinet, especially if you have to move the pin around.
The metal bracket that it rests on, sticks out quite far from the side lets it the arm rattle about, especially in transit which is what happened on my T2 when transporting to and from Pinfest last year.
Plus more importantly on TAF, the large metal Thing box under the playfield is really close to the arm and if not tucked right to the side, hits it.
This is what I think has happened in my case as the bracket was completely missing from my Addams and looks like it had been ripped off the side. So I needed to come up with another plan.
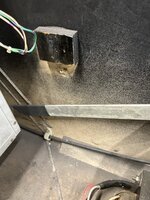
In the end, I used an old shim from TAF bookcase mechanism and drilled a couple of holes in it.
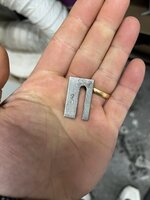
Once powder coated, I then screwed it close to the side of the cabinet.
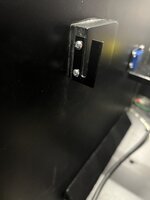
It turns out it’s a perfect fit for the support arm and holds it nice and secure and more importantly closer to the side and no where near the Thing box.
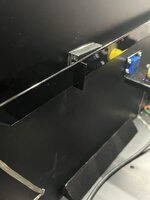
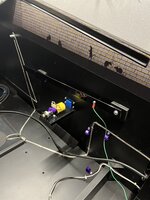
Once my one was complete I did it all again on the second cab.
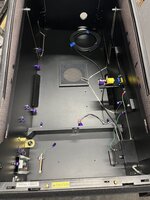
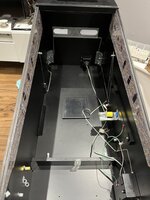
I plan to finish the back boxes next and restore the transformers, then I’ll get back on rebuilding the playfields.


They tested all ok, but on a couple of the flipper coils, the sleeves couldn’t be removed so I’ll just fit new coils to all the flippers for good measure.
Both cabinets are now basically complete, with only the transformers to re-fit.
First job I did was to rebuild the knocker and power boxes for both games.


Next up was to fit the leg mounts, power box, tilt bob mechanism and new earthing braid.


Then I could finally start to fit some of my newly dyed plastics along with the knocker.


Im well pleased with the purple as it looks completely different when next to a black surface as the colour really pops.
When it comes to the playfield support arm, I was never really keen on the way they are secured to side of the cabinet, especially if you have to move the pin around.
The metal bracket that it rests on, sticks out quite far from the side lets it the arm rattle about, especially in transit which is what happened on my T2 when transporting to and from Pinfest last year.
Plus more importantly on TAF, the large metal Thing box under the playfield is really close to the arm and if not tucked right to the side, hits it.
This is what I think has happened in my case as the bracket was completely missing from my Addams and looks like it had been ripped off the side. So I needed to come up with another plan.

In the end, I used an old shim from TAF bookcase mechanism and drilled a couple of holes in it.

Once powder coated, I then screwed it close to the side of the cabinet.

It turns out it’s a perfect fit for the support arm and holds it nice and secure and more importantly closer to the side and no where near the Thing box.


Once my one was complete I did it all again on the second cab.


I plan to finish the back boxes next and restore the transformers, then I’ll get back on rebuilding the playfields.
Last edited:
Hang on news flash!!!!! the leg plates aren't powder coated wtf !!!!!!! 


Cracking work as ever matey!!!


Cracking work as ever matey!!!
Hang on news flash!!!!! the leg plates aren't powder coated wtf !!!!!!!


Cracking work as ever matey!!!
Check out the photo above that. Trust me, I powder coated everything on that one
haha!!!! brill man!!!The one with zinc plated leg plates is the other Addams I’m working on. That will have zinc plated, polished and chrome parts.
Check out the photo above that. Trust me, I powder coated everything on that one
The back boxes on both games are now done. I started by fitting the metal corner brackets followed by stapling in some new earthing braid.
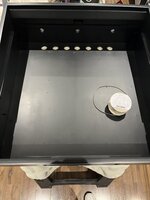
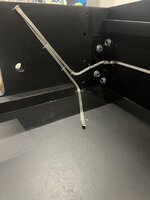
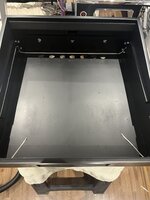
I then added the rest of powder coated metalwork, and finished it off with cable clips and new FBI stickers.
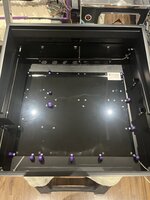
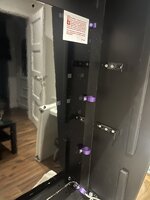
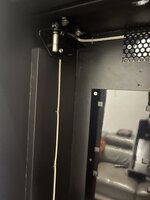
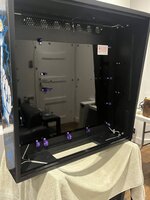
I’ve started restoring both transformers, which I’ll finish in the next day or 2. Once they are in, that’s basically the cabinets done.
So I’ll then crack on with the playfields again and think I’ll give some home zinc plating a go


I then added the rest of powder coated metalwork, and finished it off with cable clips and new FBI stickers.


I’ve started restoring both transformers, which I’ll finish in the next day or 2. Once they are in, that’s basically the cabinets done.
So I’ll then crack on with the playfields again and think I’ll give some home zinc plating a go
Last edited:
Looks fab man!!! just a daft question with all that powder coating are you going to get earth continuity ok on the back plane for the boards, and around the rest of the cab etc ???
Might be worth metering it out just to safe
Cheers
kev
Might be worth metering it out just to safe
Cheers
kev
Thanks mateLooks fab man!!! just a daft question with all that powder coating are you going to get earth continuity ok on the back plane for the boards, and around the rest of the cab etc ???
Might be worth metering it out just to safe
Cheers
kev
On any of the powder coated parts that come into contact with the earthing braid around the cab, I remove a small amount of the coating so that they’re direct contact. I then like you suggested go a round with a meter to check everything is good.
I had to do the same on my T2 due to all the chrome.
Ant you have it covered, QualityThanks mate. You make a good point, which I should have mentioned. The large metal pcb board in the back box was only powder coated on the front.
On any of the powder coated parts that come into contact with the earthing braid around the cab, I remove a small amount of the coating so that they’re direct contact. I then like you suggested go a round with a meter to check everything is good.
I had to do the same on my T2 due to all the chrome.
Why did I even doubt it AntThanks mate. You make a good point, which I should have mentioned. The large metal pcb board in the back box was only powder coated on the front.
On any of the powder coated parts that come into contact with the earthing braid around the cab, I remove a small amount of the coating so that they’re direct contact. I then like you suggested go a round with a meter to check everything is good.
I had to do the same on my T2 due to all the chrome.
I did a lot of home zinc plating - therse a vid I did somewhere on here on a demo man restore i didThe back boxes on both games are now done. I started by fitting the metal corner brackets followed by stapling in some new earthing braid.
View attachment 191499View attachment 191500
View attachment 191501
I then added the rest of powder coated metalwork, and finished it off with cable clips and new FBI stickers.
View attachment 191496View attachment 191495
View attachment 191498
View attachment 191493
I’ve started restoring both transformers, which I’ll finish in the next day or 2. Once they are in, that’s basically the cabinets done.
So I’ll then crack on with the playfields again and think I’ll give some home zinc plating a go
Thanks mate. Just finishing the transformers up this evening. I want to get them done asap so I can crack in with the playfields again.Ant you have it covered, Quality
Nice. I’ll have a search for it. I know the basic principle and have watched aload of videos on YouTube, so am pretty confident with doing It.I did a lot of home zinc plating - therse a vid I did somewhere on here on a demo man restore i did
I’m going for a zinc & nickel plating with a clear passivate. I’ll be doing 95% of the parts/mechs on the second TAF I’m working on.
The last part that I needed to restore for the cabinets were the transformers.
One of them had alot of surface rust so took a lot longer than I expected to get it back to bare metal.
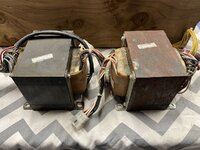
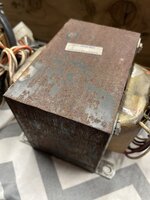
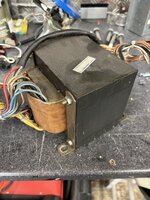
First thing I did was to mask up all the wires and crack out the wire wheel, my drill and remove all the old paint and rust.
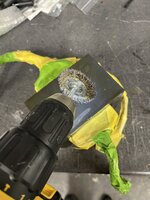
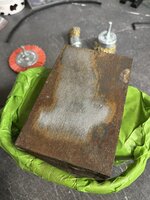
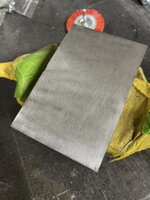
They then had 2 coats of grey primer applied.
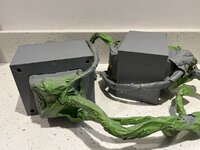
Once dry they received 3 coats of satin black which I then left to dry for a few days in order for the paint to harden.
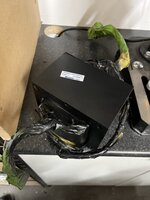
I then added new warranty labels to both them.
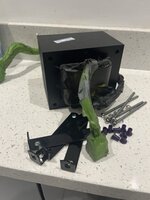
Final job was to assemble them with their powder coated brackets, spacers and polished bolts. The spacers for my transformer didn’t escape the purple dye either
I then added braiding to the wiring on both of them.
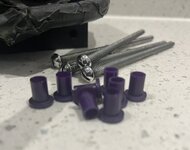
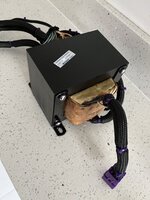
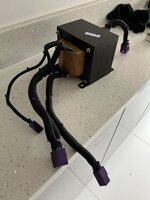
Next job to tackle is rebuilding the underside of both playfields and to clean the cabinet harnesses .
One of them had alot of surface rust so took a lot longer than I expected to get it back to bare metal.


First thing I did was to mask up all the wires and crack out the wire wheel, my drill and remove all the old paint and rust.


They then had 2 coats of grey primer applied.

Once dry they received 3 coats of satin black which I then left to dry for a few days in order for the paint to harden.
I then added new warranty labels to both them.

Final job was to assemble them with their powder coated brackets, spacers and polished bolts. The spacers for my transformer didn’t escape the purple dye either
I then added braiding to the wiring on both of them.


Next job to tackle is rebuilding the underside of both playfields and to clean the cabinet harnesses .
Last edited:

