What's new
Pinball info

Register a free account today to become a member! Once signed in, you'll be able to participate on this site by adding your own topics and posts, as well as connect with other members through your own private inbox!

Complete The Addams Family(s) Restoration

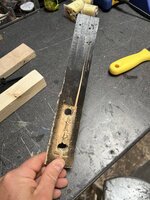
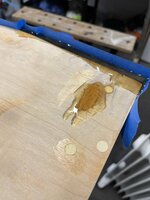
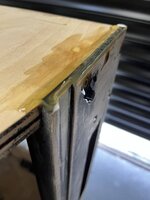
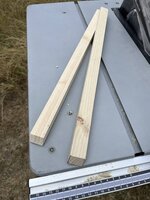
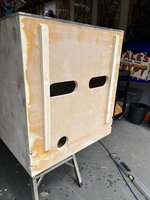
The bottom 2 internal wooden leg supports were completely knackered so needed replacing.
DE3447E9-EC8C-48FF-A5BC-951FED893B36.jpeg

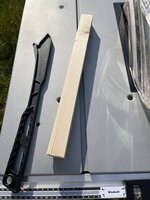
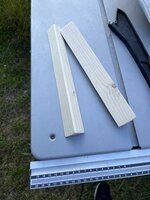
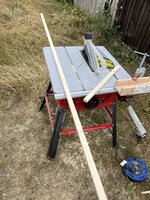
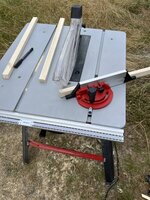
I used one of the originals as a template so that I could make exact copies. To do this, I cracked out the table saw and started to make some cuts.
F0CC2C37-0A63-497C-8621-26CA929FB8D3.jpegDA28B6F4-10F2-4DE3-BC35-2F0C095449FE.jpeg

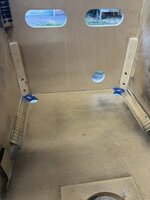
Once I was happy with the shape, I glued them in place and drilled new holes for the leg bolts.
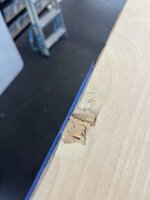
Next job is to use resin to rebuild the damaged corners and any deep holes/damage that the cabinet has sustained over the years.
E4378658-7B03-43B3-8BC6-5BEBE221FAC4.jpeg
 
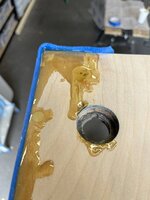
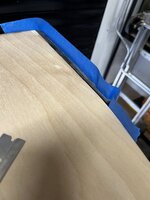
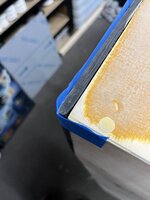
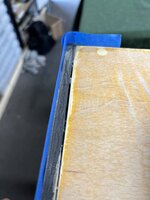
For any deeper holes or major damage especially on the corners, I like to use resin as I feel you get a smoother and neater finish when sanded. Plus it doesn’t shrink.
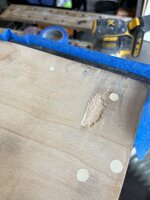
I also used it to infill the holes I made for the counter sunk bolts.
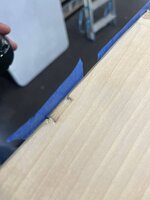
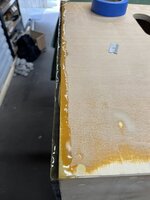
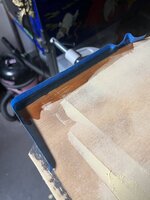
I use some tape along the edge so that is doesn’t run everywhere.
518894AD-6554-4F75-B8B6-68DC35C55979.jpegDBC964F4-A787-4694-BBF9-B1538DCCB5D6.jpegD73712C7-80CC-419E-B11A-1BC724705A63.jpeg

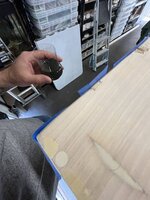
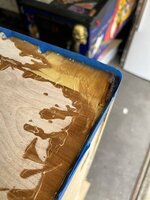
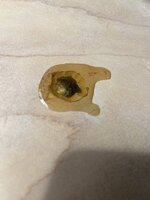
I seem to always make a mess when I use it 🤔😂, but only takes 30 minutes of so to dry so I just sand it off.
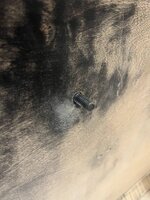
36487F9F-75DE-4A31-B244-C19EBA2F7519.jpeg5697F430-53C5-4578-8915-4A4562544803.jpeg142C454D-CF41-4359-BD8D-757EB9BB6F4F.jpeg2846A8CD-35A0-4E3A-A37F-CB7DD81D030E.jpeg
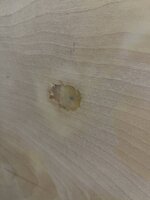
With this stuff, I start with a 60 grit sand paper to move most of the material as it goes rock hard. Then 120 and 240 grit to level it all smooth.
0CFC4A02-7F6F-4737-AF6E-8205CF9BA05E.jpegF386730F-ED15-4C88-9CEF-F33B7599E945.jpeg
When the resin is sanded, to get a really flat finish, I skim a final fine coat of regular filler over to the top and block sand it smooth, as well as all the corners to ensure they are nice and sharpe. I then sanded the entire cabinet with 240 grit both inside and out.
4CC5E521-7E99-4B44-AD1A-DAACD54F255C.jpeg
56C7FDF9-150C-400D-88F7-79E7219E3E68.jpeg06190E0C-A03F-4007-B549-2A9E7479D8A5.jpegCE836689-3AEF-4BE1-9460-AFF61104E544.jpeg
 
Last edited:
For any deeper holes or major damage especially on the corners, I like to use resin as I feel you get a smoother and neater finish when sanded. Plus it doesn’t shrink.
I also used it to infill the holes I made for the counter sunk bolts.
I use some tape along the edge so that is doesn’t run everywhere.
View attachment 178589View attachment 178590View attachment 178591

I seem to always make a mess when I use it 🤔😂, but only takes 30 minutes of so to dry so I just sand it off.
View attachment 178592View attachment 178593View attachment 178594View attachment 178595
With this stuff, I start with a 60 grit sand paper to move most of the material as it goes rock hard. Then 120 and 240 grit to level it all smooth.
View attachment 178601View attachment 178597
When the resin is sanded, to get a really flat finish, I skim a final fine coat of regular filler over to the top and block sand it smooth as well as all the corners to ensure they are nice and straight. I then sanded the entire cabinet with 240 grit both inside and out.
View attachment 178596
View attachment 178598View attachment 178600View attachment 178602
What resin you using please buddy
 
What resin you using please buddy
Just some general purpose polyester resin. I bought this stuff but you can buy in smaller amounts if needed.

 
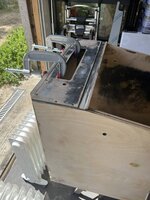
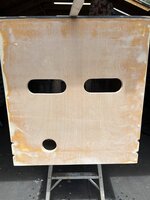
Next job on the cabinet was was to refit the top panel for the back box.
Firstly I glued the front back in place as these are usually alway loose or hanging off due to the screws for the top glass rail
2B977EED-D455-43EB-9F5F-E5B852D7FA23.jpeg
I then run some glue on the top of the cabinet and clamped it in place so everything was square followed by some 70mm screws to make sure it was rock solid.
70386165-60A0-4B9C-9C15-BE289D15ADCE.jpeg46BCD7BC-0497-407E-9315-8407B6A8588D.jpeg
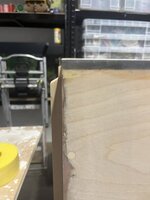
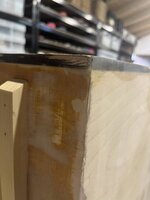
Based on what ive seen on my other games, the top panel never lines up with the cabinet, so I thought while I have some resin mixed, I’d use to get a nice smooth finish and to fill the gaps.
6EFFD5B6-4731-422F-B9DB-EF682905D580.jpeg05425AEE-AD0D-4AD4-999D-FE503EDCD977.jpeg22390F53-1A7C-4F44-B0D0-C5B2F1B29E30.jpeg609B07BB-C86C-49AD-AF1F-75EA09F3D853.jpegEA97EC2A-34E1-4A21-8D16-8106E7EAEF46.jpeg6299DA73-AB66-46FB-9886-77FE1245B059.jpeg5AA9F338-5464-4734-B5E7-5C9BC164D451.jpeg
Once dry, it’s just need to be sanded flush. I can then fit some new sliders.
 
My Taxi cab is pretty wrecked will go down the resin route too, great work as always Ant and thanks for sharing all this detail, it must add a fair amount of hours to your restorations.
 
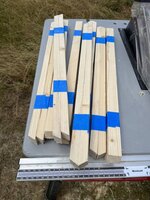
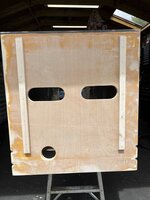
Instead of making one set of slider like I did for my T2, I made a batch of them as I knew I’d need some for future projects. Plus it was a lot more cost effective when buying the wood.
637EEE92-87B6-434E-81C5-0DF03A233510.jpegF47DD844-AE1D-4B96-B09A-BA09C7D6403A.jpeg50B2A89D-A642-4D01-9967-CD8014553FD6.jpeg9EC276B1-B395-4499-B0A9-4B0B1FDD816B.jpeg
Fitting the sliders is a simple job of applying some glue and nailing them in place.
2C5B76BB-F409-4D43-BB1A-C77AAE89D8AD.jpegD8A73933-7DFD-4E6D-8E77-ACF6BB185F2C.jpegC14C78BC-9F0E-44EE-84D6-B7F133F7B360.jpeg
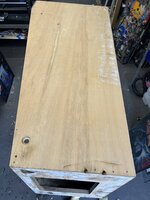
Last job was to sand down the resin at the top of the cabinet so that everything is flush and the corners are nice and straight.
DB736C1F-529B-4558-9DFC-976622EC5A79.jpegCFEC3CA0-9E3D-4354-A676-845CC4BF1401.jpeg
My plan is to restore both games side by side, so before I move onto the back box, I’ll get the other TAF cabinet to the same stage as this one.
 
My plan is to restore both games side by side, so before I move onto the back box, I’ll get the other TAF cabinet to the same stage as this one.

Production line restorations, love it! You want my TAF there at the same time? 😂

Really enjoy keeping up with some of these resto threads 😎

Chris.
 
Production line restorations, love it! You want my TAF there at the same time? 😂

Really enjoy keeping up with some of these resto threads 😎

Chris.
Yeah when I thought about it, it just made sense to try to keep both restorations at the same stage before moving onto the next job.

Once the other cabinet is ready for paint, like my one currently is, I’ll crack on with prepping the back boxes, then paint and finally installing the decals and screen printing the warning text.
 
I started work on the 2nd TAF that I’m working on and got it all broken down and ready for the decals to come off.
FB3186DF-9EEA-4F89-AB35-BF81BE095CBB.jpeg6362AD56-B474-41AE-B73B-89E81A9055CE.jpeg

A28FAA45-395D-4D02-A5DE-FBDBE436718C.jpeg
When it came to stripping the decals from the cabinet, I noticed they came away a lot easier on this one compared to my cabinet. I could literally peel it away with my hands.
1600FB33-7CB3-4B84-8587-40F2959CEB82.jpeg8DC87C90-B289-4B63-9813-78684457561A.jpeg
Before I started the endless job of filling and sanding, I like to re-glue the top part of the cabinet as this is always loose and to also glue and screw any corners that need it to help strengthen the overall structure.
925ED397-4A8D-4C9F-8422-0063467D81BA.jpeg
 
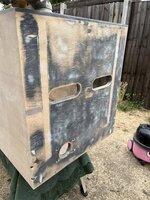
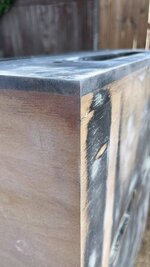
After another round of filling and sanding, I’m really pleased with how this one is looking. Surface is looking good and all corners are nice and straight.
30895A90-4225-490C-A80C-2A0AFFF1FF3F.jpegDA617536-7294-4F94-8DF1-AB2C526A79E7.jpeg2E3F18FC-EBD4-4D3C-9043-BD8D006CCAFF.jpeg939B832F-BDFF-4C42-88B0-37784BFE9C42.jpegB5676417-FCB2-4836-97C1-4323B0571835.jpeg
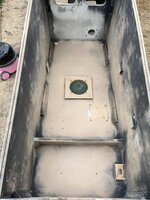
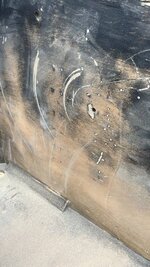
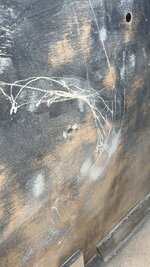
Before dismantling this game, both myself and owner noticed that the playfield was really tight to the sides when lifting and the Pinstadiums fitted on the left hand side would not hold to the magnet strip.

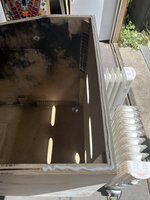
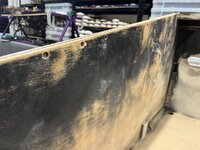
It was hard to see what the issue was when fully assembled, however once stripped you could clearly see the damage to the inside of the cabinet. This has now been filled and sanded smooth but you can still see all the scraps from the playfield.
63BF2455-3053-461A-88E0-460D6378B3AF.jpegE173753A-714B-44B9-8FAB-6CF42D840C0D.jpeg
Clearly something wasn’t right and when I looked down the sides of the cabinet, you could see the left side had quite a large bow going in to the cab.
I think at some point in it life’s, it’s been stored with that side against a damp wall, like in a cold garage as only the left side is bowed.
So the next job to do is to try and fix the bow. 🤔
 
Last edited:
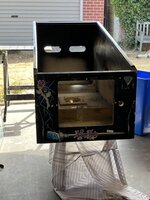
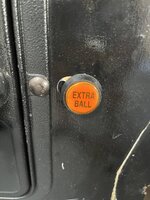
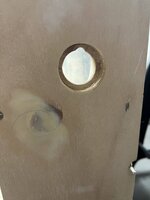
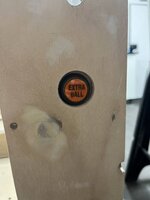
When the game came to me, it was running TAF gold roms and had an extra ball button literally just stuck on the front through an old security bar hole.
5AE2BBBF-1274-4756-B7B4-7AE88716C88C.jpeg
The owner wanted to keep the button, so I said I’ll try and get it looking better than it was 🤔.
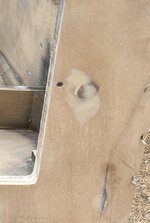
First job was to plug the old hole with a wooden dowel followed by some resin and a bit of filler to finish it off.
30FF495F-B479-474F-95DA-8C0B72EB95D3.jpeg
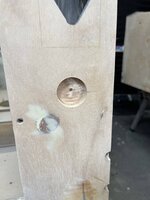
Next I took some measurements so I could work out the best place to mount the new button in relation to the coin door and the shooter rod. My plan was to mount the button similar to how it would be on the Gold edition cabinet and also the same as a regular start button. So I used my router to make the initial hole.
4CD8BB31-E22F-410E-8F3B-A57CF8B15539.jpeg
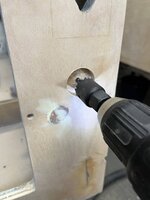
I could then drill all the way through with a 1” hole saw.
A6C02857-2E54-4C3C-89FD-62DA83368555.jpeg
Last job was to file a small semi circle at the top of the hole, the same as the start button, so that the button could be centred and not spin.
42515F3C-95AD-4950-ADE6-D108A522DD8A.jpeg
Quick test fit to make sure it fits and then on to sorting out the bowed side panel.
095F26AE-BA06-40DE-8B10-96CFEDD53E05.jpeg
 
I'm so glad I only need to patch and sand mine. Great job as always mate!
 
Fantastic ant !

I'm so glad I only need to patch and sand mine. Great job as always mate!
Thanks guys. Trying to fix the bow in the side of the cabinet is proving to be a real challenge and the complete opposite to how you normal work with wood 😮

This is why I’m more of a metal guy, simply heat things up and bash them back in place 😂
 
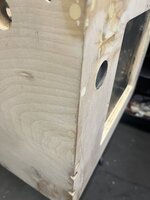
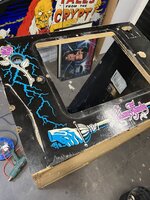
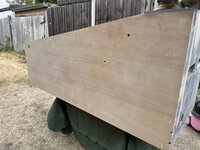
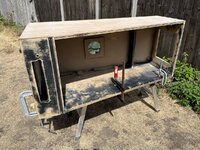
Next job is to finally try and tackle the warped left side of the main cabinet. It has quite a bad bow inwards which was causing the playfield to scrap the side and for the Pinstadiums not to stay attached. So it needed to be addressed.

Plywood is generally warps due to exposure to moisture. If it has been exposed to too much moisture it starts to move.

Basically to straighten out plywood that has warped, you need to reintroduce moisture to the opposite side and lay it in the sun with something weighing it down.
This helps balance the overall moisture content in the wood.
Sounds simple, but it has been a real challenge to fix.

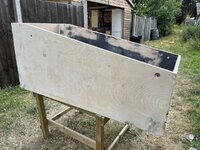
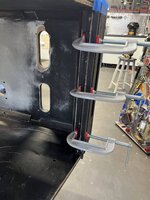
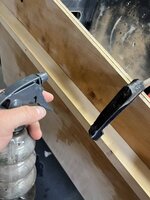
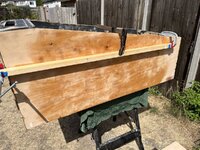
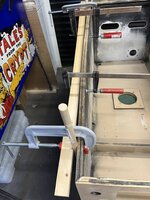
My first attempt, I sprayed the concave side of the wood with hot water and clamped a straight edge to the side. I then put it out in the sun for a couple of hours.
7F575269-7336-4F93-B7AC-BF4D083C6918.jpeg8BD6DDBA-5CC9-49FB-A59F-A1ABDCBD86C1.jpegBB4A57C9-63D3-4E91-B49E-7AE3FC938E84.jpeg1E7D5642-BA21-4CA2-9BAF-4977D101E16E.jpeg
Unfortunately this had minimal effect, because as soon as I released the clamps, the wood bowed straight back inwards. So on to plan B 🤔

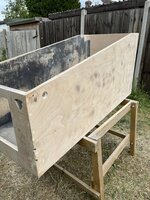
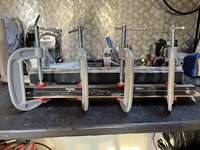
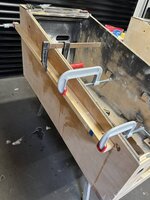
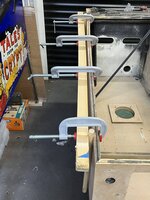
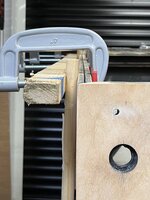
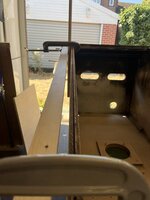
On the next attempt I sprayed the side with a lot of warm water but instead of clamping a straight edge directly to the side, I used a couple of spacers so that there was approximately 30mm between the straight edge and the side on the cabinet.
I could then over clamp it, so the plywood was actually bowing in the opposite direction. The idea being that when the clamps are released, it would bow back but just not as far.
It was abit risky doing this as there was a possibility that if I over did it, it could stay bowed in the opposite direction 😬.94F05614-EEB0-42D8-9B92-BDE274F2E836.jpeg
0975EA79-9CFC-4BCD-97AA-07B0EB97F494.jpeg3E5627EA-B8EA-4596-AAF0-EA1111E846FF.jpeg
This time, instead of leaving it like this for a couple of hours, I left it clamped up for 5 days, regularly spraying hot was on the side.
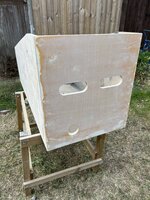
When I finally removed the clamps, I could see the side slowly moving back. However my plan worked as it is now nice a straight 😀.
1FFB6E20-C431-47BE-B9DC-A32E486F19DB.jpeg
 
Last edited:
Next job is to finally try and tackle the warped left side of the main cabinet. It has quite a bad bow inwards which was causing the playfield to scrap the side and for the Pinstadiums not to stay attached. So it needed to be addressed.

Plywood is generally warps due to exposure to moisture. If it has been exposed to too much moisture it starts to move.

Basically to straighten out plywood that has warped, you need to reintroduce moisture to the opposite side and lay it in the sun with something weighing it down.
This helps balance the overall moisture content in the wood.
Sounds simple, but it has been a real challenge to fix.

My first attempt, I sprayed the concave side of the wood with hot water and clamped a straight edge to the side. I then put it out in the sun for a couple of hours.
View attachment 180846View attachment 180845View attachment 180848View attachment 180849
Unfortunately this had minimal effect, because as soon as I released the clamps, the wood bowed straight back inwards. So on to plan B 🤔

On the next attempt I sprayed the side with a lot of warm water but instead of clamping a straight edge directly to the side, I used a couple of spacers so that there was approximately 30mm between the straight edge and the side on the cabinet.
I could then over clamp it, so the plywood was actually bowing in the opposite direction. The idea being that when the clamps are released, it would bow back but just not as far.
It was abit risky doing this as there was a possibility that if I over did it, it could stay bowed in the opposite direction 😬.View attachment 180844
View attachment 180843View attachment 180851
This time, instead of leaving it like this for a couple of hours, I left it clamped up for 5 days, regularly spraying hot was on the side.
When I finally removed the clamps, I could see the side slowly moving back. However my plan worked as it is now nice a straight 😀.
View attachment 180850
Genius!!!!
 
Looking great mate

Genius!!!!
Cheers guys.

It’s a job that was very frustrating. It took a while for it to finally work. Plus when I had it clamped up, I was worried that it would set it the opposite direction 😬

But it was something that needed to be done, the bow was causing some real damage to the internal sides of the cabinet.
 
I heat treat warped guitar necks. That is even more fun.
Excellent work bud.
Watching this workshop log.
Thanks a lot.
Heat treating was Plan C. If plan B with warm water didn’t work I was thinking of using a wallpaper steamer on it under a towel, as I know this is also another method to fix warps in wood.
 
That really clever, how do you even know where to start doing that
As people say, Google is your friend 😉
Plus there are a few videos on YouTube of people showing you how to fix sheets of warped plywood.

I think that’s slightly easier as your just dealing with a large 2.4m sheet of ply that you can easily be weighed down on a flat surface.

The issue I had is that the side of cab is not that big, plus it’s part of a rigid structure and has probably been warped for years, so it was a lot harder to manipulate back to its original position.
 
Last edited:
Would this method work on chip board or just ply?
I would say no to chipboard. Plywood is basically lots of thins sheets glued together.

Where as Chipboard and MDF for example is compressed fibres and compressed saw shavings.

The issue with this technique is that you need to use water and with MDF and Chipboard, they should never get wet as they will just swell up like a sponge
 
The owner of the 2nd Addams I’m working on likes to fit Pinstadiums to his games, but is not keen on the magnetic strip that is supplied with them as they tend to peal off and can occasionally get knocked when lifting the playfield.

This game will have art blades installed, so my idea is to fit small but strong magnets flush with the inside the cabinet
EC7ACB4F-C9BC-4A2A-955C-E8BE60F6E285.jpeg
I marked out where the Pinstadiums will mount and drilled 11 holes evenly spaced on both sides of the cabinet.
C9A55070-215F-44D4-BA72-DA7A27E64ADD.jpeg698F1548-DD4A-4269-A814-32F91E9327EE.jpeg
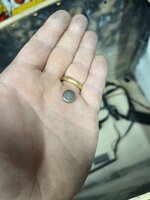
Tested fitted the magnets and they are a nice tight fit and really grip onto the Pinstadiums well. The plan will be to install the art blades, cut round the hole, then fit the magnets.
6F063EB4-57B5-4556-BEFD-E8E4BBF06790.jpeg
Next job is to re-build the back boxes. The one on my game in particular needs major surgery 😞🤔
 
Last edited:
Fantastic work as always Ant 👍🏼 I’m sure this will be a perfect Addams by the time you are finished with it 👌🏼
Thanks Dave. For my Addams, I ideally want to do something a bit different and I’ve got some ideas I’m going to try out. Weather they work, is the question 🤔

For the other Addams I’m working on, that’s going to have a more traditional look, but all the metal and armour etc will be polished up so should really good when complete.
 
Back
Top Bottom