Pinball info
You are using an out of date browser. It may not display this or other websites correctly.
You should upgrade or use an alternative browser.
You should upgrade or use an alternative browser.
Complete Terminator 2 Restoration
- Thread starter Ant-H
- Start date
If this makes it to pinfest, it's going on a turn table pedestal, lights, confetti, fanfare, the lot!
Best to wear* velvet gloves while playing it. Wouldn't want to tarnish all that chrome
Last edited:
That’s exactly what my wife says to meBest to where velvet gloves while playing it. Wouldn't want to tarnish all that chrome
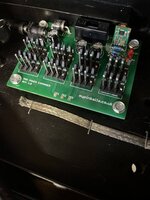
Got round to installing the main wiring harness in the cabinet today. First job though was to install a @myPinballs Mod Power Board so that all my mods don’t put a strain on the driver board. I went with the 5 and 12v version.
Super easy to fit thanks to easy to understand instructions.
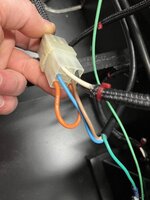
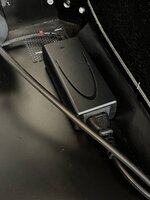
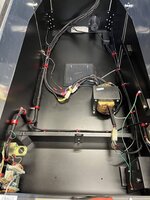
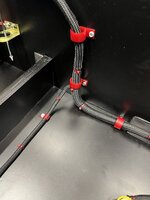
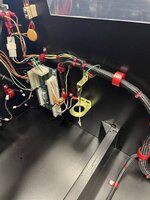
Once this was in place I could run the newly braided harness through the clips and into position. The plan for tomorrow is to restore the speaker/dmd panel and possibly if I get time start to fit the chrome.
Super easy to fit thanks to easy to understand instructions.


Once this was in place I could run the newly braided harness through the clips and into position. The plan for tomorrow is to restore the speaker/dmd panel and possibly if I get time start to fit the chrome.


Lovely install , well done on the detail. Looks brill, ‘proper job’Got round to installing the main wiring harness in the cabinet today. First job though was to install a @myPinballs Mod Power Board so that all my mods don’t put a strain on the driver board. I went with the 5 and 12v version.
Super easy to fit thanks to easy to understand instructions.
View attachment 167312View attachment 167311View attachment 167310
Once this was in place I could run the newly braided harness through the clips and into position. The plan for tomorrow is to restore the speaker/dmd panel and possibly if I get time start to fit the chrome.
View attachment 167315View attachment 167314View attachment 167313
Made an early start this morning and cracked on with the DMD panel. First job was to fully disassemble the panel.
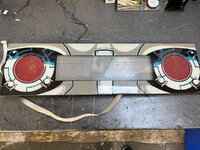
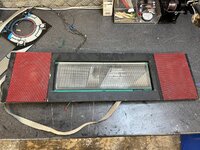
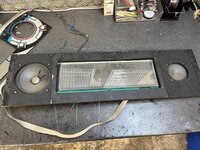
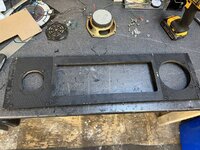
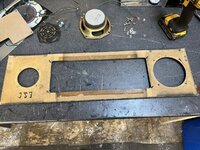
Next up I sanded off the old paint and filled any damage to the wood, before giving it a coat of primer.
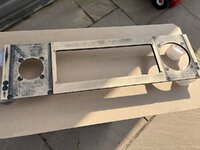
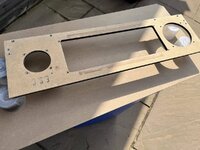
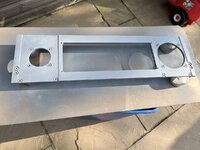
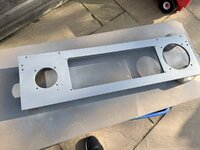
This was followed by 2 coats of the same satin black paint I used on the cabinet and back box. I’m going to leave this to fully harden until tomorrow. I’ll then start the re-assembly.


Next up I sanded off the old paint and filled any damage to the wood, before giving it a coat of primer.


This was followed by 2 coats of the same satin black paint I used on the cabinet and back box. I’m going to leave this to fully harden until tomorrow. I’ll then start the re-assembly.
After closely inspecting the red speaker grills, I decided not to re-paint them and they had no damage to them but rather 30 years of dirt and dust that seemed superglued on to them.
I tried scrubbing them in the sink but couldn't shift it.
So I chucked them both in the sonic cleaner for a 10 minute blast and that did the trick as they came out like new.
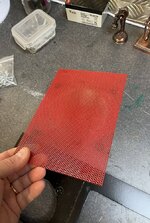
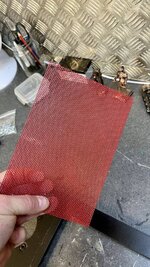
Once the the black paint was dry. I re-stapled the red grills to the wooden surround.
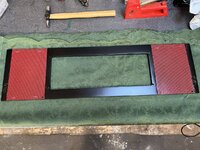
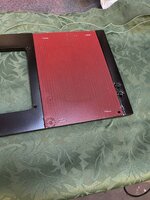
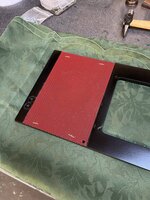
To secure the new screen printed speaker panel in place, I used black double sided tape so that it wouldn’t show through the artwork.
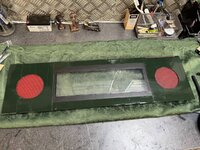
Instead of going with standard plastic trim for the back box, I’ve gone with metal so I could get everything powder coated to match.
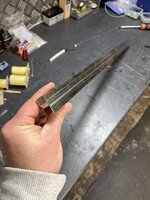
Most of these parts are readily available in the UK, however I did struggle to find a metal H section which fits to the top of the speaker panel. I managed to find one company in the US who stock them and ordered a few so I had them ready for future projects.
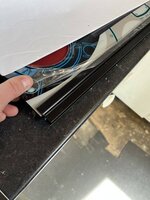
Overall I’m pleased with how the speaker panel looks and it’s now just waiting for it’s new speakers and colour DMD to be fitted. Once this is done, I’ll remove the protective plastic and add to the back box.
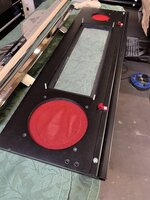
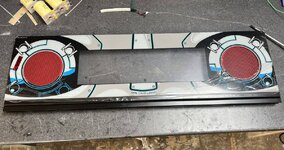
I tried scrubbing them in the sink but couldn't shift it.
So I chucked them both in the sonic cleaner for a 10 minute blast and that did the trick as they came out like new.


Once the the black paint was dry. I re-stapled the red grills to the wooden surround.


To secure the new screen printed speaker panel in place, I used black double sided tape so that it wouldn’t show through the artwork.

Instead of going with standard plastic trim for the back box, I’ve gone with metal so I could get everything powder coated to match.
Most of these parts are readily available in the UK, however I did struggle to find a metal H section which fits to the top of the speaker panel. I managed to find one company in the US who stock them and ordered a few so I had them ready for future projects.


Overall I’m pleased with how the speaker panel looks and it’s now just waiting for it’s new speakers and colour DMD to be fitted. Once this is done, I’ll remove the protective plastic and add to the back box.


Last edited:
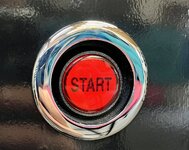
Another little job I’ve managed to fit in today was to start installing some of the chrome. I have had a couple of these parts In place in the past just to see how they look and to check fitment but now they are permanently in place I couldn’t be more pleased. 
First to go on was one of my starter button surround mods which I machined. They are made from stainless steel but this one I chromed.
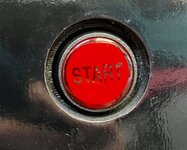
Next up was the coin door. If I have time tonight I’ll fit the leg protectors and the corner trims that I made, which I don’t think I mentioned earlier in the thread
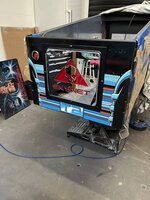
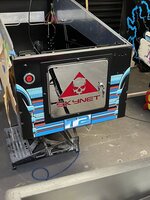
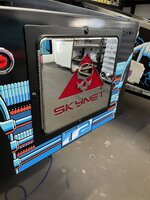
First to go on was one of my starter button surround mods which I machined. They are made from stainless steel but this one I chromed.


Next up was the coin door. If I have time tonight I’ll fit the leg protectors and the corner trims that I made, which I don’t think I mentioned earlier in the thread


Best to wear* velvet gloves while playing it. Wouldn't want to tarnish all that chrome
You'd need Arnie's sunglasses to go near it, I think.
I see trinkets for Addams Family lying about, too.
Ha ha, well spotted. I’ve started to collect parts for my next build.I see trinkets for Addams Family lying about, too.
Those particular parts are the mods that available in the US for TAF and retail between $40 and $90 depending on where you get them.
I found the actual parts used, and they are simply pencil sharpeners sold for £3.99
A tiny point about the cabinet equipment, while I remember. There's one wing-nut on the thread - I hope this game won't be getting rough treatment, but original equipment had two, above and below the cone, to lock it on the rod.
Yes that’s right. I have the other wing nut that’s with the cone, for some reason I just haven’t installed it yetA tiny point about the cabinet equipment, while I remember. There's one wing-nut on the thread - I hope this game won't be getting rough treatment, but original equipment had two, above and below the cone, to lock it on the rod.
Wow it's really coming along, absolutely amazing work. It's becoming almost too good to play 
 .
.
How many hours do you reckon it's taken you, I'm guessing it's got to be in the 500 range now? Its taken me around 160 with the LOTR and mine just a bog standard clean and replace parts. Not a super duper restore.
How many hours do you reckon it's taken you, I'm guessing it's got to be in the 500 range now? Its taken me around 160 with the LOTR and mine just a bog standard clean and replace parts. Not a super duper restore.
To be honest mate, I don’t have a clueWow it's really coming along, absolutely amazing work. It's becoming almost too good to play.
How many hours do you reckon it's taken you, I'm guessing it's got to be in the 500 range now? Its taken me around 160 with the LOTR and mine just a bog standard clean and replace parts. Not a super duper restore.
If I was to guess I’d say between 400 and 500.
I’ve already decided for my next build that I’ll make more of an effort to track the number of hours I put in to it.
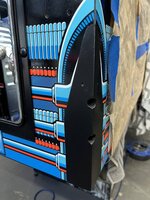
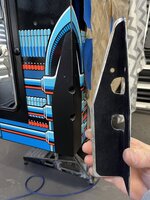
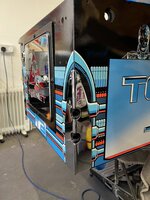
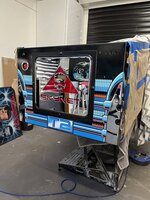
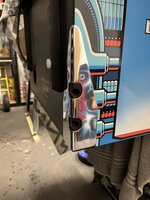
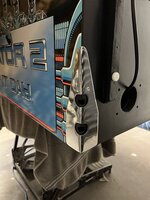
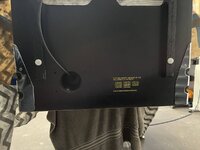
I’ll have some more time tomorrow to work on my T2, but I did have a spare hour today to install the 4 leg protectors I made.
I double checked to make sure the cabinet decals were cut correctly around them so to avoid any future wrinkling. It was then a simple case of screwing them down.
Tomorrow I’ll fit the corner trims that I made last year. Had a quick look at them today and I think I’m going to have to modify them slightly as I didn’t account for the chrome build up on them as well as on the leg protectors, as the fitment when I tested them today could be better IMO.


AWESOME WORK
I have no other words !
I have no other words !
Thanks mate.AWESOME WORK
I have no other words !
I was planning to fit some more shiny bits last weekend but didn’t get round to it until this evening.
As I thought, I had to make some adjustments to the fitment which I didn’t account for when I originally fabricated the parts. I’ve got one more to modify in the morning so I’ll put an update on tomorrow.
Once this is done, by the end off the bank holiday the plan is to wire up the boards and plug in the playfield whilst it’s next to the cabinet and test it out. My thinking is that it will be easier to make any adjustments to bulbs sockets, switches etc whilst the playfield is still on the rotisserie.
When I was planning the build last year, I decided early on that I didn’t want to go with the chrome edition decals/look but still wanted to add some bling to the standard cabinet parts like the legs, lock down bar and side rails etc.
I also wanted to somehow add some more trim so that it would look different from the standard cabinet/chrome edition.
After making the leg protectors I had an idea for some trim that I could fit to all 4 corners that would go from the top of legs to the top of the cabinet. I didn’t want them to be very wide like the leg protectors, and the problem I had was finding some mild steel angle with the radius I was after. It was also far to small for me to bend the angle I wanted myself.
In the end I found a piece is 15mm box section that had perfect corners and ended up cutting it to the size I was after.
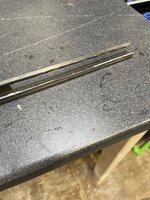
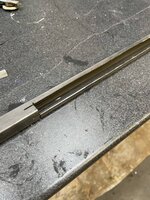
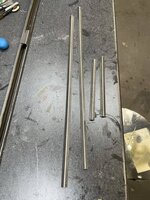
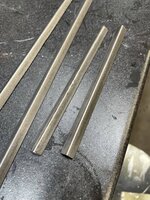
These were then sent to the platers with the rest of the parts.
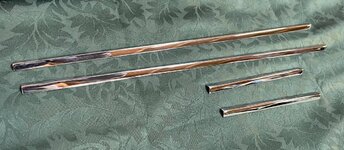
When I first mocked them up before playing, I fitted them so that the bottom of each one went under the top leg protectors, and they fitted great.
However once everything was chromed I tried them again and I think due to the added thickness of the chrome they no longer fitted in a way I was happy with, so had to come up with a plan to modify them without damaging the new chrome finish.

As I could no longer fit the bottom of them under the leg protectors, I tried butting them up to them. However as I had originally cut the ends of them square, it didn’t look good.
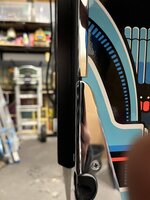
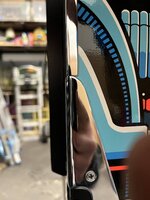
The only way to get these to fit in a way that wouldn’t bug me was to cut a radius into the bottom of each length so that it would fit flush with the top of the leg protectors. The concern I had was damaging the chrome finish.
After drawing the shape I needed, I ended up using my bench grinder to remove most of the material and to make the rough curve and then finished it off with my dremel.
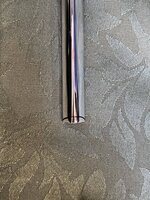
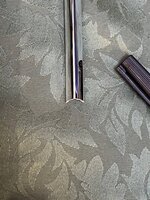
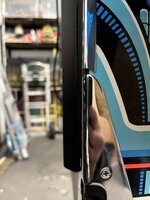
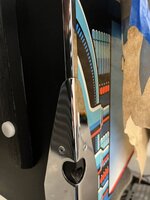
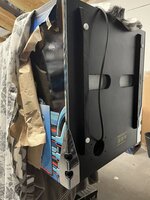
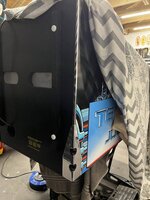
I finished the last one today and I was massively relieved that I came up with a plan b and to not completely bugger up the chrome and in the end, I think they came out better that I originally envisioned.
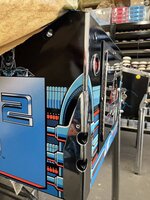
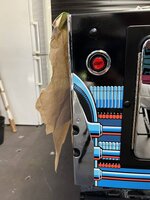
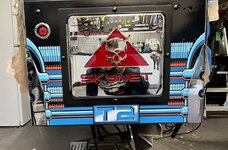
I also wanted to somehow add some more trim so that it would look different from the standard cabinet/chrome edition.
After making the leg protectors I had an idea for some trim that I could fit to all 4 corners that would go from the top of legs to the top of the cabinet. I didn’t want them to be very wide like the leg protectors, and the problem I had was finding some mild steel angle with the radius I was after. It was also far to small for me to bend the angle I wanted myself.
In the end I found a piece is 15mm box section that had perfect corners and ended up cutting it to the size I was after.


These were then sent to the platers with the rest of the parts.

When I first mocked them up before playing, I fitted them so that the bottom of each one went under the top leg protectors, and they fitted great.
However once everything was chromed I tried them again and I think due to the added thickness of the chrome they no longer fitted in a way I was happy with, so had to come up with a plan to modify them without damaging the new chrome finish.
As I could no longer fit the bottom of them under the leg protectors, I tried butting them up to them. However as I had originally cut the ends of them square, it didn’t look good.


The only way to get these to fit in a way that wouldn’t bug me was to cut a radius into the bottom of each length so that it would fit flush with the top of the leg protectors. The concern I had was damaging the chrome finish.
After drawing the shape I needed, I ended up using my bench grinder to remove most of the material and to make the rough curve and then finished it off with my dremel.


I finished the last one today and I was massively relieved that I came up with a plan b and to not completely bugger up the chrome


Yeah I know some of the stuff I’ve done is boarder line crazySome of the stuff you’ve done warrants a call to the men in white coatsbut hats off to you it looks absolutely fantastic

It was the same when I was doing a car up a few years ago. I cut some corners due to cost or time and when I’d finished it, I was never really happy with the end result and ended up selling the car. So now I go all in and try to do any projects I undertake to the best of my ability.
Change of plan over the last few days. We decided to go away for the weekend so didn’t get done as much as I’d planned and I had a slight issue when installing the PinSound board  .
.
I did however end up staying up most of the night on Friday working on it. First job I did was to install the PinSound kit and the new colour DMD.
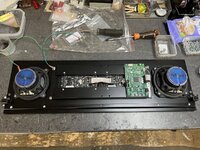
First up was the subwoofer. Compared to the original I took out, this one is massive.
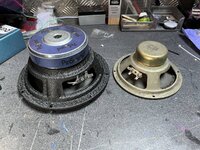
The instructions that came with the PinSound speaker kit was excellent and very easy to follow. I needed to fit the speaker adapter onto the base of the cabinet.
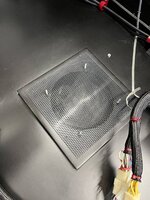
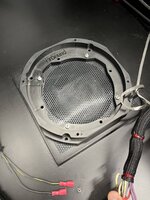
It was a simple case of then screwing the sub in place.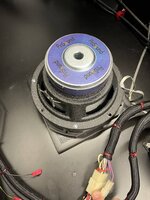
Next was the speakers for the speaker panel. Again the quality of the speakers looks great and are a massive improvement on the standard ones.
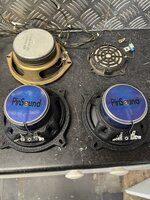
The left speaker is a simple replacement using the original hardware. The right speaker needed another adapter that is supplied with the kit.
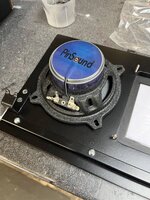
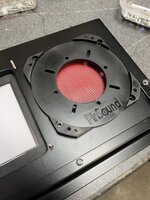
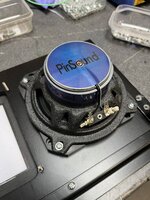
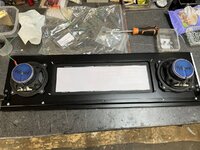
I installed the new colour dmd next. I went with the LED version as I personally like the look of the dots on T2. Again really easy to install. It took literally a couple of minutes.
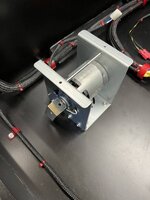
The last part of the PinSound kit to go in was the shaker motor to the base of the cabinet.
I decided to place the shaker on the left hand side and used the supplied template to drill the mounting holes.
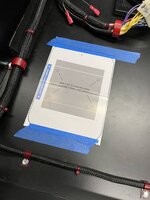
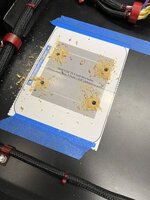
4 T-nuts are then hammered home from the underside of the cabinet so that the shaker motor can be bolted down.
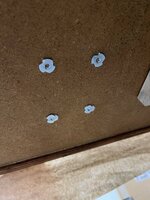
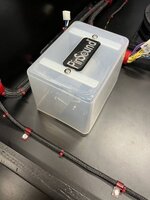
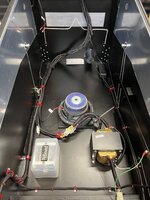
I did decide to shorten the wires of the 2.1 wiring kit that was supplied for the speakers in order to fit the braiding, as there was so much excess.
Overall though I think the whole PinSound kit is well made and very easy to install.
By this time, it was about 7.30pm on Friday, so I thought Id keep going and atempt to switch the game on

I did however end up staying up most of the night on Friday working on it. First job I did was to install the PinSound kit and the new colour DMD.
First up was the subwoofer. Compared to the original I took out, this one is massive.

The instructions that came with the PinSound speaker kit was excellent and very easy to follow. I needed to fit the speaker adapter onto the base of the cabinet.


It was a simple case of then screwing the sub in place.

Next was the speakers for the speaker panel. Again the quality of the speakers looks great and are a massive improvement on the standard ones.

The left speaker is a simple replacement using the original hardware. The right speaker needed another adapter that is supplied with the kit.


I installed the new colour dmd next. I went with the LED version as I personally like the look of the dots on T2. Again really easy to install. It took literally a couple of minutes.

The last part of the PinSound kit to go in was the shaker motor to the base of the cabinet.
I decided to place the shaker on the left hand side and used the supplied template to drill the mounting holes.


4 T-nuts are then hammered home from the underside of the cabinet so that the shaker motor can be bolted down.


I did decide to shorten the wires of the 2.1 wiring kit that was supplied for the speakers in order to fit the braiding, as there was so much excess.
Overall though I think the whole PinSound kit is well made and very easy to install.

By this time, it was about 7.30pm on Friday, so I thought Id keep going and atempt to switch the game on
Last edited:
Pinsound is great found the same experience on my CFTBL. You'll have to let me know what the shaker motor is like!Change of plan over the last few days. We decided to go away for the weekend so didn’t get done as much as I’d planned and I had a slight issue when installing the PinSound board.
I did however end up staying up most of the night on Friday working on it. First job I did was to install the PinSound kit and the new colour DMD.
First up was the subwoofer. Compared to the original I took out, this one is massive.
View attachment 168665
The instructions that came with the PinSound speaker kit was excellent and very easy to follow. I needed to fit the speaker adapter onto the base of the cabinet.
View attachment 168667View attachment 168666
It was a simple case of then screwing the sub in place. View attachment 168668
Next was the speakers for the speaker panel. Again the quality of the speakers looks great and are a massive improvement on the standard ones.
View attachment 168669
The left speaker is a simple replacement using the original hardware. The right speaker needed another adapter that is supplied with the kit.
View attachment 168672View attachment 168671View attachment 168674View attachment 168676
I installed the new colour dmd next. I went with the LED version as I personally like the look of the dots on T2. Again really easy to install. It took literally a couple of minutes.
View attachment 168679
The last part of the PinSound kit to go in was the shaker motor to the base of the cabinet.
I decided to place the shaker on the left hand side and used the supplied template to drill the mounting holes.
View attachment 168684View attachment 168685
4 T-nuts are then hammered home from the underside of the cabinet so that the shaker motor can be bolted down.
View attachment 168686View attachment 168687View attachment 168689
I did decide to shorten the wires of the 2.1 wiring kit that was supplied for the speakers in order to fit the braiding, as there was so much excess.
Overall though I think the whole PinSound kit is well made and very easy to install.
View attachment 168688
By this time, it was about 7.30pm on Friday, so I thought Id keep going and atempt to switch the game on
I’ve been a little apprehensive when is comes to switching the game back on. As part of the rebuild, I installed all new coils, switches and lamp sockets, so I was slightly concerned that something would go bang when I did turn the power on due to me making a mistake with some wiring or diodes etc. Once I know everything is ok, I’ll then fit the PinSound board and Colour DMD.
My plan was to triple check all my wiring to make sure all the diodes were the right way round and that there were no wires touching, and then to switch it on in 3 stages.
The first being with just the cabinet wires connected. Basically a smoke test to make sure nothing starts smoking on any of the boards.
Second stage, I planned to plug in the GI for the back box and if all goes well I would then connect up the playfield.
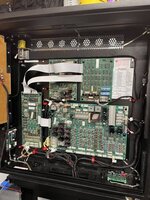
Before switching it on, I fitted the cabinet harness in place in the back box and made sure everything was good before switching it on for the first time in 9 months

View attachment FullSizeRender.MOV
Result!! Nothing caught fire . (The weird noise in the background is coming from my fish tank)
I then plugged in the GI harness for the back box and switched it back on. No smoke again . But I did notice that only a few of the leds were one.
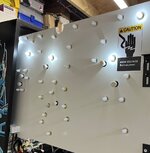
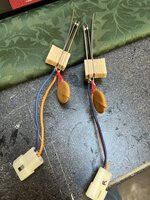
After some head scratching, I worked out that the little metal legs on each bulb needed adjusting so they had a better connection.
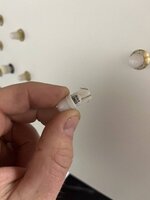
I did this until they were all finally on.
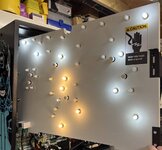
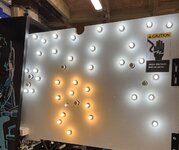
View attachment FullSizeRender.MOV
At this point, it was 9.30pm on Friday, so I thought I’d crack on with hooking up the playfield.
My plan was to triple check all my wiring to make sure all the diodes were the right way round and that there were no wires touching, and then to switch it on in 3 stages.
The first being with just the cabinet wires connected. Basically a smoke test to make sure nothing starts smoking on any of the boards.
Second stage, I planned to plug in the GI for the back box and if all goes well I would then connect up the playfield.
Before switching it on, I fitted the cabinet harness in place in the back box and made sure everything was good before switching it on for the first time in 9 months

View attachment FullSizeRender.MOV
Result!! Nothing caught fire
I then plugged in the GI harness for the back box and switched it back on. No smoke again

After some head scratching, I worked out that the little metal legs on each bulb needed adjusting so they had a better connection.

I did this until they were all finally on.


View attachment FullSizeRender.MOV
At this point, it was 9.30pm on Friday, so I thought I’d crack on with hooking up the playfield.
I’ve been a little apprehensive when is comes to switching the game back on. As part of the rebuild, I installed all new coils, switches and lamp sockets, so I was slightly concerned that something would go bang when I did turn the power on due to me making a mistake with some wiring or diodes etc. Once I know everything is ok, I’ll then fit the PinSound board and Colour DMD.
My plan was to triple check all my wiring to make sure all the diodes were the right way round and that there were no wires touching, and then to switch it on in 3 stages.
The first being with just the cabinet wires connected. Basically a smoke test to make sure nothing starts smoking on any of the boards.
Second stage, I planned to plug in the GI for the back box and if all goes well I would then connect up the playfield.
Before switching it on, I fitted the cabinet harness in place in the back box and made sure everything was good before switching it on for the first time in 9 months
View attachment 168703
View attachment 168709
Result!! Nothing caught fire. (The weird noise in the background is coming from my fish tank)
I then plugged in the GI harness for the back box and switched it back on. No smoke again. But I did notice that only a few of the leds were one.
View attachment 168710
After some head scratching, I worked out that the little metal legs on each bulb needed adjusting so they had a better connection.
View attachment 168707
I did this until they were all finally on.
View attachment 168711View attachment 168712
View attachment 168706
At this point, it was 9.30pm on Friday, so I thought I’d crack on with hooking up the playfield.
When I see that blinking LED on the MPU board I feel so less stressed.
Great job.
Also you passed the 'smoke test'
Scott

