What's new
Pinball info

Register a free account today to become a member! Once signed in, you'll be able to participate on this site by adding your own topics and posts, as well as connect with other members through your own private inbox!

Complete Terminator 2 Restoration

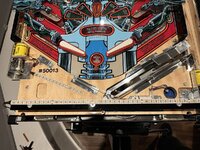
When it came to lighting up the apron, the challenge I had was how to mount an led strip for the blue acrylic used to light the Terminator 2 font.

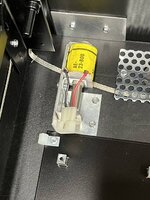
Lighting the red Skynet skulls for easier enough as I had plenty of space to fix a couple of led strips to the playfield. However for the Terminator font, the drain coil was right in the middle, and directly under the blue acrylic I wanted to light up.

After some head scratching and some measuring I came up with a plan 😀
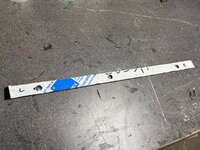
First thing to do was to cut some spare black acrylic I had and then drill 3 x 6mm holes in it. These were then counter sunk so that the bolt head would sit flush with the acrylic.
793C962F-8B9E-486E-AF76-8901579D69C6.jpeg

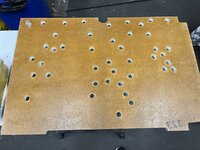
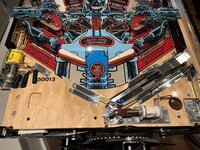
Next I marked the position of the holes onto the playfield and drilled these as well.
7FA7C5CB-FAB5-4B2D-8ADD-F915C96ED0A5.jpeg

I then cut down 3 spacers to 28mm in order to give me the clearance needed for the acrylic to sit above the coil mechanism.
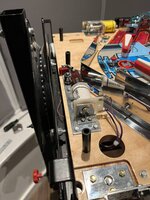
0BDAE7E9-194A-496E-8A25-E650E29950FD.jpeg

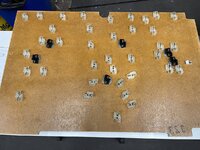
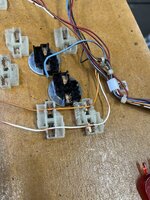
It was then a simple case of running the bolts through the spacers and locking them in place on the underside of the playfield with a few nyloc nuts.
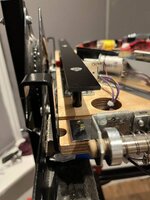
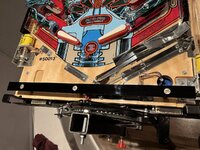
39C188CF-26C2-4517-BAA8-BFCC95A022E7.jpegA531F13F-4199-448A-9EF3-1E4909949F92.jpeg

Luckily my measurements were spot on as I had enough clearance on both the underside and the top so that I could mount the led strip so it wouldn’t hit the the apron.
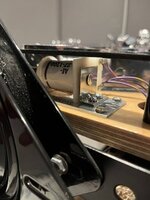
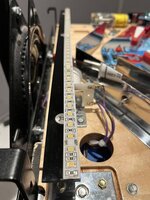
CDA15690-9CC4-4365-B157-672A00E1DBC5.jpeg659D3B8D-CA89-4D5C-9870-0EFF5535A6EA.jpegB9A5B26E-E792-4A2D-A1B0-8591B336DB4A.jpeg

After doing a quick test, I’m really pleased with the distribution of the light and overall how the apron looks. I can now cross this job off the list and move onto rebuilding the back box.
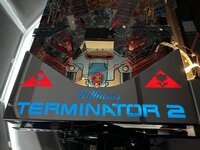
A2321EBF-8E06-407E-AD2F-91DC41687244.jpeg
 
Last edited:
Thanks guys, I really appreciate it 😀

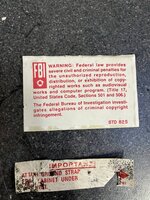
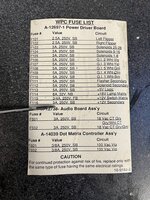
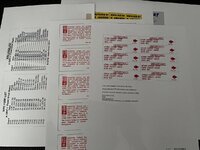
The plan this weekend is to start on the back box, so in preparation for this I printed some new stickers today ready to replace all the old and yellowed ones that I took off.
4C97040E-AAC5-459B-9728-1F85C1E751E8.jpeg4D0A29DB-3309-472A-9AB9-D00C30F3941D.jpegE314B990-BD62-4837-A657-D32566A47744.jpeg09DA5FD6-FE09-4EE0-9D58-07BE56262B27.jpeg27C51E8A-3E67-41C7-BAA8-9167F7C8BADE.jpeg3D881D61-E3C4-481A-894A-75E270E60FA0.jpeg
 
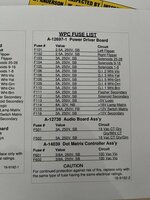
I'd have been inclined to alter the fuse list in one case, whichever G.I. string it is that's just for the 'CPU' lamps. A 5A fuse for just four bulbs? (that's if they still are bulbs, anyway). I reduced that fuse value in works' T2's. One of them had a label attached to the power/driver board saying that for T2 only that fuse was 2-1/2 A. The other side said "Penny, this is the circuit board that's missing" after an incident with a collector.
 
Last edited:
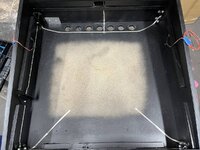
I still haven’t got round to starting on the back box yet. That is the plan for this week.

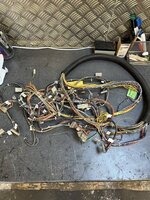
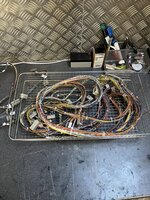
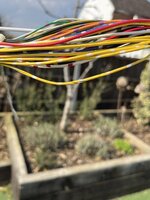
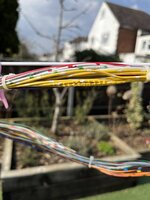
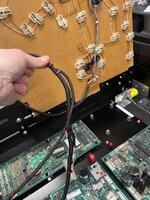
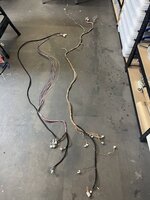
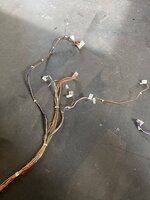
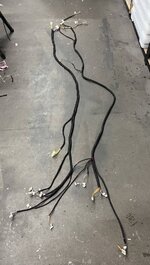
I did however finally clean the wiring harness. When I cleaned the wiring on the playfield I did that by hand which took me hours, so I wasn’t keen on doing it again.

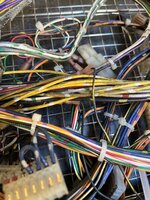
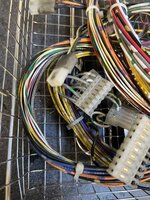
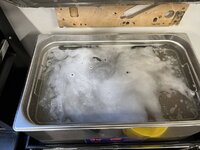
So I thought I’d test out my new ultra sonic cleaner. Like the rest of the T2, when I took it apart, the wiring harness itself was dirty, and I mean really dirty. Even some of the connectors looked like they had black paint overspray on them.

985FD73A-7941-48C7-9BDD-044D9474176B.jpeg
FE97FE9D-9EEF-4D88-A0A6-99A489881164.jpeg75B0A244-1116-431C-B9A1-8B26443E17F2.jpeg
F7138FED-D634-4D0C-87F0-EFF435FA72E6.jpeg
FF8D5391-913E-49ED-9093-C6D76703AEA3.jpeg
After getting some great advise from @CHRIS B PINBALLS, I used some TFR in with the water and set the temperature to 40 deg and time to 25 minutes, turning the harness half way through the cycle.
3C1138CD-7288-4062-B988-53F1EE999666.jpeg

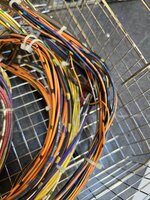
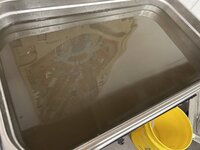
After it had finished I washed it in clean water and hung it out to dry. I couldn’t believe the transformation and the colour of the water afterwards. Definitely was worth buying the larger Ultra Sonic cleaner.

F36768DE-7A9F-41E9-95E2-D489FC03B7CB.jpeg9320E735-1CD4-4D8D-8F21-6BD0157F5FD0.jpeg
 
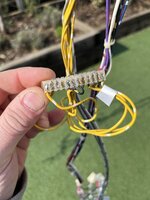
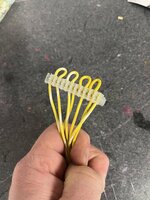
When I originally got T2, the pins for the GI circuit on the driver board was replaced as it was completely burnt out. The IDC connector itself worked but I planned to change it as it clearly had been bodged in the past.

CA76F986-7F55-44A7-817C-B77EEC04103F.jpeg

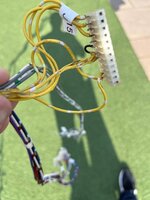
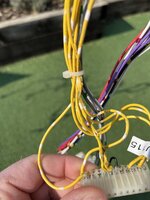
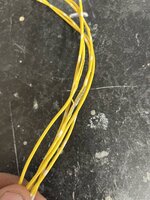
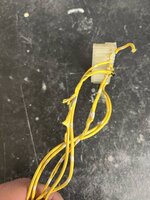
When the harness was drying I noticed that some of the yellow wiring that was previously covered by the black cable trunking was melted and the actual wire could be seen through the insulation.

E4B4A88B-1FDB-46E9-B634-CA23C2321AF6.jpeg28C2331D-7B83-48DE-9A06-BC293E14957B.jpegE3BD9C12-2181-4D81-9BC5-A36DD12F24A3.jpeg2A5CE123-108D-473B-8DF4-21964745FB24.jpeg

So I thought the best thing to do was to completely replace all the wires and connectors for J115. The parts have turned up today so that’s another job for this week.
 
Now THAT's a ultrasonic cleaner!
Seriously, I couldn’t believe the difference afterwards and the colour of the water.
It saved me hours cleaning it by hand with baby wipes like I did with the playfield harness 😬

I’m going to use it to clean the metal grills from the speaker panel next as they have 30 years of dirt and dust on them as well. I tried scrubbing them in the sink but it wouldn’t shift.
 
Finished sorting out the new wiring and connector for J115.
0D4B7FE6-3998-4D00-A5FE-8CC82650F31A.jpeg

The old wiring was truly knackered 😬
BFAB8092-E3F7-49D5-890F-DD6CA27CBB8B.jpegA4473099-A641-4F4E-844A-0B95057B729A.jpeg

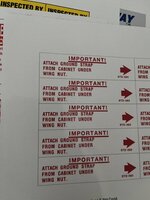
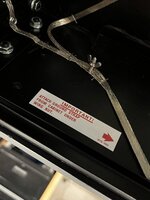
I also made a start rebuilding the back box this evening by stapling in the new grounding straps. Ideally I’d like to get this job crossed off the list this week.

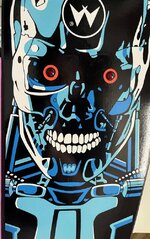
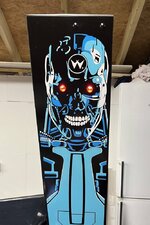
I’m also going to tackle/finish the LED eyes mod for the T800’s on the back box decals. I tried out some smaller LEDs for the eyes last year but was never really happy with it so put it on the back burner until I could find suitable replacements, and I think I’ve finally found the perfect size lights for it to work.

58D9011D-732C-4BC1-AA03-CF60DB764BFC.jpeg1ACF709C-A525-4D97-8840-91372FCEC03B.jpeg
 
Finished sorting out the new wiring and connector for J115.
View attachment 166000

The old wiring was truly knackered 😬
View attachment 166012View attachment 166001

I also made a start rebuilding the back box this evening by stapling in the new grounding straps. Ideally I’d like to get this job crossed off the list this week.

I’m also going to tackle/finish the LED eyes mod for the T800’s on the back box decals. I tried out some smaller LEDs for the eyes last year but was never really happy with it so put it on the back burner until I could find suitable replacements, and I think I’ve finally found the perfect size lights for it to work.

View attachment 166009View attachment 166011

Oh God I'm having flash backs 🤣

I know you can't see it with the plate on top but why not spray the middle anyway. I did on mine it would bug me knowing a patch was there. 😸
 
Oh God I'm having flash backs 🤣

I know you can't see it with the plate on top but why not spray the middle anyway. I did on mine it would bug me knowing a patch was there. 😸

I did this when my original plan was to keep it as close to the original look as possible. That soon went out the window 😂
There’s a few things I’ve done on this which has given me more ideas that I’m going to do differently and try out on my next one.

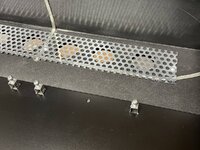
Polished up the metal grill and re-fitted the knocker assembly and just for Scott, the metal pcb panel so the patch can no longer be seen 🤔😂

A507634C-E59B-462B-A447-0C3DF234CE3F.jpeg5D130687-1899-46D0-B6AB-8BAC65A13CCA.jpegBC70072B-99C7-4811-BFE3-3FD5B1CD6968.jpeg
 
I did this when my original plan was to keep it as close to the original look as possible. That soon went out the window 😂
There’s a few things I’ve done on this which has given me more ideas that I’m going to do differently and try out on my next one.

Polished up the metal grill and re-fitted the knocker assembly and just for Scott, the metal pcb panel so the patch can no longer be seen 🤔😂

View attachment 166030View attachment 166031View attachment 166032

Yes boy!

Screw the purists this looks sexy! Lol
 
Yesterday I basically finished re-assembling the back box. First job was to give the back of the door a quick spray varnish before fitting the cleaned bulb sockets and re-wiring it. This is when lots of photos definitely come in handy.
866DCCAD-54FD-461B-9ADE-85A6939A3A5F.jpeg69E6D76A-0FFC-4739-BD60-616F42072FF8.jpeg8003559F-E780-4370-88C0-45EC7777D5FF.jpeg6748FAAE-7A4A-4414-BF14-0003D1A44FA3.jpeg
 
I remember seeing on @stumblor super mint Fishtails that he sold a few months back he had used oranges coloured wire clips which I thought was a great detail to add.

I had a look online and couldn’t find any suppliers that sold them. Turns out, after asking Davey where he got them from, they were actually dyed orange.

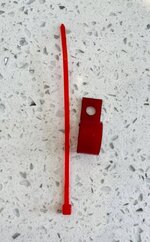
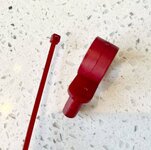
I wanted all my wire clips red, so after a quick look on Amazon an order was placed for the dye and I gave it a go myself. Thanks again to Davey for the advise.
D340A509-91C7-425B-B840-EEBEAF553F1B.jpeg

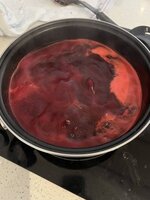
It was really easy to do. Just boil up some water, add the dye and a drop of washing up liquid.

1E55F16E-B42D-43F5-8D17-C303FD633119.jpeg

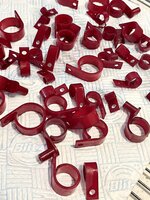
I tested one out first and I timed how long it took to the dye them the shade I was looking for. In this case it was 2 minutes. The longer it stays in the darker it would get. They came out great.

08F3D583-EF08-4D84-AD2D-FC233CF19BEE.jpeg

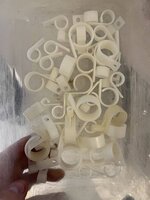
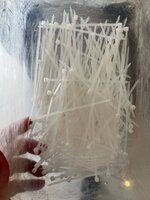
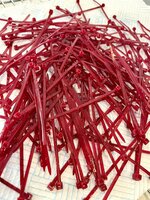
I know it’s way overkill, and my wife says I have a problem 😂 but the red cable ties I originally bought , now didn’t match so I thought Id see if I could dye some standard whites on. 😂🤪

I honestly thought they would melt or distort due to the heat but after literally 40 seconds in the dye, they were done.

F18830F3-B6D9-4B1F-8D7A-B049D67D4FEB.jpeg98555C52-E1EC-4723-A504-932E8C183A4B.jpeg1921B6E0-6649-4A4C-AB05-543E7A700164.jpegDB03CBEA-7731-40C2-A7C5-0AD5F477F6DD.jpeg

So the plan for this morning is to finish the wiring harness and put the final touch’s to the back box.
 
I remember seeing on @stumblor super mint Fishtails that he sold a few months back he had used oranges coloured wire clips which I thought was a great detail to add.

I had a look online and couldn’t find any suppliers that sold them. Turns out, after asking Davey where he got them from, they were actually dyed orange.

I wanted all my wire clips red, so after a quick look on Amazon an order was placed for the dye and I gave it a go myself. Thanks again to Davey for the advise.
View attachment 166242

It was really easy to do. Just boil up some water, add the dye and a drop of washing up liquid.

View attachment 166241

I tested one out first and I timed how long it took to the dye them the shade I was looking for. In this case it was 2 minutes. The longer it stays in the darker it would get. They came out great.

View attachment 166243

I know it’s way overkill, and my wife says I have a problem 😂 but the red cable ties I originally bought , now didn’t match so I thought Id see if I could dye some standard whites on. 😂🤪

I honestly thought they would melt or distort due to the heat but after literally 40 seconds in the dye, they were done.

View attachment 166246View attachment 166248View attachment 166245View attachment 166247

So the plan for this morning is to finish the wiring harness and put the final touch’s to the back box.


You definitely do have a problem but it's an ailment that I've seen a few times now 😂

Great work mate
 
I remember seeing on @stumblor super mint Fishtails that he sold a few months back he had used oranges coloured wire clips which I thought was a great detail to add.

I had a look online and couldn’t find any suppliers that sold them. Turns out, after asking Davey where he got them from, they were actually dyed orange.

I wanted all my wire clips red, so after a quick look on Amazon an order was placed for the dye and I gave it a go myself. Thanks again to Davey for the advise.
View attachment 166242

It was really easy to do. Just boil up some water, add the dye and a drop of washing up liquid.

View attachment 166241

I tested one out first and I timed how long it took to the dye them the shade I was looking for. In this case it was 2 minutes. The longer it stays in the darker it would get. They came out great.

View attachment 166243

I know it’s way overkill, and my wife says I have a problem 😂 but the red cable ties I originally bought , now didn’t match so I thought Id see if I could dye some standard whites on. 😂🤪

I honestly thought they would melt or distort due to the heat but after literally 40 seconds in the dye, they were done.

View attachment 166246View attachment 166248View attachment 166245View attachment 166247

So the plan for this morning is to finish the wiring harness and put the final touch’s to the back box.
Would’ve never thought of dying the wire clips and cable ties but it looks awesome. This is going to be an infinitely better looking game than when it left the factory!
 
Yeah I was just happy to turn mine white again. lol you have too much time.
 
Again? The natural colour for cable ties is an off-white, ivory sort of colour. But I know what you mean. I got a bit hung up on tie colours with my F-14, using Red ties on lamp wiring, Green on switch wiring, etc.
 
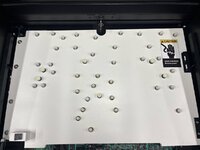
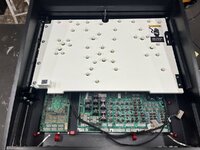
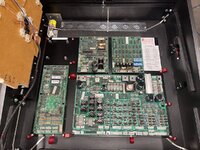
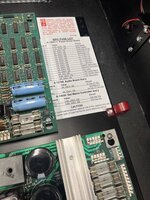
Apart from the DMD panel, I think I can say the back box is complete.

After fitting the mounting hardware I had to lightly sand down some of the powder coating on the hinges for the door in order for it to fit.
99CC40AD-409C-449C-BB94-95B09BBF57EC.jpeg

I then added the new decals I printed and my red wire clips 🤪 followed by all the boards. Last job was fitting some braiding to the bulb wiring.

6B56846F-0CBB-4644-9E00-0E103163BFC3.jpegDE339286-5201-446C-BD53-EB24E4A6D9A3.jpegFC2355B7-5784-4AEF-A6AE-7BA6178482F8.jpegA957D8CE-9E7A-47A2-B491-4C280CF51235.jpeg
69E2B270-6C76-4267-B04F-08811009839A.jpeg
F95C1826-C49C-42DA-BA6C-2EA15112E555.jpeg
 
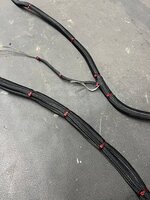
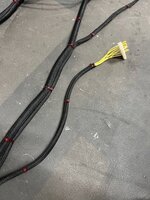
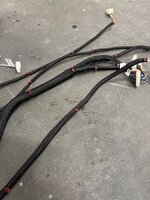
Had a trip down to Brighton today so didn’t get a lot done on T2, but I did manage to finish adding the braiding to the main wiring harness. Have to say this was not an enjoyable job to do. Just need to do the wiring on the playfield now. 😬

38C0D46B-6EC5-482F-B889-497B1383649B.jpeg53F0F1E5-E359-46E3-9A1B-300BF7F86987.jpeg239919B6-95FD-49F8-89C2-72A0A890084F.jpeg75DBA4DE-734C-4389-96ED-9A05AC46244B.jpeg7CC2FD00-871B-47A2-846B-DEB52E2E5624.jpeg57508DF4-56B3-408F-A523-A13AC0DDD85F.jpeg
 
Last edited:
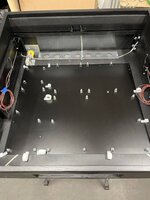
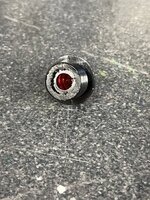
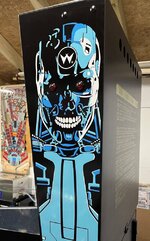
Earlier on in the build I added some small led’s to all the T-800’s on the side of the cabinet which turned out really well. I then added slightly bigger leds to the sides of the back box. However I have never been too happy with how these turned out.
90AEA3E4-C1CC-47A0-A7F2-67396217A771.jpeg
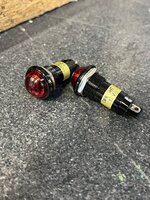
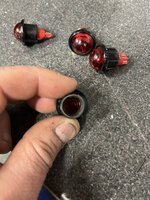
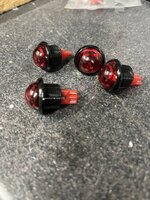
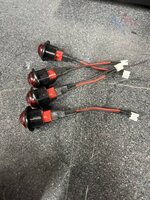
They looked ok when they were lit up, but when off they looked like beady little bug eyes. The issue I had was I couldn’t find anything with a large enough diameter to cover the whole of the eye. So I had another long look online last month and finally came across literally the perfect sized bulbs in regards to diameter. Unfortunately they weren’t cheap. 😬
36AD444A-5AA6-4091-B205-F191E81BE0D8.jpeg
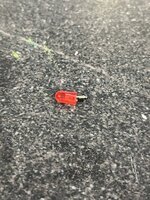
When I ordered them I knew I’d have to modify each one in order for them to work. The first thing I did was test out the 12v led that came sealed in each unit. To say I was disappointed was an understatement. The light it gave out was pathetic.
05B5E142-16CB-4CDC-A3F2-51CC79F3AF81.jpeg
First job was to cut the sealed unit in order to remove the bulb.
86579A81-B999-4936-B992-2A6482F64293.jpeg5493E162-FF09-4D05-A173-F635816B9A64.jpeg
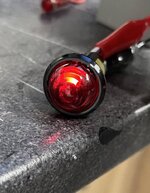
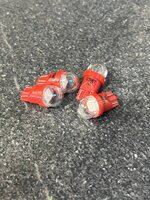
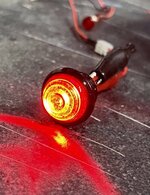
My plan was to use 4 red comet leds, but for them to work, I had to crack out the dremal again to enlarge the holes in order to fit them. Once I was happy with the fitment and glued them in place with some epoxy.
60F25288-F3CF-4FA2-BE49-025A399D35F2.jpeg
39D293FD-344A-4E03-A3FE-B7D374F217FE.jpeg2CFF5C49-BB5C-4A5C-A801-FB73CC59E5DF.jpeg
Before I went any further I thought I’d test them to see how they looked. Compared to the original bulbs they were so much brighter.
6618FBF0-92F3-4378-BDF7-D3470DC7FB1C.jpeg
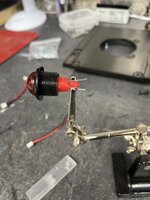
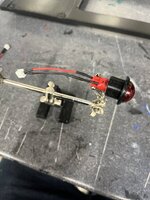
Next I used some connectors from Comets Matrix range and soldered the wire to the metal legs of the bulb followed by some heat shrink.
086E84E4-A609-4C44-AF1B-A4F5C303ACA8.jpeg1A4D1191-5F71-4C44-8870-E2357FECA2E4.jpeg48557ADE-F7BD-4D8E-9FA8-3BD1E31367AD.jpeg
Last job was to enlarge holes in the side of the back box without ruining the decals 😬. Luckily it all went to plan and I didn’t mess it up whilst drilling the 16mm holes.

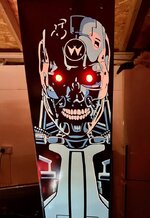
In my opinion, they look 100 times better than the little bug eyes that were fitted before. I’ll power these as well as all the other leds in the side of the cabinet with a separate mod power board.
2A01DA0B-C451-45E3-856D-3A0C647629D9.jpeg17783531-D26D-46CE-9C55-22C6B43206DE.jpegC176C819-2C5F-49B7-A2D0-9FC206C70ADB.jpeg
 
Last edited:
I just went back to the start of this thread . This is your first pin restoration!!! Jeez! You do things properly don't you . It's going to be amazingp
Cheers Andy. Ive learnt from previous projects over the years that when Ive cut corners, be it due to time or cost, the finished article would always bug me in some way.
So now my view is if I’m going to spend the time and money on a project I only want to do it once and to make sure I don’t have the “I wish I did that differently” mindset at the end.
 
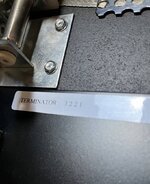
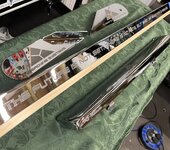
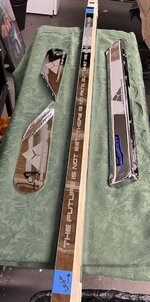
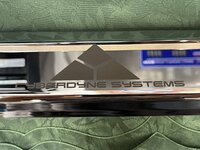
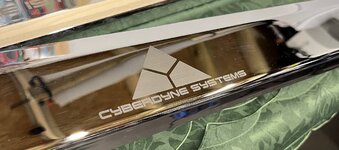
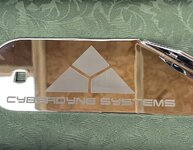
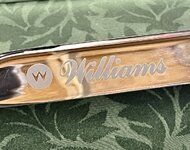
Didn’t get much done today but did pick up the lock down bar, back box hinges and side rails after having some laser etching done. Apart from the Williams logo, I gave them the same Terminator font that was used on the coin door and apron.

Turned out better than I expected. Can’t wait to fit it now.

3DCEF429-5DD5-49D6-A158-21FDDD842493.jpeg8FDB51E1-80A9-42C1-9157-67B226E063FD.jpeg9C8E59D8-F10B-43E5-9136-6B36A6AF2CBF.jpeg8DA7AE29-E1ED-4141-AEA4-88822904C5AB.jpegF45B565A-35CC-468C-9B90-CD3AF185159D.jpeg1F60B155-D1FD-439E-A1B8-D116DFCB2D42.jpeg
 
Absolutely stunning

Thanks Kris. It was a bit of a gamble taking the newly chromed parts and having them etched.
There was some concern that there could have been a problem with the process/laser etching and ruin the chrome.

They ended up testing different settings with some old bits I gave them before etching the chromed parts.
 
Back
Top Bottom