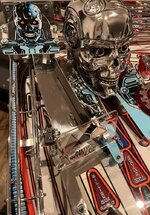
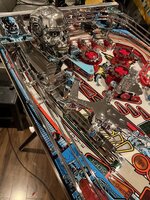
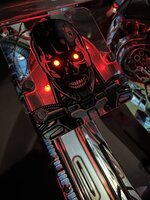
Got to have me a T2 at some point . This one will be superb. Great work
Pinball info
You are using an out of date browser. It may not display this or other websites correctly.
You should upgrade or use an alternative browser.
You should upgrade or use an alternative browser.
Complete Terminator 2 Restoration
- Thread starter Ant-H
- Start date
Do you need a press for rivets or does a standard hand tool suffice?
No not really. I only bought the kit as I heard pinrestore was closing, so placed an order for a couple of bits and included the rivet press kit at the same time.
Got to have me a T2 at some point . This one will be superb. Great work
Thanks Andy.
I had a free couple of hours this morning so I installed NVRAM to the mpu board.
Before I purchased my first pin, I had zero experience with soldering, and in the past sent out my mpu boards to have the nvram fitted. Since then Ive had some practice when doing some board work on my FT, so thought I’d give this a go.
I have to admit that after reading some posts on pinside and watching a few YouTube videos, I was a little nervous due to the traces being so small
I got some great advise from Bob (Pinballtoys) who kindly explained the best method to use if the original ram chip was readily available as the number one priority is to avoid pulling out any of the traces.
If I needed to keep the old chip I would have de-soldered it while in place, but then if I didn’t get out all the solder, I could pull a trace when trying to remove it.
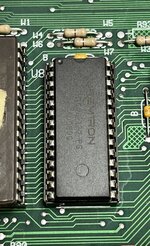
First job was to cut the old ram chip out leaving the little legs in the board.
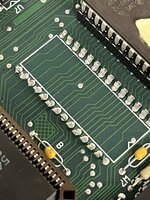
Next I removed each leg individually with my soldering iron and a pair tweezers.
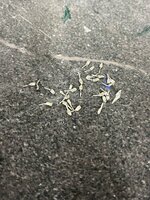
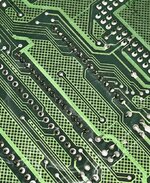
I could then solder suck the holes clear, solder in a socket and fit the NVRAM.
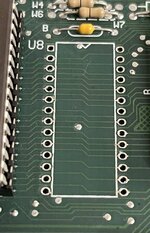
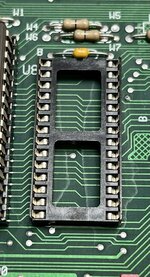
Before I purchased my first pin, I had zero experience with soldering, and in the past sent out my mpu boards to have the nvram fitted. Since then Ive had some practice when doing some board work on my FT, so thought I’d give this a go.
I have to admit that after reading some posts on pinside and watching a few YouTube videos, I was a little nervous due to the traces being so small
I got some great advise from Bob (Pinballtoys) who kindly explained the best method to use if the original ram chip was readily available as the number one priority is to avoid pulling out any of the traces.
If I needed to keep the old chip I would have de-soldered it while in place, but then if I didn’t get out all the solder, I could pull a trace when trying to remove it.
First job was to cut the old ram chip out leaving the little legs in the board.

Next I removed each leg individually with my soldering iron and a pair tweezers.

I could then solder suck the holes clear, solder in a socket and fit the NVRAM.


Last edited:
Bobbdobalina
Site Supporter
Braver man than me. I suck at soldering.
Great job
Great job
I had a free couple of hours this morning so I installed NVRAM to the mpu board.
Before I purchased my first pin, I had zero experience with soldering, and in the past sent out my mpu boards to have the nvram fitted. Since then Ive had some practice when doing some board work on my FT, so thought I’d give this a go.
I have to admit that after reading some posts on pinside and watching a few YouTube videos, I was a little nervous due to the traces being so small
I got some great advise from Bob (Pinballtoys) who kindly explained the best method to use if the original ram chip was readily available as the number one priority is to avoid pulling out any of the traces.
If I needed to keep the old chip I would have de-soldered it while in place, but then if I didn’t get out all the solder, I could pull a trace when trying to remove it.
First job was to cut the old ram chip out leaving the little legs in the board.
View attachment 160940
Next I removed each leg individually with my soldering iron and a pair tweezers.
View attachment 160939
I could then solder suck the holes clear, solder in a socket and fit the NVRAM.
View attachment 160945
View attachment 160942View attachment 160944
View attachment 160947
My plan was to tackle the final job on the playfield this evening. I thought it would only take me an hour is so. Boy was I wrong 
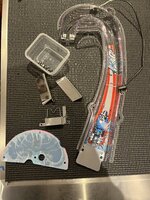
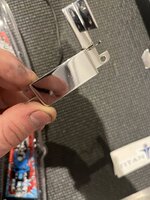
I got round and finally polished the last part that needed doing as well.
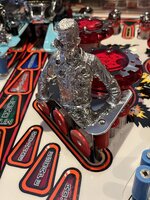
I actually misplaced the original part a few weeks ago which was real “oh ****” moment in the build. And to make matters worse the ball gate is not available anymore . Luckily I found one for sale on eBay in the US.
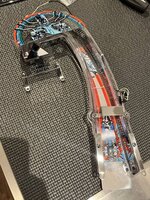
When it came to securing the ramp in place, it turned out not to be a straight forward, quick job as I thought.
I could not get the bottom entrance to the ramp to sit flush with the metal posts. It was out by about 5mm, and would not budge.
I think with the ramp being a repro, it obviously wasn’t made to the exact same shape as the original. To get round this issue I installed a 2 washers under the front posts, which raised them just enough so that I could screw it down.
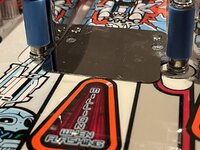
However this then presented another problem. The underside of the ramp was hitting one of the nyloc nuts that secured one of the plastics in place and was again causing problems with fitment. The solution this time was to swap out the chunky nyloc nut with a low profile nut. This gave just enough clearance so that the ramp didn’t hit any other part on the playfield.
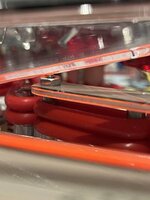
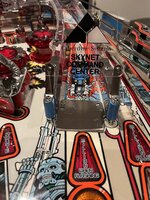
Final job for tonight was to fit the last of the re-chromed wire forms. I’ll adjust the 2 switches on the ramp tomorrow and then I think the playfield is basically done
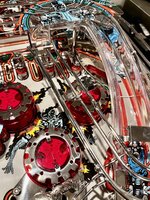
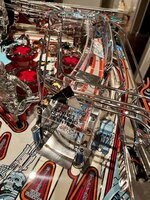
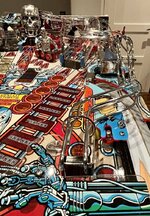

I got round and finally polished the last part that needed doing as well.
I actually misplaced the original part a few weeks ago which was real “oh ****” moment in the build. And to make matters worse the ball gate is not available anymore


When it came to securing the ramp in place, it turned out not to be a straight forward, quick job as I thought.
I could not get the bottom entrance to the ramp to sit flush with the metal posts. It was out by about 5mm, and would not budge.
I think with the ramp being a repro, it obviously wasn’t made to the exact same shape as the original. To get round this issue I installed a 2 washers under the front posts, which raised them just enough so that I could screw it down.

However this then presented another problem. The underside of the ramp was hitting one of the nyloc nuts that secured one of the plastics in place and was again causing problems with fitment. The solution this time was to swap out the chunky nyloc nut with a low profile nut. This gave just enough clearance so that the ramp didn’t hit any other part on the playfield.


Final job for tonight was to fit the last of the re-chromed wire forms. I’ll adjust the 2 switches on the ramp tomorrow and then I think the playfield is basically done


Last edited:
I’ve just checked over everything and apart from fitting the apron and hanger's I think I can say the playfield swap is finally complete  .
.
Before starting it I was very apprehensive about it due to never having done one before. When you first look at the underside, you don’t know where to start!
But It’s came out so much better than I had originally hoped and planned.
I had a couple challenges along the way but learnt loads in the process and am much more confident for when I start on my TAF next.
The plan now is to:-
Finish & fit the apron and coin door
Rebuild the back box
Restore the speaker/DMD panel
Clean the cabinet harness
Fit all the chrome
Re-fit the playfield
Switch on
Build a topper.
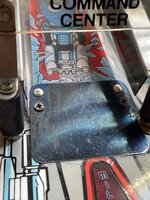
Before
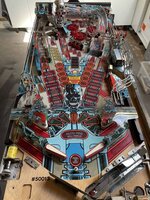
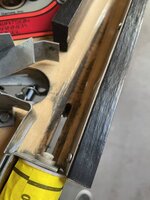
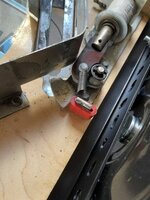
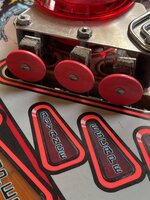
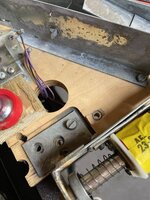
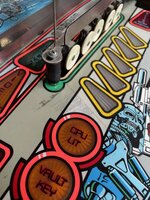
After
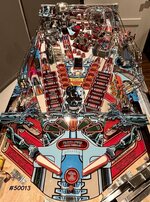
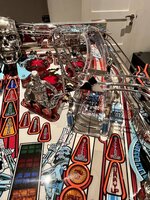
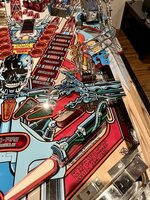
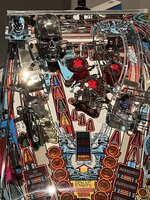
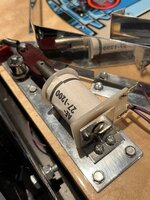
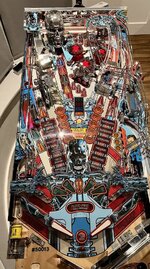
Before starting it I was very apprehensive about it due to never having done one before. When you first look at the underside, you don’t know where to start!
But It’s came out so much better than I had originally hoped and planned.
I had a couple challenges along the way but learnt loads in the process and am much more confident for when I start on my TAF next.
The plan now is to:-
Finish & fit the apron and coin door
Rebuild the back box
Restore the speaker/DMD panel
Clean the cabinet harness
Fit all the chrome
Re-fit the playfield
Switch on
Build a topper.
Before


After


Last edited:
That look amazing, great work. Are you going for the same with Adam's ie large amount of work
Thanks a lot.
Yeah that’s the plan. I’m already starting to amass parts for it, so that I have everything I need for when I start.
Should keep me busy for most of the year.
Yep and your bank account emptyThanks a lot.
Yeah that’s the plan. I’m already starting to amass parts for it, so that I have everything I need for when I start.
Should keep me busy for most of the year.
At least with Adam's you can get everything
I’ve had the acrylic for the coin door and apron for a while now so thought I should really get them both finished and crossed off the list.
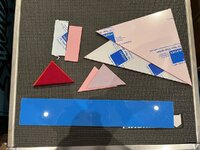
First up at the weekend was the apron. The blue acrylic was straight forward.
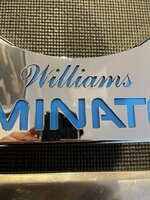
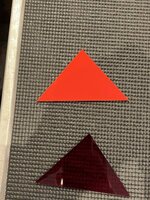
I went with 2 different shades of red in the end. The one I initially wanted was the perfect colour, but was transparent and wouldn’t work when the leds light up.
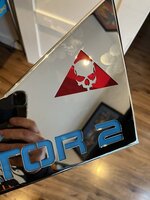
The other shade of red that I had would work with the leds but was to orange for my liking, so I combined the two which worked out perfectly.
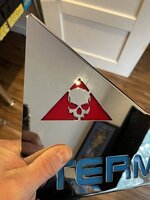
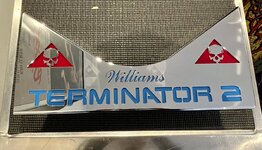
Did a quick test was happy with how it looked. I could see that I would have some clearance issues when fitting it due to the red acrylic on the right side, but I’ll tackle that when I get to it.
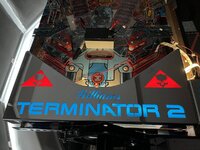

First up at the weekend was the apron. The blue acrylic was straight forward.

I went with 2 different shades of red in the end. The one I initially wanted was the perfect colour, but was transparent and wouldn’t work when the leds light up.

The other shade of red that I had would work with the leds but was to orange for my liking, so I combined the two which worked out perfectly.


Did a quick test was happy with how it looked. I could see that I would have some clearance issues when fitting it due to the red acrylic on the right side, but I’ll tackle that when I get to it.

Last edited:
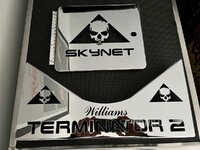
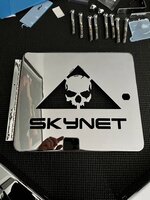
The shooter Lane cover was supposed to be straight forward with a piece of the blue acrylic behind it.
Then I had a thought and decided it would look better if all the Skynet symbols were red so they matched
So after a lot of measuring and trimming I squeezed in a small piece of the red acrylic.
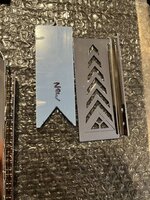
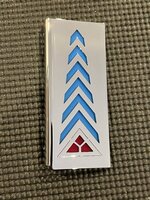
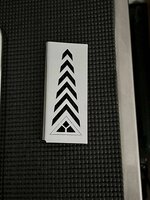
When it came to the coin door, fitting the acrylic was straight forward enough.
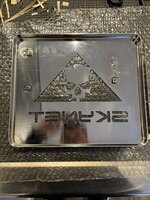
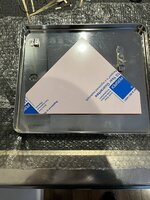
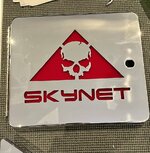
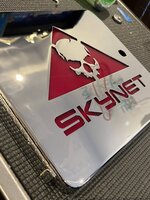
I was really happy with how it looked. The problem I had was when fitted the 4 led strips around the sides of the door and tested, it looked ****. You couldn’t actually tell it was lite up . To much of the light was being lost. Back to the drawing board.
So plan b is the job for today
Then I had a thought and decided it would look better if all the Skynet symbols were red so they matched
So after a lot of measuring and trimming I squeezed in a small piece of the red acrylic.


When it came to the coin door, fitting the acrylic was straight forward enough.


I was really happy with how it looked. The problem I had was when fitted the 4 led strips around the sides of the door and tested, it looked ****. You couldn’t actually tell it was lite up
So plan b is the job for today
Last edited:
Transparent red acrylic maybe?The shooter Lane cover was surprised to be straight forward with a piece of the blue acrylic behind it.
Then I had a thought and decided it would look better it all the Skynet symbols were red so they matched
So after a lot of measuring and trimming I squeezed in a small piece of the red acrylic.
View attachment 163132
View attachment 163134
When it came to the coin door, fitting the acrylic was straight forward enough.
View attachment 163133View attachment 163135View attachment 163136View attachment 163137
I was really happy with how it looked. The problem I had was when fitted the 4 led strips around the sides of the door and tested, it looked ****. You couldn’t actually tell it was lite up. To much of the light was being lost. Back to the drawing board.
So plan b is the job for today
I'm getting some for my custom speaker overlay. Will let you know how it looks.
Transparent red acrylic maybe?
I'm getting some for my custom speaker overlay. Will let you know how it looks.
Transparent was the problem. The red acrylic I wanted to use was transparent. The issue with this is that you could actually see through it and see the leds, and any other wires or mechs that were behind it.
The acrylic to get to solve this is Translucent. This is a solid colour so you can’t see through but it still lets plenty light through. So I combined the 2 so that I could still use the shade of red I originally wanted.
Also the problem with the coin door was the fact that there was nothing behind it deflecting the light through the acrylic. The light got absorbed by the inside of the cabinet so the light effect on the acrylic was minimal.
Absolutely stunning work you are doing here, really enjoying following your progress.
Thanks mate
Ant, this is amazing! Cannot wait to see it all put together and video of it playing. How far off are you from complete reassembly? What is left to be done?
Thanks Rich. There’s not much left now. I’m picking up the last couple of parts that I forgot to get done from the powder coaters tomorrow
Rebuild the back box
Restore the speaker/DMD panel
Clean the cabinet harness
Fit all the chrome
Re-fit the playfield
Switch on
Build a topper.
I’m hoping to have it near enough ready to switch on and run some tests by the end of the month, depending on work commitments. Plus I’m eager to start on the next one.
So I tackled the problem I had with losing light on the coin door today. It was so disappointing when I originally tested it out. The light coming through was truly pathetic. I even asked for my wife’s opinion and her first question was are they switched on 

So Instead on running the leds around the entire sides door, this loosing all the light into the inside of the cabinet, I wanted to aim all the light directly through the acrylic.
I needed to come up with a way to mount the leds so that the faced forward, towards to red acrylic. Obviously I couldn’t cover the whole back of the door with a mount plate as I still needed to access it to install and get to the service buttons.
In order to do this my idea was to use a piece of black acrylic cut to the same shape and mount it with some spaces approx 15mm away from the red piece.
First obstacle was how to actually fix the black piece so it sat away from the red acrylic. After some head scratching I came up with the idea to use T-nuts.
I marked out 3 mounting points on the black piece where I could drill holes so that it wouldn’t be seen when viewed from the front of the door. These points were then marked on the red acrylic and drilled so that they lined up perfectly.
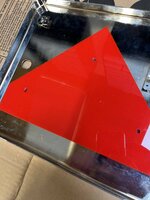
Next job was to fit the 3 t-nuts. I had to grind around 2mm off the bottom of each one as they were slightly to long.
I then proceeded to heat each one up until they were red hot and then pressed them into the holes I had drillled in the red acrylic so that the spikes melted into it. Once they had cooled, they wouldn’t budge.
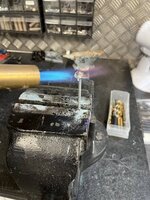
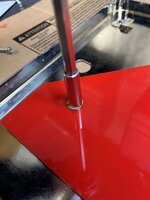
In then simply stuck 3 comet led strips to the black acrylic and used 15mm spacers before screwing down onto the 3 t-nuts.
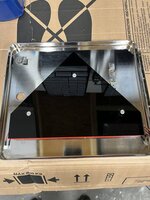
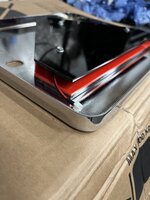
Did a quick test and am much happier with how it looks. The light really shines through the door now which was what I had originally envisioned when I came up the whole coin door idea.

So Instead on running the leds around the entire sides door, this loosing all the light into the inside of the cabinet, I wanted to aim all the light directly through the acrylic.
I needed to come up with a way to mount the leds so that the faced forward, towards to red acrylic. Obviously I couldn’t cover the whole back of the door with a mount plate as I still needed to access it to install and get to the service buttons.
In order to do this my idea was to use a piece of black acrylic cut to the same shape and mount it with some spaces approx 15mm away from the red piece.
First obstacle was how to actually fix the black piece so it sat away from the red acrylic. After some head scratching I came up with the idea to use T-nuts.
I marked out 3 mounting points on the black piece where I could drill holes so that it wouldn’t be seen when viewed from the front of the door. These points were then marked on the red acrylic and drilled so that they lined up perfectly.


Next job was to fit the 3 t-nuts. I had to grind around 2mm off the bottom of each one as they were slightly to long.
I then proceeded to heat each one up until they were red hot and then pressed them into the holes I had drillled in the red acrylic so that the spikes melted into it. Once they had cooled, they wouldn’t budge.


In then simply stuck 3 comet led strips to the black acrylic and used 15mm spacers before screwing down onto the 3 t-nuts.


Did a quick test and am much happier with how it looks. The light really shines through the door now which was what I had originally envisioned when I came up the whole coin door idea.

I'm literally speechless at the lengths gone to on this. It's gonna be the best T2 in existence
Bobbdobalina
Site Supporter
I quite agree you’ve took it to the next level, simply amazingI'm literally speechless at the lengths gone to on this. It's gonna be the best T2 in existence
Fantastic progress Ant. Can’t wait to see the end result. What a journey 
Before I move onto the back box I wanted to be able to fully cross off the list, the apron lighting mod.
The first thing I needed to do was to install the playfield hangers.
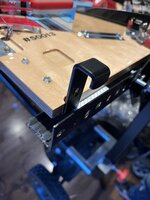
After offering the apron up to the playfield I could tell straight away there was a clearance issue. The acrylic on the Skynet skull on the right was hitting the top of the ball trough. After taking some measurements, I cracked out the cutting disc and started trimming.
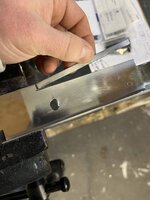
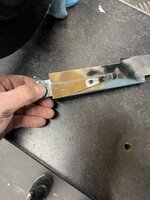
In the end I took off 5mm, which gave me enough room underneath the apron. Next job was to work out how I was going to mount the leds.
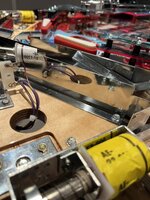
The first thing I needed to do was to install the playfield hangers.

After offering the apron up to the playfield I could tell straight away there was a clearance issue. The acrylic on the Skynet skull on the right was hitting the top of the ball trough. After taking some measurements, I cracked out the cutting disc and started trimming.


In the end I took off 5mm, which gave me enough room underneath the apron. Next job was to work out how I was going to mount the leds.

If Ant is good enough to bring this to UKPinfest, I think I know which machine will get best in show!
If Ant is good enough to bring this to UKPinfest, I think I know which machine will get best in show!
I get back from holiday on the 26th Aug, so I’m hoping to make it for the Saturday and Sunday.

