loving this thread. excellent work.
Pinball info
You are using an out of date browser. It may not display this or other websites correctly.
You should upgrade or use an alternative browser.
You should upgrade or use an alternative browser.
Complete Not another WH20 !
- Thread starter Beowulfz07
- Start date
OP
OP
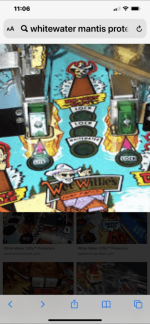
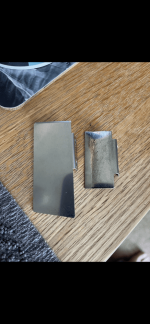
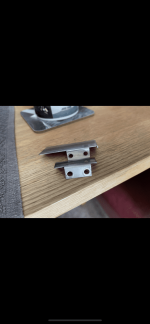
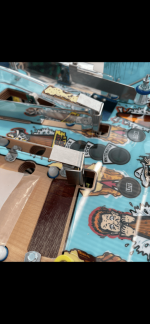
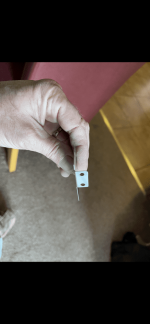
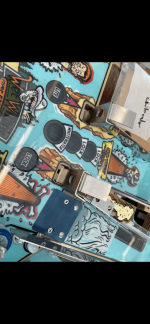
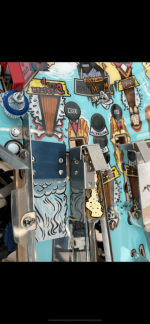
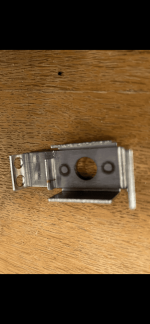
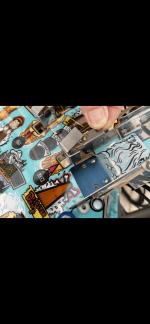
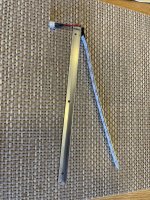
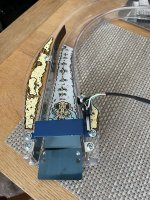
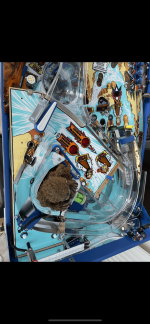
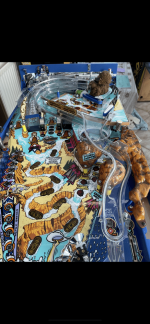
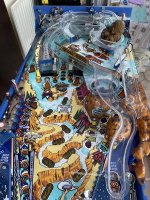
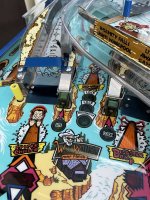
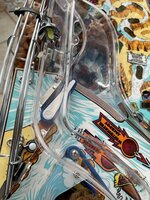
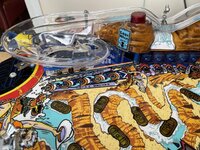
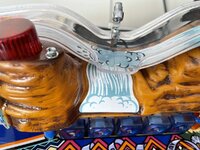
Mantis protectors fitted and just thought I’d show what appears to be a problem when using mantis protectors with cliffys ramp protector.
If you look on cliffs website he is showing his longer ramp protector fitted with the wrong side mantis target protector.
This means that the mantis sits too far left and reduces the lane opening.
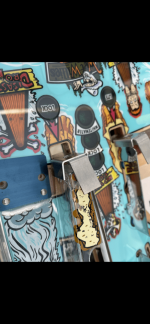
The mantis protectors are target and ramp protectors and the right hand one is designed to wrap around and overlap the factory fitted protector.
If you fit cliffs improved protector that has a 90 degree bend on the end which stops the mantis from fitting.
I have contacted Cliff and advised him to provide 2 options for his protector, as it is for use without mantis target protectors and one with the angle removed for use with mantis.
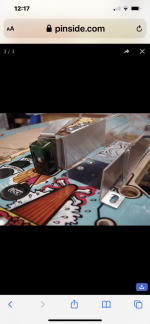
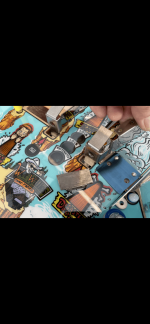
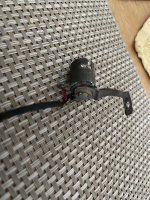
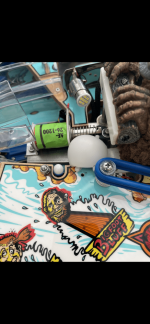
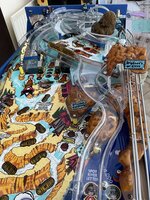
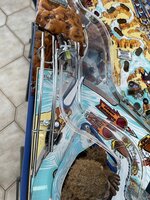
I also had an issue with the left mantis overhanging the ramp cutout, which prevented the left ramp from fitting correctly.
My ramps are new and thicker, so that probably doesn’t help.
Anyway, I simply marked the mantis protector where it was overhanging and removed that section with a dremel.
I probably removed more than I needed to but it fits perfectly now, and I didn’t have to adjust the targets either and they work perfectly.
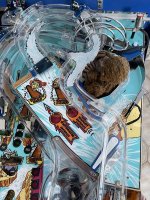
I have read that people had issues where only a hard shot would register when used with mantis and some people even replaced the square targets with the smaller flat targets.
I believe that if the ramps and mantis protectors are fitted correctly you shouldn’t have any issues at all.
If you look on cliffs website he is showing his longer ramp protector fitted with the wrong side mantis target protector.
This means that the mantis sits too far left and reduces the lane opening.
The mantis protectors are target and ramp protectors and the right hand one is designed to wrap around and overlap the factory fitted protector.
If you fit cliffs improved protector that has a 90 degree bend on the end which stops the mantis from fitting.
I have contacted Cliff and advised him to provide 2 options for his protector, as it is for use without mantis target protectors and one with the angle removed for use with mantis.
I also had an issue with the left mantis overhanging the ramp cutout, which prevented the left ramp from fitting correctly.
My ramps are new and thicker, so that probably doesn’t help.
Anyway, I simply marked the mantis protector where it was overhanging and removed that section with a dremel.
I probably removed more than I needed to but it fits perfectly now, and I didn’t have to adjust the targets either and they work perfectly.
I have read that people had issues where only a hard shot would register when used with mantis and some people even replaced the square targets with the smaller flat targets.
I believe that if the ramps and mantis protectors are fitted correctly you shouldn’t have any issues at all.
Attachments
-
 048C9A9D-9BF6-4026-AACB-75E169B07AA5.png176.1 KB · Views: 29
 -
 D83F1655-8892-4AB2-A7E5-69132AEBFDD0.png77.8 KB · Views: 30
 -
 DDDD3BAF-3EC0-4223-993E-7329E7F9D0A1.png142.1 KB · Views: 28
 -
 203AAA7D-B838-4542-A8C8-C6235D20C8AB.png96.3 KB · Views: 25
 -
 6BB8A820-7C20-4F3A-8D39-6AA2AACB6332.png134.3 KB · Views: 24
 -
 BC1133D0-57B9-4CD6-AFA6-AA8B3C377954.png49.9 KB · Views: 24
 -
 9913E3D9-D547-4306-86D9-57D6A92D52A4.png134.7 KB · Views: 23
 -
 F7AE9D1F-1804-4259-B4E7-BEDF64B738F4.png67.8 KB · Views: 23
 -
 9AED6742-4F07-4D9F-B78D-81D421C44D5F.png74.6 KB · Views: 23
 -
 D043B8F6-2113-4071-AF97-94B446EE0455.png124.5 KB · Views: 22
 -
 BDF2D78D-35FC-428D-82D3-7524B9CE78CF.png166.9 KB · Views: 21
 -
 77EE1E90-CF3B-4F89-8288-EE0F997C2A68.png118.6 KB · Views: 19
 -
 4E38EEEE-A1DF-4FE9-918B-66FE13967E0A.png130.5 KB · Views: 17
 -
 A8123DA8-6993-4E5E-A1AB-DD030BAB5894.png91.2 KB · Views: 28
OP
OP
OP
OP
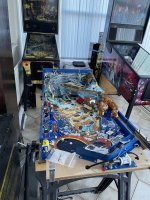
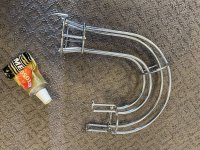
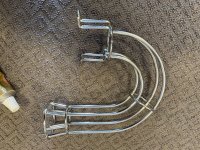
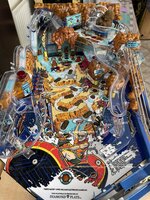
Upper playfield almost finished.
Need to attach the whirlpool ramp and then it’s going on the playfield tomorrow
Need to attach the whirlpool ramp and then it’s going on the playfield tomorrow
Attachments

OP
OP
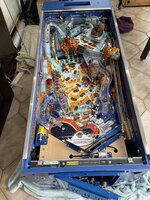
Upper playfield finally in !
The new ramps are thicker, so a fair bit of relocating and manoeuvring to do to get everything to sit correctly prior to fixing.
Spent a lot of time trying to find where a flasher was supposed to go as it clearly wasn’t in the correct place when I took it off, turns out someone bent the bracket and fixed it in the side of the playfield when it should have been fitted to the right side of upper playfield as it is the cave flasher.
2nd ramp fixed in place too.
Wrapped alll the flasher cables and connected up most of the upper playfield connectors and flashers under the playfield.
Made a bracket which will sit on backboard above mini playfield and fitted with orange led strip linked to gi to illuminate mountain from underneath which I’ll fit tomorrow.
Right mountain plastic fitted.
Oh and playfield protector removed.
I wasn’t happy with the water marks it was making, I use them all the time without issues but wasn’t working on this so no point to protect the playfield if it looks crap !
Also found some smaller hex posts for the sling spotlights so they will not only clear the glass but give easier individual positioning.
Hopefully last 2 big ramps will have switches done and new decals fitted tomorrow.
Attachments
-
 F066CF9F-3CF1-4302-8F0F-7A832DDE46CE.jpeg245.9 KB · Views: 24
 -
 28D8685D-B5B4-4DDB-963C-9028B07DFC2D.jpeg158.7 KB · Views: 24
 -
 8A9B9458-10E5-411B-B91E-C04627A24657.jpeg227.7 KB · Views: 24
 -
 72188835-CDCE-4874-9206-ED4325A2C6AD.jpeg255.3 KB · Views: 24
 -
 1A77316A-733D-4CAF-8BCE-B2A95BA018B3.jpeg157.5 KB · Views: 24
 -
 C79F2174-3A00-43F5-812C-58B19249196B.jpeg189.2 KB · Views: 26
OP
OP
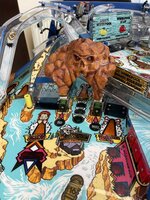
Finishing some bits on upper playfield while I can get at it easier, first up the Big Foot Hot Foot mod, led bank installed by diverter, another led bank installed to right of Bigfoot, just the spotlight to fit and the control board.
Fitted the bracket to backboard with amber led strip to light mountains from underneath.
Fitted the bracket to backboard with amber led strip to light mountains from underneath.
Attachments


OP
OP
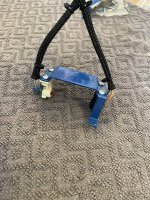
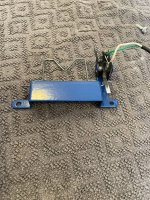
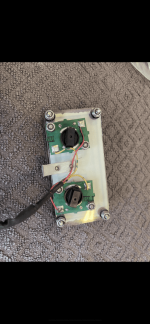
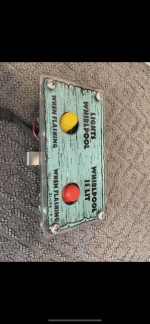
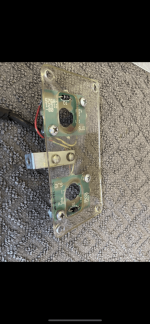
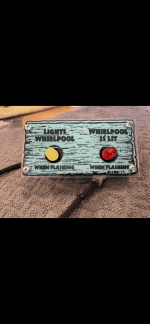
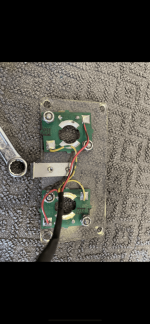
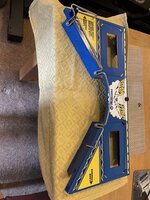
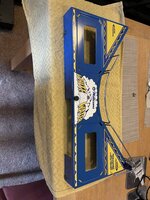
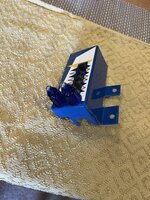
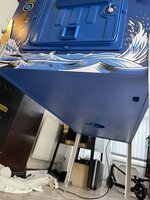
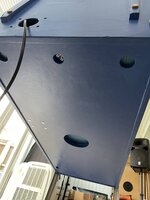
Stripped the light board, resoldered pcbs, drilled and riveted bracket to new blue plastic backboard.
Cleaned and wrapped cables, fitted new front plastic and yellow and red comet indicator bulbs.
Cleaned and wrapped cables, fitted new front plastic and yellow and red comet indicator bulbs.
Attachments
-
 22B3BAE3-FF56-4B5A-82F9-7C3ACD599EC4.png146.4 KB · Views: 10
 -
 7159533F-3252-419B-A86C-53F9D0D43CAB.png145.2 KB · Views: 9
 -
 54DFA23A-44A8-4831-9917-0326385C3035.png167.2 KB · Views: 8
 -
 69423CAF-EDA1-4E37-A028-C754D73B69FB.png170.5 KB · Views: 8
 -
 2B751771-5A63-44F1-8F9E-EFAC3D45D891.png92.4 KB · Views: 9
 -
 FB19A281-4933-4EDE-925F-8181947F653B.png64.5 KB · Views: 9
 -
 060C56E9-D25A-45D2-923D-24EA1535B009.png166.7 KB · Views: 10
OP
OP
Spent rest of the day finally finishing last of the ramp switches, cleaning, soldering and wrapping.
Fitted new plastic around Bigfoot.
Test fitted circular ramp and fitted ramp to right flipper.
Fitted new plastic around Bigfoot.
Test fitted circular ramp and fitted ramp to right flipper.
Attachments
Ant-H
Site Supporter
You attention to detail is exceptional. It’s going to look amazing when complete.
OP
OP
Thankyou, much appreciatedYou attention to detail is exceptional. It’s going to look amazing when complete.

OP
OP
With 10 days until power on lol  things are creeping along !
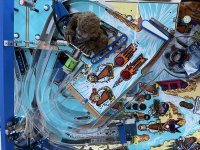
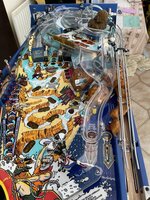
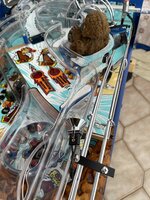
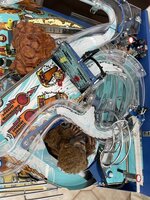
Cleaned and polished the popper chute, drilled and fixed the mantis protectors now that ramps are in place and switches are free and adjusted to register easily.
Tightened upper playfield posts as I forgot I loosened them to get the playfield on lol
Fitted switches to canyon ramp and got it in place finally.
Fixed the popper chute, adjusted Bigfoot cave switch and refitted gi socket that I removed for the hot foot mod led bank.
Also had to drill the new ramp for switch bracket fitting as the predrilled hole was out by a lot.
It now all fits together nicely and diverter works freely, sorted out all the fixings ready to fix ramp in place tomorrow
things are creeping along !Cleaned and polished the popper chute, drilled and fixed the mantis protectors now that ramps are in place and switches are free and adjusted to register easily.
Tightened upper playfield posts as I forgot I loosened them to get the playfield on lol
Fitted switches to canyon ramp and got it in place finally.
Fixed the popper chute, adjusted Bigfoot cave switch and refitted gi socket that I removed for the hot foot mod led bank.
Also had to drill the new ramp for switch bracket fitting as the predrilled hole was out by a lot.
It now all fits together nicely and diverter works freely, sorted out all the fixings ready to fix ramp in place tomorrow
Attachments
-
 C3868CAF-17E9-4B65-9A00-2B1A7E56C893.jpeg375.1 KB · Views: 24
 -
 41EC7918-EFBD-4988-B018-E954B9D4673B.jpeg383.1 KB · Views: 26
 -
 573E4665-B8DA-4154-A0F0-B9CC1A6971D1.jpeg205.9 KB · Views: 24
 -
 4565509F-ED1E-43B1-A16A-CDA1BA065EC8.jpeg156.5 KB · Views: 23
 -
 9923FDFD-0F54-45A3-BB63-AE03007B4886.jpeg184.3 KB · Views: 24
 -
 A32DDA50-043E-4E56-BC0D-2BE680CA7070.jpeg132.7 KB · Views: 21
OP
OP
With a lot of help and support from youIt looks brand new.
Really great job there Tony.

OP
OP
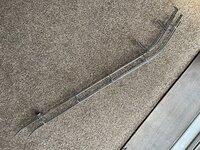
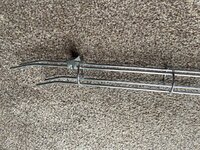
Shooter rail cleaned.
Rapids ramp also finished and ready to go on, just waiting for a sticker for the left mountain to arrive before I can fit it
Rapids ramp also finished and ready to go on, just waiting for a sticker for the left mountain to arrive before I can fit it
Attachments

OP
OP
Due to thicker ramps, existing screws not long enough to join the ramps together, longer screws finally arrived today so right ramp joined and finished.
Shooter rail fixed and the hot foot mode spotlight fitted to shooter rail.
New Bigfoot cave fitted so right side done.
Just a few bits to do and playfield will be finally done.
Shooter rail fixed and the hot foot mode spotlight fitted to shooter rail.
New Bigfoot cave fitted so right side done.
Just a few bits to do and playfield will be finally done.
Attachments
-
 E4E582C0-2739-4A70-8AC5-C06EC5EADBC3.jpeg196 KB · Views: 13
 -
 B1F6EEE0-BAF4-46BE-8B45-0D56C13B5E1C.jpeg137.8 KB · Views: 13
 -
 B0D96533-3C14-4FE8-86C3-EF8C98CA8C78.jpeg156.7 KB · Views: 13
 -
 8A8A245A-BD8D-44FA-A5DD-D85F50C3DC57.jpeg198.6 KB · Views: 12
 -
 4A132022-3130-4DF2-BEE2-F77DD4B45658.jpeg164.2 KB · Views: 13
Do you have the airball reduction thing installed, i believe there is a kit available ive had a few airballs off the standup targets and im looking for a resolve
OP
OP
Which stand up targets ? The 2 either side of the ramp?Do you have the airball reduction thing installed, i believe there is a kit available ive had a few airballs off the standup targets and im looking for a resolve
I have mantis protectors installed, they prevent the targets from going back too far when installed correctly.
I’m not aware of any other kit for it
OP
OP
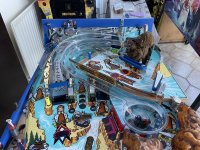
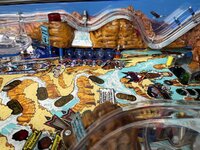
Sticker arrived, thanks Phil Palmer, fitted to left mountain and fitted to playfield.
Left ramp finally on and last switches and sign fitted on entrance to rapids and canyon.
Waterfall light fitted on left ramp.
Rear mountain fitted but will remove to fit the flasher domes tomorrow now that the flashers have been aligned.
Left ramp finally on and last switches and sign fitted on entrance to rapids and canyon.
Waterfall light fitted on left ramp.
Rear mountain fitted but will remove to fit the flasher domes tomorrow now that the flashers have been aligned.
Attachments
-
 74A12D84-D4D2-4716-BDE4-428C2B3C4C57.jpeg330.5 KB · Views: 22
 -
 C5A966DF-5D2F-4C8B-BD19-01A782171A44.jpeg235.8 KB · Views: 20
 -
 CD820E19-E3E8-43C7-87F0-6BBBE78EB496.jpeg246.2 KB · Views: 18
 -
 B3744BE7-4BD2-4040-958F-00FE6C84130D.jpeg174.4 KB · Views: 19
 -
 AB660380-1770-40F6-8072-1A5FE0D631C8.jpeg182.7 KB · Views: 20
 -
 E5E605AE-4170-4C94-86F2-0F9C5C69439B.jpeg147.5 KB · Views: 21
 -
 11BD4F2B-5572-42DF-B998-C45C1C8CD9F9.jpeg208.7 KB · Views: 25
OP
OP
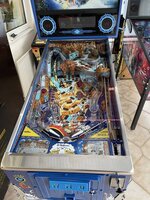
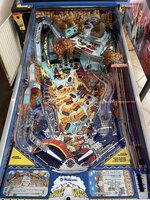
Had to run the OCD GI power cable to the transformer and rewrap cables.
Playfield in at last and looking good.
Playfield in at last and looking good.
Attachments
OP
OP
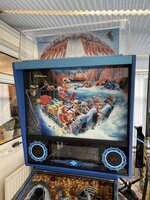
Backbox on, powder coated hinges and bolts fitted.
Also affixed 2 amber led strips under the rear glass receiver to light the mountains from above.
Next up, wiring, flippers and testing
Also affixed 2 amber led strips under the rear glass receiver to light the mountains from above.
Next up, wiring, flippers and testing
Attachments
OP
OP
Thankyou, that’s very kind of youI’ve just read this thread from the start. What fantastic work. Your skill and patience is outstanding. And thanks for taking the time to photograph and share everything.
Had to run the OCD GI power cable to the transformer and rewrap cables.
Playfield in at last and looking good.
What cabinet decals did you use? These look better than most I’ve seen.
Great work, it’s looking outstanding
Sent from my iPad using Tapatalk
OP
OP
T
I can get any decal sets for £175 delivered
I’ve had 5 sets and they’re excellent, baywatch, 2 x Tom’s, WH20 and just got a set for Indy 500.
They are spot on colour wise, not thin, very easy to put on and you can seal them quicker with a heatgun and also remove any creases. Far better than the next gen ones in my opinion
ThankyouWhat cabinet decals did you use? These look better than most I’ve seen.
Great work, it’s looking outstanding
Sent from my iPad using Tapatalk
I can get any decal sets for £175 delivered
I’ve had 5 sets and they’re excellent, baywatch, 2 x Tom’s, WH20 and just got a set for Indy 500.
They are spot on colour wise, not thin, very easy to put on and you can seal them quicker with a heatgun and also remove any creases. Far better than the next gen ones in my opinion
OP
OP
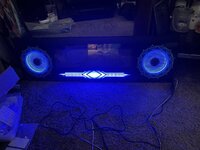
Wired up the rgb speaker lights and the blue led strip, had some fun and games as the speaker leds are 5v and the strip is 12v but got there eventually.
Pic and quick video but the led strip looks bright and whiter than it does in real life, the speaker leds are the usual any colour etc and there is a dimmer on the strip so i can adjust it so it doesn’t overpower the colordmd
Pic and quick video but the led strip looks bright and whiter than it does in real life, the speaker leds are the usual any colour etc and there is a dimmer on the strip so i can adjust it so it doesn’t overpower the colordmd
Attachments
@Beowulfz07 - do you need anymore of my chest hair to do bigfoot?
OP
OP
Thanks for all your donations Phil and thanks to you he’s finished nicely tho as shown earlier in the log I did have to paint some of your ginger bits@Beowulfz07 - do you need anymore of my chest hair to do bigfoot?
OP
OP
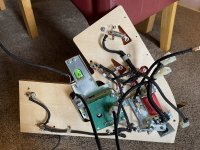
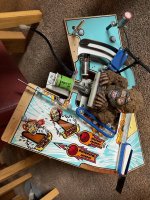
Another small update.
Apron furniture cleaned and fitted, shooter guard also done.
Snapped a superband flipper rubber so had to order more which have now arrived and managed to lose my new ribbon cable set which should arrive tomorrow.
Did manage to fire up the driver board which is the first time both transformers and wiring have been tested since doing them, so a huge relief all works ok and ready to connect up the cabinet fully tomorrow and test prior to connecting the playfield once I’ve plugged the upper playfield in underneath.
Attachments
OP
OP
Machine finally on legs, connected up and original foil topper tested and working great
Attachments
OP
OP
OCD led fitted and none of the led strips worked due to conversion from ac to dc, luckily just a simple reverse of a couple of matrix connectors and all working.
Apron and shooter guard on, foil instruction cards too.
All coils etc tested.
Pinsound remix works and sounds like a new machine and the shaker works well too.
CPR mirror looks absolutely gorgeous.
Just a few tweaks to do once it’s had a few games on it
Apron and shooter guard on, foil instruction cards too.
All coils etc tested.
Pinsound remix works and sounds like a new machine and the shaker works well too.
CPR mirror looks absolutely gorgeous.
Just a few tweaks to do once it’s had a few games on it
Attachments
-
 00574DC5-5C16-4F98-9D2D-3522E2F7C321.jpeg148.9 KB · Views: 11
 -
 E67111FE-D7AC-4A6C-82FC-777D4B973E69.jpeg166.6 KB · Views: 10
 -
 646673B0-B838-4901-AEAB-94B3B60F435E.jpeg218.3 KB · Views: 10
 -
 F2372FAA-6673-46E8-B580-6311B2E20B39.jpeg154.6 KB · Views: 10
 -
 4E29FA40-7B70-4FEC-BF51-EE19B2489816.jpeg180.3 KB · Views: 11
 -
 0ABA166D-186B-4A34-A4F2-EB764C49B9D0.jpeg218.2 KB · Views: 9
 -
 7E345C93-E202-4B9F-9936-4F21A283441F.jpeg106.5 KB · Views: 9
 -
 7A8CAD54-7EDD-43E7-A24F-121CA91DF55B.jpeg104.9 KB · Views: 11
 -
 CF52BDF3-908F-40F0-99DC-8C824056E0BE.jpeg88.9 KB · Views: 12