What's new
Pinball info

Register a free account today to become a member! Once signed in, you'll be able to participate on this site by adding your own topics and posts, as well as connect with other members through your own private inbox!

Complete Not another WH20 !

Beowulfz07

Registered
Joined
Jun 10, 2018
Messages
855
Location
Wellingborough
Started this 3 months ago so I haven’t jumped on the WH20 band wagon.
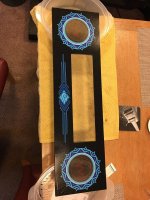
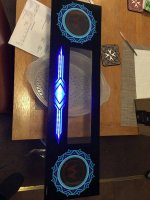
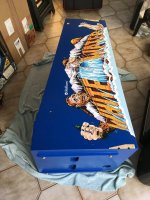
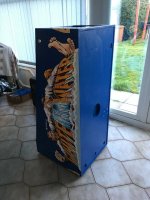
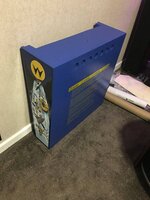
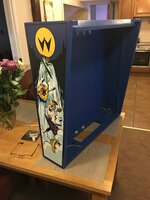
Chris B has a stunning ice version in progress for someone but luckily as gorgeous as it’s looking I’m not a fan of the ice mountains so in that respect mine is more traditional, tho I’m trying to make it as if they brought it out now and have therefore decided to add every bell and whistle I can think of.
It’s my hobby, not my job and I’m doing it for me, posting these pics to maybe give others some ideas or inspiration or indeed to show what not to do lol 😂
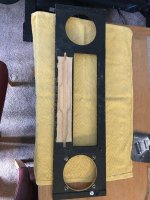
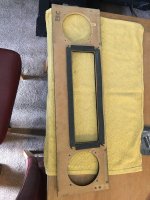
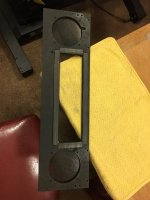
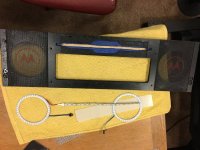
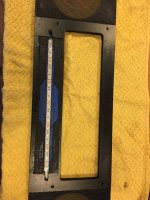
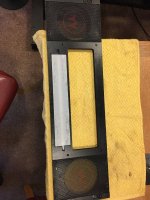
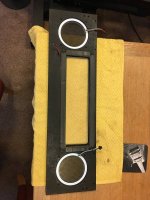
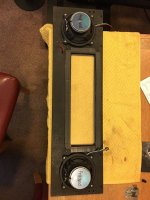
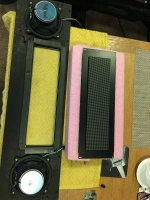
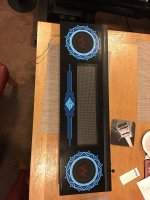
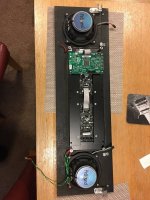
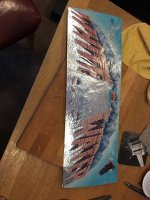
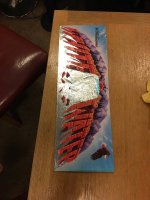
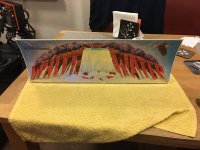
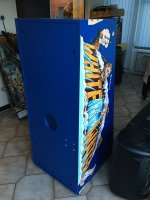
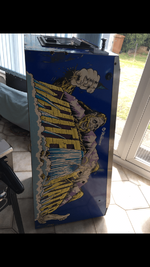
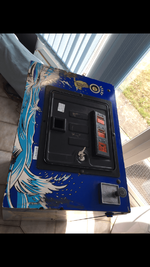
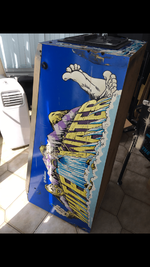
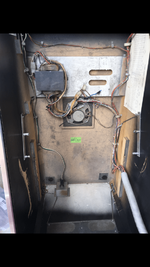
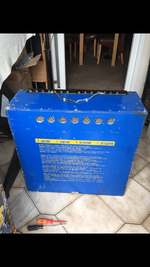
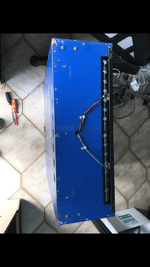
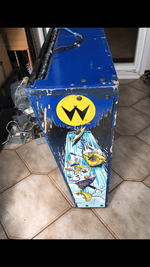
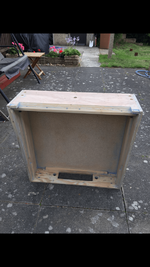
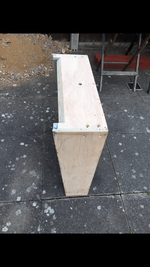
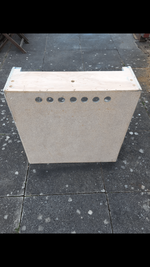
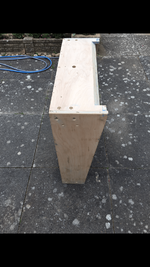
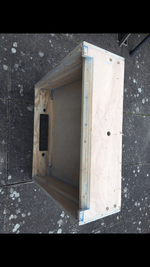
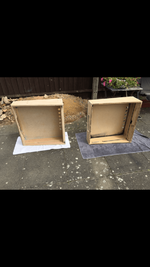
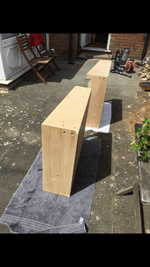
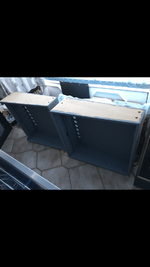
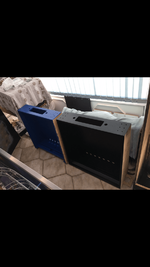
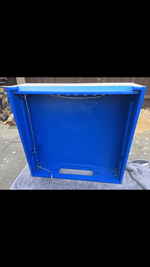
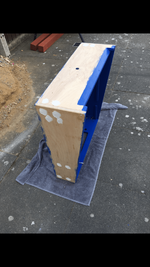
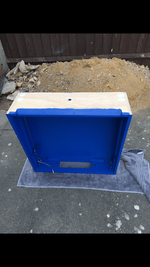
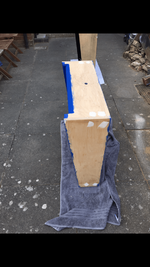
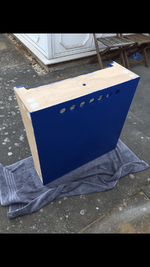
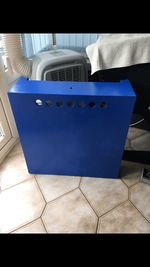
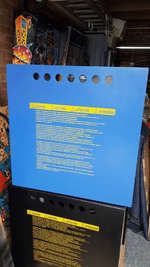
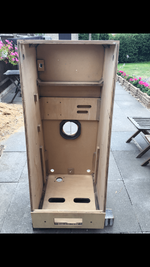
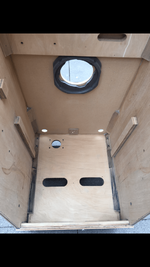
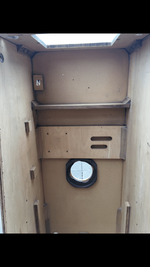
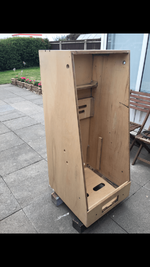
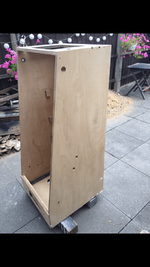
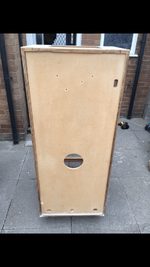
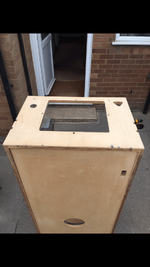
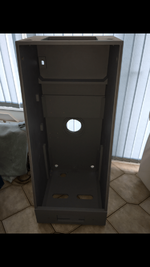
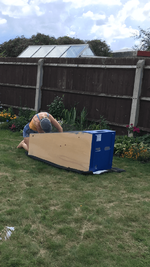
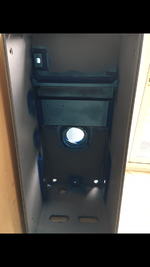
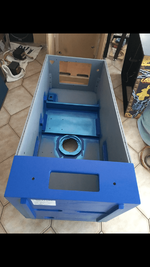
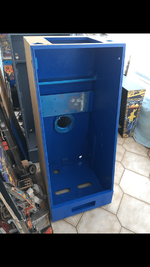
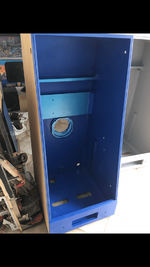
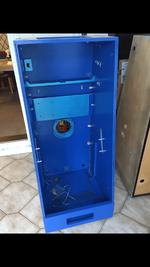
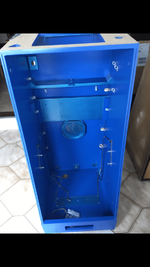
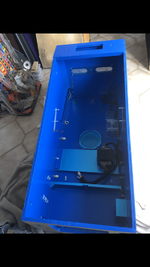
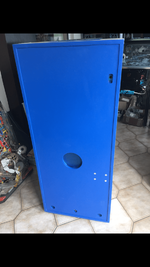
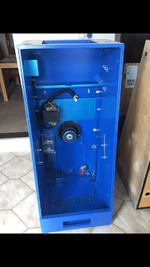
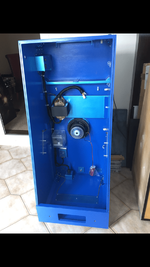
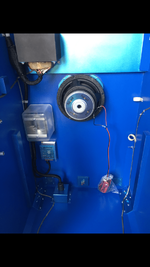
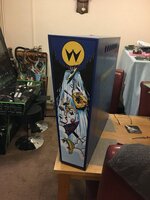
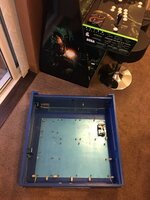
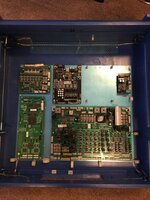
Anyway, here’s where I’m at so far -
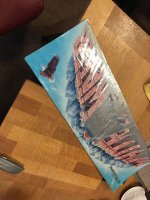
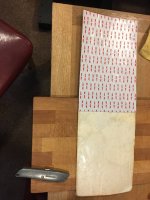
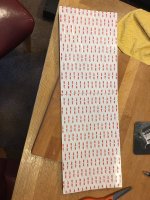
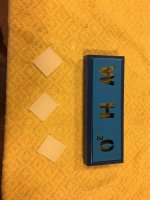
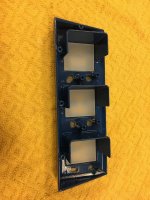
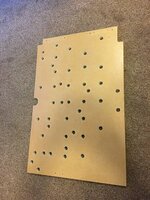
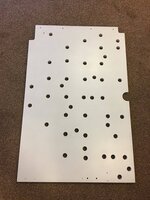
First pics are how it was
 

Attachments

  • 8BD40ECC-36ED-45E4-9E20-38406F0C8120.png
    8BD40ECC-36ED-45E4-9E20-38406F0C8120.png
    148.7 KB · Views: 116
  • DF3F4FF1-8422-4015-87D2-0FDFBF718018.png
    DF3F4FF1-8422-4015-87D2-0FDFBF718018.png
    154.2 KB · Views: 115
  • 8F4DD002-224B-4BC3-AD49-75608C3AA924.png
    8F4DD002-224B-4BC3-AD49-75608C3AA924.png
    157.6 KB · Views: 107
  • D52D745A-E2B6-4D0D-ABCD-8BBEDAF971DC.png
    D52D745A-E2B6-4D0D-ABCD-8BBEDAF971DC.png
    160.6 KB · Views: 98
  • 8FD65B78-6420-45AB-B70E-085311720D4E.png
    8FD65B78-6420-45AB-B70E-085311720D4E.png
    172.1 KB · Views: 99
  • AED83C24-B81B-4275-8E84-CDCE4010D90A.png
    AED83C24-B81B-4275-8E84-CDCE4010D90A.png
    165.3 KB · Views: 100
  • E4D2A29E-D071-4873-8E7B-75D4235249A6.png
    E4D2A29E-D071-4873-8E7B-75D4235249A6.png
    143.7 KB · Views: 94
  • 66EFF28A-111A-40DA-B5D1-07E9A8DFBE74.png
    66EFF28A-111A-40DA-B5D1-07E9A8DFBE74.png
    179.8 KB · Views: 87
  • B136D93B-9733-4E07-8392-89555F9F03D9.png
    B136D93B-9733-4E07-8392-89555F9F03D9.png
    196.2 KB · Views: 86
  • 16AF793B-E76A-40C4-82E6-5BB13DAA269C.png
    16AF793B-E76A-40C4-82E6-5BB13DAA269C.png
    84.4 KB · Views: 98
Backbox stripped, filled and sanded
 

Attachments

  • 85E763A4-CD70-453E-81E2-73FF5FC90FC0.png
    85E763A4-CD70-453E-81E2-73FF5FC90FC0.png
    180.3 KB · Views: 62
  • DF62FD05-7F50-41C9-B79F-2C673D5B3A24.png
    DF62FD05-7F50-41C9-B79F-2C673D5B3A24.png
    182.7 KB · Views: 59
  • DFE109FE-AFAD-47C3-BC2C-AE001DA955BB.png
    DFE109FE-AFAD-47C3-BC2C-AE001DA955BB.png
    202.8 KB · Views: 57
  • 297A98B7-E2C8-4DD9-9280-552EBD91F1AC.png
    297A98B7-E2C8-4DD9-9280-552EBD91F1AC.png
    182 KB · Views: 56
  • C5CEC4EC-A368-4C3A-B78B-E082A6413DBD.png
    C5CEC4EC-A368-4C3A-B78B-E082A6413DBD.png
    174.4 KB · Views: 54
  • 7F163658-0385-4E37-9AF7-77C51FCBBAE3.png
    7F163658-0385-4E37-9AF7-77C51FCBBAE3.png
    95.6 KB · Views: 52
  • EE0FC82F-0C11-40BB-8966-01E46EC8D8AF.png
    EE0FC82F-0C11-40BB-8966-01E46EC8D8AF.png
    184.1 KB · Views: 57
Backbox primes, undercoated and painted
 

Attachments

  • 36DB5AC4-76A8-48A3-BBD9-DBA9F50C4E74.png
    36DB5AC4-76A8-48A3-BBD9-DBA9F50C4E74.png
    66.8 KB · Views: 59
  • B0B29D29-4279-424B-A385-2A610639F16F.png
    B0B29D29-4279-424B-A385-2A610639F16F.png
    69.8 KB · Views: 59
  • B8BB4523-9052-4D28-B3B2-B7A96D740355.png
    B8BB4523-9052-4D28-B3B2-B7A96D740355.png
    75.6 KB · Views: 59
  • 82320D2F-AD80-424D-90E6-D543D0826D3D.png
    82320D2F-AD80-424D-90E6-D543D0826D3D.png
    181.6 KB · Views: 51
  • 6EB9EB7B-8887-4089-BEC0-FEDF5BA03FC8.png
    6EB9EB7B-8887-4089-BEC0-FEDF5BA03FC8.png
    146.6 KB · Views: 51
  • B680FA9F-CB83-4C45-AF78-97791508D127.png
    B680FA9F-CB83-4C45-AF78-97791508D127.png
    183.3 KB · Views: 46
  • 2809F209-3A9B-4DEC-8EDF-7805FADD24FD.png
    2809F209-3A9B-4DEC-8EDF-7805FADD24FD.png
    150.5 KB · Views: 48
  • 29157721-ECA1-4903-9D40-1ABB6433EC73.png
    29157721-ECA1-4903-9D40-1ABB6433EC73.png
    129.3 KB · Views: 56
Cabinet stripped, filled and sanded
Added larger speaker spacer
Made custom block for phono sockets which is recessed on the bottom so they don’t catch if slid on its bottom, for easy connection to external sub.
All bolts recessed and same in the backbox.
Due to the extremely short support rails for the bottom, I have completely reglued the entire bottom panel along with gluing and screwing the support rails in.
The cabinet is now completely sound and very strong especially as they fitted a separate shelf to support the Transformer.
This was only fitted to later model whitewater machines
 

Attachments

  • DCA741BA-241C-4F72-BC8B-D2D369871360.png
    DCA741BA-241C-4F72-BC8B-D2D369871360.png
    176.7 KB · Views: 55
  • 445154A7-1DAA-4F88-9817-F408D6E553E1.png
    445154A7-1DAA-4F88-9817-F408D6E553E1.png
    128.5 KB · Views: 53
  • CE3D91CA-7E1A-4CFA-9204-E213D7BEF2A8.png
    CE3D91CA-7E1A-4CFA-9204-E213D7BEF2A8.png
    124.3 KB · Views: 53
  • 91698001-9411-45D1-BE99-A8BF3F4FBB00.png
    91698001-9411-45D1-BE99-A8BF3F4FBB00.png
    152.1 KB · Views: 50
  • AB7BA7D2-894A-4B1F-9056-03E5926F9C0E.png
    AB7BA7D2-894A-4B1F-9056-03E5926F9C0E.png
    165.4 KB · Views: 48
  • 53E262DA-6829-43E4-BC76-0E57B0F7CF5A.png
    53E262DA-6829-43E4-BC76-0E57B0F7CF5A.png
    158.3 KB · Views: 48
  • 6D215523-DE71-4EB4-B57D-E3239E0FE176.png
    6D215523-DE71-4EB4-B57D-E3239E0FE176.png
    123.6 KB · Views: 54
Cabinet primed, undercoated and painted.
I wanted something different so I have sprayed metallic blue on the inside face edges of the rails (difficult to see from pics) along with the front divider and shelf.
New type leg brackets fitted and also painted metallic blue.
 

Attachments

  • E6EF45F7-6E46-4F31-9574-0D4E5D28E97A.png
    E6EF45F7-6E46-4F31-9574-0D4E5D28E97A.png
    99 KB · Views: 64
  • 5C9A7310-1775-468F-B3C9-3FB0AF3C0BB0.png
    5C9A7310-1775-468F-B3C9-3FB0AF3C0BB0.png
    230.3 KB · Views: 62
  • 3B9D414A-ACEA-4936-8885-70133DEAD71B.png
    3B9D414A-ACEA-4936-8885-70133DEAD71B.png
    108.3 KB · Views: 64
  • 8352051C-6620-4F61-8BD4-1A3C8E442C08.png
    8352051C-6620-4F61-8BD4-1A3C8E442C08.png
    112.1 KB · Views: 59
  • 04E43ADF-B5A9-4146-9176-8B141298D882.png
    04E43ADF-B5A9-4146-9176-8B141298D882.png
    140.6 KB · Views: 57
  • 55591C02-FB32-4433-B89D-13E64DF4452E.png
    55591C02-FB32-4433-B89D-13E64DF4452E.png
    147.6 KB · Views: 56
  • 854AC66B-3C12-4939-BCEE-7DCC1C7E93FC.png
    854AC66B-3C12-4939-BCEE-7DCC1C7E93FC.png
    129.6 KB · Views: 52
  • 37D39CA6-3923-4C37-99AF-5C297DE9A43B.png
    37D39CA6-3923-4C37-99AF-5C297DE9A43B.png
    135.1 KB · Views: 54
  • 8DBFDFB5-43F0-4EF9-9458-6A314FC6F9D3.png
    8DBFDFB5-43F0-4EF9-9458-6A314FC6F9D3.png
    126.9 KB · Views: 57
Transformer has been cleaned and painted with high temperature paint.
Brackets sprayed metallic blue along with select other metal parts.
All cables cleaned and wrapped.
Shaker, pinsound speaker and external sub phonos fitted
Separate 5a 12v PSU fitted to power my custom speaker panel lights, led flipper buttons and new additional lighting 😉
This is wired to the main switch so will come on with the machine
 

Attachments

  • A143A616-9116-4C68-9051-80128DC0D630.png
    A143A616-9116-4C68-9051-80128DC0D630.png
    135.3 KB · Views: 68
  • E6ABD429-CC83-4593-8940-14508FA8258B.png
    E6ABD429-CC83-4593-8940-14508FA8258B.png
    136.8 KB · Views: 62
  • 776E0CEA-B7F8-46B5-8BA3-0C29AEF6AAF5.png
    776E0CEA-B7F8-46B5-8BA3-0C29AEF6AAF5.png
    139.1 KB · Views: 64
  • 701BDD0F-7008-4F69-88D9-254DA96E3A0E.png
    701BDD0F-7008-4F69-88D9-254DA96E3A0E.png
    140.6 KB · Views: 67
  • DD018842-DEA1-4816-AAB7-EFDF372DD55D.png
    DD018842-DEA1-4816-AAB7-EFDF372DD55D.png
    143.7 KB · Views: 65
  • 6553C181-49DE-4E36-93B8-6D692B5EA57E.png
    6553C181-49DE-4E36-93B8-6D692B5EA57E.png
    137.2 KB · Views: 69
Looking good, a lot of time and effort going into this but sure is going to be worth it.
Flame polishing the ramps was enough for me😂
 
Having spent the weekend mostly on Dirty Harry repairing the opto on the right orbit which meant virtually stripping the playfield so decided to fit cliffys all round and give it a thorough clean and wax, meant I couldn’t do as much with WH20 as I wanted but the backbox decals are done and very pleased with the colour matching as you can’t tell where the decal ends and the paint begins.
Also sanded the light board, undercoated and sprayed it, then varnished the sides and back for a pristine modern feel and look.
Looking forward to getting the painted metal backboard in tomorrow along with the boards and the topper wiring.
 

Attachments

  • F2157934-7920-456B-9626-48C716CA9283.jpeg
    F2157934-7920-456B-9626-48C716CA9283.jpeg
    138.5 KB · Views: 81
  • 6D6EC995-90B4-4959-80C9-A60F50F6280E.jpeg
    6D6EC995-90B4-4959-80C9-A60F50F6280E.jpeg
    94.7 KB · Views: 77
  • 9414007B-70EA-473D-AD9D-EA6B7AF50739.jpeg
    9414007B-70EA-473D-AD9D-EA6B7AF50739.jpeg
    109.6 KB · Views: 78
  • C8E45626-ED0B-4AD6-A4A2-7EC42E103A9F.jpeg
    C8E45626-ED0B-4AD6-A4A2-7EC42E103A9F.jpeg
    96.7 KB · Views: 63
  • 575197BF-63A0-4C4A-B819-513568DF9980.jpeg
    575197BF-63A0-4C4A-B819-513568DF9980.jpeg
    98.7 KB · Views: 66
Metal backboard and fixings in.
Drilled holes and fitted shaker board with plastic standoffs.
Boards fitted including new CPU board with latest home Rom and no more batteries, power driver board fully serviced and pinsound board fitted, just the topper light chaser board and video board once I’ve reflowed solder on some joints.
 

Attachments

  • 07277D0F-4922-45BB-BAAC-DD63943D1BAA.jpeg
    07277D0F-4922-45BB-BAAC-DD63943D1BAA.jpeg
    108.2 KB · Views: 67
  • C7926CB9-2A05-4244-996E-89BDB9CE8120.jpeg
    C7926CB9-2A05-4244-996E-89BDB9CE8120.jpeg
    130.8 KB · Views: 64
Looks v noice! What paint do you use for your cabs @Beowulfz07 ?
Thankyou 😀
I always use Rustins primer / undercoat and use a brush, it’s expensive but it covers very well, dries quickly and creates a wonderful base for the top coat which is either Simoniz acrylic satin black spray paint which is great and incredibly cheap or for Baywatch and WH20 I took the decals into BnQ and got them scanned and use Valspar V700 paint which again covers well, very durable and washable
 

Attachments

  • 8C47332A-C376-47CA-B8BA-76B9A02AFA3D.png
    8C47332A-C376-47CA-B8BA-76B9A02AFA3D.png
    157.5 KB · Views: 20
Now that both TOM’s are finished, I’m back on my WH20.
First up is the speaker panel, then finish the Topper and last few bits on the backbox, then to put decals on the cab and put the loom in and then just leaves me with the playfield.
Nothing straightforward on this machine, so had a bit to do on the speaker panel.
It’s now been cut and recessed, holes for speakers done along with the holes for led cables.
Now to give it a quick sand and paint it
 

Attachments

  • F5E25A00-7DEB-475D-8E49-B109D99FF5B4.jpeg
    F5E25A00-7DEB-475D-8E49-B109D99FF5B4.jpeg
    130.5 KB · Views: 38
  • 811A25C6-99F8-4A39-B930-B738743A543E.jpeg
    811A25C6-99F8-4A39-B930-B738743A543E.jpeg
    125.8 KB · Views: 33
Thankyou 😀
I always use Rustins primer / undercoat and use a brush, it’s expensive but it covers very well, dries quickly and creates a wonderful base for the top coat which is either Simoniz acrylic satin black spray paint which is great and incredibly cheap or for Baywatch and WH20 I took the decals into BnQ and got them scanned and use Valspar V700 paint which again covers well, very durable and washable
Hi,

Stupid question - when you said you took the decals in to B&Q, was that to colour match the blue?

Interested as this is a project I've got lined up next, too.

Kind regards,
Wayne.
 
Hi,

Stupid question - when you said you took the decals in to B&Q, was that to colour match the blue?

Interested as this is a project I've got lined up next, too.

Kind regards,
Wayne.
Hi Wayne and yes, much easier to take the decals in and very pleased with the result and the quality of the paint.
 
Rubbed down and painted.
Speaker grills on.
Ready for the led strip and diffuser fitted before fitting speaker panel.
Then the speaker lights can go in along with the pinsound speakers and hardware then job done.
Thanks to Vimtoman for the speaker lights and dimmer for the speaker panel.
 

Attachments

  • 75902C6D-BB3C-4893-8FE5-C55BAEFD9733.jpeg
    75902C6D-BB3C-4893-8FE5-C55BAEFD9733.jpeg
    92 KB · Views: 37
  • D28F5A41-F520-4630-BB89-FF6081FAAEEE.jpeg
    D28F5A41-F520-4630-BB89-FF6081FAAEEE.jpeg
    162 KB · Views: 31
Looking good Tony! I promised to show my powder coat for the HS2... still a work in progress but this should give you an idea.
8fe9ac04acae58648ca3408a8b04d1c3.jpg

It’s actually a chrome powder coat, with a red lacquer powder coat on top - Prismatic Powders Lollipop Red. Obviously powder coated ever bolt and bit of metal that goes inside - to give it a fresh out of a modern factory look. Not everyone’s cup of tea - but I’m pleased with it.

Thanks again for the paint tip. Undercoat and Top Coat per your recommendation.

Keep sharing your experience - helps us newbies massively.

Mike
That looks awesome Mike 😃
And I’m really flattered but I’m still a newbie and rely heavily on some great pinball friends and this forum.
Seriously looks gorgeous Mike
 
Had some time after work to finish off the speaker panel from yesterday and really pleased with the result.
Led strip in, homemade diffuser fitted.
New speaker panel on.
Speaker lights in and pinsound speakers fitted.
New colourdmd LED display in and the rest of the panel hardware on so that’s finished and just the wiring to do once it’s in the machine.
Next up, finish the topper and last bits on the backbox.
 

Attachments

  • D46173BF-4FB6-4F7E-BAA9-874E5D2FDF62.jpeg
    D46173BF-4FB6-4F7E-BAA9-874E5D2FDF62.jpeg
    145.7 KB · Views: 43
  • 6EEDF860-818B-46D1-98F4-95C99AD7D177.jpeg
    6EEDF860-818B-46D1-98F4-95C99AD7D177.jpeg
    126.7 KB · Views: 37
  • A071AA64-41E0-486D-940D-3BFE87FD3196.jpeg
    A071AA64-41E0-486D-940D-3BFE87FD3196.jpeg
    117.8 KB · Views: 37
  • 139AB40C-4BA4-4CE2-9756-556651AA2017.jpeg
    139AB40C-4BA4-4CE2-9756-556651AA2017.jpeg
    96.7 KB · Views: 36
  • 65F750D2-F83E-4DE8-A30D-8E7829175788.jpeg
    65F750D2-F83E-4DE8-A30D-8E7829175788.jpeg
    103.9 KB · Views: 34
  • E96C39D2-5B40-47A7-A5F4-F81EDF37BA41.jpeg
    E96C39D2-5B40-47A7-A5F4-F81EDF37BA41.jpeg
    107.1 KB · Views: 34
  • C7F8685C-AE1F-43D9-9C65-CD71AEAB28DC.jpeg
    C7F8685C-AE1F-43D9-9C65-CD71AEAB28DC.jpeg
    116.4 KB · Views: 33
  • 1A017CC4-BAC9-4466-A5A6-EE35839A4CDB.jpeg
    1A017CC4-BAC9-4466-A5A6-EE35839A4CDB.jpeg
    123.2 KB · Views: 32
  • DF1558FA-5973-4FD1-A819-07E96EE9E91A.jpeg
    DF1558FA-5973-4FD1-A819-07E96EE9E91A.jpeg
    121.9 KB · Views: 44
Topper day
Used 3M sheets and stuck to back of decal.
Put new overlay on decal so now it’s nice and bright.
Attached the decal to new topper base.
I’m very happy with it compared to how it was where the original decal had severely blown and left the base.
Despite having a few creases in the foil, they didn’t show when it was lit, so now should be much better.
Just a few bits to do on the backbox and then it can go on along with the new dome.
 

Attachments

  • 831573E2-35ED-4CBE-B631-E388E4D95FBD.jpeg
    831573E2-35ED-4CBE-B631-E388E4D95FBD.jpeg
    114 KB · Views: 51
  • 051E089B-43E1-4EB9-8778-687989D959D3.jpeg
    051E089B-43E1-4EB9-8778-687989D959D3.jpeg
    101.5 KB · Views: 44
  • 738F9B12-76CD-4514-AC10-7E9A7BB0C251.jpeg
    738F9B12-76CD-4514-AC10-7E9A7BB0C251.jpeg
    125.5 KB · Views: 48
  • 9541E491-2AF3-47B8-BD8C-4DD561D93F7D.jpeg
    9541E491-2AF3-47B8-BD8C-4DD561D93F7D.jpeg
    122.1 KB · Views: 44
  • E3BD23D8-52BE-4161-A340-AE0B79AD2F68.jpeg
    E3BD23D8-52BE-4161-A340-AE0B79AD2F68.jpeg
    97.9 KB · Views: 43
  • C6D30042-791E-41DD-B6E8-63E0335BE844.jpeg
    C6D30042-791E-41DD-B6E8-63E0335BE844.jpeg
    148.3 KB · Views: 57
Had time during the week to clean the coin door loom and fit new service buttons.
Coindoor powder coated last year.
Huge thanks to collywobbles for taking my idea and making the overlay and diffusers.
I hate triple coin doors so thanks to him it has completely transformed it and can’t wait to see it installed and lit up.
Had to drill the rivets out today, then used some more 3M to fix the overlay to the coin door.
Hopefully get it fitted to the door and fit the loom tomorrow.
 

Attachments

  • B022A923-804D-4862-953D-3744ACE4944F.jpeg
    B022A923-804D-4862-953D-3744ACE4944F.jpeg
    122.3 KB · Views: 33
  • 08BF7FD5-C72F-41B8-960B-5DF192E39F13.jpeg
    08BF7FD5-C72F-41B8-960B-5DF192E39F13.jpeg
    125.5 KB · Views: 32
  • 661E4D35-9D22-4789-A14C-7D233D2FB4ED.jpeg
    661E4D35-9D22-4789-A14C-7D233D2FB4ED.jpeg
    118.5 KB · Views: 28
  • F1289B0D-D76E-4BCB-84D6-1F28B40EDFF5.jpeg
    F1289B0D-D76E-4BCB-84D6-1F28B40EDFF5.jpeg
    124.3 KB · Views: 26
  • BD0B33FF-C2E8-41C4-BCD5-0D41364C7AB8.jpeg
    BD0B33FF-C2E8-41C4-BCD5-0D41364C7AB8.jpeg
    88.4 KB · Views: 36
Looking good Tony! I promised to show my powder coat for the HS2... still a work in progress but this should give you an idea.
8fe9ac04acae58648ca3408a8b04d1c3.jpg

It’s actually a chrome powder coat, with a red lacquer powder coat on top - Prismatic Powders Lollipop Red. Obviously powder coated ever bolt and bit of metal that goes inside - to give it a fresh out of a modern factory look. Not everyone’s cup of tea - but I’m pleased with it.

Thanks again for the paint tip. Undercoat and Top Coat per your recommendation.

Keep sharing your experience - helps us newbies massively.

Mike
Looks very nice indeed
 
Backbox just waiting for the surrounds for the CPR mirror so that’s pretty much complete so back to the cabinet to get that done.
Decals done today and relieved they are out the way.
Just need to do some paint touch ups and refit the cabinet protectors.
Then I’m on to the good stuff, last bit of Earth braiding and then lockdown receiver, coindoor etc and the loom to go in.
Playfield time getting nearer
 

Attachments

  • E5D69A17-14E3-483C-A4CB-487E883CA27A.jpeg
    E5D69A17-14E3-483C-A4CB-487E883CA27A.jpeg
    125.7 KB · Views: 68
  • A284A105-7487-44E6-BE36-32954E7E4982.jpeg
    A284A105-7487-44E6-BE36-32954E7E4982.jpeg
    93.4 KB · Views: 58
  • 0BE8BC20-C81C-4BBD-81D9-F974293DF5BC.jpeg
    0BE8BC20-C81C-4BBD-81D9-F974293DF5BC.jpeg
    90 KB · Views: 59
  • 19D6680A-1D30-40FE-BBC8-A76E1985C069.jpeg
    19D6680A-1D30-40FE-BBC8-A76E1985C069.jpeg
    128.6 KB · Views: 60
  • 01BFAB71-F0AB-499D-9D3F-11D4C6B9A703.jpeg
    01BFAB71-F0AB-499D-9D3F-11D4C6B9A703.jpeg
    81.2 KB · Views: 71
Back
Top Bottom