What's new
Pinball info

Register a free account today to become a member! Once signed in, you'll be able to participate on this site by adding your own topics and posts, as well as connect with other members through your own private inbox!

Complete Not another WH20 !

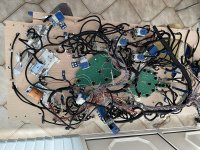
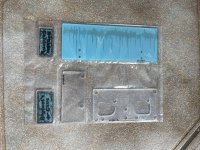
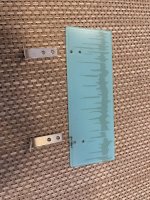
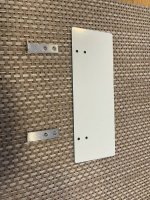
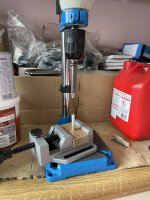
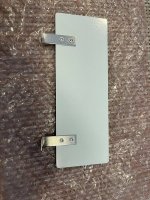
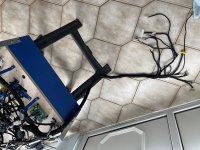
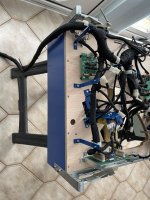
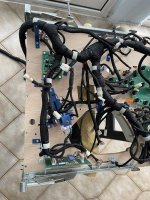
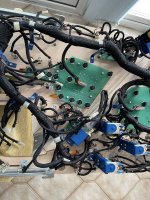
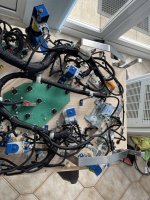
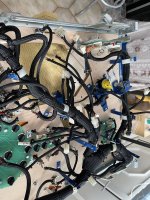
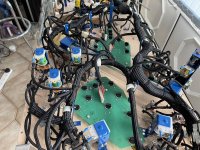
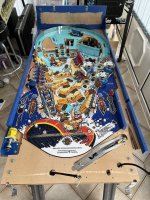
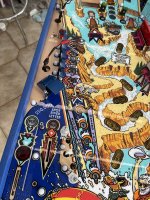
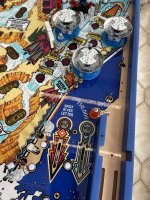
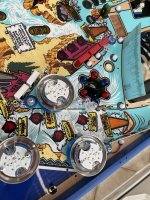
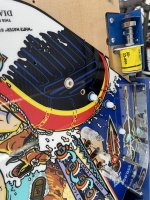
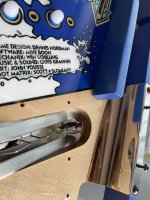
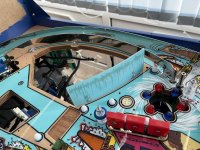
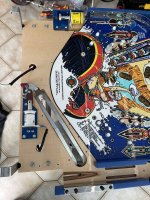
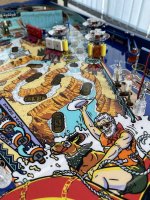
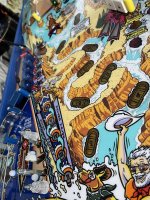
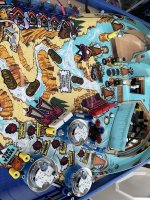
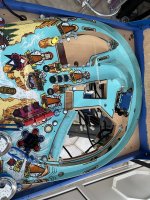
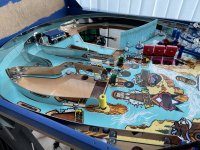
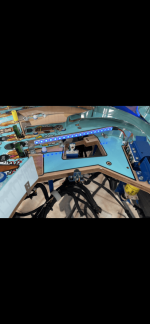
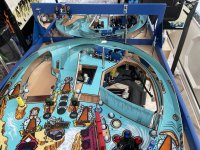
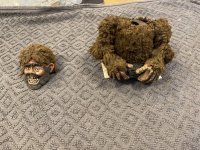
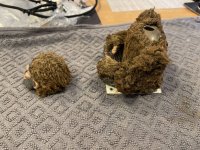
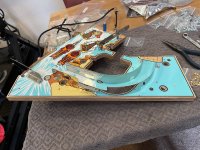
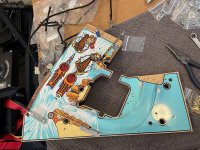
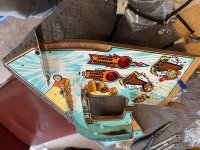
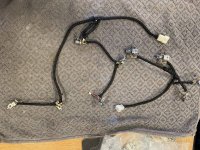
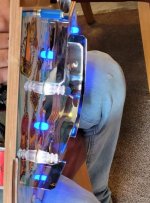
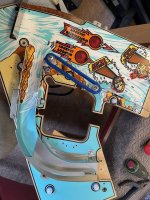
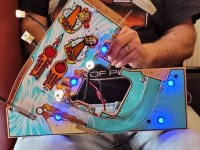
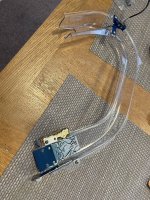
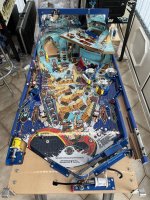
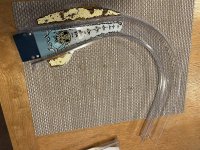
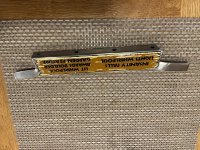
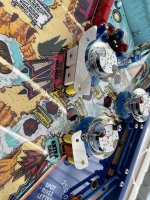
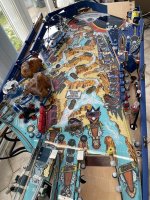
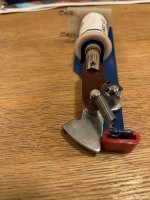
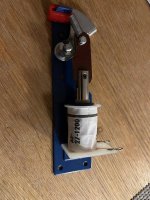
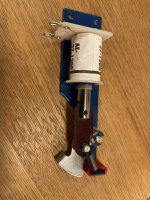
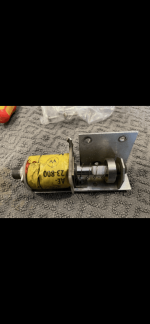
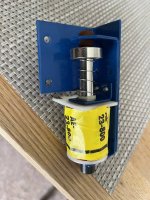
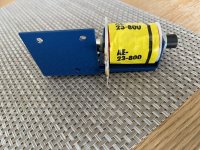
Last few mechs cleaned.
 

Attachments

  • D1A1D46E-9ABB-4F0F-9C7A-758DB1C22279.png
    D1A1D46E-9ABB-4F0F-9C7A-758DB1C22279.png
    123.9 KB · Views: 26
  • 8851F8CB-0B8D-4807-B7A9-E8D761F2C7C9.jpeg
    8851F8CB-0B8D-4807-B7A9-E8D761F2C7C9.jpeg
    99.7 KB · Views: 25
  • 97FD2BE6-4C6B-443A-A0F6-04C407D74914.jpeg
    97FD2BE6-4C6B-443A-A0F6-04C407D74914.jpeg
    111.5 KB · Views: 24
  • 731FF572-027D-4205-834C-C1B19EF2DB74.jpeg
    731FF572-027D-4205-834C-C1B19EF2DB74.jpeg
    131 KB · Views: 24
  • 03C7917E-8748-412D-9780-293E8B5C19B0.png
    03C7917E-8748-412D-9780-293E8B5C19B0.png
    67.2 KB · Views: 24
  • 74FD385B-BBC3-4529-AC68-6D5E3D4D4551.jpeg
    74FD385B-BBC3-4529-AC68-6D5E3D4D4551.jpeg
    121.3 KB · Views: 20
  • 73421D67-5CE3-4177-AEA4-D6E04B1CF9AB.jpeg
    73421D67-5CE3-4177-AEA4-D6E04B1CF9AB.jpeg
    191.3 KB · Views: 17
  • BE6B243C-8B48-41F4-9354-27C14033A593.jpeg
    BE6B243C-8B48-41F4-9354-27C14033A593.jpeg
    204.1 KB · Views: 21
Hope the underside will be finished this weekend
 

Attachments

  • 95B6A282-D2BC-47F6-A4B9-7B15415E925E.jpeg
    95B6A282-D2BC-47F6-A4B9-7B15415E925E.jpeg
    251.9 KB · Views: 20
  • CF3BCA3E-2C9D-4622-BB1B-2A60E23433EC.jpeg
    CF3BCA3E-2C9D-4622-BB1B-2A60E23433EC.jpeg
    263 KB · Views: 20
  • CA94D568-8CBF-4007-BFEB-9362E9A20BED.jpeg
    CA94D568-8CBF-4007-BFEB-9362E9A20BED.jpeg
    237 KB · Views: 20
Why paint the mech metalwork? I mean it looks nice, but apart from that is there any other reason?
My reasons are that it not only looks nice but stops corrosion.
Especially when some parts are no longer available so they have to be cleaned and look quite poor afterwards, powder coating is just as cost effective as replating but has the benefit of being done in a specific colour.
At the end of the day it’s individual taste
 
Huge thanks to vimtoman for letting me use his rivets and tools to do my plastics.
First one done
 

Attachments

  • 203D8FA1-E7AD-42D8-BA81-A0EF0D38958A.jpeg
    203D8FA1-E7AD-42D8-BA81-A0EF0D38958A.jpeg
    223.6 KB · Views: 22
  • 5D70FCAF-5049-44A3-92BB-CA6E0203B2A3.jpeg
    5D70FCAF-5049-44A3-92BB-CA6E0203B2A3.jpeg
    192.3 KB · Views: 19
  • 5102E8FD-7FAA-4AC7-B6A1-948BCCF812D3.jpeg
    5102E8FD-7FAA-4AC7-B6A1-948BCCF812D3.jpeg
    225.6 KB · Views: 18
  • 8A7FDA47-EEEA-4CCF-9B45-3AC624B0ECA4.jpeg
    8A7FDA47-EEEA-4CCF-9B45-3AC624B0ECA4.jpeg
    306.8 KB · Views: 18
  • E0856590-674C-4990-9F22-7263D8DCC7A8.jpeg
    E0856590-674C-4990-9F22-7263D8DCC7A8.jpeg
    182.9 KB · Views: 18
  • 3832A304-32B6-4795-8AD0-A973B2663832.jpeg
    3832A304-32B6-4795-8AD0-A973B2663832.jpeg
    171.3 KB · Views: 23
  • 8DDF0A92-B3F9-41FF-A38B-16A2BF22A7E3.jpeg
    8DDF0A92-B3F9-41FF-A38B-16A2BF22A7E3.jpeg
    121.7 KB · Views: 23
  • 85D2FD04-BC7A-47A1-83F6-BF6953068289.jpeg
    85D2FD04-BC7A-47A1-83F6-BF6953068289.jpeg
    136.8 KB · Views: 23
  • B16CDBFB-B4E7-4370-97D7-A487EEDFF9D9.jpeg
    B16CDBFB-B4E7-4370-97D7-A487EEDFF9D9.jpeg
    137.4 KB · Views: 23
The underside of playfield finally finished.
The keen eyed will no doubt notice I’ve put the playfield hangers upside down lol 😂
The cons of working on the playfield upside down and so keen to get them on to turn it over !
Fortunately an easy fix which I’ll do tomorrow.
So all wrapping done, plastic fitted which I riveted the brackets on a few days ago.
Playfield slides and supports cleaned and fitted.
Will just need tidying up once the mini playfield and ramp switches are fitted.
 

Attachments

  • 9512412B-E419-4465-8136-00B029CD4995.jpeg
    9512412B-E419-4465-8136-00B029CD4995.jpeg
    205.8 KB · Views: 32
  • 46818885-EF61-43F3-8FCD-B73D11621D90.jpeg
    46818885-EF61-43F3-8FCD-B73D11621D90.jpeg
    133.2 KB · Views: 28
  • A6133D18-D222-4DC0-8B16-9DE8CB9BE616.jpeg
    A6133D18-D222-4DC0-8B16-9DE8CB9BE616.jpeg
    154 KB · Views: 27
  • ED48EED5-E348-4D8B-83F1-EC32C70116C4.jpeg
    ED48EED5-E348-4D8B-83F1-EC32C70116C4.jpeg
    179.9 KB · Views: 27
  • 208B2838-1CAB-4E45-BED1-7952B83A7AB9.jpeg
    208B2838-1CAB-4E45-BED1-7952B83A7AB9.jpeg
    153.6 KB · Views: 26
  • 1CF3F671-4112-4FFC-BA38-EEDC6D5ED2DD.jpeg
    1CF3F671-4112-4FFC-BA38-EEDC6D5ED2DD.jpeg
    171.8 KB · Views: 27
  • 642026D7-F61D-4280-A2DA-B8055FAC7337.jpeg
    642026D7-F61D-4280-A2DA-B8055FAC7337.jpeg
    248.2 KB · Views: 23
  • AE864F54-C47D-47A7-A8BD-5F9E6586B2FF.jpeg
    AE864F54-C47D-47A7-A8BD-5F9E6586B2FF.jpeg
    198.9 KB · Views: 26
  • 4739EA83-9F0D-47D7-B604-BD71301A5DD4.jpeg
    4739EA83-9F0D-47D7-B604-BD71301A5DD4.jpeg
    164.6 KB · Views: 28
Playfield flipped and can’t put into how pleased I am to see the playfield again !
Tightened all the star posts once I checked alignment of the led boards, wires etc.
Fitted shooter guard and haven’t found the new level yet !
Auto kicker rail fitted along with another rail at the top.
 

Attachments

  • 601CD797-0F50-4FBC-9C55-5B1463D58E88.jpeg
    601CD797-0F50-4FBC-9C55-5B1463D58E88.jpeg
    171.5 KB · Views: 40
  • 967C7994-500C-47E1-A8EA-1C65001052A1.jpeg
    967C7994-500C-47E1-A8EA-1C65001052A1.jpeg
    191.6 KB · Views: 38
  • ABC5BD44-05D4-4F8A-8D14-6E0120D5D4CC.jpeg
    ABC5BD44-05D4-4F8A-8D14-6E0120D5D4CC.jpeg
    167 KB · Views: 32
  • D4D132C4-576B-46C5-B2F4-73BC2D0D1688.jpeg
    D4D132C4-576B-46C5-B2F4-73BC2D0D1688.jpeg
    170.4 KB · Views: 31
  • 416D7867-AAEF-44E0-A8BF-3AE294D00DD7.jpeg
    416D7867-AAEF-44E0-A8BF-3AE294D00DD7.jpeg
    143.6 KB · Views: 31
  • 2E5BBBFE-E6CA-45E8-8F9B-DA0F0664432B.jpeg
    2E5BBBFE-E6CA-45E8-8F9B-DA0F0664432B.jpeg
    103.4 KB · Views: 33
  • 16874111-D7C5-4D66-93BD-EB768683E7AC.jpeg
    16874111-D7C5-4D66-93BD-EB768683E7AC.jpeg
    179.5 KB · Views: 38
Another quick update today.
Turned the hangers the right way round !
Fitted final coil assembly and soldered.
Fitted more posts and experimented with different post rubbers.
Also fitted last of guide rails to main playfield.
 

Attachments

  • 557A4B01-3D02-4768-9AC1-5B0E30B9C261.jpeg
    557A4B01-3D02-4768-9AC1-5B0E30B9C261.jpeg
    167 KB · Views: 32
  • CC23F7E8-4A6F-470C-A240-E05B91AA9550.jpeg
    CC23F7E8-4A6F-470C-A240-E05B91AA9550.jpeg
    182.8 KB · Views: 30
  • 5DC6E007-21D3-4AB1-8DB2-913ABD7C9A7C.jpeg
    5DC6E007-21D3-4AB1-8DB2-913ABD7C9A7C.jpeg
    171.6 KB · Views: 31
  • B070913C-D84F-43B1-A69E-6E2D48A4C742.jpeg
    B070913C-D84F-43B1-A69E-6E2D48A4C742.jpeg
    157 KB · Views: 29
  • C6446716-B89E-479E-8E5D-31166D2D1154.jpeg
    C6446716-B89E-479E-8E5D-31166D2D1154.jpeg
    180.6 KB · Views: 29
  • C8AB603F-6760-43EA-8398-C443684958EA.jpeg
    C8AB603F-6760-43EA-8398-C443684958EA.jpeg
    196.7 KB · Views: 28
  • 638F7B5B-77B9-4E78-81D6-966DF78D372D.jpeg
    638F7B5B-77B9-4E78-81D6-966DF78D372D.jpeg
    167.8 KB · Views: 30
  • 0E8E5DCB-1576-4767-9620-7750319FA928.jpeg
    0E8E5DCB-1576-4767-9620-7750319FA928.jpeg
    192.9 KB · Views: 33
Just found this thread, looks like a fantastic job!

I like the way you start off by throwing these posts out there - Bam, backbox sanded filled and painted. Bam, cabinet completely sanded, primed, painted, etc etc. I wish it was that fast in reality!
I'm restoring a Whirlwind at the moment, well I say restoring, mainly procrastinating as can never decide the best way to tackle each job. These restoration threads are brilliant for getting ideas about the best way to do things, so I really must pull my finger out and catch up!

Ben
Thanks Ben lol 😂
I started this over a year ago and you can see it was back to bare wood !
This is my 4th one so not skilled or experienced enough to try and tell people the best way to do things, merely to show what I’ve done and to maybe give some ideas / inspiration to others as I know it’s quite daunting when you first start.
I found reading about things on the internet and asking people on here and then finding what is comfortable for me with the tools available.
Just take your time and you’ll get there
 
Just found this thread, looks like a fantastic job!

I like the way you start off by throwing these posts out there - Bam, backbox sanded filled and painted. Bam, cabinet completely sanded, primed, painted, etc etc. I wish it was that fast in reality!
I'm restoring a Whirlwind at the moment, well I say restoring, mainly procrastinating as can never decide the best way to tackle each job. These restoration threads are brilliant for getting ideas about the best way to do things, so I really must pull my finger out and catch up!

Ben
I have a fair few parts for whirlwind left over from a super mint one I did
 
Finished the backboard today, fitted 2 light sockets with flex bulbs to light the ramps.
Fitted 2 led strips to guide rails.
Installed last few posts and the post supports for upper playfield.
Installed 2 light sockets on left side with flex bulbs to illuminate the mountains, and fitted the 2 flashers although I’m going to change the flasher bulbs.
 

Attachments

  • E614FD99-F836-43F8-B889-BC44AAC09009.png
    E614FD99-F836-43F8-B889-BC44AAC09009.png
    69.9 KB · Views: 32
  • 3FB920DC-AD9C-41E8-95E3-D0A5B692F16F.png
    3FB920DC-AD9C-41E8-95E3-D0A5B692F16F.png
    62.3 KB · Views: 34
  • 1B8DD74E-6AD9-46A4-8F98-74B81C78D973.jpeg
    1B8DD74E-6AD9-46A4-8F98-74B81C78D973.jpeg
    163.9 KB · Views: 31
  • E9436C8D-709C-4132-B3ED-74C0BCAE7F92.jpeg
    E9436C8D-709C-4132-B3ED-74C0BCAE7F92.jpeg
    174.9 KB · Views: 32
  • B94CCC85-5706-4249-B41F-2F614BD6B14A.jpeg
    B94CCC85-5706-4249-B41F-2F614BD6B14A.jpeg
    171.7 KB · Views: 27
  • 7E1974F4-17B3-4AF3-B0E4-0497CCB4AC1E.jpeg
    7E1974F4-17B3-4AF3-B0E4-0497CCB4AC1E.jpeg
    212.7 KB · Views: 30
I think it was @Fubar who told me to stop by, glad he did! Insane job on this build @Beowulfz07 looks absolutely fantastic. Great attention to detail.

I shudder to think of the hours you spent feeding wire through cable wrap. I take me hate off to you, looks the nuts. 🤘
 
I think it was @Fubar who told me to stop by, glad he did! Insane job on this build @Beowulfz07 looks absolutely fantastic. Great attention to detail.

I shudder to think of the hours you spent feeding wire through cable wrap. I take me hate off to you, looks the nuts. 🤘
Thankyou, and yes it did take longer than I imagined to do the wrapping, fortunately this wrap is excellent in that you put it over the cables and then cables can exit at any point along it.
But it’s quite a headache as you have to make sure you use the correct diameter and when you cut it you need to melt the ends to prevent fraying.
I won’t be doing it to any machines in the future lol 😂
 
As I commented before - great restoration.

I hope you tested all the wiring out before and after you made it look amazing. Would hate to find a fault in that now.....

Think I would be too scared to even play a game on this.
 
As I commented before - great restoration.

I hope you tested all the wiring out before and after you made it look amazing. Would hate to find a fault in that now.....

Think I would be too scared to even play a game on this.
Thanks Phil and yes I did but still stressing about connecting to the boards lol 😂
I intend to connect the cabinet first and power up, then the playfield GI followed by switches and finally coils.
I know I don’t have any shorts on the playfield loom or components so I should be ok but this is pinball 😂😂😂
 
Cleaned, repaired and wrapped upper playfield loom and wired a matrix power connector for a couple of star posts.
Finished painting the fur on Bigfoot, and started on the head.
Fitted posts and rails to upper playfield and flipper bracket
 

Attachments

  • 923C39AA-156A-42E6-B346-807999680091.jpeg
    923C39AA-156A-42E6-B346-807999680091.jpeg
    321.8 KB · Views: 18
  • AC4DE8CA-548F-4D86-B373-BD1CDEC2005D.jpeg
    AC4DE8CA-548F-4D86-B373-BD1CDEC2005D.jpeg
    260.3 KB · Views: 19
  • DB669746-F2E5-4F3E-9B78-7B7F25F25CF6.jpeg
    DB669746-F2E5-4F3E-9B78-7B7F25F25CF6.jpeg
    233.2 KB · Views: 18
  • 99DB4879-A8CC-4B01-97A8-1535CB8DAB45.jpeg
    99DB4879-A8CC-4B01-97A8-1535CB8DAB45.jpeg
    242.4 KB · Views: 18
  • 2610E66D-17BA-4096-B6B1-47E8B1BB06D8.jpeg
    2610E66D-17BA-4096-B6B1-47E8B1BB06D8.jpeg
    218.8 KB · Views: 17
  • C89FD2AB-E310-486E-8059-966BDF1DD187.jpeg
    C89FD2AB-E310-486E-8059-966BDF1DD187.jpeg
    391.1 KB · Views: 19
Bigfoot head finished
 

Attachments

  • B63C4083-C6D8-4864-BBAE-6F3DE5567E39.jpeg
    B63C4083-C6D8-4864-BBAE-6F3DE5567E39.jpeg
    82.2 KB · Views: 16
  • 1FCEC3FB-06A9-4A9C-9AE4-185F749BD1F2.jpeg
    1FCEC3FB-06A9-4A9C-9AE4-185F749BD1F2.jpeg
    139.3 KB · Views: 16
  • BD04076E-0AA1-4529-B3C5-4C49411D0385.jpeg
    BD04076E-0AA1-4529-B3C5-4C49411D0385.jpeg
    108.7 KB · Views: 16
Thanks to Jim at MyPinballs for the tip to replace the 2 metal posts and single rubber with double star posts which would protect the bulb underneath, plus I was able to light them.
 

Attachments

  • B93D6495-AC1D-4746-B7CA-A6342BBA913C.jpeg
    B93D6495-AC1D-4746-B7CA-A6342BBA913C.jpeg
    60 KB · Views: 21
  • FB71CAFD-6E77-44D7-B6F4-DA3964BE745C.jpeg
    FB71CAFD-6E77-44D7-B6F4-DA3964BE745C.jpeg
    155.1 KB · Views: 21
  • AF4884DA-7E83-4F10-82BB-6E86B8246DC9.jpeg
    AF4884DA-7E83-4F10-82BB-6E86B8246DC9.jpeg
    60 KB · Views: 21
First new ramp decals etc fitted. Fixed in place and done a test fit of the upper playfield
 

Attachments

  • ED1CDE6C-798A-4AEE-BE58-179FC0F082B7.jpeg
    ED1CDE6C-798A-4AEE-BE58-179FC0F082B7.jpeg
    241.7 KB · Views: 13
  • F9100A43-A9B7-4DC0-8C29-F29F678422EA.jpeg
    F9100A43-A9B7-4DC0-8C29-F29F678422EA.jpeg
    180.9 KB · Views: 13
2nd ramp decals done and fitted in place.
Upper playfield metal sign done.
Sling plastics and protectors fitted along with double spotlights on sling, but need to replace one hex post with one half the size to avoid touching the glass.
 

Attachments

  • F38BFFD0-F700-4442-849E-401D0FCD1F07.jpeg
    F38BFFD0-F700-4442-849E-401D0FCD1F07.jpeg
    312.7 KB · Views: 22
  • C21E5930-844C-4ACA-B21C-45FC4CBE5151.jpeg
    C21E5930-844C-4ACA-B21C-45FC4CBE5151.jpeg
    298.2 KB · Views: 17
  • FFDA5FBB-87EE-4F7F-A524-34D56CC5137B.jpeg
    FFDA5FBB-87EE-4F7F-A524-34D56CC5137B.jpeg
    305 KB · Views: 15
  • D1FAF0F7-4AF9-44EA-86B1-E3B370185AF8.jpeg
    D1FAF0F7-4AF9-44EA-86B1-E3B370185AF8.jpeg
    148.3 KB · Views: 15
  • DFE97872-56E1-44F6-9655-7A36ADBB51B3.jpeg
    DFE97872-56E1-44F6-9655-7A36ADBB51B3.jpeg
    188.3 KB · Views: 16
  • 1DCBEF2C-FBB4-4150-95F7-DFFAFB2F6E6D.jpeg
    1DCBEF2C-FBB4-4150-95F7-DFFAFB2F6E6D.jpeg
    180.2 KB · Views: 18
  • 04D95B05-8E5D-4FE4-93BE-ECD0241E5649.png
    04D95B05-8E5D-4FE4-93BE-ECD0241E5649.png
    164.6 KB · Views: 20
  • 76BEC73C-B912-4AEE-B1B1-4F75B505E36C.jpeg
    76BEC73C-B912-4AEE-B1B1-4F75B505E36C.jpeg
    179.9 KB · Views: 24
Back
Top Bottom