What's new
Pinball info

Register a free account today to become a member! Once signed in, you'll be able to participate on this site by adding your own topics and posts, as well as connect with other members through your own private inbox!

In Progress Whitewater Full Refurb

Yeah it's 1/16in and is just spinning inside it. The next size up is 2mm but is too big.

So reckon getting a 1/16in reverse thread tap is the way to go?
 
Do you have a 5/64" key to try? Only slightly smaller than 2mm at 1.98mm but may make the difference unless 2mm is miles to big.

If that doesn't work then yes a small reverse thread tap should remove it easily and in the safest and most elegant fashion. The exact size isn't too important, the taps have tapered ends and you will probably only need to get a couple of threads to bite to remove it. If you get yourself a little set with a range of sizes you will have options. 1/16" isn't very big at all though.

Alternatively you could get creative and try and run some solder in the hole around the 1/16in key to get it to grip. The biggest issue I can see with this method is getting sufficient heat into the the joint to get the solder to flow and form a joint. You'll need a fairly powerful iron as all that metal will act like a big heat sink and draw the heat away from where you need it. Don't be afraid to stick a load of solder on the nib to help transfer heat into the joint. Super glue is an option too but this will obviously sacrifice whatever you stick into it. If it works the solder could be reheated and cleaned up fairly easily.
 
Last edited:
I like the sound of the solder method, I'll give that a go tonight.

Thanks for your help :thumbs:
 
Its definitely an allen head, but a torx bit is actually a pretty good idea. Every so often they do grip in fixings that they shouldn't!
 
I have that exact set Dan, like you say I used them loads during the tear down.

Unfortunately like the allen keys they're either too small or too big! :mad:
 
Stripped Bigfoot this evening but got stuck trying to get the head bracket off. Seriously frustrated and nearly ended up ripping it off!
Think I'm right in saying that the hole in the picture should be loosened off with an Alan key but all of the sizes I have are either too big or too small so I'm guessing it has been stripped to the point that it's too far gone?
Any other ideas how to get it out?
Cheers
I used one of the star shaped tools to get that bolt out as it had been thread locked. Seems to give you more purchase and it came out easy and went back fine too

Cheers Kev
 
Didn't get much done as I was watching England embarrass South Africa this morning. :D

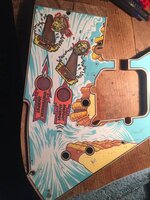
Pulled the two areas of Mylar off the playfield using the hairdryer method which worked really well. Then gave it a wipe with white spirit and the the glue came right off after leaving it for about a minute so happy days!

Gave the whole thing a good clean but there is some proper ground in ball trails which don't want to budge, anyone got a good method of cleaning these??

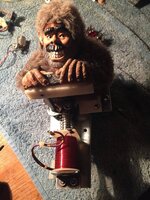
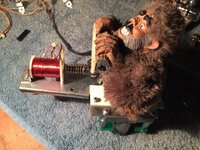
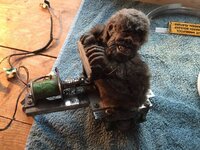
Got all of the flipper parts out of the tumbler and hand polished some of the bits which were still a bit dull with autosol and wire wool. Gave the coil a bath in the ultrasonic cleaner and dryed it out with the compressor. There are some screws and washers missing and rather than ordering individual parts does anyone do a pack of common parts in the UK like those on the Marco website??

Cheers :)
Get yourself one of these from Pinball heaven as well - the metal protector - well worth having (in fact get a full set - boulders targets etc)

P8030554.JPG

Cheers Kev
 
Cheers for all the suggestion chaps, much appreciated. :thumbs:

Unfortunately none of them worked so I ended up hammering in a bit which was just too small for the grub screw and it came out easy. Was a bit scared it wouldn't go back but no problem so happy days!

So Bigfoot has had his fur washed and blow dried and is now back together and looking a lot better than he did a couple of days ago!

Kev, I bought a set of those protectors which look the business after I saw them on yours. Just need to work out where I've put them now. :hmm:

Flattened the mini playfield with 400 grit which got rid of a lot of the ball trails. Will do the hobo clear coat on the weekend weather permitting. :)
 

Attachments

  • image.jpg
    image.jpg
    129.6 KB · Views: 48
  • image.jpg
    image.jpg
    199.3 KB · Views: 48
  • image.jpg
    image.jpg
    232.8 KB · Views: 49
  • image.jpg
    image.jpg
    123.5 KB · Views: 48
Last edited:
Haven't uploaded in a while so here's the last couple of weekend work :)

Wet & dry sanded the mini playfield with 400 grit then 600 grit then cleaned it off with some Naphtha and a tack rag to get as much dust off as possible.

I laid down the first three coast as directed leaving about 15 mins between each.

Unfortunately I left it to dry in my workshop while I was tinkering and even though I didn't realise this kicked up loads of dust leaving the playfield with tons of specks.

So out with the wet & dry again until it was back to what I started with! :mad:

I'm not sure how other guys got on using the rattle can clear but I found that I ended up with a better finish by laying down 6 light coats.

Some before and after shots :thumbs:

IMG_3165.JPG

IMG_3200.JPG

IMG_3311.JPG

IMG_3317.JPG

Really happy and to be honest quite surprised how well it turned out! :clap:
 
Next it was time to paint and decal the backbox.

Sanded with 240 grit one last time on bare wood then laid down the first layer of primer.

Sanded this again with 240 then another two coats of primer with very light sanding in between until I was happy with the finish.

IMG_3287.JPG

IMG_3275.JPG

Then three coats of the Peugeot Indigo blue variant I bought, again with very light sanding in between if required.

IMG_3316.JPG

IMG_3322.JPG

I had some trouble trying to match the paint colour to my decals in the local car paint shop and it ended up slightly off unfortunately but it's only noticeable if you're really looking for it.

IMG_3341.JPG

The decals were purchased on ebay from the chap in Bulgaria and they seem to be good quality, quite thick and are printed on '3M Scotchcal Film Series 25' if that means anything to anyone.

IMG_3339.JPG

I took my time positioning the decal on the side of the head, measuring and checking that there was roughly the same gap top and bottom and side to side. I placed a 8kg kettle bell on a tea towel at the top end to stop it moving around too much. This took a lot longer than I thought as once you move one bit slightly it throws the other sides off. Once I was happy I lifted the free end of the decal up, peeled off about 3 inches and cut off the backing. Laid it down on the head, removed the kettle bell then used one of the 3M felt applicators removing some of the backing and pushing the decal down as I went along. I ended up with a few very small air bubbles on both sides but nothing too bad.

IMG_3348.JPG

The bit I was dreading was cutting the excess off and on the first side it went just alright. I used a metal meter rule and cut the decal back a millimeter or so from the edge of the head. As the decals were quite thick they have a distinct white line down the side unless you cut them just right. The other side ended up perfect so overall I am happy with the result. :clap:

IMG_3349.JPG
 
Last couple of weekends work:

The speaker panel was in average shape but definitely worth putting in a bit of time and effort to save it.

Out with the Novus 3 to get out the really heavy, deep scratches which there were quite a lot of.

Followed this up with Novus 2 and considering how it started I'm please with how it came out. You can only see the scratches now if you're really up close.

IMG_3328.JPG
IMG_3333.JPG
IMG_3334.JPG
IMG_3335.JPG
 
Next up was replacing everything in the head.

I gave the boards a wash with warm water in the shower then gave them a really good dry using the compressor.

I had sanded the metal mounting plate with 80 grit and I was going to spray it silver but I quite like the 'brushed' look so left it as is.

The ground braid was quite fiddly and I definitely need a better staple gun!

My power driver board was hacked to fcuk so will need replacing. Thinking of going for the pinLED as heard Rottendog can have some issues if anyone has any experience of either?

IMG_3394.JPG
IMG_3395.JPG
IMG_3396.JPG
IMG_3397.JPG
 
Lastly was cleaning the light board which was minging.

Removed everything, tumbled all the metal parts and put all of the plastic bits in the sonic cleaning along with the full wiring loom.

Gave the board a light sand then sprayed it with two coats of primer then four coats of white.

Excuse the last ****ty iphone picture, the board it actually white and not gray!

That's it for now :)

Probably should have said at the beginning that this is the first time I've done anything other than cliffy's and LED's to a pin so if you see anything which doesn't look right or can think of a better way of doing something please let me know!

Cheers all :thumbs:

IMG_3411.JPG
IMG_3401.JPG
IMG_3412.JPG
IMG_3443.JPG
IMG_3444.JPG
 
Looking really really nice!! hoping to have a decent project game myself. quite enjoyable bring a pin back to life i bet ?
 
Cheers chaps :)

I'm enjoying the process a lot more than I thought to be honest with you Justin, especially during the quiet winter months.

Just picked this lot up from the powder coasters this afternoon, well chuffed with how it turned out :clap:

image.jpeg
 
Wow.......... that Whitewater is going to look...................Blue.
 
Haha, just a bit! ;)

It was all pitted and rusty before so powder coating was the only way to save it and save a few ££ rather than buying new.

Wasn't too keen on the look until I saw this one which made my mind up.

image.jpeg
 
Slow progress last couple of weeks especially seeing as I had a special delivery :):clap:
IMG_3531.JPG
Finished off the speaker panel with a new pair of speakers as the old ones were knackered and from a Data East! Had the off set frame made by Manny and they look mint, hopefully they'll sound the same too.
IMG_3460.JPG
IMG_3459.JPG
Also rebuilt the newly powder coated coin door besides a coin slot I need to order, well chuffed how it turned out.
IMG_3490.JPG
Fitted the last bits to the mini playfield for now including a brand spanking new whirlpool ramp as the old one was fubar.
IMG_3448.JPG
IMG_3449.JPG
IMG_3453.JPG
 
Back
Top Bottom