What's new
Pinball info

Register a free account today to become a member! Once signed in, you'll be able to participate on this site by adding your own topics and posts, as well as connect with other members through your own private inbox!

In Progress Whitewater Full Refurb

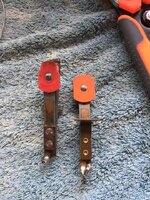
@RudeDogg1 kindly printed me off some coil wrappers.

Using the same clear in a can you suggested in your Fish Tales (I think?) thread, worked a treat on the mini playfield! :)
 
Easter weekend progress.

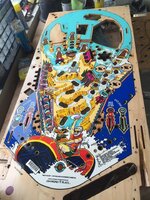
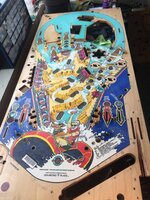
Finished prepping the main playfield for clear coat the same way as the mini playfield.
Wet & dry sanded with 400 grit then 600 grit to get most of the 20+ years ground in dirt and ball trails out.
IMG_3904.JPG
Gave it a blow with the compressor then cleaned with come thinners and gave it a wipe with a tack rag.
Masked off the bigger holes as the wiring harness is still attached underneath and put some foam in the threaded holes.
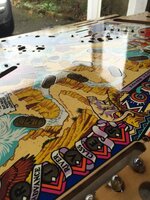
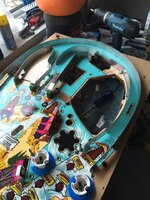
Laid down three coats leaving around 15 mins between each and after 24hrs it looked like this.
IMG_3910.JPG
There are still a few areas I'm not 100% happy with so will give it another sand and couple of coats of clear before reassembly starts.

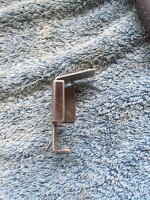
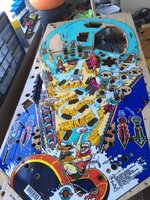
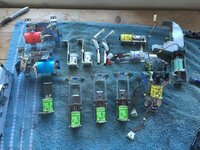
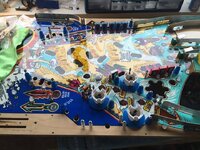
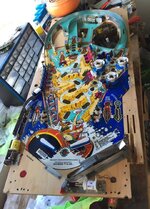
Finished cleaning & rebuilding all of the playfield mechanisms which felt like a big achievement. New coil wrappers added care of @RudeDogg1 make them look mint!
IMG_3928.JPG
That's it for now folks :thumbs:
 
Only just looking into it so not right away.
Will start a new thread on the subject and keep people updated once thing get moving.
Sorry for hijacking the thread.
Is the thread started Daz as you know I need one quick!!!!
 
looks great @Jsyjay what clear did you use out of interest and is the cab together yet -v ery keen to see this as I suspect I will end up making one for DM shop log on here

Cheers Kev
 
I used the same Autotek stuff as you Kev, worked a treat!
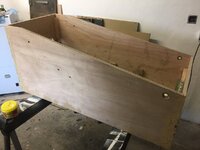
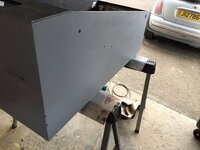
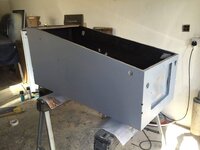
Cab has had the first round of filler, will hopefully have it prepped for decals by the end of the weekend :thumbs:
IMG_3937.JPG
 
looking sweet!!! did you use forstner bits for the flipper buttons? and what about speaker holes and grill holes at the back etc? how did you do the glass channel slots ?? I have never used a router but looking at getting one and having a go - great learning curve

Cheers Kev
 
Cheers mate, quite proud of it although it's no where near professional level.
I had to google what a forstner bit was but yes that's what I used, ha-ha. The right hand button hole is perfect but the left hand one is going to need some filling as it's too slightly too wide.
Luckily filler can hide a lot of sins!
Speaker holes drilled out with a large core bit at the right diameter then cut out the bit in the middle with a jigsaw.
You can see on the picture that they're not perfect but after a bit of sanding they look decent enough. No one looks at the back of the cabinet anyway!
Glass channel slots used a 3.2mm hand router. The hardest bit was setting up the guide to make sure it was bang in the middle!
Great learning curve but not sure I would bother again. If someone sold a flat pack cab I would be all over it!
IMG_3547.JPG
 
brill thanks for that info man!!! was thinking a dremel might do for the glass channel with the right bit?

So you didn't use a router for the speaker holes etc do you mean the vent grille oblongs in the back of the cab with a hole cutter and jigsaw? Did you also route in the bottom sheet as well as per original cab ?

Cheers kev
 
You should be alright with a dremel and the 3.2mm bit just make sure your guide is set up bang on!
Sorry, yeah I meant the grill holes in the back.
The bottom of the cab I didn't route as I thought that was beyond my skill level. So instead I ran the braces all the way along the cab either side and pinned it every half inch or so. I think reckon it will be easily strong enough, sure I'll find out soon!
Speaker hole in the bottom of the cab I used a jig saw which gave a pretty rough finish then sanded the edges. It's not perfect but again no one is ever going to know!
 
Is the thread started Daz as you know I need one quick!!!!
Should know more in the next few weeks.
The only thing you'd need to do is router out the cab for the Demo Man side handles.
As soon as I hear something you will be the first to know.
 
Should know more in the next few weeks.
The only thing you'd need to do is router out the cab for the Demo Man side handles.
As soon as I hear something you will be the first to know.
Cool thanks Daz
 
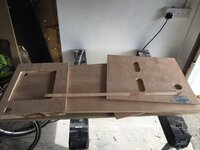
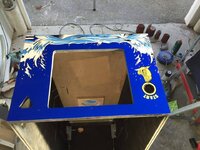
Update time.
I must have ended up doing maybe 5 or 6 rounds of filling & sanding on the cab until my patience ran out and I've decided that although it's not perfect it will do.
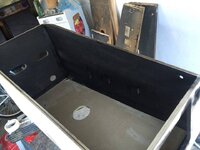
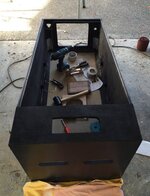
The insides have been sprayed black after masking off the bottom.
13014894_10156817277890472_860772423_n.jpg
I also test fitted the lockdown bar & receiver and they fit thank god!
13023550_10156817277945472_748702380_n.jpg
I sanded the whole cab with 80 grit to get all of the raised filler smooth then worked up to 120 then 240.
Then it was time for primer. I had some left over that I used on the head I had bought in a similar store to Halfords and a new can I bought in a proper car paint body shop and the difference between the two was night and day. The proper stuff from the body shop went down much easier and created a similar finish after one coat to the Halfords type 2+ coats and it was less than half the price!
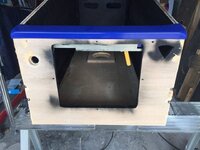
The below is after one coat and you can still see a lot of the grain coming through but after three coats this was gone.
13020354_10156817278010472_1909132336_n.jpg
13023572_10156817278080472_2063660874_n.jpg
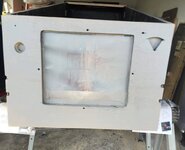
This is what it ended up looking like after three coats with the decent stuff.
13014989_10156817278145472_282134821_n.jpg
I'll give it another light sand with 240 grit before spraying the back and corners black and FINALLY applying the new decals. :thumbs:
 
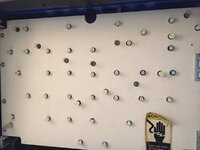
Playfield, had a bit of a nightmare.
After giving it another light sand to get some dust specks out I gave it another three coats of clear and when I came back this had happened.
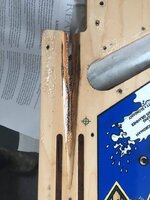
13020407_10156817277865472_1955969435_n.jpg
Strangely it had only happened around the outside edges of the playfield and not at all in the middle. No idea what went on there but it was back out with the wet & dry AGAIN! :cuckoo:
These things are sent to try us so after it was all prepped another three coats and it's as close to perfect I can get it.
I also filled any of the insert which weren't 100% level with clear coat from a pipette before the last coats.
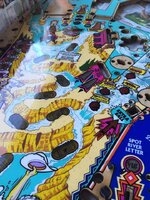
13045463_10156817277920472_1151761654_n.jpg 13022282_10156817278190472_2084431977_n.jpg
So with all that done reassembly could finally start! :clap:
The wrong old lock targets were replaced with the proper green ones and I installed the Mantis protectors. They were an absolute **** to fit as the additional clear meant that I had to properly wedge them into place. Then adjusting the lock targets so that they would register when hit probably took me about an hour! Worth it considering how much new ramps cost though. :eek:
13023187_10156817278360472_1917525965_n.jpg 13022284_10156817278395472_961819470_n.jpg
Then it was a case of fitting all of the under playfield switches and targets back into place.
All of the now shiney posts were installed with a bit of help from a rubber mallet as the clear had made the holes a fair bit narrower.
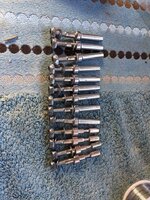
13059378_10156817278415472_332964571_n.jpg
And here's where I ended up yesterday, the end actually feels close for the first time since I started doing this! :)
12992887_10156817278455472_2069758697_n.jpg
 
Loads more progress this weekend.
Playfield: Installed all of the polished metal ball guides.
13101265_10156842253170472_1005451920_n.jpg
Fitted the all new pop bumpers which were and absolute **** to do especially as after I had soldered them all back the skirt on the left of the picture on the above was in the wrong place! :mad:
13059401_10156842253255472_386003398_n.jpg
All plastic posts and star posts fitted :)
13059745_10156842253410472_444968264_n.jpg
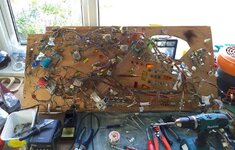
All mechanisms fitted and soldered back into place. My soldering still leaves a lot to desired but is getting better. :thumbs:
I'll clear up the rats nest or wiring with new zip ties before putting the playfield back in the cab.
13081795_10156842254010472_1296344278_n.jpg
Few other bits like cliffy slot & shooter lane kick out protectors, rubbers and LED's added top side and this is where I ended up yesterday. Still a way to go but getting there! :clap:
 
Cabinet: Painted all of the corners and back black with a couple of light sandings between coats if there were any drips. All ground braiding added, not the neatest but no one will see it.
13082139_10156842253465472_1301722700_n.jpg
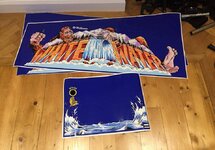
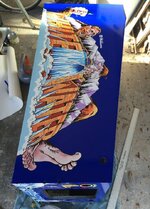
Next finally on to the decals. I had left them out flat for a week or two in a warm room until they looked like this:
13084168_10156842253090472_1602316203_n.jpg
Font was a bit of a mission trying to line up the start button but went on quite well. Cutting out the start button hole and coin door went pretty well and will have a few touch ups with the black sharpie.
13101352_10156842253640472_1075246911_n.jpg
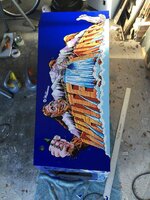
First side went on perfect and cutting off the excess decal went the same.
13059639_10156842253695472_645391751_n.jpg
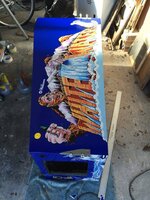
Second side went on the same, well chuffed. :)
13081835_10156842253750472_275581307_n.jpg
Added the new flipper button and test fitted the stern metal protectors to one side before it was time to call it a day.
13059810_10156842253890472_2057416050_n.jpg
Cheers all. :thumbs:
 
If one of you guys has led's in the back box can you send me a pic please, need to know the flasher locations, ta. :)
 
If one of you guys has led's in the back box can you send me a pic please, need to know the flasher locations, ta. :)
Sure someone will get to you before me, as mine is wrapped up for a house move on friday, but if not give me a shout. I have colour co-ordinated my backbox with LEDs and flashers and I think it looks great -however the purists prefer just all white leds.

Cheers Kev
 
Here you go mate.
The flashers are the incandescent ones and the 8smd LEDs.

There's bloody loads of them

image.jpeg
 
Back
Top Bottom