I changed the bottom on mine.... But I did it properly :0p
Pinball info
You are using an out of date browser. It may not display this or other websites correctly.
You should upgrade or use an alternative browser.
You should upgrade or use an alternative browser.
Complete TAF, fullish rebuild
- Thread starter Lee ellison
- Start date
OP
OP
 Yes or no , do I put the stickers back in ? Note these are not in correct position , just to show the stickers in question
If they are in reasonable condition, I would just to keep them with the machine. Most of mine were trash and didn't go back in.
Not sure about the ply.
Might need to be convinced.
Might need to be convinced.
OP
OP
Some are good and some are poor , I,ll put them in place and see what they look like
ok , and I suppose your black cat is blacker than mine ,! MeeeeeeowI changed the bottom on mine.... But I did it properly :0p
OP
OP
 Temp put together and hide all the s--t laying around the conservatory, bloody guests coming , I say just close the curtains and don,t tell em we have a conservatory , .
Still waiting on decals and wire braiding , hopefully come soon or I,ll be running out of work
Some are good and some are poor , I,ll put them in place and see what they look like
ok , and I suppose your black cat is blacker than mine ,! Meeeeeeow
I was taking the p btw ;0p. I wouldn't wanna take the end off if it wasn't damaged or coming off
OP
OP
I was taking the p btw ;0p. I wouldn't wanna take the end off if it wasn't damaged or coming off
")
OP
OP

 Guests gone so machine back to bits and conservatory a mess again .
Ply wood secured to base , edges sealed , ready for more paint when the sealant and glue go off ,
never ending this pinball resto!
OP
OP
1st coat on , still getting some kind of paint reaction ! But it seams to settle down as it's drying !

Looking good
OP
OP
Plenty of filler and I used a 3mm sheet of ply on the bottom of cabinet , you can,t get a smooth finish on the original fibreboard , unless you use special sealer and paints , if you get close there are a couple of imperfections , but when it hardens fully I,ll give it a mop and polish , same as what you use on car paint ! . Hopefully by tomorrow all paintwork finished , but still waiting on decals and new earth braid . Still , I've got loads more hardware polishing to do .
OP
OP
Also it's a satin black and a satin purple I used , not as glossy ! Also fine sandpaper in between coats , also used an acrylic sealer around the joins to give a nice clean line , you can paint over acrylic sealer
Lee
Lee
Great job Lee, I think that will look the dogs danglies when it's finished.
OP
OP
Thanks for the positive comments from everyoneGreat job Lee, I think that will look the dogs danglies when it's finished.
He's right tho Lee - Looking great there
OP
OP
Thanks Paul , here it is this morning with a bit of bling added , can,t do much else till the braid or the decals arrive , might mark out in felt tip the routes for the wire braiding ! , just to keep myself busyHe's right tho Lee - Looking great there
 Quite happy with it myself so far , it's a big learning curve
OP
OP
Before 
 After
After
After
OP
OP

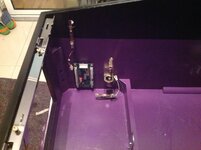
 Can't find the switch that sits on the base , near the tilt bob mech , I've seen it somewhere ! I probably put it somewhere safe !
 Don't get carried away putting all those cool shiny bits on Lee, they'll get in the way when you start re-braiding!
ooh yes... you have to braid under the Power box, over the leg plates etc etc....Don't get carried away putting all those cool shiny bits on Lee, they'll get in the way when you start re-braiding!
OP
OP
Yeh I know lads , the big bits are just sat in place , not screwed in yet , I'm looking at how to run the braid , so these bits are helping me find the best route , I don't like the way the original braiding cut corners and went on angles , I think I will try and run all the braid at right angles to try and keep it looking tidy
For your first time resto you are certainly doing a great job.
Keep up the good work.
Bet you can't wait to make a start on the decals.
Keep up the good work.
Bet you can't wait to make a start on the decals.
OP
OP
OP
OP
I,m looking forward to doing the decals , but scared Sh------ss. I just want to make a good job of them ,For your first time resto you are certainly doing a great job.
Keep up the good work.
Bet you can't wait to make a start on the decals.
I've been watching loads of " how to videos" on decals , so should be ok.
I'm going to do the dry method as I want as much adhesion onto the cabinet as possible , if anyone has any other tips or what not to do , please let me know.
Lee
looks lovely m8, just been rebraiding mine to
OP
OP
Thaks , yrs is coming along nicely and looks fab , where did you get the braiding from ,I got some online from the uk , but they did not tell me it is not in stock so might get it end of the week , but I go back to Africa next Tuesday , might have to finish it when I get back in March !looks lovely m8, just been rebraiding mine to
mine came from pin restore as I was ordering other stuff but think the European places sell it to
I,m looking forward to doing the decals , but scared Sh------ss. I just want to make a good job of them ,
I've been watching loads of " how to videos" on decals , so should be ok.
I'm going to do the dry method as I want as much adhesion onto the cabinet as possible , if anyone has any other tips or what not to do , please let me know.
Lee
Dry is best IMO, fool-proof too as long as you get the positioning right. A good tip is to leave the decals laying out in a warm room for a few days prior to using them to make sure they are completely flat.
Buy yourself some of these:
http://www.ebay.co.uk/itm/Pair-Irwi...t=UK_Hand_Tools_Equipment&hash=item2ecdd20744
and stick some felt on each jaw so they don't mark the decals.
