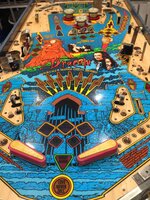
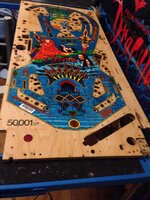
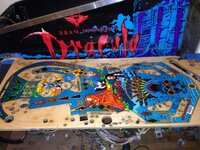
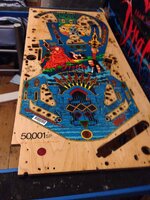
Indeed I was very lucky as most the colours I needed I had ready mixed that were a very good match apart from one blue and a wood colour. A quick tip tho people various mixes of flesh tones make a good match for the wood tone
Pinball info
You are using an out of date browser. It may not display this or other websites correctly.
You should upgrade or use an alternative browser.
You should upgrade or use an alternative browser.
In Progress Bram stokers shop log and mods
- Thread starter RudeDogg1
- Start date
@RudeDogg1 the touch up looks fantastic, what did you use to fill the corner and how did you do it (if you don't mind sharing your silky skills that is  )
)
2 part filler for the pf I used ronseal pale colour but for cabs I use upol car body filler. I just masked the area as close to the damage as pos. Then just smeared filler on pealin the mask off before it sets. Then remask when dry use a file for the hole walls and various sand and wet n dry for the other area (second masking is to protect the good paint.
Thanks @RudeDogg1 for the info, I'm also restoring my Dracula and am just waiting for a treasure cove polishing kit from 1stoppinall to arrive (thanks goes to @Paul and @Sgt GrizZ for helping me source it) so I can get it looking all shiny and like new hopefully. I think following your advice I might have a go a the rat hole also 


What's your playfield like?
Is yours mylared?
It was mylared around the pop bumpers and the side lanes. I've removed all of it now, just need to remove the remaining parts before I use the kit (when it arrives).
The artwork you did on the castle etc really do look great, I've looked at some of the paints you recommended but am not sure yet whether I'm going to give it a try. My skills are progressing though I've touched up the cab really well and I'm just waiting for my backbox to return so I can redecal it. It's having the text printed on the back at the moment, I took it back to the wood and resprayed it, it looked like Drac himself had taken a bite or two!!
The artwork you did on the castle etc really do look great, I've looked at some of the paints you recommended but am not sure yet whether I'm going to give it a try. My skills are progressing though I've touched up the cab really well and I'm just waiting for my backbox to return so I can redecal it. It's having the text printed on the back at the moment, I took it back to the wood and resprayed it, it looked like Drac himself had taken a bite or two!!
Does anyone know where to get the tubing that is used on pop bumper light holder legs?
That's just fish tank tubing Rudi
It's a lot more narrow the stuff on this
Just use heat sink, does the job.
Yeah that's what the legend said
Playfield now cleared gonna flatten it back and polish it tomoz then leave it a few more days to harden more before doing anything else to it. Metal work polished and or tumbled. Just need to clean the plastics and ramps
how do you do that Rudi thats amazing!!!! the colours look perfect
Cheers Kev
Cheers Kev
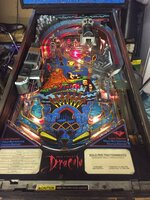
Mine has arrived now - playfield is mint but the whole thing is minging - replaced 24 lamps and 6 flashers just to get it going!! Had to take the subways off to replace some lamps boy were they filthy - looks like first time off in 20 years I reckon!!!
A couple of pics before and after for you(dont want to steal your thread!!)
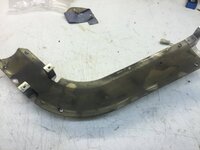

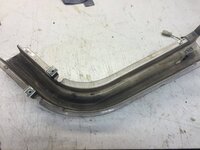
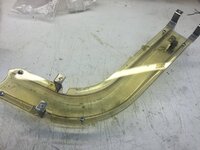
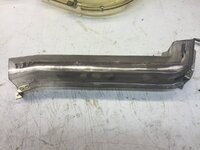
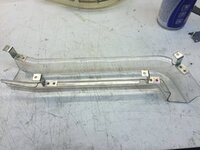
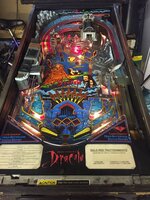
Cheers Kev
A couple of pics before and after for you(dont want to steal your thread!!)


Cheers Kev
Attachments
**** I thought mine was bad and thanks kev
Rudi I second that, I have similar damage on my VECTOR pf that I'd like to repair myself.So rudi could you wlak us through how you did that repair and then painted it etc??
The hardest part is matching the paint tone. Think it was just a fluke that I had premixed colours that matched.
1, Clean the filth off the playfield with foam cleaner or similar (no polishes).
2, Then lightly sand the playfield with very fine wet n dry.
3, Wipe over with napthia (lighter fluid).
4, If the damage has worn a shape into the wood it will need filling with a 2 part filler. I recommend you mask around the damage before filling and remove it while still wet.
5, remask and sand flat (the mask protects the surrounding area).
6, depending on the paint u use you may need to prime the area.
7, then if it's line work you need to paint use a decent masking tape I use tamiya tape. You need to do it in stages so the tape doesn't take the last colour off so let it dry properly. Lin the tape up against a good bit of the line so it's straight and matches. Depending on the size of area you can use an airbrush or fine brush. My damage was small so I used a brush.
A tip I figured out if filling damage on bare wood like I did on a pop hole and behind 3 targets. Use flesh tones to get a match
thanks rudi and what paints do you use and then do you clear over the top of the finished job ?
I use whatever paints I have to hand coat d' arms, badgers freakflex, garage kit colors, artists acrylics, velajo. Yeah always seal with clear after
Has all the metal worked just been tumbled and polished on a grinder or have you had it plated ?
CHeers Kev
CHeers Kev
That looks an expensive list of new bits!!! was everything that bad ?? a new 'Start' switch!!!!! Looks over £150 ???
Very interested to see how you LED this looks like inserts and flashers only ?? no GI ?
Who do you use for your parts Rudi and where did you get the silicone bands ?
Cheers Kev
Very interested to see how you LED this looks like inserts and flashers only ?? no GI ?
Who do you use for your parts Rudi and where did you get the silicone bands ?
Cheers Kev
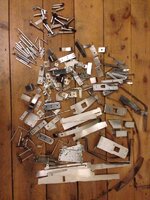
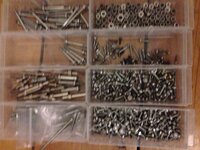
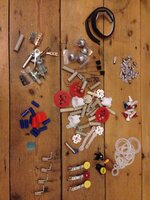
Nice work. When you rebuild how do you know which similar screw, post, bolt etc goes where?Shiny bits....
Nice work. When you rebuild how do you know which similar screw, post, bolt etc goes where?
I've taken pics of each area then pics of that area disassembled but no doubt I'll still struggle lol
If you get stuck Rudi I have one still in one piece at the moment!!!I've taken pics of each area then pics of that area disassembled but no doubt I'll still struggle lol
Cheers Kev
Rudi did you see my previous posts ?

