Pinball info
You are using an out of date browser. It may not display this or other websites correctly.
You should upgrade or use an alternative browser.
You should upgrade or use an alternative browser.
Complete The Addams Family(s) Restoration
- Thread starter Ant-H
- Start date
Most of the jobs I’ve got done over the last week or so have been those little fiddly wiring/soldering jobs.
First up was to get the chairs back on the playfields. As I powder coated the mounting bracket on mine and re-plated the one on the other, I had to refit the lamp sockets.
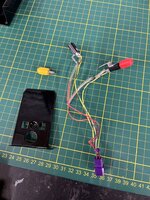
These had to be riveted back in place. But before doing so, I filed the front plastic edges down of each lamp holder so that it would be easier to slide the chair over the top of the bracket.
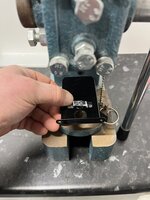
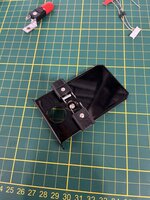
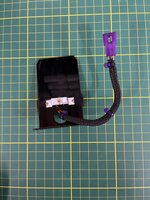
I asked @RudeDogg1 to paint the chair on my game and again he did another great job. I have since given it a coat of gloss lacquer.
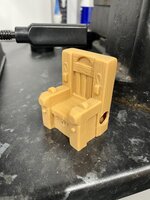
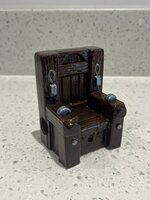
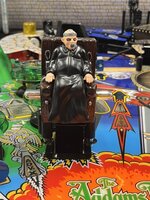
When it came to the Festor mod, I wanted something slightly different on my game. There seems to be 2 different versions available, but I managed to find another which I’m really pleased with.
The model was made in a clear resin then hand painted so that the bulb is the only thing that lights up. He also fits the chair perfectly and looks a-bit more like Uncle Festor from the films imo.
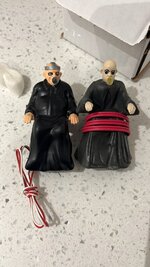
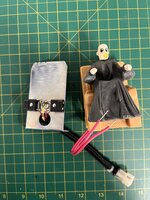
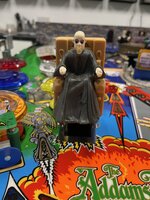
I’ve used coloured lens leds from comet for the chair and bookcase on the other game, and for mine I wanted something that would go more with the darker look I’m going for.
So I found these cool glass leds that look like incandescent bulbs.
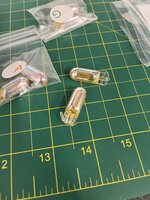
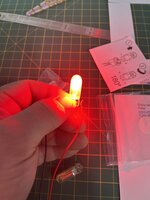
They all look the same. However when powered, they light in a particular colour. I’ve gone red, yellow and green, so that they match the correct colours for the game.
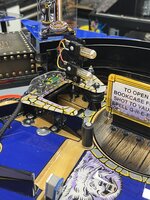
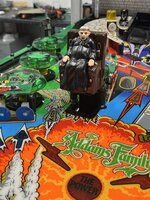
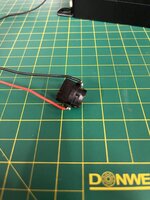
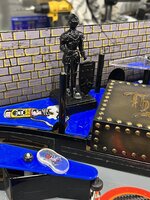
Next up I tackled a couple of mods. One being the train and the other the suit of armour. These particular mods are readily available to purchase online, however the prices range from $50 to $150 plus in some places, plus shipping to the UK on top
 .
.
The crazy thing is, they are just pencil sharpeners that have been modded to take an led. So I thought I’d make my own and save some money.
I managed to find exactly the same items at a fraction of the cost.
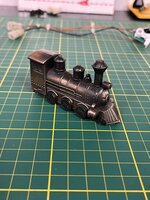
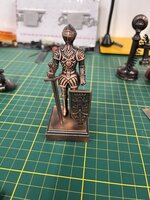
First thing I did was to remove the actual pencil sharper and drill a hole for the leds.
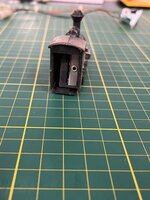
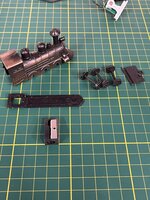
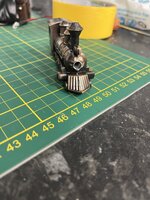
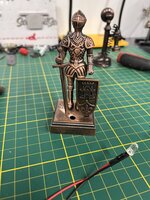
I had to also come up with a way to mount each one as well. The train was simple enough as it has a base that I could glue a t-nut to. The armour however was hollow underneath. So I filled it with a metal resin and whilst still drying, I sunk and t-nut into it. Once dry I used my Dremel to create a groove so that the wire for the led could be completely hidden.
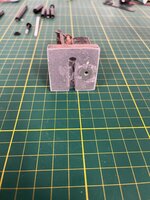
The suit of armour mod that you can buy online has usually been painted silver, but there was only one colour my one was going
I ended up painting the train to match as well.
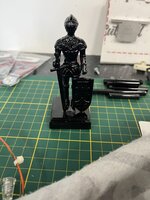
Once dry, I simply added the leds and mounted them in place.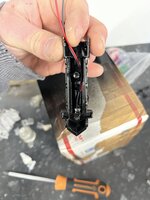
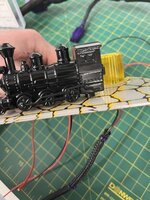
I wired the led for the suit of armour directly to a GI bulb so that it’s on all the time.
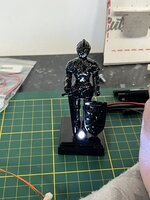 However for the train mod, I wanted that to only to light up when the train jackpot insert is lite, so I soldered the wires to the lamp socket for that particular insert.
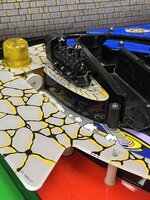
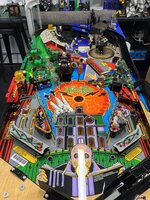
Overall I’m really pleased with how they both came out and the fact that I didn’t have to spend £70+ each for them.
First up was to get the chairs back on the playfields. As I powder coated the mounting bracket on mine and re-plated the one on the other, I had to refit the lamp sockets.

These had to be riveted back in place. But before doing so, I filed the front plastic edges down of each lamp holder so that it would be easier to slide the chair over the top of the bracket.


I asked @RudeDogg1 to paint the chair on my game and again he did another great job. I have since given it a coat of gloss lacquer.


When it came to the Festor mod, I wanted something slightly different on my game. There seems to be 2 different versions available, but I managed to find another which I’m really pleased with.
The model was made in a clear resin then hand painted so that the bulb is the only thing that lights up. He also fits the chair perfectly and looks a-bit more like Uncle Festor from the films imo.


I’ve used coloured lens leds from comet for the chair and bookcase on the other game, and for mine I wanted something that would go more with the darker look I’m going for.
So I found these cool glass leds that look like incandescent bulbs.

They all look the same. However when powered, they light in a particular colour. I’ve gone red, yellow and green, so that they match the correct colours for the game.


Next up I tackled a couple of mods. One being the train and the other the suit of armour. These particular mods are readily available to purchase online, however the prices range from $50 to $150 plus in some places, plus shipping to the UK on top
The crazy thing is, they are just pencil sharpeners that have been modded to take an led. So I thought I’d make my own and save some money.
I managed to find exactly the same items at a fraction of the cost.


First thing I did was to remove the actual pencil sharper and drill a hole for the leds.


I had to also come up with a way to mount each one as well. The train was simple enough as it has a base that I could glue a t-nut to. The armour however was hollow underneath. So I filled it with a metal resin and whilst still drying, I sunk and t-nut into it. Once dry I used my Dremel to create a groove so that the wire for the led could be completely hidden.

The suit of armour mod that you can buy online has usually been painted silver, but there was only one colour my one was going
I ended up painting the train to match as well.

Once dry, I simply added the leds and mounted them in place.


I wired the led for the suit of armour directly to a GI bulb so that it’s on all the time.
 However for the train mod, I wanted that to only to light up when the train jackpot insert is lite, so I soldered the wires to the lamp socket for that particular insert.


Overall I’m really pleased with how they both came out and the fact that I didn’t have to spend £70+ each for them.
Last edited:
I did actually gloss the chair then did a coat of Matt because most people want Matt 
I’ve had a couple of messages asking if I have the phone mod as well.
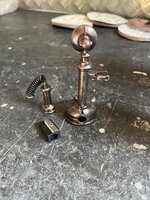
Yes I did get the phone, which is another pencil sharpener and is exactly the same as the ones you can buy online.
I modded it to fit but decided not to install it in the end.
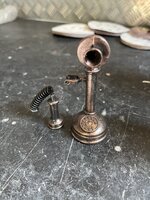
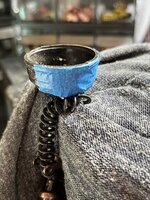
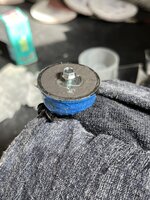
It was basically the same process as the suit of armour. I removed the actual sharpener, filled the base with a metal epoxy and sank in t-nut whilst it was still setting. Then gave the base a light sand to level it off.
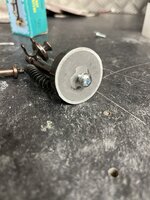
Yes I did get the phone, which is another pencil sharpener and is exactly the same as the ones you can buy online.
I modded it to fit but decided not to install it in the end.

It was basically the same process as the suit of armour. I removed the actual sharpener, filled the base with a metal epoxy and sank in t-nut whilst it was still setting. Then gave the base a light sand to level it off.


I managed to cross off a few more of those little jobs from the list this week.
First job was to fit some new stainless steel ramp flaps to the shooter lane ramp as well as the Thing ramp.
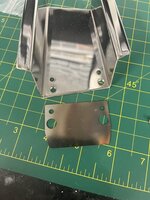
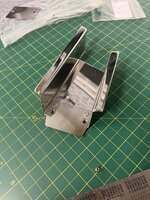
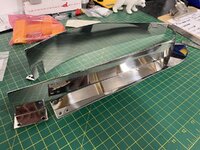
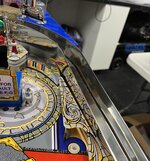
I managed to find the same tape that was used on my original playfield when installing ramps. Basically this is used as a soft “spacer” between the ramp flaps and the PF.
I didn’t need to use this on the Kruzman playfield due to the extra thickness in the clear coat that he apples.
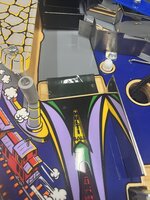
When it came to the flipper bats on my playfield, I obviously wanted to use black which I thought would be a simple job
However this wasn’t the case. I already had some spare black flipper, but for the life me, I couldn’t find anywhere in the world that sold black mini flipper bats.
So in the end my only option if I wanted matching black was to paint a set of standard flippers them myself.
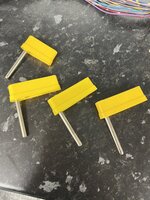
I gave everything a light sand and undercoated them with a plastic primer.
Once dry, I sanded them back ready for the top coat.
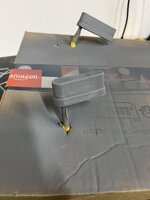
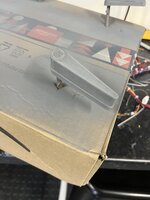
They all then received 3 coats of gloss black followed by 2 coats of clear.
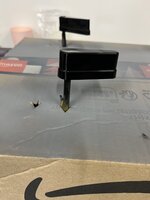
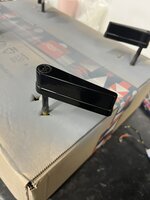
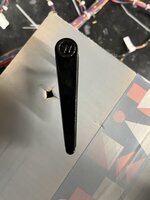
I’ve let them dry/harden all week but got them installed along with some titans last night.
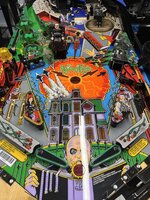
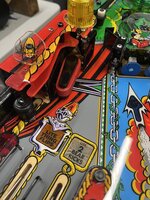
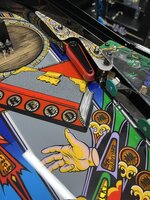
Im happy I stuck with the original plan for black flippers as I think they suit this playfield.
Plan for this weekend, is the lighting mod for the swamps, fit the flipper bats on the other playfield and restore/rebuild the back boxes.
First job was to fit some new stainless steel ramp flaps to the shooter lane ramp as well as the Thing ramp.


I managed to find the same tape that was used on my original playfield when installing ramps. Basically this is used as a soft “spacer” between the ramp flaps and the PF.
I didn’t need to use this on the Kruzman playfield due to the extra thickness in the clear coat that he apples.

When it came to the flipper bats on my playfield, I obviously wanted to use black which I thought would be a simple job
However this wasn’t the case. I already had some spare black flipper, but for the life me, I couldn’t find anywhere in the world that sold black mini flipper bats.
So in the end my only option if I wanted matching black was to paint a set of standard flippers them myself.

I gave everything a light sand and undercoated them with a plastic primer.
Once dry, I sanded them back ready for the top coat.


They all then received 3 coats of gloss black followed by 2 coats of clear.


I’ve let them dry/harden all week but got them installed along with some titans last night.


Im happy I stuck with the original plan for black flippers as I think they suit this playfield.
Plan for this weekend, is the lighting mod for the swamps, fit the flipper bats on the other playfield and restore/rebuild the back boxes.
Last edited:
This past weekend I thought I’d get the last piece of both cabinets restored and back together. The actual back box was basically already finished so I just needed to refit all the boards.
Before doing this I re-flowed the solder for the connectors on all the boards. The main boards went in first along with a replacement FBI sticker.
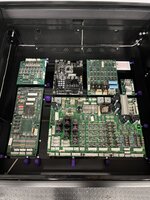
Next I fit the shaker motor board as well as the separate 12v/5v mod power board on the right hand side.
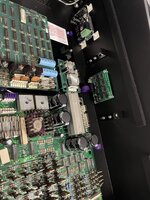
Whilst the back boxes were laying flat, I thought it would be easier to re-fit the flasher lamp boards for the toppers. I did neaten up the wiring so it wasn’t hanging down excessively.
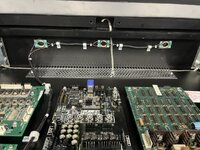
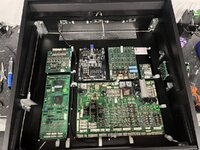
Once both were done, I cracked on with restoring the back box lamp boards. Both were covered in soot and general dirt both on the front and back.
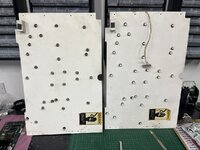
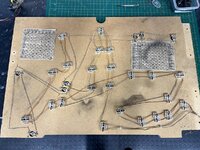
First thing to come off were the lamp holders and wiring.
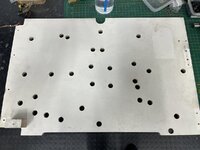
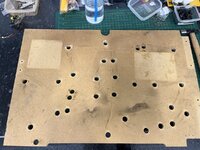
I sanded both sides down and then masked up the holes on the front so that I could clear coat the backs of them. I ended up spending quite of bit of time sanding the backs in order to remove the ground in dirt from the mdf.
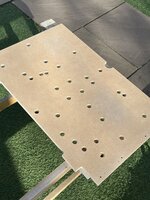
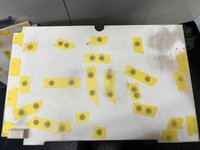
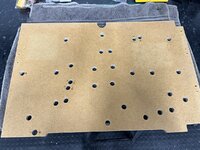
Once the clear coat was dry, I masked up the holes again and primed the fronts of both boards followed by 2 coats of Matt white.
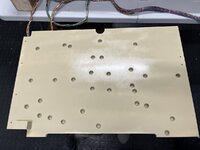
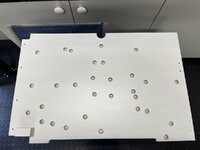
The bulb sockets for both games were cleaned in the ultra sonic and like all the other plastic parts on my TAF, they had a quick dip in the purple dye .
.
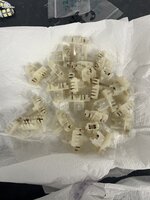
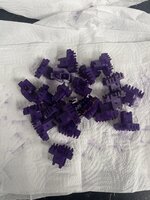
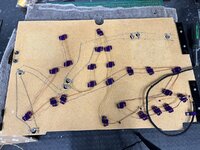
The wiring harness was also cleaned before being fitted back to the boards.
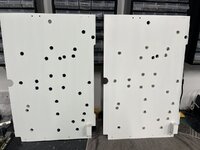
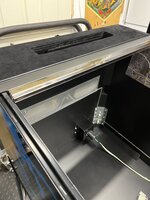
Last job was to fit the hinges and latches as well as replacement decals to both the front and rear along with cool white comet leds.
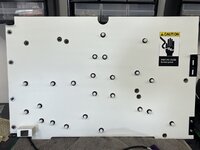
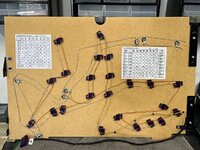
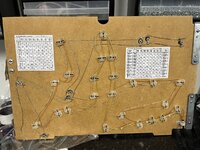
I also installed the back box hinges as well as metal rear glass slides and new latches on both games. I decided to fit a new coin door on my game as well. The coin door for the other game needs to be restored before it can go back on.
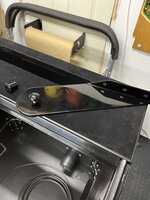
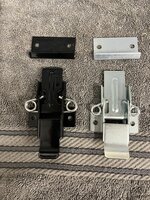
Final job to cross off the list was to get them both fitted back to the cabinets.
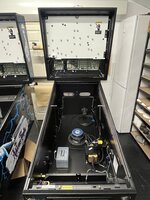
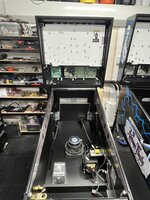
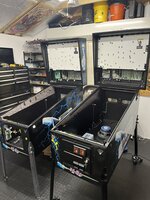
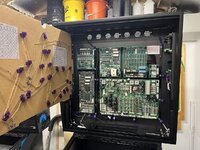
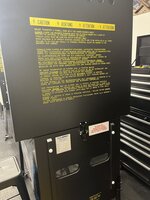
I think I’ll fit the toppers and both cabinet harnesses next. I’m also going to upgrade the flipper switches on my game from the standard leaf switches to opto boards.
Before doing this I re-flowed the solder for the connectors on all the boards. The main boards went in first along with a replacement FBI sticker.

Next I fit the shaker motor board as well as the separate 12v/5v mod power board on the right hand side.

Whilst the back boxes were laying flat, I thought it would be easier to re-fit the flasher lamp boards for the toppers. I did neaten up the wiring so it wasn’t hanging down excessively.


Once both were done, I cracked on with restoring the back box lamp boards. Both were covered in soot and general dirt both on the front and back.


First thing to come off were the lamp holders and wiring.


I sanded both sides down and then masked up the holes on the front so that I could clear coat the backs of them. I ended up spending quite of bit of time sanding the backs in order to remove the ground in dirt from the mdf.


Once the clear coat was dry, I masked up the holes again and primed the fronts of both boards followed by 2 coats of Matt white.


The bulb sockets for both games were cleaned in the ultra sonic and like all the other plastic parts on my TAF, they had a quick dip in the purple dye


The wiring harness was also cleaned before being fitted back to the boards.


Last job was to fit the hinges and latches as well as replacement decals to both the front and rear along with cool white comet leds.


I also installed the back box hinges as well as metal rear glass slides and new latches on both games. I decided to fit a new coin door on my game as well. The coin door for the other game needs to be restored before it can go back on.


Final job to cross off the list was to get them both fitted back to the cabinets.


I think I’ll fit the toppers and both cabinet harnesses next. I’m also going to upgrade the flipper switches on my game from the standard leaf switches to opto boards.
Last edited:
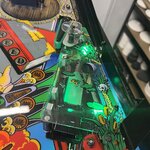
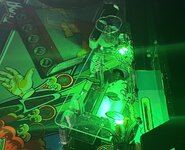
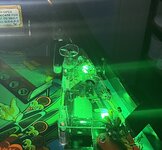
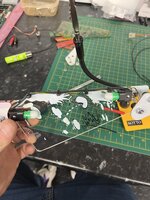
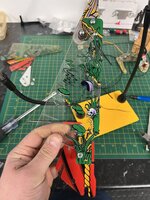
I wanted to add a little bit more light to swamp as I feel it’s quite a large plastic with no real lighting to make it stand out. But I also didn’t want the bulb on show.
The swamp plastic set that I removed did seem to have a light mod added at some point in its life. My plan was to add 2 green 2Smd leds so that it should really light the area nicely.
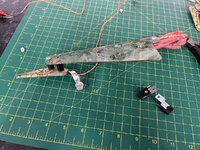
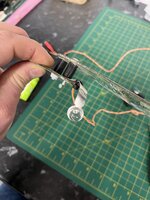
The first lamp socket to fit was pretty simple to do. I just added a black spacer to raise the top plastic up enough to clear the lamp holder.
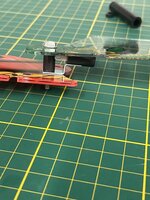
For the opposite end of the plastic I drilled an additional hole and riveted another lamp socket in place.
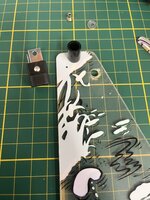
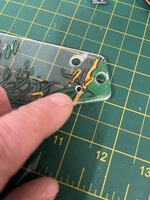
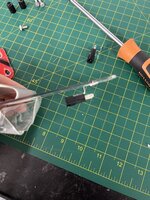
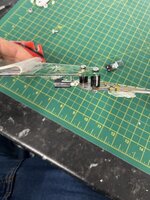
Once the lamp sockets were in place I could wire them up.
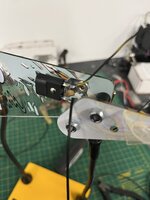
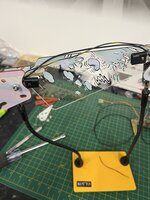
To tidy the wiring up, I drilled 4 small holes on the side of the plastic and cable tied it along the edge.
Im happy with how it turned out as the bulbs don’t really stand out which is what I was aiming for. So I replicated the mod on the other game as well
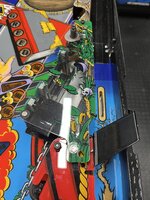
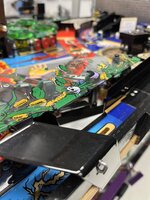
The swamp plastic set that I removed did seem to have a light mod added at some point in its life. My plan was to add 2 green 2Smd leds so that it should really light the area nicely.


The first lamp socket to fit was pretty simple to do. I just added a black spacer to raise the top plastic up enough to clear the lamp holder.

For the opposite end of the plastic I drilled an additional hole and riveted another lamp socket in place.


Once the lamp sockets were in place I could wire them up.


To tidy the wiring up, I drilled 4 small holes on the side of the plastic and cable tied it along the edge.


Im happy with how it turned out as the bulbs don’t really stand out which is what I was aiming for. So I replicated the mod on the other game as well


Eagerly awaits a pic of it lit 
Simply awesome Ant!!!
I did hook them up to a battery to see what it looked like but forgot to take a photo. It did look Petey good though. Definitely a lot brighter.Eagerly awaits a pic of it lit
I’ll refit it over the weekend and get a photo
Thanks Phil.@Ant-H - I wish you would just do the job properly instead of cutting corners
Great job - said it before and no doubt I will say it again.
Do you have any idea of man hours these two TAF's owe you?
I did make a point this time around of making a note of the hours I was spending on each game, but I admit, I have forgotten to tally it up for the last couple of weeks.
I usually work on them from 6pm to 8pm weeknights and and roughly 10am to 7pm at the weekends.
When Im back home tomorrow I’ll add it up and let you know.
Cheers mate. I can see the light at the end of the tunnel now with these projectsSimply awesome Ant!!!
I’ve been working on a lighting mod the toppers this evening. They are really starting to take shape now.
Preemptive yoik.
May do this to mine
May do this to mine
Two more jobs have now been crossed off the list 
The first was to do a conversion to the flipper switches. As standard, TAF has leaf switches for the flippers, similar to T2 and I think HS2.
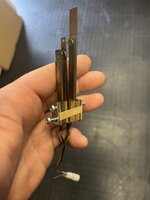
I believe on an TAFG, the updated Rom that was used aloud them to use the newer opto boards to activate the flippers.
Personally I like the instant activation that the opto switches give and as I’m running the gold roms in my game, I thought I’d try the conversion out.
First thing I did was to purchase the parts that I’d needed for the conversion.
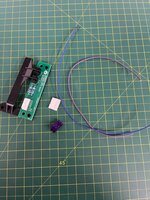
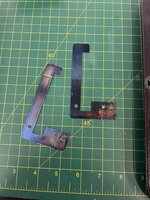
Frustratingly the metal parts arrived quite rusty, so I gave them a light sand and had them powder coated gloss black
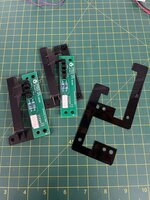
 Next, I needed to get power and ground to them. So I pulled the 12v & ground from the coin door interface board by adding a small connector.
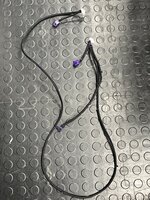
I also needed to make a new harness so that the right opto board could also get power and ground from the one on the left.
The switch signals use the same connectors as the leaf switches, so I just plugged everything back in.
I’ll test them out once I get the playfield hooked up, but I’m pretty confident they should work. Plus I won’t have to mess about about trying to synchronise both flippers to activate at the same time.
Second job crossed off was to install both toppers along with a lighting mod. I really should have done this before I fitted the back boxes as in the end, I removed them again to make it easier.
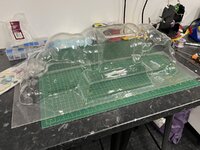
There seems to be 3 different toppers available, clear, smoked and solid black. I went with clear on both games to help with the lighting mods.
Once I applied the decals I compared one to a smoked topper
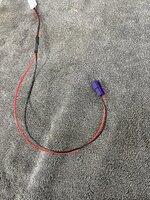
For the actual lighting, ive gone with lights that have different setting but in order to fit it the way I wanted, I had to cut it up and re-solder it back together.
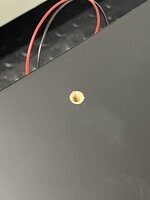
I didn’t want the wires to be seen so I made a small hole in the top of the back box.
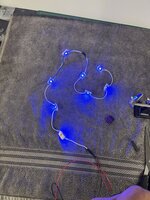
I did a quick test to make sure it still worked
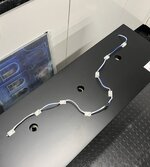
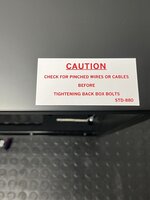
I then fitted them in place along with a new caution decal. They will be powered from a separate power supply board which I fitted inside the back box.
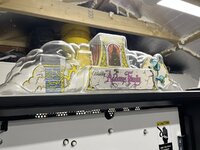
When I fitted the toppers back and tested the lighting, I was a little disappointed as too much of the light was being lost through the plastic of the topper. Plus I’ve never really been keen on the way the cloud is basically see through.
I remember my wife showing me some videos on YouTube last year, of people who create a thunder storm lighting effect in a room or above a dinning table by basically sticking leds strips on the ceiling and then covering them with white stuffing to create the storm cloud effect, which did look pretty good.
So I thought I could use the same concept with the toppers and used some stuffing inside then to make it look more like an actual cloud as well as hopefully hold the light in. I made a plastic box/cover that I placed inside to cover the lights and to create a void. The stuffing then went on top.
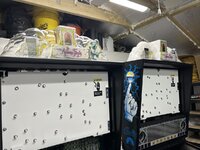
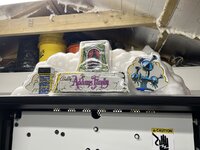
The difference was huge. The whole of the topper now glow up with blue light and pulsate slowly to mimic a storm. I’m hoping the 9smd flashers will also add to the effect when they get activated during multiball.

Next couple of jobs I want to tackle is to re-build the plastic ramps and wire forms, install some lighting boards and then start to plug everything back in and run some tests
The first was to do a conversion to the flipper switches. As standard, TAF has leaf switches for the flippers, similar to T2 and I think HS2.

I believe on an TAFG, the updated Rom that was used aloud them to use the newer opto boards to activate the flippers.
Personally I like the instant activation that the opto switches give and as I’m running the gold roms in my game, I thought I’d try the conversion out.
First thing I did was to purchase the parts that I’d needed for the conversion.

Frustratingly the metal parts arrived quite rusty, so I gave them a light sand and had them powder coated gloss black


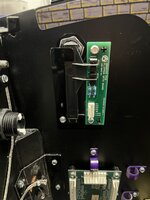
 Next, I needed to get power and ground to them. So I pulled the 12v & ground from the coin door interface board by adding a small connector.


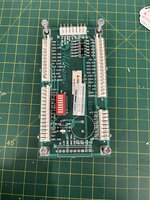
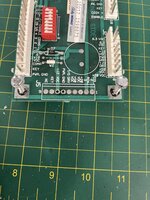
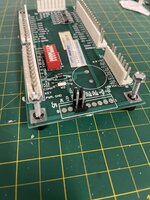
I also needed to make a new harness so that the right opto board could also get power and ground from the one on the left.

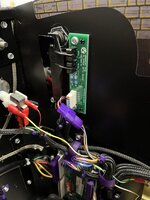
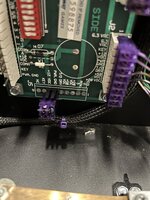
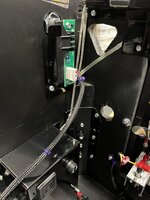
The switch signals use the same connectors as the leaf switches, so I just plugged everything back in.


I’ll test them out once I get the playfield hooked up, but I’m pretty confident they should work. Plus I won’t have to mess about about trying to synchronise both flippers to activate at the same time.
Second job crossed off was to install both toppers along with a lighting mod. I really should have done this before I fitted the back boxes as in the end, I removed them again to make it easier.
There seems to be 3 different toppers available, clear, smoked and solid black. I went with clear on both games to help with the lighting mods.

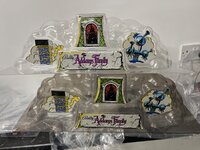
Once I applied the decals I compared one to a smoked topper

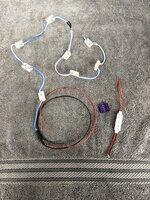
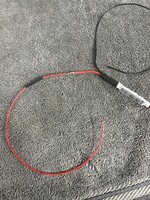
For the actual lighting, ive gone with lights that have different setting but in order to fit it the way I wanted, I had to cut it up and re-solder it back together.


I didn’t want the wires to be seen so I made a small hole in the top of the back box.

I did a quick test to make sure it still worked

I then fitted them in place along with a new caution decal. They will be powered from a separate power supply board which I fitted inside the back box.


When I fitted the toppers back and tested the lighting, I was a little disappointed as too much of the light was being lost through the plastic of the topper. Plus I’ve never really been keen on the way the cloud is basically see through.

I remember my wife showing me some videos on YouTube last year, of people who create a thunder storm lighting effect in a room or above a dinning table by basically sticking leds strips on the ceiling and then covering them with white stuffing to create the storm cloud effect, which did look pretty good.
So I thought I could use the same concept with the toppers and used some stuffing inside then to make it look more like an actual cloud as well as hopefully hold the light in. I made a plastic box/cover that I placed inside to cover the lights and to create a void. The stuffing then went on top.


The difference was huge. The whole of the topper now glow up with blue light and pulsate slowly to mimic a storm. I’m hoping the 9smd flashers will also add to the effect when they get activated during multiball.

Next couple of jobs I want to tackle is to re-build the plastic ramps and wire forms, install some lighting boards and then start to plug everything back in and run some tests
Last edited:
You've nailed it really shows the lights up this restoration is excellent.Two more jobs have now been crossed off the list
The first was to do a conversion to the flipper switches. As standard, TAF has leaf switches for the flippers, similar to T2 and I think HS2.
View attachment 198516
I believe on an TAFG, the updated Rom that was used aloud them to use the newer opto boards to activate the flippers.
Personally I like the instant activation that the opto switches give and as I’m running the gold roms in my game, I thought I’d try the conversion out.
First thing I did was to purchase the parts that I’d needed for the conversion.
View attachment 198487
Frustratingly the metal parts arrived quite rusty, so I gave them a light sand and had them powder coated gloss black
View attachment 198501
View attachment 198485View attachment 198488Next, I needed to get power and ground to them. So I pulled the 12v & ground from the coin door interface board by adding a small connector.
View attachment 198481View attachment 198482View attachment 198484
I also needed to make a new harness so that the right opto board could also get power and ground from the one on the left.
View attachment 198517
The switch signals use the same connectors as the leaf switches, so I just plugged everything back in.
View attachment 198490View attachment 198491View attachment 198496
I’ll test them out once I get the playfield hooked up, but I’m pretty confident they should work. Plus I won’t have to mess about about trying to synchronise both flippers to activate at the same time.
Second job crossed off was to install both toppers along with a lighting mod. I really should have done this before I fitted the back boxes as in the end, I removed them again to make it easier.
There seems to be 3 different toppers available, clear, smoked and solid black. I went with clear on both games to help with the lighting mods.
View attachment 198502
Once I applied the decals I compared one to a smoked topper
View attachment 198503
For the actual lighting, ive gone with lights that have different setting but in order to fit it the way I wanted, I had to cut it up and re-solder it back together.
View attachment 198495View attachment 198497View attachment 198499
I didn’t want the wires to be seen so I made a small hole in the top of the back box.
View attachment 198494
I did a quick test to make sure it still worked
View attachment 198500
I then fitted them in place along with a new caution decal. They will be powered from a separate power supply board which I fitted inside the back box.
View attachment 198507View attachment 198493
When I fitted the toppers back and tested the lighting, I was a little disappointed as too much of the light was being lost through the plastic of the topper. Plus I’ve never really been keen on the way the cloud is basically see through.
View attachment 198504
I remember my wife showing me some videos on YouTube last year, of people who create a thunder storm lighting effect in a room or above a dinning table by basically sticking leds strips on the ceiling and then covering them with white stuffing to create the storm cloud effect, which did look pretty good.
So I thought I could use the same concept with the toppers and used some stuffing inside then to make it look more like an actual cloud as well as hopefully hold the light in. I made a plastic box/cover that I placed inside to cover the lights and to create a void. The stuffing then went on top.
View attachment 198506
View attachment 198505
The difference was huge. The whole of the topper now glow up with blue light and pulsate slowly to mimic a storm. I’m hoping the 9smd flashers will also add to the effect when they get activated during multiball.
View attachment 198519
Next couple of jobs I want to tackle is to re-build the plastic ramps and wire forms, install some lighting boards and then start to plug everything back in and run some tests
Top notch pal better than newTwo more jobs have now been crossed off the list
The first was to do a conversion to the flipper switches. As standard, TAF has leaf switches for the flippers, similar to T2 and I think HS2.
View attachment 198516
I believe on an TAFG, the updated Rom that was used aloud them to use the newer opto boards to activate the flippers.
Personally I like the instant activation that the opto switches give and as I’m running the gold roms in my game, I thought I’d try the conversion out.
First thing I did was to purchase the parts that I’d needed for the conversion.
View attachment 198487
Frustratingly the metal parts arrived quite rusty, so I gave them a light sand and had them powder coated gloss black
View attachment 198501
View attachment 198485View attachment 198488Next, I needed to get power and ground to them. So I pulled the 12v & ground from the coin door interface board by adding a small connector.
View attachment 198481View attachment 198482View attachment 198484
I also needed to make a new harness so that the right opto board could also get power and ground from the one on the left.
View attachment 198517
The switch signals use the same connectors as the leaf switches, so I just plugged everything back in.
View attachment 198490View attachment 198491View attachment 198496
I’ll test them out once I get the playfield hooked up, but I’m pretty confident they should work. Plus I won’t have to mess about about trying to synchronise both flippers to activate at the same time.
Second job crossed off was to install both toppers along with a lighting mod. I really should have done this before I fitted the back boxes as in the end, I removed them again to make it easier.
There seems to be 3 different toppers available, clear, smoked and solid black. I went with clear on both games to help with the lighting mods.
View attachment 198502
Once I applied the decals I compared one to a smoked topper
View attachment 198503
For the actual lighting, ive gone with lights that have different setting but in order to fit it the way I wanted, I had to cut it up and re-solder it back together.
View attachment 198495View attachment 198497View attachment 198499
I didn’t want the wires to be seen so I made a small hole in the top of the back box.
View attachment 198494
I did a quick test to make sure it still worked
View attachment 198500
I then fitted them in place along with a new caution decal. They will be powered from a separate power supply board which I fitted inside the back box.
View attachment 198507View attachment 198493
When I fitted the toppers back and tested the lighting, I was a little disappointed as too much of the light was being lost through the plastic of the topper. Plus I’ve never really been keen on the way the cloud is basically see through.
View attachment 198504
I remember my wife showing me some videos on YouTube last year, of people who create a thunder storm lighting effect in a room or above a dinning table by basically sticking leds strips on the ceiling and then covering them with white stuffing to create the storm cloud effect, which did look pretty good.
So I thought I could use the same concept with the toppers and used some stuffing inside then to make it look more like an actual cloud as well as hopefully hold the light in. I made a plastic box/cover that I placed inside to cover the lights and to create a void. The stuffing then went on top.
View attachment 198506
View attachment 198505
The difference was huge. The whole of the topper now glow up with blue light and pulsate slowly to mimic a storm. I’m hoping the 9smd flashers will also add to the effect when they get activated during multiball.
View attachment 198519
Next couple of jobs I want to tackle is to re-build the plastic ramps and wire forms, install some lighting boards and then start to plug everything back in and run some tests
much of the light was being lost through the plastic of the topper
When Addams was first launched, and before I'd seen it, the rep from a competing larger operator described the topper as "projecting spiders onto the ceiling"
Last edited:
That’s an interesting idea. Shame they never really went with the concept.When Addams was first launched, the rep from a competitor described the topper as "projecting spiders onto the ceiling"
Thanks mate. I’m hoping to have both restorations fully complete within the next couple of weeksYou've nailed it really shows the lights up this restoration is excellent.
I went away over the bank holiday weekend, but got quite a bit more work done on both games.
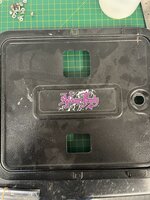
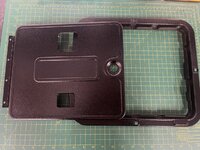
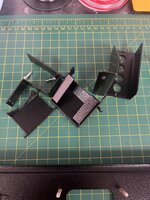
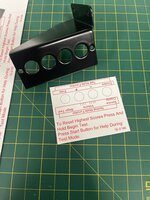
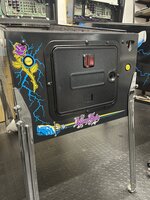
Firstly I rebuilt the coin door after getting it powder coated in the same hammered finish.
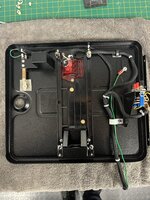
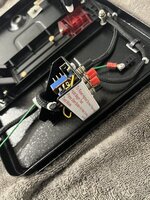
Next up I wired up the power and the light for the extra ball button.
Powering the button was pretty straight forward. The easiest way is to connect one wire from the white-brown side of the 'Slam Tilt' on the coin door to one side of the extra ball switch.
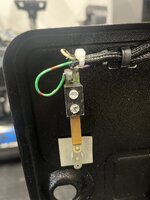
The other wire goes directly from the green-brown side of the 'Plumb Bob Tilt' to other side of the switch.
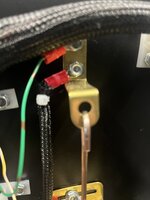
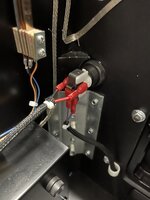
Lighting the button was a bit more involved as you have run 2 wires all the way upto the back box. One goes to J134-1 and the other to J138-4.
The last major job I needed to do on the playfields was to rebuild and install the new ramps.
The old ramps had clearly seen better days.
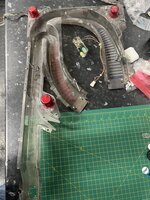
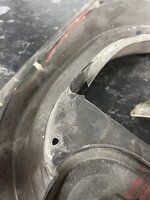
Personally, I prefer the clear ramps to the original smoked versions as they help light up the back of the playfield which I think this game needs.
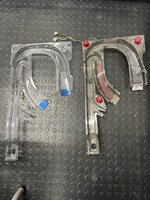
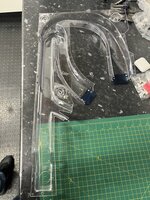
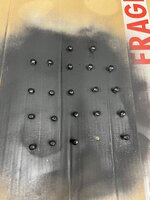
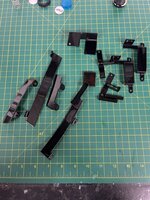
The decals were the first thing to go on. I also decided to paint all the screws that would go on my ramp.
This was followed by powder coated ramp flaps and brackets for mine and stainless steel ramp flaps and mirror polished brackets for the other TAF.
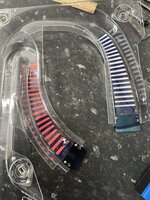
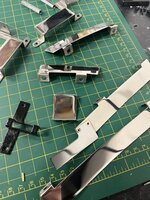
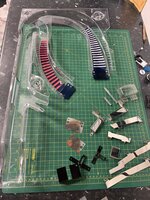
I fitted new switches to the harness and tried to install it so it wouldn’t stand out to much. I also found black switch covers, which were slightly too big, so I had to trim them slightly in order to fit them.
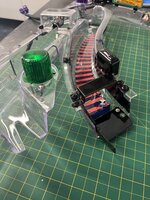
Overall I’m really happy with how they both came out.
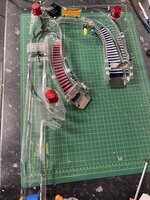
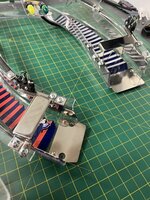
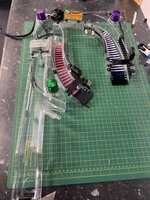
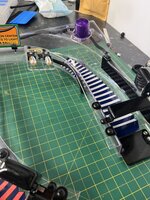
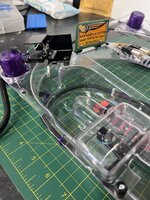
The last job to do was to install them both along with the wire forms.
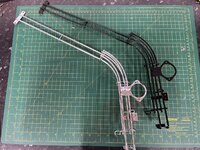
That’s basically the playfields complete. There a couple of mods I want to try, but I think the next stage will be to start plug it all back in and run some tests
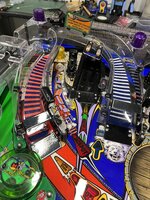
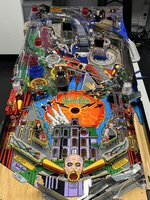
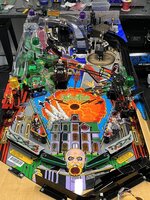
Firstly I rebuilt the coin door after getting it powder coated in the same hammered finish.


Next up I wired up the power and the light for the extra ball button.
Powering the button was pretty straight forward. The easiest way is to connect one wire from the white-brown side of the 'Slam Tilt' on the coin door to one side of the extra ball switch.

The other wire goes directly from the green-brown side of the 'Plumb Bob Tilt' to other side of the switch.


Lighting the button was a bit more involved as you have run 2 wires all the way upto the back box. One goes to J134-1 and the other to J138-4.
The last major job I needed to do on the playfields was to rebuild and install the new ramps.
The old ramps had clearly seen better days.


Personally, I prefer the clear ramps to the original smoked versions as they help light up the back of the playfield which I think this game needs.


The decals were the first thing to go on. I also decided to paint all the screws that would go on my ramp.

This was followed by powder coated ramp flaps and brackets for mine and stainless steel ramp flaps and mirror polished brackets for the other TAF.


I fitted new switches to the harness and tried to install it so it wouldn’t stand out to much. I also found black switch covers, which were slightly too big, so I had to trim them slightly in order to fit them.

Overall I’m really happy with how they both came out.


The last job to do was to install them both along with the wire forms.

That’s basically the playfields complete. There a couple of mods I want to try, but I think the next stage will be to start plug it all back in and run some tests


Roll on the smoke test, good luckI went away over the bank holiday weekend, but got quite a bit more work done on both games.
Firstly I rebuilt the coin door after getting it powder coated in the same hammered finish.
View attachment 199343
View attachment 199344
View attachment 199351
View attachment 199345View attachment 199346View attachment 199347View attachment 199348
Next up I wired up the power and the light for the extra ball button.
Powering the button was pretty straight forward. The easiest way is to connect one wire from the white-brown side of the 'Slam Tilt' on the coin door to one side of the extra ball switch.
View attachment 199349
The other wire goes directly from the green-brown side of the 'Plumb Bob Tilt' to other side of the switch.
View attachment 199350
View attachment 199355
Lighting the button was a bit more involved as you have run 2 wires all the way upto the back box. One goes to J134-1 and the other to J138-4.
The last major job I needed to do on the playfields was to rebuild and install the new ramps.
The old ramps had clearly seen better days.
View attachment 199357View attachment 199358
Personally, I prefer the clear ramps to the original smoked versions as they help light up the back of the playfield which I think this game needs.
View attachment 199356
View attachment 199359
The decals were the first thing to go on. I also decided to paint all the screws that would go on my ramp.
View attachment 199361
This was followed by powder coated ramp flaps and brackets for mine and stainless steel ramp flaps and mirror polished brackets for the other TAF.
View attachment 199360
View attachment 199363View attachment 199368
View attachment 199367
I fitted new switches to the harness and tried to install it so it wouldn’t stand out to much. I also found black switch covers, which were slightly too big, so I had to trim them slightly in order to fit them.
View attachment 199362
Overall I’m really happy with how they both came out.
View attachment 199369View attachment 199371
View attachment 199364View attachment 199365View attachment 199366
The last job to do was to install them both along with the wire forms.
View attachment 199373
That’s basically the playfields complete. There a couple of mods I want to try, but I think the next stage will be to start plug it all back in and run some tests
View attachment 199372View attachment 199375View attachment 199374
Still totally insane Ant but f***king awesome!!!!
Roll on the smoke test, good luck
I’m going to start plugging stuff back in this weekend. I’ll start with the cabinet then the playfields. Hopefully I remembered to solder all the diodes the right way
Still totally insane Ant but f***king awesome!!!!
Thanks mate. I’m nearly there with both of them now. Most outstanding jobs are pretty straight forward.
But I was looking at the Pinstadium mod in my game and I think I’ll have to make some small adjustments to the cabinet in order to completely hide the wiring for the light bars.
The original idea I had in my head was to not have them stand out when looking down onto the playfield.
Will one of these make it to pinfest this year mate ??Thanks mate. I’m nearly there with both of them now. Most outstanding jobs are pretty straight forward.
But I was looking at the Pinstadium mod in my game and I think I’ll have to make some small adjustments to the cabinet in order to completely hide the wiring for the light bars.
The original idea I had in my head was to not have them stand out when looking down onto the playfield.
Cheers
Kev

