What's new
Pinball info

Register a free account today to become a member! Once signed in, you'll be able to participate on this site by adding your own topics and posts, as well as connect with other members through your own private inbox!

In Progress Adventures in Budget Restoration: 1978 Bally PARAGON

I'll swap em for yours and a pf overlay ;)
And maybe I ought to throw a bit of cash your way too:oops:
Well, I'm about to get back in contact with @ABSOLUTE CONTROL (Hi Jim, I haven't forgotten you!) to get the ball rolling on the final overlay. Think I mentioned it before but Jim said the vinyl is wide enough that he'd be able to print 2 anyway as he charges by length irrespective of width of the printed content.

Just don't hold you breath... I'm not exactly rushing on this project ;)
 
July 2014
DROP-TARGET REBUILD

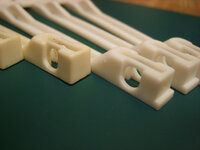
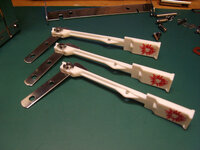
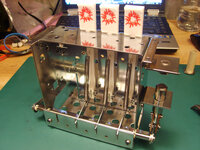
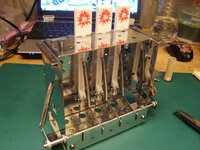
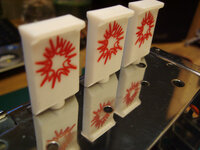
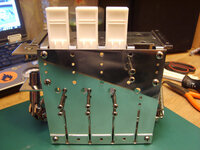
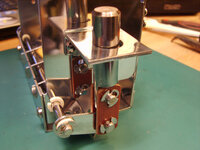
So after my little tease earlier I managed to spend a couple of hours finishing up the polishing and putting the triple drop-target bank back together. @ronsplooter you'll be pleased to know I broke out the new reproduction drop-targets from Classics Arcades Inc. They don't look too bad out of the packet but I'm a little upset because the ones @Gaz Shiells has are much better!
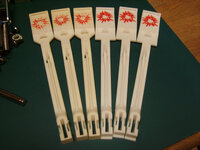
farm3.staticflickr.com_2914_14421736279_14af4233d0_c.jpg

farm4.staticflickr.com_3908_14421704298_fe7ed6f82c_c.jpg

I do think the hot stamping could have been better (original left, repro right):
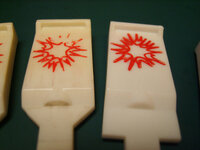
farm6.staticflickr.com_5528_14608309155_102ce453de_c.jpg

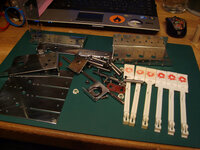
So, starting with a big pile of shiny bits:
farm6.staticflickr.com_5579_14421703558_cfcd412bcc_c.jpg

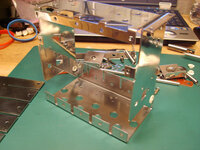
I first assembled the main chassis:

farm4.staticflickr.com_3881_14608308265_c1051ae707_c.jpg

farm4.staticflickr.com_3917_14421916187_0ea3522e4f_c.jpg

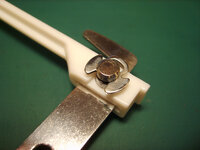
The attached the reset levers to the bottom of the drop-targets with the pins and E-clips:
farm6.staticflickr.com_5278_14421702698_b1220bdb26_c.jpg

farm3.staticflickr.com_2895_14585302636_821a89d1a9_c.jpg

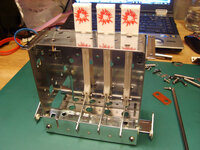
Drop-targets positioned into chassis in upright reset position with reset bar in place across the bottom of the chassis:
farm4.staticflickr.com_3922_14606288194_857d41f8fe_c.jpg

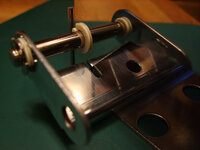
The narrow slot in the reset bar lines up with the end-plate. Shaft in position with nylon bearing and E-clip retainers:
farm4.staticflickr.com_3886_14585302246_f3788aa5fc_c.jpg

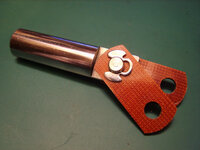
Polished plunger with fibre links fitted with pin and E-clips:
farm3.staticflickr.com_2906_14421701558_784a4ccd2d_c.jpg

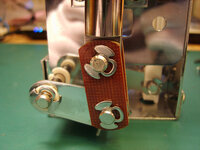
Plunger in place on the end of the reset bar with final retaining E-clip:
farm6.staticflickr.com_5476_14605065831_5771941462_c.jpg

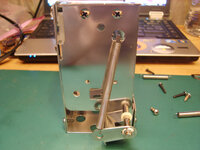
Tension spring in place on the other end of the reset bar:
farm4.staticflickr.com_3899_14585300986_815ed7e4cf_c.jpg

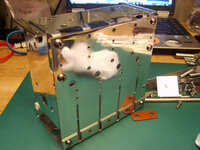
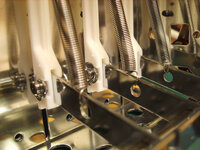
Tension springs pull each drop-target forward to just keep it latched on the top-plate:
farm6.staticflickr.com_5471_14421699278_3aa7d18a82_c.jpg

Job done!!!
farm4.staticflickr.com_3912_14608305875_30eeeb77a9_c.jpg

farm6.staticflickr.com_5520_14605064961_89de042871_c.jpg

farm3.staticflickr.com_2916_14421670720_0ee6c0cc82_c.jpg

farm4.staticflickr.com_3870_14421913607_941c2a315f_c.jpg

farm3.staticflickr.com_2895_14421699108_997b2d5eb7_c.jpg

PINPORN!!! :D
 
Does that mean he gets a ban ?
Please, Mr @Paul, Sir! Don't ban me! I'll be a good boy. No more PINSMUT, I promise!!! :oops:

Well... no more tonight. I haven't polished anything today ;)

Actually wondering what to do next? I like polishing things but going to need a whole heap of enthusiasm to tackle the bigger in-line drop-targets. Quite fancy doing a saucer kicker as they look needlessly complicated or maybe a nice simple slingshot mech? Although I did prime the backbox light board, so maybe I should actually finish it with satin white spray and refit the GI? Then there's the wiring loom the clean. And all the lamp holders to buff. Or the coils to clean, fit new diodes and print and fit new wrappers.

And of course there are at least 3 trillion leaf switches to completely strip, polish, burnish and re-assemble... :eek:

...which reminds me I still haven't found anywhere that sells fish paper...
 
July 2014
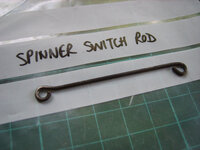
SPINNER SWITCH ROD

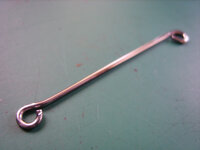
After much deliberation I've taken a massive step forward in the restoration process today. Behold! I have bringeth maximum reflectivity to the rod that connects from the crank on the spinner to the switch that registers each turn!

BEFORE:
farm4.staticflickr.com_3902_14598261856_2bfc4d6287_c.jpg

AFTER:
farm3.staticflickr.com_2916_14434875197_c92968ea40_c.jpg

You can tell I've had a boring day at work...
 
If you get stuck there's a Haunted House that I know of that needs a good polish... and then some...! ;)
I'll bring my polishing kit next time I come. Can't make next league meeting as it's my Mum's 60th birthday but will see if I can sneak a few Fridays past the missus :p
 
July 2014
SAUCER KICKERS

Okay, cracking on properly this time! Borrowed a real mains-powered 130W Dremel from my neighbour to try it out. Knew it would be better than my miniature hobby tool which has a transformer as the motor is 12V (I bought it for model railway stuff) but blimey! It's STONKING!

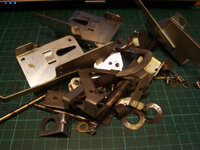
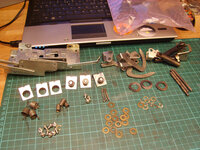
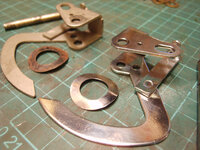
So, I've decided the next batch of mechanisms to attack are the saucer kickers; three of them. 2 right-handed and 1-left hand, or it could be 1 right-hand and two left-hand. Not sure. The parts are either so small or fiddly there's little to no chance of getting them anywhere near the bench polisher in a useful way, hence why I wanted to try the Dremel. Here's what I'm starting with:

farm4.staticflickr.com_3901_14477818259_fd3ab2a3b7_c.jpg

Sorting it out there are:
  • 3 x base plates
  • 3 x kicker arms
  • 3 x plungers with bracket fixed with split pin
  • 3 x coil brackets
  • 3 x coil end stops
  • 3 x large springs
  • 3 x small spring
  • 3 x split pins
  • 3 x sprung washers
  • 3 x shafts
  • 12 x machine screws with captive washers
  • 15 x brass washers
  • 9 x mini E-clips
farm6.staticflickr.com_5566_14684356313_5881d28f09_c.jpg

I had a go a removing the split pin from the plunger but those things aren't going anywhere without the use of lump hammer and then something's going to get broken for no good reason. The kickers themselves are very interesting mechanisms with an unusual looking double spring arrangement. Seemingly needlessly over-complicated. I'll try and find out why they are like they are?

It's getting late but here's a sample of what's been done so far, with unpolished parts for comparison:

farm3.staticflickr.com_2909_14664097872_f05bd365f0_c.jpg

Looks like it's been chrome plated but honest it's just buffing with green steel compound and 1-inch and 1/2-inch felt wheels!
 
I'd hazard a guess he doesn't have a tumbler. :)

I don't either - it's on the list of things I intend to pick up.
 
Yeah, I haven't got one :(

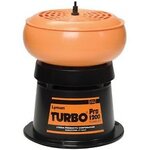
A mate has one I should borrow really, but first time I tried it on a random selection of junk parts I wasn't blown away. Screws are a no-no because the heads just got all clogged with rouge. Same for parts like lamp holders. Some bits were great and came up good, but the finish definitely not as good as detailed hand polishing.

I'd like to try the tumbler again but maybe with the coarser medium (walnut or corn?) and without the added compound/rouge just to get parts basically clean. I can then finish them off by hand because I really want a high-end "concours" finish ;)
 
To be fair the bits you've done by hand look really good - so at best the tumbler is just saving you some time.
 
Did you ever come across these two vids for a homemade tumbler & ultrasonic cleaner?


And that's my basic modus operandi! I've got plenty of time but not an endless supply of cash ;) Plus I find it quite enjoyable and therapeutic. I like inspecting each piece, seeing if it's any different from the others, looking for wear and how it fits into the whole mechanism. It's why I like model railways too. I should have been a mechanical engineer but a lifetime with computers led me to be a software engineer instead :D
 
Did you ever come across these two vids for a homemade tumbler & ultrasonic cleaner?


LOL! Excellent, but I smell spoof. In the tumbler vid he cut the long screws off with Swiss a Army Knife scissors! And he hammered in staples with a hammer but referred to them as "U-nails"!
 
Haha maybe. I just remember seeing it a few days ago and the talk of one reminded me.

The biggest points in the video I can say that I only really took notice of was that his flies were undone and he went for cat litter that looked like it had been used by a cat already.
 
LOL! Excellent, but I smell spoof. In the tumbler vid he cut the long screws off with Swiss a Army Knife scissors! And he hammered in staples with a hammer but referred to them as "U-nails"!

LOL, also note the parts at the end had been spray painted ;)
 
Thing is, the principle of what he's doing is reasonably sound.

Haha, I watched a few of his vids as they are all subtly funny, and I was reading the comments on one vid, and some guy was saying he'd been tuning in every week to see the progress he is making on the bike, and after watching 19 episodes, he just worked out it's a joke :rofl:

Personally I like the screwdrivers made from broom handles and duck tape
 
Okay, I've succumbed... picking up the tumbler tomorrow... :p I guess it'll be nice to take all the grunt out of the cleaning and just concentrate on the finishing polish.

I'm sure I read it somewhere on here (will have a search in a minute) but instead of spending loads on "proper" media can't you buy the stuff from pet shops? Is crushed corn used for chinchilla bedding or something like that?
 
Back
Top Bottom