Pinball info
You are using an out of date browser. It may not display this or other websites correctly.
You should upgrade or use an alternative browser.
You should upgrade or use an alternative browser.
In Progress Adventures in Budget Restoration: 1978 Bally PARAGON
- Thread starter Nedreud
- Start date
We were blinded by the shiney.
Actually Bally put them that way round from the factory.
It's later games where we worked out that the solder joints are more likely to break from the shock of the plunger hitting the end stop
Actually Bally put them that way round from the factory.
It's later games where we worked out that the solder joints are more likely to break from the shock of the plunger hitting the end stop
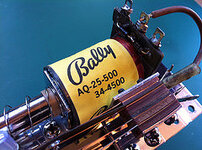
You know, I did wonder that because the short wire between coil and EOS (see picture) sits nicely where it is, but flipping the coil round so the lugs are away from the coil stop the wire seems a little stretched. It fits but seems awkward.We were blinded by the shiney.
Actually Bally put them that way round from the factory.
It's later games where we worked out that the solder joints are more likely to break from the shock of the plunger hitting the end stop
Awesome work ... So glad you bought the game!
When you're done I will be needing full details of the playfield overlay for an up and coming project.
Thank you! Hope you're keeping well? I realised I was stood next to you at UKPP on Sunday whilst playing that beautiful Zaccaria NAUTILUS EM with the perspex windows, but missed you when I'd finished. What a fantastic restoration and lovely game to play. Must have put on at least a dozen games and managed to clock the reels all the way past 1,000,000!Awesome work ... So glad you bought the game!
Was that your DEFENDER at the party?
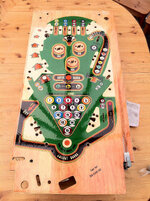
Quite a few people keen to know all the ins and outs of that little adventure. As you can see I'm making good progress getting all the mechanicals into AAA+ condition. The playfield is totally stripped bare and the next job is to sand it clean. But I'm going to get a scrap of plywood and clearcoat and prime that first as a tester for my method of applying the decal. The bit that's really putting me off is dealing with the cupped inserts. Sanding off the original artwork will reveal how many of them are too low and I'm hoping that I can them raise them just proud of the surface and sand them flush. All evidence should then be hidden with clearcoat and decal.When you're done I will be needing full details of the playfield overlay for an up and coming project.
That's the theory anyway...
... and of course there's added distraction of arrival of my third pinball. Another project. I was warned this would happen
Thank you! Hope you're keeping well? I realised I was stood next to you at UKPP on Sunday whilst playing that beautiful Zaccaria NAUTILUS EM with the perspex windows, but missed you when I'd finished. What a fantastic restoration and lovely game to play. Must have put on at least a dozen games and managed to clock the reels all the way past 1,000,000!
Was that your DEFENDER at the party?
Sorry to have missed you!
The Defender wasn't mine it was Terry Sullivans, though I did set it up and take it down again (along with the other 6 classics he brought!)
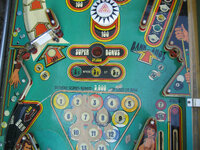
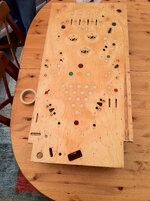
I do have overlay experience or at least fitting one. I did an Eight Ball restoration for Terry (who owns Defender above) a few years ago and that was pretty much bare wood, luckily he had a commercial overlay for it (which is no longer available).
Prep involved sanding it as close to totally flat is I could get to avoid the sunken insert issue which involved much elbow grease. The wood was then sealed with clear varnish and left to dry for a few weeks. It was a bottle check actually fitting the overlay as you only get one chance.
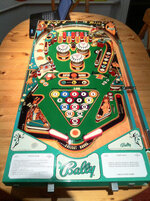
Here's some photos:
Tips:
1. Align the inserts at the bottom first. if there is any alignment issues at the top as there was with this overlay (which was different to the playfield only 1-2 mm though) they will be further away from the player so less noticeable.
2. Before fitting the overlay make a tracing paper (or other method) mark with the locations of all the screw holes etc that are not on the overlay.
3. Will add more here if I think of any.
I do have an EBD overlay to fit at some point, likely it will be my winter project this year.
Prep involved sanding it as close to totally flat is I could get to avoid the sunken insert issue which involved much elbow grease. The wood was then sealed with clear varnish and left to dry for a few weeks. It was a bottle check actually fitting the overlay as you only get one chance.
Here's some photos:


Tips:
1. Align the inserts at the bottom first. if there is any alignment issues at the top as there was with this overlay (which was different to the playfield only 1-2 mm though) they will be further away from the player so less noticeable.
2. Before fitting the overlay make a tracing paper (or other method) mark with the locations of all the screw holes etc that are not on the overlay.
3. Will add more here if I think of any.
I do have an EBD overlay to fit at some point, likely it will be my winter project this year.
Last edited:
Nice job Dave.
Played a few games at Terrys on the very same game and you did a great job.
Played a few games at Terrys on the very same game and you did a great job.
The l/hand slingshot plastic must've been cut down to suit the 'standard' size of the area on Mystic. Pity.
Nedreud, I'm late here and can't quite believe your achievements.... makes me feel quite quilty for throwing some stuff away ! Truly inspiring. Well done.
Yup, @Dave2084's handiwork on that EIGHT BALL inspired me to do the same for PARAGON.Nice job Dave.
Played a few games at Terrys on the very same game and you did a great job.
Thanks, @JMP. Each to their ownNedreud, I'm late here and can't quite believe your achievements.... makes me feel quite quilty for throwing some stuff away ! Truly inspiring. Well done.
MUST CONCENTRATE
We do what we can! I'm surprised how much I pulled off the rusty junk playfield and salvaged. I have bought plenty of new new parts, including the following:
- All coil sleeves
- Flipper bushings
- Every electrolytic capacitor on all circuit boards
- Every component on the power supply rectifier board
- Molex connector housings with Trifurcon pins
- Rubbers
- Flipper bats and bands
- Pop bumper skirts and spoons
- #44 lamps
- Leg levellers
- A standard Pinball
- Earth braid
- Drop-targets
- Pop bumper caps
Well done! 15 pages. That's quite an epic!Well, it took me 2 cups of coffee but Ive just read the whole thread!
I doubt I'll ever have parts as shiny as that
Shiny parts just need time, patience and elbow grease. No secret sauce. Best of all, shiny is free!
Fantastic thread, what a re-build............. 


Just read through this thread as I’ve bought a paragon myself.
All I can say is incredible!
All I can say is incredible!

