What's new
Pinball info

Register a free account today to become a member! Once signed in, you'll be able to participate on this site by adding your own topics and posts, as well as connect with other members through your own private inbox!

Today I worked on......

......Stern “sam” sound system really is terrible, Standard. Speaker upgrade essential. Been working on a plug and play active subwoofer system.That moves with the machine . Compact. This is the cheaper version without a remote volume control. The More expensive sub will have a volume control in the coin door....sounds fabulous..........
View attachment 109949
Hey bud
In the past I have upgraded the spekaers in SAM games and taken a line out off the main PCB and fed a 2.1 amplifier. Works out much better than stock stuff. The amp on the SAM/Whitestar boards do not sound that good!
 
Flipper Fidelity speakers with the 10” sub sounded awesome on my Tron LE, which is SAM. Loud and more than enough bass. How loud do you need these things to be when you’re playing them? o_O
 
Got up a bit early this morning and thought I'd video installing my new PIN2DMD into my Getaway High Speed 2. A few members have asked for pointers on installing them - its really easy, but hope this video helps.

 
Kick out not working properly? It was kicking to top of the right slingshot or right in lane and not the left flipper. Seen better days? Can't think why...

20200614_130929.jpg

Lets have a closer look by comparing old with new...

20200614_132307.jpg

Rear

20200614_132330.jpg

Hmm, not quite the same pattern part after all, ball cradle not connecting to the VUK shaft...

20200614_134607.jpg

Time to get the wizard out...

20200614_143716.jpg20200614_144825.jpg

That's better.

20200614_145845.jpg

Now working properly...

20200614_152356 - Copy.jpg
 
Upgraded Lights and Speakers for my Whitestar pins.

Spent the day making several protos and came up with my own design that houses the standard stern speakers and upgraded ones.
Although these can’t be made from scraps / off-cuts the cost a little more to make but the trade off is well worth it as they require no glueing whatsoever due to the one piece design on the top/bottom making them simply snap together extremely tightly.

45DA1707-244C-4302-8957-D33F6B1CDD53.jpeg

5579BF45-586A-4AD7-9650-D4D00D5365DC.jpeg

5119C1A2-2D97-43BE-9072-9F11BB058582.jpeg

standard stern speakers
6D28E9B2-E773-493D-B840-899F3755FD82.jpeg

let’s beef them up a little
93F59835-E2EB-4678-AA64-2DCAE6AAC877.jpeg

ahhh that’s better
91BB7F55-A099-4C5F-B676-035F42CB06FE.jpeg

before
2BC90C83-1636-4DC4-8677-DDE20EA3451C.jpeg

and after but pics don’t give them justice as they actually do look like TV tubes in white LED which compliments my speaker panel sillyness
BE47FF87-CABB-44B6-9FD2-12885AFB49D2.jpeg

while I was on made some silhouette style inserts for a couple of our pinheads on here.
DDA7535F-FA23-4037-9749-5A68FE695ED6.jpeg

Pics don’t do justice they quite a nice addition to the normally dull stern ones
F151242C-927D-4833-921B-5AEF3D5B37E2.jpeg
I am currently working on whitestar ones but waiting on some hardware hopefully soon

col
 

Attachments

  • B3DDDDA0-C61F-4441-9A2D-A7C348A126A1.jpeg
    B3DDDDA0-C61F-4441-9A2D-A7C348A126A1.jpeg
    143.4 KB · Views: 17
Last edited:
Upgraded Lights and Speakers for my Whitestar pins.

Spent the day making several protos and came up with my own design that houses the standard stern speakers and upgraded ones.
Although these can’t be made from scraps / off-cuts so cost a little more the trade off is well worth it as they require no glueing whatsoever due to the one piece design on the top/bottom they simply snap together extremely tightly

I am currently working on whitestar ones but waiting on some hardware hopefully soon

col

Looking superb them Col.And no doubt in person they'll look 10x better

:thumbs:
 
My Streets of Rage Dino king conversion is pretty much finished 😃 it's now wired for JAMMA and I've chucked a 60 in 1 into it so I can check my work. The control panel is laid out to mimic a megadrive so the last job is to install a rpi using pi2jamma and setup a megadrive emu on retropie. I'll probably have it boot straight into Streets of Rage 2 👍Big thanks to Olly @Muddymusic for creating the custom art! I finally finished it mate 🤣

IMG_20200622_210446.jpg

IMG_20200622_210452.jpg

IMG_20200622_210508.jpg
 
Working on a few pins today. Juggler switch on CV couldn’t take any more bending so finally put a new one in, don’t know why I waited so long!

Bought some used WCS plastics from Londonpinball on eBay, mainly for the slingshot pair. One was new but slightly yellowed so matched☺️

Fitted Flipper Fidelity set of speakers in TWD but had to bend the bar to miss the 8” sub, ended up taking volume balancer out from the circuit as the cab speakers were struggling to keep up with the sub. Bass pretty good now. Just waiting on the speaker lights from the states to arrive for it.
 

Attachments

  • A0596669-A1BF-4387-AB6A-0BC86E1EF006.jpeg
    A0596669-A1BF-4387-AB6A-0BC86E1EF006.jpeg
    80.7 KB · Views: 21
  • A9CC49E4-44AD-433C-8D07-C072C56D581B.jpeg
    A9CC49E4-44AD-433C-8D07-C072C56D581B.jpeg
    115.4 KB · Views: 22
  • 42F84431-5501-47A5-BF25-7DE7AF0AE2B4.jpeg
    42F84431-5501-47A5-BF25-7DE7AF0AE2B4.jpeg
    132 KB · Views: 22
View attachment 111420

Some new boards arrived today, this time it's for an Arduino controlled full colour LED strip replacement for the 'ripple' effect on the creature hologram.

Will replace the Triac board on the playfield that usually controls the dodgy ripple motor.

@replicas
Looking forward to seeing this develop.
 
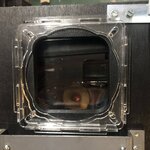
A real sense of achievement today for me, and some of you may roll your eyes. I had an annoying problem on my RFM, centre right martian was not being activated, so thought dodgy reed switch, so out with the PF and with my trusty Fluke DVM that i have not used since i was a Canon field engineer I started testing. Switch all OK, bugger, thought it was going to be easy fix. Out with the PDF of the manual, and time to tackle the switch matrix, at that point i thought hmmm....time to google "how to read a switch matrix", a couple of websites and Youtube video later i got the concept. So i thought lets see if the fault is on the PF, before it reaches the power board. OK, so clean all connectors, plugged in same thing, hmmmm, now what. Lets start tracing from each of the switchse in the row, started from the wrong end, so nothing between the middle target and the connector on the PF. Try next one...nothing, ok, lets start on the left hand side...checked between left outline and left return switches....nothing...ok its blu-wht wire...gave a little tug...oh look although it looked connected, it wasn't. Out with the soldering iron, and solder, re connected, checked from switch back to target bingo, checked target to connecter....bingo! Slid it all back in powered up....beautiful!!!. Second job, replace the batteries attached to my DE SW with a battery pack that keeps it well away from the board, i've seen the damage that can do, and apparently these boards are more rare than rocking horse poo. OK, these maybe routine things for you workshop boys, for me that has not done this for 30 odd years, it made my day.
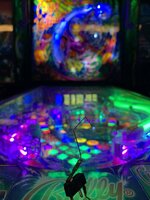
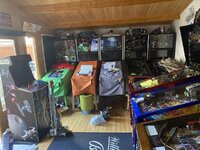
 
Job for today.... build my PINBOX PC..... Bought an empty RFM computer case a couple of years ago to build into, the motherboard is just half an inch too big....

PinboxPC.png
 
I have wanted mirror blades for my Hook forever, but there isn't room for a fag paper down the side of the pf and I've even b*ggered my art sideblades. Inspired by my pal @Solar Sailer adventures with HIP I solved this today by cutting these home made SlitherMirrors (TM :cool:), narrow blades which sit on top of the side rails. Cheap and very cheerful :thumbs:

20200702_154507_001.jpg

20200702_154428.jpg

20200702_154634.jpg
 

Attachments

  • 20200702_154428.jpg
    20200702_154428.jpg
    178.7 KB · Views: 14
  • 20200702_153541.jpg
    20200702_153541.jpg
    198 KB · Views: 14
Some more Demo Man TLC
Apron Cards, Blue Superbands, LED’s throughout except just a few flashers, new floating eye, target decals, cleaned, replaced missing plastic (now with coly’s protector underneath) Just the gun handles to get coated and 1 more plastic to replace. I’m playing this a lot - ‘it’s a very enjoyable pin [emoji106]
8fc2493276e9c93d9f37b08ffe768569.jpg

4588e5422691d14ffaf8d83d70727ee5.jpg
4a5e18b928d3b1b49a8f7b5ee25dc30d.jpg
e98bf0323454da95975bf1b36383da4d.jpg
9768cc1134fd014130b229aa45be075a.jpg


Sent from my iPhone using Tapatalk
 
Screen taken out of sttng, thanks to @Vimtoman for the gasket and fixing kit/cable kit. Just had to buy the clear screen.
Much nicer now, just need to play better!
D72B22C8-E24F-4FB5-92EE-0B9913284AA4.jpeg
 
Re-arranged the games room.. ever trying to figure out how to get another game in, and the most amount of games that can get the glass off... I think I’m at max.. the only option is to tombstone a few games to fit more in..

room is 5.5m (L)x 3.8m (W) give or take, Has 11 games and an arcade mame machine in there.

7A3D3850-4D2F-4196-9FD9-05EB54AB3603.jpeg
11FA01E4-9022-4EDE-A2AD-E3B8DAF76807.jpeg
AF23F057-A300-465C-BA5E-2ACF293CAC98.jpeg
 

Attachments

  • E04B3F9C-31FE-42BD-9B83-C3D09A2EEA6B.jpeg
    E04B3F9C-31FE-42BD-9B83-C3D09A2EEA6B.jpeg
    193 KB · Views: 17
Last edited:
Re-arranged the games room.. ever trying to figure out how to get another game in, and the most amount of games that can get the glass off... I think I’m at max.. the only option is to tombstone a few games to fit more in..

room is 5.5m (L)x 3.8m (W) give or take, Has 11 games and an arcade mame machine in there.
Time to expand the shed/house encroachment!

Fitted more awesome plastics from the legend that is Mr. Wobbles, even tried a behind the plaque Freeby for size, thanks @Colywobbles, top man! Highly recommend these, pics don't do them justice but for a start they remove the horrible metal washer stern use, they enhance the light and basically looks freeking great!

Also found and mounted the Falcon with advice from Col, thanks man! If anyone knows how to light it like the premium model please me know!

20200705_180815.jpg20200705_180721.jpg20200705_180824.jpg
 
Back
Top Bottom