What's new
Pinball info

Register a free account today to become a member! Once signed in, you'll be able to participate on this site by adding your own topics and posts, as well as connect with other members through your own private inbox!

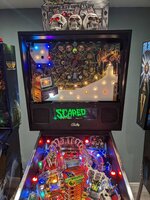
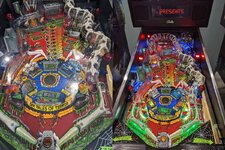
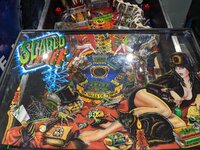
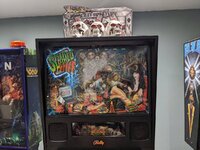
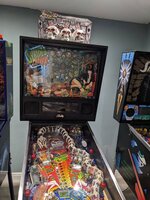
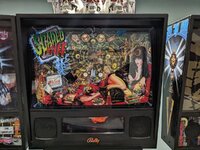
Complete Scared Stiff ... My first playfield swap

just had further shifty through your log, looks great albeit a lot of work that I would be staying clear of but well done. One little thing I would suggest thing is chuck a battery saver in there they only a couple of quid and can save you a lot of heartache.

Col
Cheers Col, its on the list I'll likely do the NVRAM upgrade.

Cheers,

Scott
 
Installed the gates, God those are annoying when you need to get the nut passed the pin on some!

Also some bright spark decided it was a great idea to use a mounting screw for a plastic, however this screw goes into a post hosting 2 large rubbers so you need to be mindful when installing as it could just come off with all the tension!

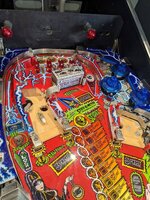
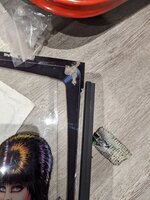
Red plastics now all installed.

I had ordered a replacement plastic from somoene but as per usual 5 days and its not even order processed yet alone shipped..

Taking a break and then onto the ramps, frogs and boney beast.

Then dare I say it... I'm done (playfield wise).

PXL_20220722_132350007.jpg
 
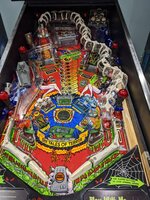
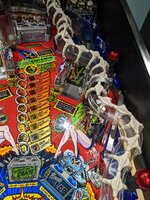
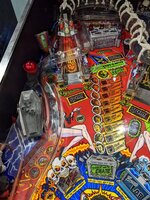
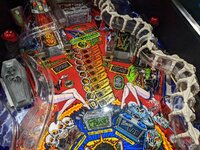
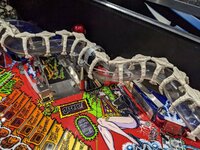
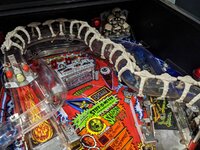
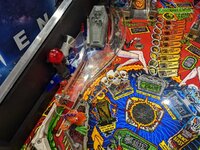
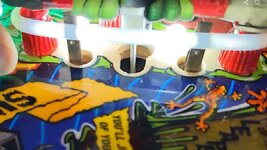
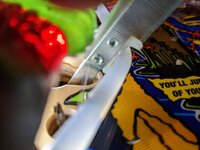
Playfield ramps are in.

Had to spend an inordinate amount of time trying to get these to line up in the new playfield.

On the plus side they now fit better than they did before as I was getting airballs on the bat ramp.

Will be able to confirm that it's fully resolved when I wire into the back box and turn on.

The bone ramp had some janky wire 'plank' instead of the usual flap. Someone screwed it into place instead of using rivets so the ramp will need eventual replacement. For now I'll see how it goes.

It's been an ordeal, I'm nearly there (I hope!)

PXL_20220722_214940249.jpg

PXL_20220722_214945922.jpg

PXL_20220722_214947123.jpg

PXL_20220722_215704539.jpgPXL_20220722_215706177.jpgPXL_20220722_215707881.jpg

PXL_20220722_215713704.jpg
 
Last edited:
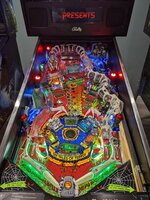
So plumbed it all in.

Powered it on.

Gi working, inserts working, display working, sound working.

Game is complaining EOS switch on right flipper is always closed.

No problem here I thought as the flipper is not actually set right so it's currently locked upwards.

Go into switch test, hit the right sling and it fires then suddenly the switch matrix keeps registering hits.


I power off.

Power back on ... No display... Check the fuses, yup they've blown.... Sigh
 
Too late now to say this (but remember next time).

Visually chek everything.

On first power up, connect just one thing at a time. Say first GI - check that....
Then 12v power and grounds
Then switch matrix (check everything inc optos)
Then the solenoids - one plug at a time.

Just keep testing.

Plugging it all in together makes fault finding harder.

Sorry you are having problems.....

I think the slingshots were too close together so they kept firing.

Hopefully that's why the fuse went.
 
Big thanks to @Ant-H for bashing around ideas and advice on what to try.

In the end it was two things.

One: the coin door ground wire was loose and shorting on the PCB in the cab!

I didn't even remove the harness so it means it was always loose! FFS honestly.


Two: The third jet was wired wrong. I thought as the two other coils were wired one way, the third would do the same.


I am utterly relieved it's all working.

I have some remaining issues to resolve.

* The left gate is on reverse and is stopping orbit shots.. d'oh
* The right flipper needs tightening down. I had to change it out as the old one was knackered. Looks like I didn't tighten enough.
* Jets/poppers need some adjustments to make them more sensitive.

* I think I burnt out the led candles for the dead heads. Need to check on them.


I'll attempt some fixes tomorrow just honestly relived it's all working.
PXL_20220724_210441145.jpg


PXL_20220724_210444798.jpg


Also thanks @Pick Holder for the advice. I did as followed, along with @Ant-H advising the same.

It's definitely best to start with nothing into the board as it helped identify the short on the coin door area.
 
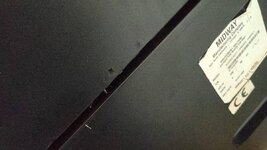
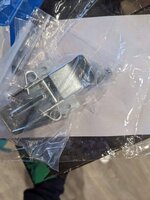
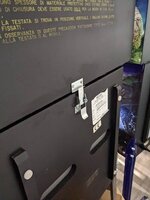
Oh small thing but how crazy is this, back box was missing the latch?!


IMG-20220618-WA0023.jpeg

PXL_20220621_200632713.jpg

PXL_20220621_220238348.jpg
 
So I've finished changing the gate around. God that was a faff. I really hate taking these ramps on and off its a total nightmare.

Especially getting that trap door to line back up and to navigate the bat ramp around the coffin.

I've clamped down the right flipper and adjusted its position.

Noticed a few LED's out and still need to adjust the top popper. Also for some reason none of my flashers in the poppers work. I'm fairly certain I wired em right :/
 
Jets/pop bumpers sorted. Bloody socket holders had corrosion!

At least I had them all wired right, happy days!

Reflowed some socket holders, to fix some out LEDs.

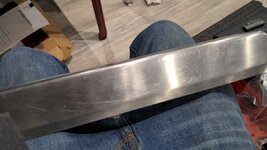
Next up I tackled the lock bar...

IMG-20220725-WA0011.jpeg

Lots of sanding later and for good measure Elvira got herself some new legs to boot.

PXL_20220725_212721397.jpg

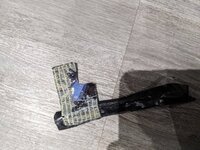
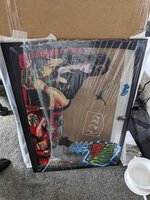
Moved onto Translite next, please people don't tape your Translite.. it pulls off the artwork...

PXL_20220725_210643017.jpg

PXL_20220725_210646370.jpg


Looks like I'll be buying another Translite later.

Cleaned it up as best I could and used BSDs Translite glass as it was in better condition.

PXL_20220725_212023828.jpg

PXL_20220725_212244059.jpg


She's nearly there I got one more surprise coming.

PXL_20220725_212651398.jpg

PXL_20220725_212658169.jpg
 
Last edited:
The back latch is for set up only.
Should have the bolts inside the cabinet.
One minimum.
This way the backbox doesnt slam down and f up the side rails
I don't know anyone who puts the bolts in to any machine unless its on location tbh.

Pinball Brothers Alien doesn't even come with bolts? They just expect you to latch it down.

Scott
 
I don't know anyone who puts the bolts in to any machine unless its on location tbh.

Pinball Brothers Alien doesn't even come with bolts? They just expect you to latch it down.

Scott
I used the internal bolts (and replaced them if they were missing) on all of my Bally/Williams pins, crazy not to considering the weight of those back boxes - don’t assume no one uses them, do what’s sensible and replace em if missing!
 
I don't know anyone who puts the bolts in to any machine unless its on location tbh.

Pinball Brothers Alien doesn't even come with bolts? They just expect you to latch it down.

Scott

Really?

Alien has a strong latch and to be fair. Dont take pinball brothers as being amazing builders of machines. You have obvoiusly not repaired any of them :) I have cuts of the metalwork inside alien.

CGC provides these bolts still in 2022. If they arent needed then why do they ship them?

Have you seen the tiny screws latches are held on by? You going to trust that?
 
Really?

You have obvoiusly not repaired any of them :) I have cuts of the metalwork inside alien.
Lol you know I had the Alien prototype right?

Mate I know Alien better than anyone hands down for issues!
 
I still think bolts are there for operation use and the latch is fine for home use. Unless you can find me solid evidence to counter this, then I think it's a matter of opinion.

The latch is easily circumvented by children so I would use them in situations such as that.

The screws would literally need to tear through the wood and I used long screws when affixing the latch? 🤷‍♂️
 
I still think bolts are there for operation use and the latch is fine for home use. Unless you can find me solid evidence to counter this, then I think it's a matter of opinion.
The latch is easily circumvented by children so I would use them in situations such as that.

The screws would literally need to tear through the wood and I used long screws when affixing the latch? 🤷‍♂️
they are your side rails and glass bud.

I had my first pin slam down onto the rails whilst playing as I nudged a bit! Phil Palmer laughed when I told him and sold me the wing bolts. Plus new side rails.
 
I still think bolts are there for operation use and the latch is fine for home use. Unless you can find me solid evidence to counter this, then I think it's a matter of opinion.

The latch is easily circumvented by children so I would use them in situations such as that.

The screws would literally need to tear through the wood and I used long screws when affixing the latch? 🤷‍♂️
Why would you even risk it? Spend all that money but then not bother to fit 2 bolts??!?
If that latch fails and that head box comes down you’ll be asking yourself the obvious question 🤦🏼‍♂️
 
I've had a games latch come loose and it start to lean forward then caught it. Some latches get worn so the head has a bit of movement without the bolts. That little bit of movement when you nudge can end up slowly pulling the latch loose. So best to advise to at least pop one in as a backup.

I didn't use bolts at first but now I pop one in if there's room, often I have an afterglow board mounted where the right hand one would go.

If you're putting a new latch in you can be sure the screws are tight and snug so probably won't have an issue but so many have loose screws or worn holes in the wood that you don't always notice when you're setting up the first time.
 
Lesson learnt the hardway don't always trust the dimples.

The left slignshot arm was making contact with the edge of the hole and chipped it..

slingshot.JPG


Moved the arm further back and repositioned it.

Bit of a balancing act between the slingshot arm re-poisition not to cause any issues with the coil position.

Found a happy medium and now the arm it clear of hitting the wood.

PXL_20220728_120118435.jpg
 
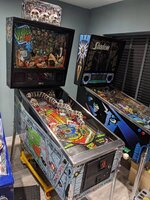
Machine is practically done.

All mechs, opto's etc are now dialled in.


Just need to wait on the last item to arrive.

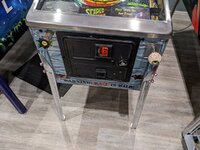
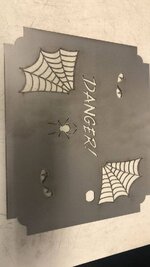
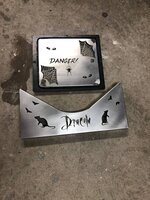
Behold the custom coin door!

Coindoor.jpeg
 
"Very nice! You've been practicing!"
Those photos will be handy when I start populating my bare playfield, yikes. I'd like to think I source a populated one but I think that's unlikey. Still the parts are coming together.

I bet you're glad that's done! Looked pretty daunting to me!
 
Back
Top Bottom