What's new
Pinball info

Register a free account today to become a member! Once signed in, you'll be able to participate on this site by adding your own topics and posts, as well as connect with other members through your own private inbox!

Complete Future Spa 💦

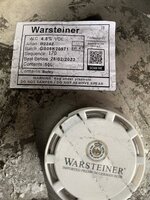
Put a small light humidity gauge partially on the red paint, just moved it off and noticed it marked the paint. Put my nail onto it and it marked.
If I put the stencil on it’s going to mark it up which is probably what was happening before but it fixed itself 🤷‍♂️
10 days that’s been on there, this paint is meant to be used in the desert😂
Better get this properly dry before the next electric increase!
Humidity has just dropped below 70%.

Just did a test with some masking tape and it has left a mark/residue like after the stencils were pulled off before😡
Think I might have to give up and get it into my room and let it cure as it’s going to be a bit stressful pulling the stencil off and seeing this, I will see if this mark disappears like the last lot did!

TBC…….
 
Today I thought sod it, it is what it is! I knew it would leave the residue looking marks and it I was right as usual😂
It doesn’t matter what conditions or timings as I have done this in warmer dry to cooler more humid, stencils off 10mins to 40mins and drying times up to 4 weeks.

Just done the other side and plenty of those residue/marks from the stencil which disappeared before, really hope it does again🤞

Will get on the coin door area in a couple of days, about time!
16DC80FA-EA00-48FB-B71F-0D4083ECF841.jpeg
5AAFD0C5-302D-4A03-9614-4A0383FE1A1A.jpeg
E350BA81-D5AC-4D20-8F7E-6EDFADF9911C.jpeg
 
Last edited:
Been working on Taxi which is now 100% flipping amazing and my wife loves it🥳

Marks getting hard to see, you really have to see them from a tight angle with a certain light so looks like they are slowly disappearing again🤷‍♂️

Some cab porn in the meantime😈
0E85D7D5-68F0-47FE-A8EF-0DDE3BA5FF42.jpeg
 
Nearly there now, fun doing this on its end but luckily I’m not short.
Looks ok but have a heater blowing around it, need this to cure asap so I can get the purple on then it can go into a room to cure properly while I sort the playfield out.
Got 3 more pins to sort out but slowly slowly with me.
1204B94B-7860-437C-8895-5316282308EA.jpeg
 
Maaaaate, I didn’t know you’d bought a taxi. Welcome to the greatest club in the world
Thanks!
It’s much better than I thought, never played one before I added this. Always thought the playfield looked too bland but it’s gown on me for sure.

Had more things to fix than I thought it would, flippers we’re f‘d (rebuild with wpc parts), plunger weak (added red spring but spin out has been repaired with tape) half backbox lights not working (burnt connector), pop bumper switch broke (made one up with old ones) backbox hinges only held on with one bolt by a thread (added bolts), bell not working (filed contacts), topper-all lamps dead ( that was easy😂) Raised inserts (hammer time!) Playfield filthy and needs backgkass lift trim as missing. Apart from that all good🤪

Now plays really fast and makes ramps easily when struggling before. Sounds great!

Playfield needs tidying up so hardtop/new playfield to make nice, might just add decals and a protector. Cab is ok and original.

View attachment trim.E0019289-E71C-45A7-817A-16AC8D83525B.MOV
 
Last edited:
Taxi looks beautiful when restored. Sounds like yours had a fair few issues!!
Nice one getting it back though .
 
Wow what PITA this purple was, there were tiny bits of stencil to pull separate from the main part so had to go from above with a scalpel blade then grab the edge with pliers and pull off which is easier said than done without touching the fresh paint around it.
Had some pin pricks in the paint finish so had to add some more to the right side.
Almost a panic situation at the last knockings with somebody at the door but they could do one😂

Once it dries I will get the metal leg protectors on and the legs on then it can join the backbox in the pinroom while I get on with sorting the playfield.

Fresh keg of Warsteiner that I’m about to make the most of 🍻
E8942823-1620-45F4-82F0-D21ED1FCD77D.jpeg
C8A63A9E-4BA7-4DE4-81DA-5D23CA422C0B.jpeg
CC348155-EF4D-4486-BEF1-095D020E4E6A.jpeg
 

Attachments

  • 42F0A259-33A6-480E-B297-6E17FA13EF14.jpeg
    42F0A259-33A6-480E-B297-6E17FA13EF14.jpeg
    150.7 KB · Views: 9
Last edited:
Metal leg/cab protectors and new legs went on today, also sprayed the part that is black that the backbox sits on.
80cm wide with the legs on and they scraped through my door to the pinroom🥵

That can sit like that for a bit to cure and hopefully the paint will go rock hard with the dehumidifier on, room sits around 55%. Pretty good considering the garage it’s in can go to 99% when the weather is wet here, yep 99% unreal.

Got all the parts for the playfield and now happy with cab but need to do Taxi next, bit of an emergency there before the ball goes through one of the inserts!

C5525571-FB54-4189-BEC9-7C1F10645AFA.jpeg
6D17596D-D35C-4AFE-88E5-FFD0BC0E0985.jpeg
 
Last edited:
Old cab art does look cool. I just don't ever see me owning one.
 
  • Like
Reactions: JT.
Cab has cured nicely now, paint is rock hard like enamel. Needed the right conditions to dry it seems.
Tumbled some bits and pieces to get the coin door on (roughly) and looking good, will be putting the playfield on my rotisserie and getting to work on that soon.
Even though I had bought new repro pop caps and targets a nice gentleman who was in the states came across some nos versions and will be sending them to me soon😎

Just stripping, cleaning, touch ups, new incandescent lamps, rubbers and a playfield protector.

Looks effing wide right!

Slowly slowly no quickie quickie here😴

064DEEEC-55CA-44E1-BA1C-62722167EB65.jpeg
 
Fitted side trims and finished fitting out cab today, used the original trims which had some dents but beat them out. Not perfect but pretty good as I didn’t want new ones as last pair I bought just looked wrong.
You can’t seem to get the exact spiral nails and I did try a few but wrong so went with a slightly larger size which I think work better anyway, had to widen holes in trim and cab, went in lovely and look good.
Playfield is pretty good, underneath is really nice with no corrosion and somebody has already fitted new diodes and capacitors on switches.
Have flipper rebuild kits so that will be done, just leaves targets and lamps to change. Will check/change coil sleeves. Topside will be stripped, already had new rubbers fitted.
Not sure what to do with the apron yet as has drink damage, will think about that.
Tune.
28F72FBA-3D45-4271-BECF-6E0AA0D2F4A8.jpeg
D013B62B-F2DD-4D9B-B30A-5497030D2C6D.jpeg
East or West?
A65D6ABA-C0CE-4D74-B522-4AEA136F3B51.jpeg

B6C5D1FB-1133-4F99-A857-69EDE5BCFBB8.jpeg
 
Playfield Stripped, foam cleaned then cutting compound/magic eraser to remove ball marks. Somebody removed the sling mylar and left all the glue behind so guessing it was the guy that sold it as it was clean. Used alcohol to remove the glue with no damage caused.
Need to do some touching up, around the inserts is tricky as different colours and not solid.
Cleaned all the posts and lane plastics in my ultrasonic cleaner trying to keep as much as I can original which also saves some money, metalwork is in the tumbler.

Not long to go

15477376-C45C-4F6B-927D-2525B4BF2EF4.jpeg
E9FED2F2-172D-4042-9BDD-48C7F16D4786.jpeg
 
Last edited:
Received a set of NOS caps and targets today, had already bought a repro set from Marco but got offered these and are miles better😎
Thanks Gary what a star!

Did the touching up this week, start putting it all back together Monday probably.
A210820D-B4DA-4C3D-A2F7-D7F53777B880.jpeg
 
Flippers kits fitted, NOS targets fitted, playfield protector fitted, new rubbers, new lamps and there were loads of them, new flipper switches. All posts were cleaned and reused.
Checked everything under the playfield and had to re solder some stuff, adjusted switches.
Playfield protector fits really well on this, totally flat. Still has the top protection layer on so will look much better when peeled off.

Just need to connect it all up, was working when I picked it up but who knows now🤞

Too much football on today to concentrate on this, now fancy a Tales of the Arabian Nights😂
1669399279572.gif

D7BCDB8C-C201-45FA-80AD-A0589D7F6F4D.jpeg
784F4D92-2C1F-4387-AE37-B86D3019AED7.jpeg
DA48B8E2-CAAE-4972-A33E-B8CA99F482BF.jpeg
 
Last edited:
Finished this today, fired up and everything is working. Controlled lamps are a bit dim so either the rectifier board needs looking at or it’s connections, the long bottom connector on the rectifier board has been hacked. Soldered direct to pins and a choc block then put in so board can be taken out. Will sort all that out at some stage.
Left hand side of the apron has some rust and paint missing where a sticker has been pulled off, leaving it like that for now as I don’t like the decal that is available for it. Colour is off and a dodgy fit. Let’s just say this one adds character😂

Call this done, looks and plays great😎

8779C6E7-7207-4060-8E13-7C0673F0E109.jpeg
A027D7F3-6E78-4B69-9A17-A49743AAA006.jpeg
B3B2960B-BFA5-4773-9926-F8107FC33C51.jpeg
624F488C-D99A-46A6-8770-922586BF914D.jpeg
40BB8B74-3F91-454C-81BA-B04B93E3F778.jpeg
 
Last edited:
Stunner. Nice work mate. You gonna keep it?
Thanks mate, yes I am but who knows what’s down the road. The last pin FT I did a nice job on with Manny I have had for about 12 years.
Would be hard for me to move on if I’m honest as it does look really nice and I mainly only look at my pins😂
 
Lovely job. That prism effect, the drop target mechs, the screen printed backglass, all the tilt mechanisms - look at the love these old Ballys had v the cost cut stuff made today.

With the wretched filler, I think that the issue is that it is often harder than the material you are filling. When you sand it, you then sand down the "good" material and leave the filler standing proud.

Through bitter experience I think the best bet is to sand as little as possible and rely more on a good job with your filler knife.
Thanks, they don’t make them like they used too.

I was thinking the next time I do one I would not bare wood it and just flat the paint then put a blocker primer on, the amount of primer and first coat I put on was silly. Cab was just soaking it all up, Ronseal wood filler was easy to sand and luckily only the front corner had the tuff stuff but turned out good in the end.

I still have all the used spray cans somewhere, I’m going to line them up and take a pic. A lot more than I thought it would use!

Might put the original apron cards back in, not sure the modern version suits this.
 
Did a tip run today and counted the cans of paint I used for this, 25 in total. Way more than I thought I would use but the paint is rock hard now🙏
FFA368BA-1858-4DEA-B497-E69D6B30452C.jpeg
 
Back
Top Bottom