What's new

Complete Flash Gordon Shop Log

Are you going to keep the black flipper paddles? They look good with the black background colour of the lower playfield.
Definitely mate :) I think they look very cool and a happy coincidence that they came on the game......look to be in decent shape as well!
 
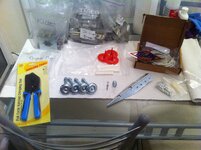
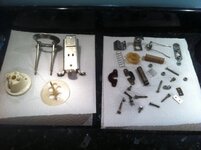
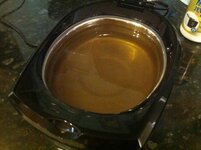
Still going through the process of stripping things off the bottom of the pf and cleaning them. I always find this bit the dullest :) Thankfully my ultrasonic cleaner takes care of all the small parts before they go into the tumbler. Here's a couple of pics of some parts after they came out of the cleaner and the other showing the nasty muddy brown water left behind afterwards :eek:

IMG_2639.JPG

IMG_2640.JPG

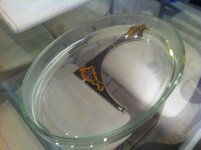
On a more positive note, the first parcel turned up from the Legend including the spare plastic he's very kindly donated to me :D It needed flattening so after a failed first experiment with a hairdryer I've gone with the glass bowl full of boiling water.....seems to do the trick!

IMG_2634.JPG

IMG_2637.JPG

Another video should be up later tonight :D
 
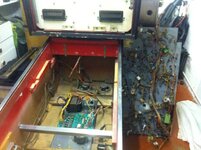
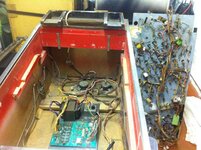
Nothing very interesting to show this week as I'm still just cleaning stuff from the playfield. I think I've got everything off the old one that needs separate cleaning so I've removed it from the cab in preparation for the pf swap. I also spent some time stripping the head down so I can clean it up before painting. There won't be a video this week as I'm sure no one wants to watch me cleaning stuff for 5 mins so here's a couple of pics as I took the game apart today :)

IMG_2694.JPG

IMG_2712.JPG
 
Getting there.
A little more gets done, looking forward to the paint job.
 
Watching this shop log with great interest. Flash Gordon is so similar to my Paragon project and just a bit before my soon-to-arrive '81 VECTOR that I'm sure there'll be much to learn and apply.

Great work! Keep at it...
 
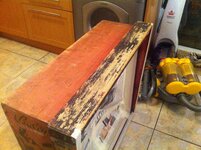
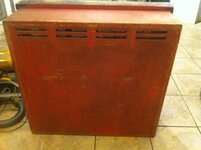
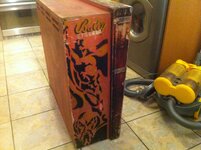
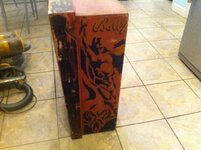
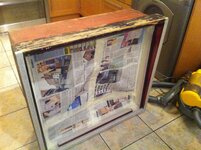
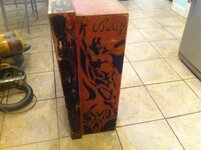
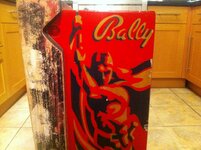
Not been a huge amount of progress on this for the last week or so but I have got the backbox at my house and started prepping for paint. Here's a few before pics for comparison once I've done some painting. I'm not going for a super restored cab and head with this just refreshing the paint. I want to keep the little nicks and dings from this thing being over 30 years old as well as stuff like the serial number that's etched in.

IMG_2766.JPG

IMG_2767.JPG

IMG_2768.JPG

IMG_2769.JPG

IMG_2765.JPG
 
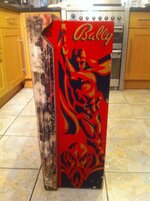
The stencils on the sides of the backbox are a thing of beauty indeed. I like the little Bally logo at the top and Ming simmering menacingly at the bottom. I've always liked stencil art and not just on pinballs machines (no surprise I'm a fan of Banksy).

@ronsplooter, how are you going to redo the stencils? Making your own or buying some ready made ones? Have you done this before, and what paints are you going to use? I'm curious as I'll be doing exactly the same thing to Flash Gordon's stable-mate, Paragon.

Keep up the great work and shop log. I'm ever so jealous of your FG! Lovely pin :)
 
I've done two fg can repaints. Both times I traced all the colour sections, and transferred to card to hand cut the stencils. Never again. We'll maybe I might do embryon when I'm bored.
 
I'm going to try and cheat and not use stencils :D If it all goes horribly wrong then that will be my back up plan but I've bought a roll of Frisket film that's used for airbrushing and have covered each side of the head with it. Then I'm going to cut out all the red leaving frisket covering the black and gold and spray the red. Once dry I'll put a new layer of frisket on and cut out the black, leaving the (new)red and gold covered then spray the black. Finally I'll follow the same process for the gold. The tricky bit is going to be making a decent job of cutting out the different colours which I'm going to start work on tonight......I'll try and post some pics of how I get on :)
 
I've done two fg can repaints. Both times I traced all the colour sections, and transferred to card to hand cut the stencils. Never again. We'll maybe I might do embryon when I'm bored.
And what a fantastic job you did there Andy. Your Flash Gordon is a thing of beauty and I want it so bad.
 
Here's a couple of pics now I've started cutting out the frisket from the red areas. It's proving quite tricky due to all the curves and strange shapes but I'm going slow so I don't mess it up....should be a lot easier on the cab as that's mainly straight lines.

IMG_2772.JPG

IMG_2774.JPG
 
...I've bought a roll of Frisket film that's used for airbrushing...
Would you mind sharing what you bought and where, please?

I was thinking of trying something halfway between your Frisket and Andy's cardboard. I was going to use some thicker, non-adhesive plastic film. That way I can still see through it to trace the design (like Frisket) but it's rigid and sturdy enough to be flipped over and re-used to do both sides of the cabinet/backbox (like cardboard).
 
Flash Gordon fun to play and a great Backglass,that I see CPR repro'd.Think if one ever came in my possession would have to fit in Queen music and Brian Blessed shouts!
 
Keep up the good work Chris, its going to be a sweeeeeeeeeeeeeeeeeeeeeeeeeeeeeeeeeeeet machine once done.
Like the idea of it with Queen music pumping out. DI DI DI DI ......... FLASH..AH AH .......SAVIOUR OF THE UNIVERSE.
 
I used to have a real problem with Morgan Spiced rum, I was drinking a half bottle a day easy for weeks before I decided I was either gonna have to knock it on the head or become a pirate.

Spirits are the slippery slope. Too moreish.
 
There is evidence that as the number of pirates have gone down, global warming has gone up. The world needs more pirates. ;)
I do not have such issues with spiced rum, though I have to say it is a lovely little tipple.
 
Think if one ever came in my possession would have to fit in Queen music and Brian Blessed shouts!
Like the idea of it with Queen music pumping out. DI DI DI DI ......... FLASH..AH AH .......SAVIOUR OF THE UNIVERSE.

Ross H is working on this right now for his FG using an Arduino so once he's figured it all out I'm going copy his setup for mine :)
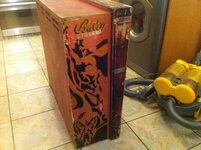
 
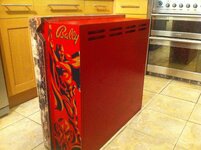
Managed to get some painting done on the head today :) I think I'm going to have to modify my approach slightly as originally I was planning to lay down the frisket, cut out and paint the red, then lay down more frisket, cut out and paint the black etc. It turns out cutting out the frisket is a f*cking ball ache because of all the small curvy shapes so while it was worth doing for the red I'm not going to do it for the black and gold. Instead I'm now going to get out the paint brushes and hand paint the black and gold shapes before spraying with a clear laquer. I'll still use black spray paint for the back glass surround just not the fiddly bits on the side :) I shouldn't have this problem on the main cab as the design is mainly straight lines so it'll be a lot easier to cut out the frisket. Right here's some before and after pics....bear in mind the black and gold areas haven't been painted yet so this is just partially done.

Before:

IMG_2768.JPG

IMG_2769.JPG

After:

IMG_2777.jpg

IMG_2778.JPG

IMG_2780.JPG
 
Back
Top Bottom