Pinball info
You are using an out of date browser. It may not display this or other websites correctly.
You should upgrade or use an alternative browser.
You should upgrade or use an alternative browser.
Complete Demolished Man!! - A painful and very slow shop log!
- Thread starter newdos
- Start date
-
- Tags
- demolition man
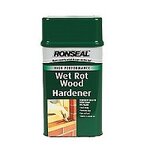
Cheers Dave just might have to try it yet !!!!That's great stuff Kev I used it last month on my wooden conservatory!
That's for snagging your skin on
and I have Dan and it hurts like fook!!!!!That's for snagging your skin on
Maybe the guide was flapping when the ball hit it and the nail was to take the bounce out of it? 

or the op straightened the ball guide and put a nail in to stop it bending again
Dunno guys got me baffled, but its coming out!!!
TBH Pete - think I will just live with it - at least its smooth as fook!!!
Really could do with another playfield but having no luck finding one - Did I ask you @steve brum if you had a spare one from 1 of your 3 DMs ?
Cheers Kev
Cheers Kev
Yeah Kev, you don't look at the mantlepiece when you're stoking the fire!!TBH Pete - think I will just live with it - at least its smooth as fook!!!

Yeah Kev, you don't look at the mantlepiece when you're stoking the fire!!TBH Pete - think I will just live with it - at least its smooth as fook!!!

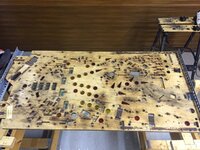
Slow slow progress first of all the new tee nuts are in
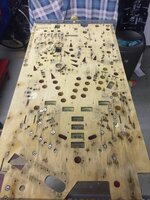
And now the top of the playfield has been filled ready for painting which I am dreading!!!
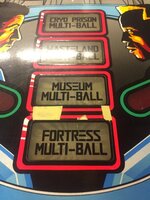
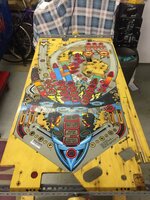
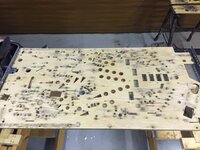
Now the whole playfield has been sanded ready for painting and then clearcoating. Think you can see how flatted off it is in these pics
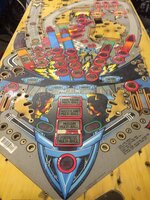
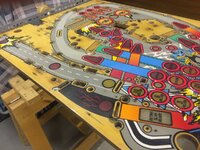
So how the heel do you mix a fluorescent red paint for the red lines - cant ever see me getting a match for those somehow!!
Quite a bit of touching up to do as well
Cheers Kev

And now the top of the playfield has been filled ready for painting which I am dreading!!!

Now the whole playfield has been sanded ready for painting and then clearcoating. Think you can see how flatted off it is in these pics


So how the heel do you mix a fluorescent red paint for the red lines - cant ever see me getting a match for those somehow!!
Quite a bit of touching up to do as well
Cheers Kev
What about a decal?
can you get one Carl - I have never seen one ???What about a decal?
Cheers Kev
well I have touched the black in by hand and around every single insert - doesn't look to clever now but once Clearcoated hopefully will look a ton better
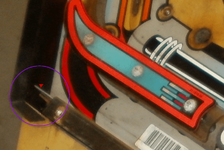
What does anyone think of doing the filler bits in white to make it look like reflections as per the left hand side of them ?? The yellow bits almost look sort of natural now the black is on !!
Cheers Kev
What does anyone think of doing the filler bits in white to make it look like reflections as per the left hand side of them ?? The yellow bits almost look sort of natural now the black is on !!
Cheers Kev

Looks pretty good to me Kev.
Nice one buddy , carry on like that I like it.
Nice one buddy , carry on like that I like it.
Holy **** you took a sander to the topside? Wish I had your balls Kev!!
You can buy fluorescent acrylic paint Kev.
http://www.bakerross.co.uk/fluorescent-acrylic-paint?gclid=COvs1OPh48kCFcjnwgodFYYGWg
http://www.bakerross.co.uk/fluorescent-acrylic-paint?gclid=COvs1OPh48kCFcjnwgodFYYGWg
Thanks daz not perfect but already 600% better/cleaner than it was. Looking forward to clear coating it it will make a hell of a difference!!Looks pretty good to me Kev.
Nice one buddy , carry on like that I like it.
Cheers Kev
nah!!!! Not a sander by hand with 400 grit paper looks crap now but once cleared it should look a lot sweeterHoly **** you took a sander to the topside? Wish I had your balls Kev!!
Cheers kev
Looking good mate, colour match as best as you can even if you have to repaint all the red on the bottom 2 it will look fine once clear coated.
I could make you digital decals for that section but no idea about printing them of applying them really

![IMG_0943[1].JPG IMG_0943[1].JPG](https://www.pinballinfo.com/community/data/attachments/24/24143-6f4caaa974c588920e69e1c4a5ff0180.jpg)
![IMG_0945[1].JPG IMG_0945[1].JPG](https://www.pinballinfo.com/community/data/attachments/24/24157-88762d94bece07035a0e0b9a4bfba43b.jpg)
![IMG_0944[1].JPG IMG_0944[1].JPG](https://www.pinballinfo.com/community/data/attachments/24/24158-eed7c358bd457b3920ee0138e847cce6.jpg)
![IMG_0969[1].JPG IMG_0969[1].JPG](https://www.pinballinfo.com/community/data/attachments/24/24484-8cdba2b50520615c078cc7b198a56e27.jpg)
