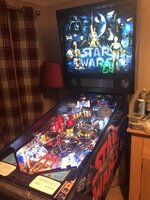
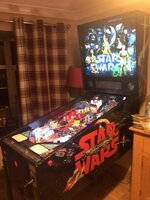
From the photo I took it looks like it was originally in the PPB board area of backbox (so bottom left).
Pinball info
You are using an out of date browser. It may not display this or other websites correctly.
You should upgrade or use an alternative browser.
You should upgrade or use an alternative browser.
Complete Data East Star Wars
- Thread starter Andy B
- Start date
Isn't that just being used to connect the wires back up where they have been cut for some reason? Definitely not original!
It was to the lighting panel. I got fed up of trying to look for the wires so brought lighting panel in from garage to fix that in backbox and low and behold there’s the missing wires!
4:40 am Bank Holiday Monday and it’s almost, almost finished.
I hooked all the boards up, connected all wiring, fired it up.
Miraculously everything that was working before I started the restoration was working!
The display was not working but that had gone kaput about a week before I started the thing and I’m buying a color DMD anyway so not fussed about that.
Played a couple of games blind and only problem is the replacement yellow stand up targets I bought are sticking when they’re hit. They are a bit flimsy and don’t appear to be as tall as the old ones so I’m wondering if they’re just snagging on playfield - particularly now I installed a playfield protector. Will have a proper look tomorrow - oops, I mean later today
Only things left to do now are fix on side rails, order replacement translite, order new playfield glass as the old one was too thick and order color DMD so it should be fully finished by the weekend.
I will post some photos up later but now I need to have a beer and hit the sack!
No final photos I’m afraid. Did not have a successful day after breaking off at 4:40 to get some kip.
I have lost the carriage bolts for attaching the side rails so can’t get that done until I get some replacements (B&Q and Screwfix don’t do small enough sizes so will need to order some from Pinball Mania).
The yellow stand up targets are still sticking when hit - they’re just way too flimsy so I may just reinstall the original, non originals I had in previously though they look nowhere near as good.
One thing that did go well is I bought and learned how to use a hand riveter for the two lights that are riveted to the plastics at th ball launch and Sarlacc Pit.
I swapped out the vast majority of the bulbs for LEDs though the kit I got was short a few bulbs and the instructions were woefully inadequate so it was a bit hit and miss and I need to order another 9 LEDs to complete the job which is really frustrating since the postage costs make buying individual bulbs expensive.
Biggest disappointment today however has been discovery that none of the GI works. All the fuses are good and I have brand new Rotten Dog power and PPB boards so I’m going to take another look at the new connectors I wired up since as the ones that were on the old board were soldered direct to board. I have the correct tool for pushing the wires in to the connectors but I couldn’t seem to get them wedged down far enough (some of them were popping out when I was connecting them up). There are 2 pins which have 2 wires going in to them as well so they were particularly difficult and I’m sure this is what’s the issue’s going to be with the GI.
But I need a break from it for a bit - I have lost my Easter working on this thing and it’s getting frustratingly boring now!
Couldn’t help myself - had another crack at it.
Got G.I. Working. As suspected was the new connectors I’d wired up. Stripped back a bit of each wire before I put them in connectors this time round rather than trying to just push them in.
Side rail bolts ordered. Playfield glass measurements noted ready for ordering tomorrow. 2 new flipper coils ordered for good measure. Leg bolts and lock down bar to spray black. New black feet to be fitted. Colour DMD to fit when that arrives, also ordered today. Mirror blades to be fitted (and not before time - I’ve already scraped some of the black paintwork off the inside of the cabinet lifting playfield up and down. Crappy yellow targets to sort out and then I’ll call it done - hopefully by weekend - don’t want to lose another!
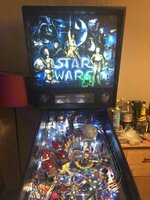
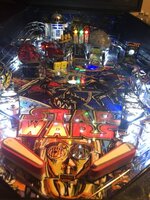
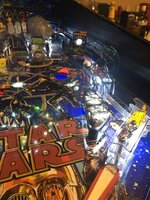
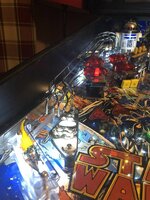
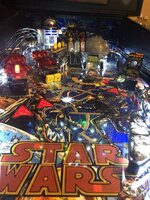
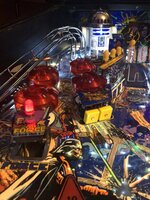
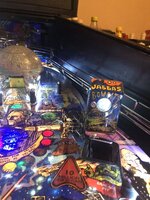
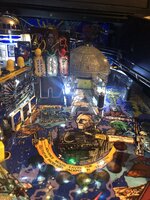
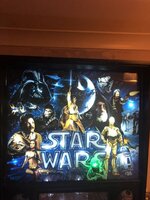
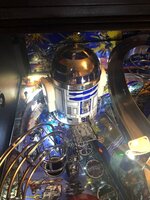
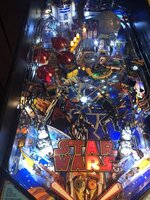
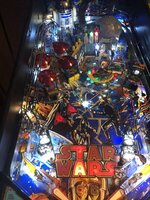
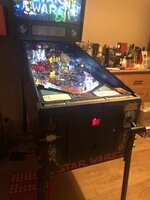
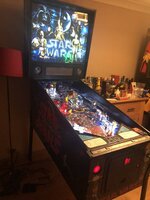
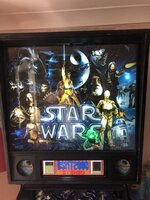
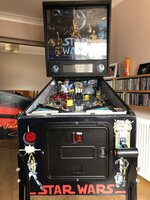
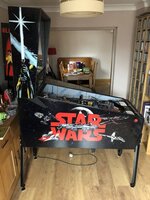
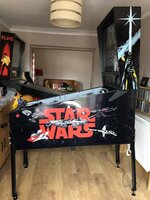
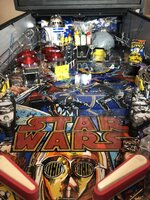
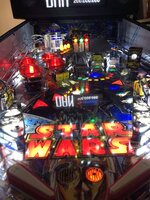
Some photos until I post completion photos up.
Note the wrong LEDs in the “STAR WARS” lettering - used some temporary wrong coloured ones until correct ones arrive.
Last edited:
Looking good man - brill effort - keep it up!!!
Cheers
kev
Cheers
kev
Thanks fellar - can see the finish line now 
Andy, where did you get the blades from for DE? These DEs are a tight fit, may be worth investing or making some side protectors to protect the blades similar to these:-Mirror blades to be fitted (and not before time - I’ve already scraped some of the black paintwork off the inside of the cabinet lifting playfield up and down.
https://pu-parts.com/pinball-assembly-blades
Andy, where did you get the blades from for DE? These DEs are a tight fit, may be worth investing or making some side protectors to protect the blades similar to these:-
https://pu-parts.com/pinball-assembly-blades
Thanks for that tip - I already scraped some paintwork down to the undercoat of the inside of the cab lifting playfield up and down so I know what a tight fit they are.
I haven’t tried the blades for size yet so they may not even fit!
Bought them from Chris B do not sure where they came from originally.
- Joined
- Jul 21, 2011
- Messages
- 2,807
Very nice
Quick tip.
If you don't want future leg decal wrinkle - fit these. See other restorations for how to cut decal.
https://www.pinball.co.uk/product/cabinet-body-parts/metal-cabinet-protectors/
Unless already done in which case ignore!
Quick tip.
If you don't want future leg decal wrinkle - fit these. See other restorations for how to cut decal.
https://www.pinball.co.uk/product/cabinet-body-parts/metal-cabinet-protectors/
Unless already done in which case ignore!
Cheers. Leg protectors already fitted though I didn’t cut the decal round them I thought the protectors were to stop you needing to trim. I’m not very handy with the craft knife so the less cutting of the decals the better
- Joined
- Jul 21, 2011
- Messages
- 2,807
Yeah, it's a tricky technique - never done it but essential to stop wrinkles.
Here is someone else's version.
Go to post 134.
https://pinside.com/pinball/forum/topic/wh2o-restoration-ride-the-rapids/page/3#post-3386967
Here is someone else's version.
Go to post 134.
https://pinside.com/pinball/forum/topic/wh2o-restoration-ride-the-rapids/page/3#post-3386967
So have you 2 types of leg protectors on one leg ?Cheers. Leg protectors already fitted though I didn’t cut the decal round them I thought the protectors were to stop you needing to trim. I’m not very handy with the craft knife so the less cutting of the decals the better
The ones mentioned are metal and cannot be seen once the leg is fitted ,also it stands the leg off the cabinet by a mm or two !!
I have black plastic leg protectors on that are about 5mm larger than the legs all round and about 3mm thick so the legs are well off the cab.
Got you 
The over type which was recommended ( and others do ) means all he weight of the machine and pressure in fixing the leg on the cab are exerted on the metal plate ,which has no contention to the decal .
The other type has connection to the decal

The over type which was recommended ( and others do ) means all he weight of the machine and pressure in fixing the leg on the cab are exerted on the metal plate ,which has no contention to the decal .
The other type has connection to the decal
- Joined
- Jul 21, 2011
- Messages
- 2,807
I know you probably don't want to hear this but the type you have on will cause wrinkles. If this is something that would bother you, then put the metal type on.I have black plastic leg protectors on that are about 5mm larger than the legs all round and about 3mm thick so the legs are well off the cab.
If it doesn't, no worries!
It was Transformers decals wrinkling badly that caused Stern to come up with the metal leg protectors.
I’ve spent that much money on the thing that (quite) a few extra quid won’t make much difference so think I will invest (if the damage is not already done) in the metal ones and doing the trimming.
To be honest I think I’m going to have to bite the bullet and do some more trimming of the decals around the edges. I fitted them flush to the edges but am finding that I am sometimes catching them (eg. When crawling underneath to turtle the cab so I can put new black feet on!) when they’re flush and I think it’s only a matter of time before they peel away as a result.
Will this thing ever end!
I sorted all the yellow stand ups last night with a bit of “fettling” eve swapped out the two round red targets down the left for yellow ones so have 5 nice new yellow targets in.
Tried some fault finding on the DMD. Tested all voltages on driver board and all good. As I have new color DMD on order I think I will fit that and see if that works and if it does then guess problem is with existing display, rather than driver board (fingers crossed).
Hi Andy,I’ve spent that much money on the thing that (quite) a few extra quid won’t make much difference so think I will invest (if the damage is not already done) in the metal ones and doing the trimming.
To be honest I think I’m going to have to bite the bullet and do some more trimming of the decals around the edges. I fitted them flush to the edges but am finding that I am sometimes catching them (eg. When crawling underneath to turtle the cab so I can put new black feet on!) when they’re flush and I think it’s only a matter of time before they peel away as a result.
Will this thing ever end!
I sorted all the yellow stand ups last night with a bit of “fettling” eve swapped out the two round red targets down the left for yellow ones so have 5 nice new yellow targets in.
Tried some fault finding on the DMD. Tested all voltages on driver board and all good. As I have new color DMD on order I think I will fit that and see if that works and if it does then guess problem is with existing display, rather than driver board (fingers crossed).
You are always best trimming the decals back 1-2mm from all the edges to stop the catching which is inevitable - as you have found out!!!
If you have any wrinkling around bolts in the cab/backbox etc loosen the bolt of and gently heat the decal and push the wrinkles out - let it cool and nip the bolt back up but dont over tighten.
Cheers
kev
Good advice Kev. Cheers. Andy.Hi Andy,
You are always best trimming the decals back 1-2mm from all the edges to stop the catching which is inevitable - as you have found out!!!
If you have any wrinkling around bolts in the cab/backbox etc loosen the bolt of and gently heat the decal and push the wrinkles out - let it cool and nip the bolt back up but dont over tighten.
Cheers
kev
Another couple of set backs meaning I can’t complete yet.
Took delivery yesterday of carriage bolts for side rails, Color DMD display, LEDs for the ones that never came with the original kit I bought and a couple of new flipper coils for good measure.
Rubbing my hands together with glee, seeing light at end of tunnel, should have known better of course:
Carriage bolts did not come with nuts. Guess I should have known this but still...and of course it’s not a simple matter of nipping out to B&Q to get hardware for these machines due to the imperial/metric thing. I even went to a couple of specialist ironmongers/industrial suppliers whilst I was out ordering new playfield glass to see if they had anything, even metric that would suit and they just looked at me like I was daft! I am 99% certain that I lost the original side rail bolts and nuts down garage whilst I was working on the cabinet but I’ve done a thorough, almost forensic, job of looking for them so must have been swept up and chucked so new ones are only option
Color DMD came with wrong power adapter to tap in to existing power supply on machine. Bit annoyed about that since as I ordered the color DMD specific to my machine. So have to wait until they send me correct one, fingers crossed by weekend.
Oh, and that order of playfield glass I mentioned earlier - won’t be ready until Tuesday. I was particularly frustrated about that as I went to a glass merchants with a trade counter and I could see all the guys cutting glass in the back whilst I placed my order so I thought they might do a while you wait service - hah!
Only good thing about yesterday was final few LEDs went in with no issues and, after fixing a mechanical snagging because I hadn’t tightened up flipper bracket properly, the new flipper coils are working a treat and I can really tell difference.
So I took the day off work today to finish everything (and then got impatient and tried to do everything last night and that’s when I spotted my issues) - now looks like I can put it off no longer and will have to take out the craft knife again to trim the decals around the edges (which have started to lift a bit where I’ve caught them whilst working on machine).
I’ll hang fire on fitting the mirror blades until I have fitted the side rails. I’ve made quite a few bad scratches to paintwork on inside of cabinet lifting playfield up and down already - there really isn’t a lot of clearance each side - so only going to fit the blades when I know I’m only going to need to lift playfield again to fix faults.
Correct power tap arrived yesterday. Fitted today in a couple of minutes. Color DMD works a treat. Love it.
Other stuff done today:
Fitted mirror blades though have not removed protective film as have yet to fit side rails as I do not currently have correct carriage bolts.
Sprayed runners on back of cab as I had scratched down to primer moving it about in the garage.
Fitted some coaster things (don’t know proper name) to runners so if I do have to have this thing stood on it’s back again the runners will be protected.
Resprayed coin door, lock down bar and side rails.
Trimmed decals few millimetres in from edges all way round so no more catching.
All Ineed now is some insulation/shearing/tubing for ground straps to speakers in backbox (any ideas where I get that from?) and a latch for the lighting panel (again, anyone know where I can get one of those from? (I mean the bolt/patch thing that holds light panel shut, not latch for bacbox which is built in on Data East’s)), carriage bolts and nuts to reattach sideraiks and the playfield glass which will be ready Tuesday.
Last edited:
looking sweet man!!!!!

