What's new
Pinball info

Register a free account today to become a member! Once signed in, you'll be able to participate on this site by adding your own topics and posts, as well as connect with other members through your own private inbox!

Complete Data East Star Wars

Can’t be as bad as the ‘blemishes’ that were in the paintwork before I took a sander to it.

Think the wife will be a lot happier with a vinyl wrapped hunk of wood (which is what she sees it as) with a few blemishes in it than the eyesore (her words, not mine) that used to be in the corner of the games room she wanted as a nice dining room.

All about balance and compromise.

:)
 
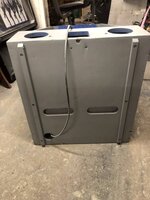
Put some rails on the back of the cab since there were none originally.

£10 piece of 15 x 21 oak stripwood from B&Q.

3BDAB7CE-9E03-4112-82D1-644B5FA91171.jpeg
 
There's a guy on pinside who seems to really know what he's doing. From memory, he said that sanding wood with anything higher than 240 is just polishing so he never goes higher (on the bare wood). Sanding paint is different though, I went to 400 and it seems that some go higher. Priming "raises the grain", it actually causes raised fibres that you then have to sand off but it should be sealed and smooth after priming and sanding (and possibly more priming and sanding).
 
Losing the will to live with this thing now.

Since the weekend I have been filling, sanding, painting, sanding, painting, filling some more etc...

Took advice and have been sanding down with 400 grit between coats of paint.

Got to a place last night where I was happy enough to spray some black on - wooho!

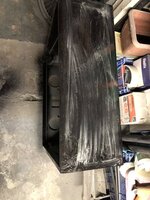
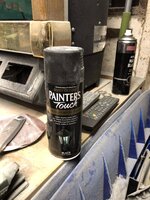
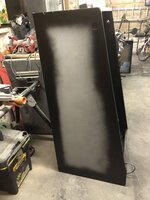
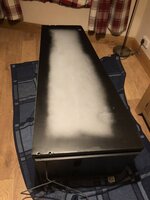
I ordered 8 cans of Matt black Simoniz but had a can of Matt black I had bought a few months back for something else so used that on bavkbox - or started to - it didn’t say it in tin - said it was OK for wood - but it set like enamel - shined, shines black - horrible!

Tried to wipe it off with paint removing wipes - bad move.
 
Oh dear, more sanding for you. I'm surprised that matt was too shiny as I was quite happy with the finish of satin black.
 
Oh Jesus - have I cocked up again?

Apart from it not being as shiny, will it make much difference in terms of applying decals to it?

I buy matt black for my jukebox refurbs I do and I prefer the non shiny cabinets for them.
 
I don't see why you can't use matt if you prefer the look, what surprises me is that you are getting an unexpected shiny finish with matt. What is different with the jukeboxes?
 
It was one particular type of paint. Photo in next post. It was almost like it was some kind of enamel spray rather than regular spray but it definitely was not! It was an absolute bathplug to get off too. Half an hour with sander using about 5 pads of 40 grit. Coming off like tar.

Anyway, all done now - just sprayed it again with primer ready to put black paint on. Whilst doing that I noticed some drips on front of cab so have them a little sand and created a dip in the surface so now I have to fill and sanding and primer and paint that - I am truly fed up.
 
You just have to do what you have to do. I noticed a low sanding spot when I thought I was ready to put the side decal on. I just had to get the filler out again. I must admit that I just made it 400 smooth, I didn't paint over it.
 
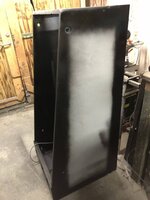
I’m done with it now. Out of the country on business from tomorrow for a week so just been over all the edges of the cabinet with a few coats of Simoniz Black Matt and then when I get back next weekend will bring it back in the house and apply the decals.
 
that looks fine to me - just give the middle of the cab into the black edges a rub over with 400 grit before decals and it will be spot on !!!

Cheers

kev
 
Agreed :)

Been on the beer last few nights after getting back from a week in Saudi where there is no beer so not risked applying decals, which is the stage I’m at now, half tanked up!

I think I have plucked up enough courage to take the plunge and put them on tonight so watch this space.
 
Bit the bullet.

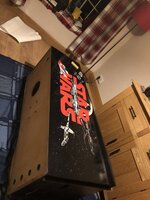
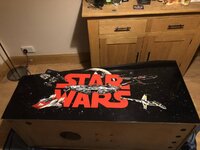
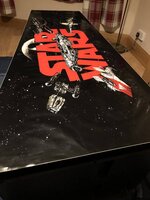
Right side decal fitted.

But nerve wracking - mainly worrying if the thing was going on straight with no cab showing - quite a tight fit but managed it in the end.

Quite a few tiny specks of dust trapped beneath so some very, very minor bumps but I can definitely live with that.

Really pleased with result. My lad says it looks the dogs and he’s a harsh judge so must be good.

Was going to do the other side whilst I was on a roll but that one seems to have bubbled/wrinkled - see 4th photo below. So have laid it out flat again with weight on and will have another look at it tomorrow.

Lighting’s not real good for photos in back room so will take some close ups at weekend in daylight.
 
Wrinkles and bubbles will push out with a roller or felt pusher thingy don't worry...looking good!

Or in the case of decals from Retro Refurbs, when you go over them with a hair dryer and soft cloth.
 
Back
Top Bottom