What's new
Pinball info

Register a free account today to become a member! Once signed in, you'll be able to participate on this site by adding your own topics and posts, as well as connect with other members through your own private inbox!

In Progress Williams - Travel Time

James

Site Supporter
Joined
Dec 29, 2017
Messages
5,100
Location
Norwich
Alias
James
4CA1115A-BBCD-4BE6-AF30-91DEE493793B.jpeg

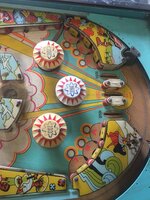
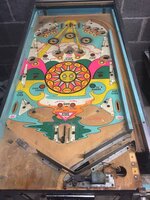
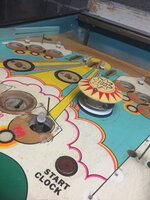
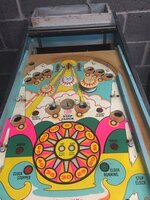
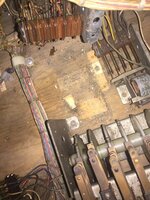
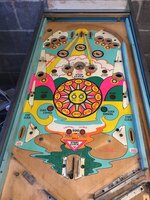
So the £110 Travel Time is in the house, this was the state of the PF when picked up.

8F86DC07-1CAB-4E96-9E4D-57C8B017CD63.jpeg

0AABAB64-36F5-4C95-8622-AAD4A2BEAE5F.jpeg

5AEF66B5-965B-4156-8A82-76A487A051B3.jpeg

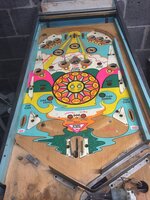
I have stripped down the PF already, it isn't in TERRIBLE shape, but it's no minter either LOL

F143A702-88A4-4594-B854-56F4D530F92B.jpeg

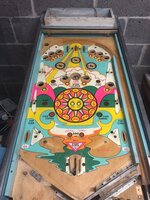
Don't let it catfish you, it's in a bit worse state than it looks, although certainly brightened up.

9DE1F6CE-40F0-41AC-9CB2-4186C56EFBAE.jpeg

Still more cleaning to do, but it's coming along quite well - I haven't tried to fire up yet as want to research how to make it more electrically safe.
 
Last edited:
Great buy. I think you'll bring that up really nice.
 
I don’t think I mentioned at the start, this is hoping to be the “star” of a meet-up I have coming up with all the uni guys and a few local friends too, we generally meet at mine now as it’s close enough for everyone, there’s space and the pinball seems to get everyone saying, oh let’s go out in Norwich, we can drink at Jays before hand :p I have 3 weekends... as it’s on the 13th April... so wish me luck.

So... I’ve spent a bit of time “touching up” the playfield, some bits I’m happy with, some not so much, but it was £110, so I think it looks nicer than before, the orange came out really bad, I’m hoping with some wax and play it’ll dampen down a bit but who knows... it’s good enough for me anyway. I will eventually strip either this down, or something else and invest in a full airbrush set... that wasn’t today.
25FF2962-86E0-4EBA-AB4B-F43EE47D8368.jpeg

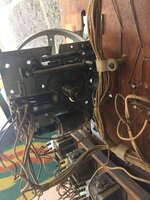
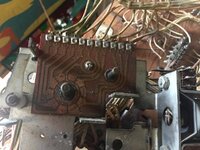
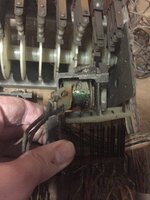
The first stepper I wanted to attack was the free play unit, it’s an up/down stepper, so the most advanced as I understand, neither way was rotating the disc at all, it was completely seized up to begin with.
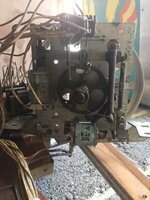
FF81A569-7938-4C51-B68E-AE85C9A8B29D.jpeg

It really is a case of just stripping it all back, cleaning like crazy and rebuilding, once done, one of the springs tensions wasn’t quite cutting it, so I simply cut a few turns out and re-fit. Happy to say the unit now works perfectly, checked the switches and all look good and logically open and close as expected.
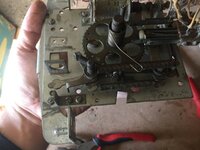
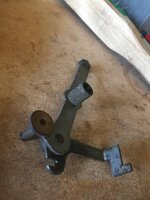
F8A44405-E78E-4D40-9A46-E952526FABB2.jpeg66C3662E-08D0-4F17-BAD6-C16C2B706FE0.jpeg

Back in as it should be.

452BA5C4-41E5-4DFA-888C-FF22D8D91E7E.jpeg

I also wanted the back box to be sorted... in preparation for the backglass that I’ll come onto in a minute.

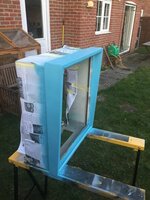
Using a mask as these old machine I imagine the paint is lead and all sorts, sanded it back from its previous state, I’m only doing the outer edge of the head as that’s the most obvious and easiest to solve for me.
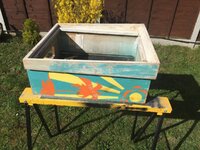
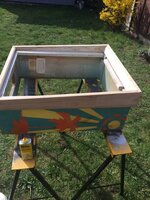
AF2CDE83-D646-4CA9-84FA-1B728DC96C40.jpeg98755722-5705-411A-9EF6-8A798A35DC84.jpeg

All primed and ready for a coat of a nice seafoam green (Tom DeLonges Strat colour, if I can find it, if not a light blue will do), before a white trim.
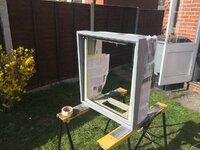
F191E94E-EBED-4E2D-ABB8-CC428034A4F0.jpeg

The backglass is shot to bits, but I knew this, my friend is looking to upscale an image in photoshop that I have, alongside the mask for the back and I’ll just have that printed to allow the light through. It’s currenlty fubar.

BF6E21B6-338F-4E8F-89AD-6C2AE9A6FB16.jpeg

Watch his space on that bit.

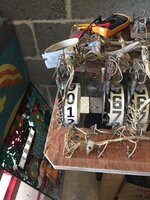
I’ve tested the score reels, all seem good but a bit gummed up tbh. I’ll strip them down hopefully during the week.

So, EM’ers, @AlanJ @Moonbus and @astyy - any ideas on what you would do with the electrics as there’s no ground on these?
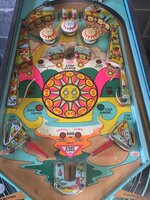
 
Don't stick your fingers in there when it's on and make sure all the fuses are correct 😋

Seriously. Clean all the switches with plain paper strips just the get rid of the gunk, make sure all the mechanism operate freely by hand and service as required. Check the way the transformer is wired so it's correct for UK.

Get a mate round and plug it in with the playfield up and backbox open. If anything starts chattering like a machine gun (apart from score reels) turn it off a diagnose.

It's then just a case of playing the game and if something does not work like a bumper or switched lamp you will have to check the schematic and corresponding relay.

The great thing about these EM games is as long as the score motor and score reel switches work you will get something out of them and they give you physical feedback to fault fund with, unlike modern games that just give you an error.

At first it is like looking through a pile of dusty spaghetti so have some wet wipes available to clean wired to see the colours

Good luck
 
Its not a problem not having a ground, but beware, there can be high voltages about. Same as with any other pin - be careful when poking about when it's switched on!!!
 
7F0CD4AD-F743-46A9-B6B8-C00E87FB4A87.jpeg

Started on the score reels today...

79D05C49-1E34-41D5-B155-B97C43C35F29.jpeg

Again, it’s all just gummed up really badly.

E256C989-468B-4067-A172-924384279405.jpeg

Pretty sure that someone has greased this up - because there’s a lot of oils and grime everywhere.

CC93B808-2D8F-4EEC-8C41-0B39A482E2DF.jpeg

Bit of brasso brings it up good with a scourer though.

7CBB3B2C-2823-44BD-846E-D59F080C4B85.jpeg

Plunger is a bit dark... removed coil too cleaned sleeve and back together.

FDB97D05-F735-41E3-A9F2-4956180D1C0A.jpeg

This is just off of the post sleeves if you will.... round mother in laws for dinner, more pictures shortly.
 
As if by magic @astyy - those numbers came off when hit with isoprop. So will be dropping something over.

27AFDD14-8524-48CF-A3F2-74779A7BC1E8.jpeg

The front needed a good old clean so I’ve done that...

Started checking on the second score reel and heard a funny crunch... 948118A3-D5F6-4FB6-BB6E-C9D88F10B1DC.jpeg

Not sure where you came from fella, but goodbye...

I rebuilt one of the pop bumpers that needed doing, but the cigarette smoke isn’t coming out...
2E8A2A87-E06D-46A7-8D2B-0FA1F4063905.jpeg

Still, it’s all about the patina right :p

CFCF3535-2C5A-4DE1-BDFD-2EB8E79B2BDD.jpeg
 
One score reel back in and stickers on - they aren’t perfect but with the timeframe, will do...

13086C6A-0777-47B6-B042-AA02B7647548.jpeg

Pop bumper one of three rebuilt, every coil on this game is gummed up and not flowing free, quick clean and it’s gorgeous.

0B4C5DD3-0621-48F8-A7D6-6A9690DFDA1F.jpeg
 
All score reels now done - Shame really the first one came off so bad as the other three didn’t - given the contrast in colour I may buy a cleaned up reel to sort that...

456D16C2-E536-4A7C-B166-0801429BAE88.jpeg

AE3BA974-460F-4E0E-92AB-AD4416198868.jpeg

Usual gummed up crud to clean off as you can see.

D5311AEB-5013-4C48-9B64-FB0A4EA8153E.jpeg

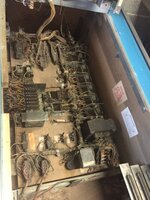
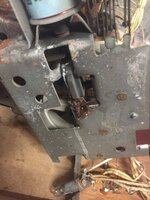
Quick check over on the inside of the cabinet and this solenoid needs swapping out, luckily what @AlanJ sent is the same one so that’ll swap in perfectly. Thanks again.
 
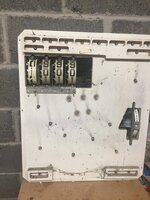
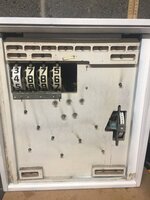
So the backbox is done apart from the match unit which I can’t fix until parts are available. Thanks Alan for the switch that’s been replaced also.

95B8D298-BF3C-4178-BBBC-89DE8922FBE6.jpeg

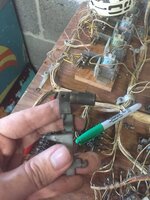
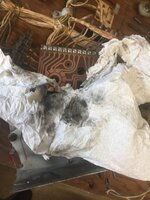
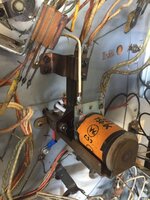
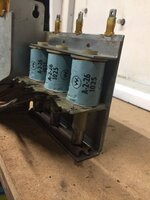
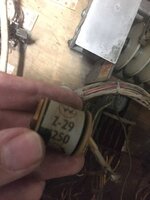
A little closer look at the smaller solenoid that is burnt out, I’m going to need to source one as the one on Alan sent up with the switches is too small, turns out it was a reset relay... not sure but presuming this has burnt out where the game wasn’t resetting probably so locked on??


F0833738-DC8A-48DE-8539-E8691F6E7621.jpeg427C146B-C2BB-4C26-8B46-4AF22BEA3EF0.jpeg


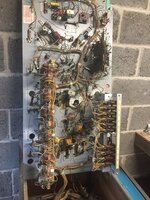
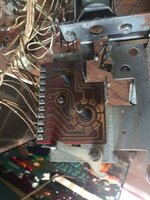
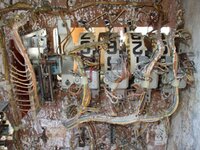
I think all mechs on that board will need to come out to clean

2E866344-AB3D-4AAD-84FF-96AB87392125.jpeg

The coil needed is a Z29 -1250

D98DD1EE-98F0-4488-947E-6C806687AC47.jpeg

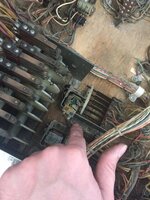
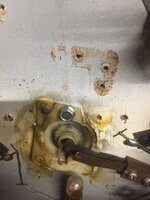
Whilst under the playfield it was clear the kicker scoop completely off of the underside and the switch was all out of sorts, reattached, adjusted, cleaned the solenoid mech too.

79AEA749-92F4-4406-A1E4-C3FCD258C8E9.jpeg

I’ll move onto the playfield topside as I think beyond cleaning, I’ll need to get that solenoid before switch on. The chime unit looks a little off, and it didn’t really make noise even manually... had a little look.

85757C52-6804-4E9E-990C-5547D60814A7.jpeg363D7364-1658-47B4-B595-B2A517E4056F.jpeg

Didn’t look so great, but goes to show... everything can clean up!

AA21D27B-7750-4628-B548-3E12E2EEEBD0.jpeg
 
Yeah I’ve struggled to find ones online too, I’ll check the one next to it, apparently it’s an old Chicago coin nomenclature for shuffle boards so perhaps it’s a previous swapout? I imagine it’s slightly beefier with 1150 windings as opposed to the 600 I currently have a spare of, so should work, could I trouble you for another favour :p?
 
Apparently @AlanJ the three are interchangeable - just different era usage for the same application with some “running hotter” or colder depending on apppication.

BEC052C3-27C7-4E8F-AD01-29CFC1A4BF89.png
 
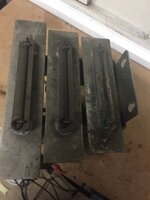
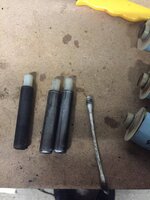
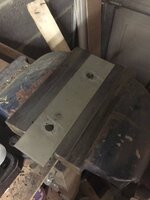
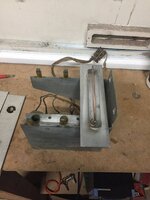
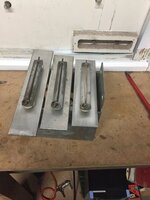
Onwards with the chime unit, the coils themselves were fine but the plunger were so gummed up at the base with that tar stuff, I had to clean them up as they weren’t moving through the coil at at all... so cleaned them up and they are now smooth as

31F52006-6A3A-48C4-99A2-A92A16195DF7.jpeg

Refitted all the coils and added some dampener to bottom I imagine to stop the flunking of metal on metal.

E54683C0-D75A-415C-8CE2-28B6D08A8985.jpeg

The actual chimes needed a really good cleanup, as that tar stuff was everywhere...

95661C92-0BBB-4F17-8E46-7CE8107B060A.jpeg

Refitting...

D9E7A4E7-A601-4CF8-A72F-9EF7C8259182.jpeg

Complete and now it’s refitted

0B781B09-1E2A-4CA5-9B31-80547457CB53.jpeg

I liked that job - nice result
 
Hi, James,

That tar stuff would've been the deteriorated remains of rubber grommets

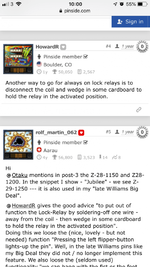
If that burnt-out relay is a 'Hold' relay, then it needs to be a higher resistance/lower current winding since it's energised most of the time that the machine's on. As those copied pages seem to mention, for use at home mechanically holding the relay plate at the On position should suffice. In fact, doing so allows the machine to be turned off and back on any time later without losing the game in progress
 
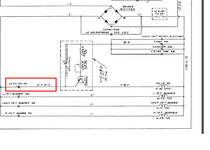
Hi @Jay Walker - whilst this isn't a LOCK Relay as mentioned, I could "upgrade" the lock relay to mechanically always be on, freeing up the associated coil to fit to this which is the Zero Reset relay.. however, and excuse my schematic reading EM's are new to me...

Looking at this, I am assuming in game the zero position relay is usually normally closed, but when open pulses round to the Clock Unit Reset to restart a new game? So would be needed?
123.png

So would need to be working, whereas the other one can be the donor?
 
That's a normally closed switch on the Zero Pos. relay (contacts closed with the relay not energised). I've not seen a time-based EM game before either, but does the 'Pulse Re(lay)' control the time remaining during a game?. Maybe the switch opening when the Zero Pos. relay operates stops the timing unit. I agree that it does need to be in order, while the Lock Relay could be locked-on to provide a relay coil.
 
Ah yes - that would make sense as there is a target to stop the clock :)
 
If it'll help, I see that boxed Pulse unit as an RC timing circuit; the variable resistor alters the 'time constant' of the circuit, the time taken to charge up the circuit and switch the transistor, operating the Pulse Relay. Provided that the circuit is powered by one or more of the four switches to the right, and the return circuit is completed by that NC contact on the Zero Pos. relay
 
Just found some pics of my Travel Time - it was a mould covered filthy non worker ....see 2nd pic ......when I got it for £40 off Ebay. Turned out alright in the end :D It went to the UK Pinball Show in 2008, then I sold it to a chap in Brighton ...something like £200 I think

82849

82850
 
That’s amazing @Sgt GrizZ - thanks for the pictures - it looks amazing all lit up. Your playfield looked much better than mine currently is. You said it was a fun game though right?
 
That’s amazing @Sgt GrizZ - thanks for the pictures - it looks amazing all lit up. Your playfield looked much better than mine currently is. You said it was a fun game though right?
Cheers. It was fun yes - the timer made for some interesting play.

The playfield side have some wear in places - prob more than you can see in that picture tbh.

Sent from my D5833 using Tapatalk
 
For the purpose of getting the machine running you can tie the lock relay by tying it in the shut position with a bit of insulated wire as long as the relay is only used to detect game activity like "tilt"
 
I think the purpose of the LOCK RE is to seemingly power down (or lock) the machine if it gets "kicked" (via the NC KICK-OFF SW that opens the circuit probably located in the centre of the motor board) or to otherwise reset the machine if powered off, so not required in HUO but nice to add back later. Back in the day punters tried all sorts of shenanigans to cheat machines of credits, replays, reset a game etc, turning them off/on mid motor cycle. It must be a long-term energised relay and not a latch/trip as they require power to the trip coil to reset (GAME OVER RE and GAME RE are trip/latch type). Have you checked the coil you're replacing is defo knack'd the wrapper would certainly appear burnt up after all these years of getting hot?

I see a separate TILT circuit which seemingly resets the Game, I guess you have a TILT bob and this game works on time not balls right? My EM loses the whole game on a tilt too - perhaps that was common.

Apologies if you know all this, I can see you're learning EM fast:thumbs:

Btw, I can't believe you haven't turned this on yet - you have more will power than me :)
 
This is why this forum is so good! Thank you @Jay Walker @astyy @AlanJ @Sgt GrizZ for all the help. NCFC are at home for the early kickoff so I’m on the goose at the moment, but I’ll get to look into all of this tomorrow I think

1F1147E9-2106-4BCB-86E0-285A4D41F04E.jpeg
 
Back
Top Bottom