What's new
Pinball info

Register a free account today to become a member! Once signed in, you'll be able to participate on this site by adding your own topics and posts, as well as connect with other members through your own private inbox!

In Progress Williams Hurricane

Sorting the lower brackets,.meant I had to sort hinges and top brackets.

IMG_20201102_112040.jpg

IMG_20201102_112932.jpg

IMG_20201102_112618.jpg

I've given them a quick acid bath to shift the rust and oxidation. Washed them off with Isoprop just to get rid of any acid. Run them through the bench polisher (formerly a bench grinder!) And the bolts and corner brackets have been sprayed with Hamerite black.

The two hinges and the two opposing clips to hold the light assembly have all been buffer up a bit, to remove rusty bits.

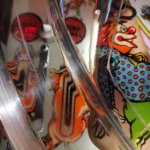
Pics of the finished pieces

IMG_20201103_100328.jpg

IMG_20201103_100332.jpg

Rust comes of pretty well with the acid cleaner and a run on a fine abrasive disc. Little bit of lithium grease on there and the backboard can go on.
 
Last edited:
I said I wouldn't, but I might as well. There are so many of the original bulbs that are blown that replacing them and doing LEDs later would be spenny.

So incase anyone gets a Williams Hurricane and wants to swap all the lights for LEDs.

THIS Google sheet gives you what you need, with links to Pin-LEDs.co.uk for each.

It covers off GI, Flashers, Backbox, Inserts, Playfield and topper. So I think this gives you all 190 (ish) bulbs you need to swap everything. I ripped off the TNT Amusements colour scheme as best I could work out from the video. All green up the right, clear top right, blue top left, red down the left hand side and orange top middle bumpers. I have picked a couple of spots for flex bulbs (the ones on wire so you can position them) you will see these in the Juggler and the drop targets on the left.

Ideally for underneath I wanted some insert LEDs that were "one sided" towers. Maybe with a reflector on one side, so they pump the light upwards into the insert. Bit like THESE but with a reflector around half of them. As these areas have lights on their side.

Anyway, I hope thats helpful to someone. Thanks to David at pin-leds for giving it the once over before order. (I need to order more, I forgot the topper!) Lots of bulbs this machine? 190 odd.
 
  • Like
Reactions: cNp
Slingshots are really busting my head.

I'd really love to see an original Hurricane layout. I've found a refurb on Pinside and I've seen the pics of @NewForestPinball amazing work previously.

Manual shows a star post left sling, left most position.

IMG_20201103_104409.jpg

IMG_20201103_102542.jpg

And if I do put a red post with screw in, it pushes the plastic up in the air.

IMG_20201103_102529.jpg

So it feels like it should be a star post. So I think I'll do that, I don't like to say "**** it", but on this occasion I will. Even though other pics seem to show the post there..

Seems the same on the right (blue) side, there other pics I've seen show both blue posts, but the right hand one doesn't go up through the plastic and just pushes it up in the air. Smaller metal post to support the rubber seems more sensible

IMG_20201103_111342.jpg
 
Last edited:
Stuffed all the LEDs in today, thanks David at pin-leds for sending the stuff out so quickly and for the 10% off for being a member of this forum!

IMG_20201103_195554.jpg

Topper left to do, forgot to order those bulbs. Tut. Looks well though, all sockets work which is a relief.

I also decided to give the left hand bank of drop targets a service. As they didn't drop. Critical. The state of the.shaftnin the picture below. Yuk.

IMG_20201103_171505.jpg

8 screws hold it in, once it comes out it's easy to see what's going on.

The theme is a duck shoot. Each of the three drop targets is a duck.

Its meant to do this:


But it currently does this:


So I removed the e tore assembly, took it to bits, cleaned the shaft that drives out of the solenoid and waxed it, so it now moves really freely.

Screenshot 2020-11-03 at 21.46.50.png

Cleaned the black plastic targets with alcohol to remove existing, useless grease. You can see below, the gummed up old grease and on the left the e-clip holding a washer and a spring and another washer.

Screenshot 2020-11-03 at 21.51.08.png

Freshened it up and superglued a snapped part or three. All three plastic targets were snapped at the base as you can see below.

Screenshot 2020-11-03 at 21.53.11.png

Once it was all apart, I was able to put a VERY small amount of Lithium grease on the black plastic of the targets. You dont need very much at all, or it gets gummed up and slows down the drop.

I gave the PCB a brush down with alcohol on both sides and put everything back together. Make sure you get all the 1/4" e-clips back in place.

Screenshot 2020-11-03 at 21.54.14.png

Back together, nice and clean.

Screenshot 2020-11-03 at 21.59.03.png


I think I better service the other ball shooter at the back too. Was pretty mucky in this assembly! :)
 
Last edited:
  • Like
Reactions: cNp
Had a look into the DMD electrical frequency "whine" .. it's not monsterously loud, but definately annoying.

I watched a great video on testing the voltages (and then subsequently fixing a DMD board.)


My voltages appear to check out.

Pin1: 112v
Pin2: 102v
Pin3: Key
Pin4: gnd
Pin5: gnd
Pin6: 5.2v
Pin7: 12.4v
Pin8: 63.7v

As far as I understand, 1 and 3 being 12v difference is good. And 112v is an ok reading?

6 and 7 look good for 5v and 12v

And Pin8 is ok at 63v on the high voltage circuit.

I have no experience of doing this, so I am just going on what I have read or watched. S'pose it could just be that the DMD is old and that's what happens. 🧐
 
you need the shorter variant of that post. I'd just saw a bit off the top or use a star post.
Perfect, I found a metal post that's shorter, so I'll use that for the time being.. 👍

Now to find two new screws to hold the bumper plastic on!
 
I seem to remember my hurricane dmd being very screechy now you mention it
Screechy is a perfect description... The more on the screen, the louder it is. Would love to understand what's going on with that, just so I understand.
 
IMG_20201105_172638.jpg
One of the red Juggler lamps wouldn't light up. (In fact, the white one doesn't light up either, but I can't seem to find any mention of that lamp in the manual either! Maybe it's a ghost!)

Tried known working LED no joy.

Tested the diode. All good. (Set you meter to the diode setting and then hold red and back proves at either end. One way you'll get nothing, one way you'll bet about 0.4v) diode is a one way value, so shouldn't get any leakage back on the 0 or OL reading)

Continuity back to both wires on lamp matrix. (Continuity setting on meter and back on the assembly wire and red on the connector wire position, just check the manual lamp matrix to ID the location.)

Measured AC voltage on all lamps. (as it has a diode I assumed AC) workers went to 3.4v and busted only went to 1v max. Set the meter to AC voltage, turn the machine on and measure red and black probes across the two wires on the lamp holder. Be careful you don't touch anything else and short something.

I swapped the lamp holder from a working position and it worked.

So I guess the lamp holder is dead.

IMG_20201105_233058_025.jpg

While I wait for lamp holder, doing flipper rebuild. Lots of corrosion on the rods.

I decided to flip the diode tab the other way round, seeing as these are pretty punchy coils. I think that's the general advice? The power bangs the diode tab if it's at the left side of my picture (coil stop) and causes the diodes to drop off. Not seen it myself obviously, but...

IMG_20201105_233058_022.jpg

I don't believe the yellow EOS has a correct "way round". Need to check that.

I gave the rod inside the coil sleeve a polish (PF wax polish) so it's smooth and did the same for the flipper bat rod too.
 
Last edited:
IMG_20201106_204345.jpg

Replaced a busted target. Yay.

IMG_20201027_210350.jpg

Not super exciting

I've been trying to straighten out the existing plastics by sandwiching them and warming them over the workshop heater.

IMG_20201106_095013.jpg

Doesn't really seem to have worked brilliantly on this piece. But the other green piece has really straightened out well. In the clamps, all day on top of the heater. Took off the heater and let it cool for an hour or so and take it out when it's cooler.

IMG_20201106_095614.jpg

In any case, I realised today when trying to reinstall this "Dunking Dummy" plastic, that it was unsupported at the front where it sits over the "dunk" target. Seemed odd it would be like this.

Quick check online and I realised the plastic is missing two tabs off the front, that attach to the posts. broken.
IMG_20201106_113126.jpg

IMG-20201106-WA0017.jpeg

Tabs on the right. So that's another few quid and more postage. I had hoped I'd caught everything and bought what I needed. These little things pop up when you're doing something for the first time I guess.

IMG_20201106_202116.jpg

This lives on top of the coinbox, I had thought it was counting plays.

It's got some "bespoke" wiring up through the cabinet and up to the knocker. The knocker wiring connects to this, so it seems to count how many times the knocker (now doesn't) knock! Bit odd.

IMG_20201106_202212.jpg

IMG_20201106_202222.jpg

The purple yellow wire is meant for the knocker I presume.. I'll check manual...
 
Last edited:
Don’t quote me but I think you either have the coin counter or the knocker connected.
So you can have one or the other? It seems to clock when I test the knocker solenoid. I'll have to do more testing 😃
 
yes mate that’s how I understand it
Okey, looks to have no wiring or connector on the knocker, so it will need that reinstating, the counter is super after market! 🙂

IMG_20201106_202130.jpg

Ramp decisions next. Everything is pretty shiny and clean now, all the bolts and screw heads etc. These plastic ramps look a bit jaded.

I might see if they brighten up with the fire!

IMG_20201106_205920.jpg
 
Screechy is a perfect description... The more on the screen, the louder it is. Would love to understand what's going on with that, just so I understand.

The DMD runs at around 200 hz which you can just about hear. It’s ****ting out EMI. Needs better shielding to stop it or run at a faster hz

also that white lamp you could not find looks like a flasher so probably under coils diagram.
 
The DMD runs at around 200 hz which you can just about hear. It’s ****ting out EMI. Needs better shielding to stop it or run at a faster hz

also that white lamp you could not find looks like a flasher so probably under coils diagram.
Lamp, found it.. as you say, flasher..

IMG_20201107_111750.jpg

The DMD is a little bit beyond my current understanding I think!
Thx for your help! Another thing ticked off..
 
Pretty much got everything back on today.


Everything seems to be working, physically. Had to sort bumpers to make them more sensitive.

But I'm now playing Hurricane. Yaas. From years sitting in a barn to playing again. A spent on LEDs , few bits and pieces but really nothing major other than the MPU board due to battery damage. I still have the old board so can try and clean it up

I notice when the game starts it's already got 3 of the PALACE light lit and 3x is already lit, so I'm wondering if the game rules are set easy?! I need to see a few other Hurricanes playing.

EDIT: checked manual and I think factory medium has PAL lit ?

IMG_20201107_222451.jpg

Topper to finish when the LEDs arrive, I've bought white, but seen some nice ones in red.. we shall see.
 
Last edited:
Correct, medium setting for PAL being lit - factory setting. The 3x being lit sound like a locked on transistor from the driver board or a connector problem. Try using the lamp test in the test menus to confirm.
 
Correct, medium setting for PAL being lit - factory setting. The 3x being lit sound like a locked on transistor from the driver board or a connector problem. Try using the lamp test in the test menus to confirm.
Thank you 🙂 I'll go have a dig around the lamp test see what's going on. I've been playing it loads, I'm not entirely sure why ppl hate the game so much. I'm enjoying it!

IMG_20201108_172844.jpg
Thankfully the corners that had snapped off were still stuck under the screws. Superglue will hopefully sort it. Quite fragile this piece of plastic.

Rebuilt second flipper. Tested and working. I don't know how to test the power of them, to check the coil or what have you.
IMG_20201108_160611.jpg

IMG_20201108_163318.jpg
 
Took the plunge and flame polished the clear ramp plastics. Worked a treat.

IMG_20201108_192246.jpg

Hard to show the process really. Once you get the flame near the plastic you see it change colour. It's a little bit like watching water dry up on a surface.

Need to be careful on tight corners where the plastic is possibly already thin.

It has made a big difference.

IMG_20201108_195102.jpg

I can see through the plastic now. Above

IMG_20201108_192943.jpg
 
Not only is this a very impressive restore but it’s one of the speediest too - good work mate [emoji106]


Sent from my iPhone using Tapatalk
 
Not only is this a very impressive restore but it’s one of the speediest too - good work mate [emoji106]


Sent from my iPhone using Tapatalk
Thanks man! Two weeks off work, with nowhere to go, helps with the speed! 🙂 Best two week family holidays EVER! HA
 
Lots of play testing.. things running smoothly. Scores getting better but my language is getting worse.

I was getting a fair amount of random slingshot misfires, probably leaf switch "leafs" too close.

So I took both sides off and cleaned it all out.

IMG_20201113_214919.jpg

Contact cleaner, rubbed with abrasive, straightened out both pairs on each side.and pushed them further parts.
IMG_20201113_215546.jpg
Decided to give the arms a clean, rub down and a lithium grease on pivots.
IMG_20201113_220245.jpg
I've taken to rubbing the rods with car finishing wax and shining them up so they are super smooth as they plunge back and forth in the sleeves.
IMG_20201113_220830.jpg
Coils, sleeve and surround were filthy too, so took a cloth and some alcohol to those to remove all the "soot" and shined the screws and bolts.

Now the contacts are further apart I get no misfires, but also the pleasant side effect of less sensitive slings firing the ball into the "egress"

They also sound less "bangy" and smoother.
IMG_20201113_222515.jpg
 
I'll move this to complete now, nothing left to do really. Everything else would be mods.

New translite and glass might be nice as original is scratched but I think I can live with that 🙂

Lighting the playfield might be good, it's a little dark in there.

This afternoon I reinstated the lamps on the top bumpers. The first hundred or so Hurricanes had lights in bumpers, they discontinued that for some reason. Mine is number 2000 and something, so I guess they stopped before that.

I followed a great tutorial and it seems to have done the trick. Link below.

IMG_20201115_122228.jpg

Lamp holders slot inside.

IMG_20201115_160452.jpg

The software has the lamps programmed into the light show, but no lamps in the bumpers. You can even see the lamps in the settings menu. So by wiring them into the lamp matrix and not simply into the GI, they work with all the other lights.

IMG_20201115_160810.jpg

With the pops removed, the lamps come through the bottom, folded the tabs over and gave them a covering of shrink wrap. Stops them causing a short.

EDIT: I used THESE for hold the bulbs, you can see them above, hard silver strip is the connector which I sheathed. But I wonder if it would be easier to use THESE which are the same lamp holder, but wire thats already sheathed a more pliable. I found it tricky to get those harder silver tabs to go where I wanted them.


IMG_20201115_172931.jpg

I made little tabs from an old flipper switch, and screwed them into the playfield and used them as connectors.

The bumps are all in the same lighting matrix column, makes things easier as you can add a common for all three lamps and then wire them up. Added a diode for each. You can see the full instructions HERE

 
Last edited:
That’s incredible I never new they removed the lights but left it all in software that’s super cool you can add them back. Wonder what other games have hidden hardware features you can wire back up, sort of like the ES sinking building (or was that a special rom?)
 
Back
Top Bottom