What's new
Pinball info

Register a free account today to become a member! Once signed in, you'll be able to participate on this site by adding your own topics and posts, as well as connect with other members through your own private inbox!

In Progress Williams Hurricane

biglouieuk

Site Supporter
Joined
Dec 22, 2019
Messages
565
Location
Kent
Alias
robllewellynuk
Thanks to a good friend, we picked up 2 pins today, from a dusty old barn.

IMG_20201024_094622.jpg

Heavy Metal Meltdown (LINK to his restoration post on here) and Hurricane. He got HMM and I got Hurricane.

No keys. Haven't fired it up yet as the barn was damp, lots of spiders!

The pin looks in good shape, some cabinet damage, rust of course. Better shape than the barn! Art work looks ok on head, sides look like the printer was missing a few colours! Ha

IMG_20201024_113858.jpg

I have the topper, but it's broken where it screws in, should be able to fix the plastic and save the topper.

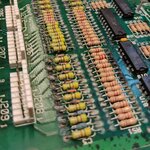
Playfield looks pretty good at first glance. I can't get into it, so don't know the state of the boards or any batteries...

IMG_20201024_153504.jpg
 
Last edited:
Would anyone have thoughts on getting into these locks, I'd really not think about the drill?!

Do keys open other cabinets at all?
 
If you drill into the centre of the locks they basically fall apart, I usally use about a 5mm metal drill and it only takes a few seconds, just be careful starting of that it doesn’t slip off and damage the cab

could use a punch/awl to make a dent to start the drill of
 
looks a bit furry around the right hand side 😩
Defo a bit furry, looks clean once the battery pack is out.. I'll need to do some reading about options for the battery later. 🙂
 
So, it fires up, no smoke.

Menus not working due to a gnd short, that I need to look at. Row 6, 7 and 8

IMG_20201024_200148.jpg

The manual has a section on GND Short Row N, so I'll read that and see what's what.

All on the same connector J209 and all related to that menu switch in the door?

IMG_20201024_203010__01.jpg

So I assume that means there is a perm gnd there causing an issue perhaps?
 
IMG_20201024_211812.jpg

The CPU board does seem to have a load of acid furriness on those resistors and u19 and u18 chips.. 😬

The schematics tell me that the gnd row fault on row 5, 6, 7 and 8 are related to a connector on J209.. nothing plugged in to J209 on the cpu board tho...

That U19 chip seems related to the troubleshooting as well...

Quite a few posts that relate to battery damage and the menu buttons... I'll try the ZEP acid clean up tomorrow 😬
 
Last edited:
So, it fires up, no smoke.

Menus not working due to a gnd short, that I need to look at. Row 6, 7 and 8

The manual has a section on GND Short Row N, so I'll read that and see what's what.

All on the same connector J209 and all related to that menu switch in the door?

So I assume that means there is a perm gnd there causing an issue perhaps?

Brave person, I think I would have let that machine dry out for a week or so before switching it on...

The GND short error is typical of battery corrosion.

Looking at your pictures of the battery corrosion of the MPU, I would say that its beyond economical repair and that you ought to invest in a new MPU. I can see 4 chips that need replacing (green and black legs are a giveaway) plus lots of resistors and capacitors at the very least.
https://www.pinballdisplays.co.uk/product-p/pl10036.htm
 
Thanks for the reply, having pulled the board and given it a good look over, I suspect you will be proved correct!

I've ordered a new one anyway, I'll see if a bit of neutralisation does anything just for fun!
Brave person, I think I would have let that machine dry out for a week or so before switching it on...

The GND short error is typical of battery corrosion.

Looking at your pictures of the battery corrosion of the MPU, I would say that its beyond economical repair and that you ought to invest in a new MPU. I can see 4 chips that need replacing (green and black legs are a giveaway) plus lots of resistors and capacitors at the very least.
https://www.pinballdisplays.co.uk/product-p/pl10036.ht
 
Having pulled the board I've given it a scrub down with some Zep cleaner to neutrise and remove some Alkaline battery leakage.

IMG_20201025_130027.jpg

It's certainly helped, now when o boot, I get no error messages about Ground Row issues, goes direct to Date and Time not set.

Before
IMG_20201024_211812.jpg

After

IMG_20201025_142457.jpg

Def better, I notice that escape and minus don't work on the switches, don't register on Switch test. I'll need to look into that later.

I also striped down the playfield a little to see what it looked like, clean it up and work out what posts I need. Various incorrect bolts and screws as you'd expect, few snapped plastics. They clean up ok, but I do wonder if I just ought to swap for replicas.

IMG_20201025_112657_619.jpg

Some lifting on the protection mylar. I need to read up on how to lift that off...

IMG_20201025_101433.jpg
 

Attachments

  • IMG_20201025_142054_204.jpg
    IMG_20201025_142054_204.jpg
    176 KB · Views: 13
While I wait for some electrical parts to arrive, I thought I'd get on with the playfield.

I've stripped a fair bit back, so I can get it cleaned.

IMG_20201026_115810_408.jpg

Just those final two set pieces to remove. I messed up and cut wires for the lamps on the back plastic. I did think, "Why aren't these factory fitted with connectors?".. They are. I have reconnected the wires with solder and shrink. 😔 Idiot.

IMG_20201026_111646.jpg

I removed the plunger. Gave it some acid to shift the rust. Obviously, that doesn't give me the chrome back, but it's clean and free moving now. 👍 I'll replace springs and rod once I get everything working and see where I am.

IMG_20201026_103837.jpg

I removed the last of the plastics. They've had a quick clean with warm water, ready to go back on. Few cracks fixed with CA glue, invisible repairs but couldn't leave them.

IMG_20201026_095336.jpg

I cleaned the translite and glass. Glass is fine, no marks. Translite, not so much. The holes are where bulbs have burnt. Again, I'll see how budget goes and maybe replace translite once I'm playing pinball.

Screenshot_20201026-213111__01.jpg

Thanks for sticking this on the artwork Arcade Warehouse! 🤪 Water and rubbing and 15 mins of my life I won't get back.

IMG_20201026_111713.jpg

Had a quick look at the line. All seems fine. Says 5amp fuse on the box.. Manual says 8amp for UK and 4amp for overseas. 🧐 My last pin had some funky, incorrect wiring at the Molex that allows you to jumper for your local supply.

IMG_20201024_193733.jpg

This is correct for UK. 1 and 7 for power and jumper 3 and 9. You can see this in your schematics to check. 👍 If you know a qualified, professional electrical engineer it's always good to ignore them and just check the schematics. Especially if you buy the pin from them.

IMG_20201025_170635.jpg

And I made a massive chicken, leek and ham pie. And because I'm a childish twat, I decorated it accordingly...

More pinball messing tomorrow..
 
Last edited:
Calcium, limescale and rust remover to neutralise the Alkaline leakage???
 
Awesome to see you on the forums again, and diving in at the deep end with a restoration, no doubt! Best of luck, looks very saveable from the start, but that acid damage will keep you busy I'm wagering!

Calcium, limescale and rust remover to neutralise the Alkaline leakage???
It's unconventional but it checks out - IMO applying an acid you can wash off is what you need for alkaline contamination after all.
And to be honest, judging by those pictures, manual trace repair is going to be inevitable, in any case. With a board like that I'd go in heavy as well to get to a 'clean' state, and just commit to the intensive manual repair.

I've even seen PCB etchant used (*very carefully!*) as a cleaner for that kind of corrosion, needless to say those people know exactly what they're doing.
 
Problem is, leaking batteries is an alkali... not an acid... thereore you neutralise with an acid (Hence the vinegar technique)....
 
Awesome to see you on the forums again, and diving in at the deep end with a restoration, no doubt! Best of luck, looks very saveable from the start, but that acid damage will keep you busy I'm wagering!


It's unconventional but it checks out - IMO applying an acid you can wash off is what you need for alkaline contamination after all.
And to be honest, judging by those pictures, manual trace repair is going to be inevitable, in any case. With a board like that I'd go in heavy as well to get to a 'clean' state, and just commit to the intensive manual repair.

I've even seen PCB etchant used (*very carefully!*) as a cleaner for that kind of corrosion, needless to say those people know exactly what they're doing.
Lovely to be back on the underside of a pinball. 🙂 I missed it! I spent the time building a Mr Driller Sega arcade but there wasn't enough dust, grief and grim! Lol

The board is borderline. The solution worked and cleaned it up, washed it off and then isoprop'd it.

Damage is Alkaline. Limescale is Alkaline. This stuff was acidic for killing Alkaline limescale. 🤪

Point is, it worked. To a point. Removed the Gnd row errors. Menu switch is not happy, but consistently not happy. I can't even short those switches to get a response and there is continuity from them all the way up to the connectors...

New board arrives today, see how that goes and then see if the board is worth saving by sending some detailed piccies to someone who knows better! 🙂

Thanks for the nice welcome back. Appreciated. 👍
 
Problem is, leaking batteries is an alkali... not an acid... thereore you neutralise with an acid (Hence the vinegar technique)....
Limescale is alkaline, my dude. Calcium carbonate deposits - therefore limescale cleaners are acids!
 
Don't forget to re-pin the connectors if the battery corrosion is that bad that it got on to the connector pins...
Will do this tonight.. regardless..

Update later on. Hammered it today.. 🙂
 
IMG_20201027_155511.jpg

More stripping back on the top today. Pretty much for everything off so I can clean the PF.

IMG_20201027_152122.jpg

Lifted out the Ferris wheel and The Juggler assemblies so I could clean them and around them. The drive belt for the wheels was solid!

IMG_20201027_160400.jpg

Decided to strip it back, clean and add a little bit of Lithium grease to keep it moving. Was super careful not to get any grease on the belts or wheels of course.
IMG_20201027_161817.jpgIMG_20201027_170221.jpgIMG_20201027_163041.jpg

IMG_20201027_171307.jpg

There are about 15 degrees of play where the black wheel meets the drive pin from the motor. Probably doesn't matter, but it will get worse. Not easy to get back to at a later date, think I'll make a new one.


for a quickie vid of what I'm seeing.

IMG_20201027_152504.jpg

Took a bit of getting out but The Juggler needed loads of cleaning so I've done that too.

IMG_20201027_183415.jpg

The CPU board arrived this morning. So popped that in for a quick test. Worked first time and the menu buttons all spring into life. Prior to that I wired in a new test switch, just to convince myself it was the corroded board... It was the board.. 🙂
IMG_20201027_114655.jpg

I ran a few tests, probably 20 odd bulbs don't work but all the sounds seem good. DMD looks solid, but did notice a few weird displays after a short period of time.

Little vid

I'll look at that tomorrow after I've deep cleaned the PF..
 
I ran a few tests, probably 20 odd bulbs don't work but all the sounds seem good. DMD looks solid, but did notice a few weird displays after a short period of time.

I'll look at that tomorrow after I've deep cleaned the PF..

No surprise that the new MPU did the trick.

The DMD issue should be an easy fix, it's typical oxidisation of the connector pins, reset both ends of the ribbon cable a few times to remove (DMD driver board and the DMD PCB) and you'll have a good image on the DMD.
 
Yeah, that wheel play almost doesn't matter there, because the wheels only ever turn in one direction, and at a constant rate. That being said, it's so much that the belt could almost risk capsizing.
 
Back
Top Bottom