For some BW games (WPC95 games mostly) I would use:
https://www.cometpinball.com/products/opmax-bulbs
Totally agree - these bulbs are fantastic.
For some BW games (WPC95 games mostly) I would use:
https://www.cometpinball.com/products/opmax-bulbs

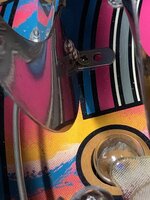
DONT FORGET - Turn off ALLOW DIM ILLUMINATION in the menu. The LEDs do not like being dimmed.I received a Fish Tales, which is my first pinball machine (well, full-sized one, anyway) a couple of weeks ago.
It had a bunch of minor niggles despite being sold as ‘in full working order’ (I kinda expected that).
Anyway, I started by fixing a ball jam in the left lane, which was due to 3” rubbers on the slingshots. These have now been replaced by 2 1/2” Perfect Play silicone rubbers in white.
View attachment 144440View attachment 144441View attachment 144451
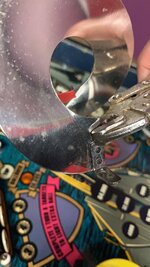
The next job was finding an occasional error in the Caster’s Club, which turned out to be an elderly, broken spring. I’ve also replaced the flipper rubbers with some green Perfect Play silicones and cleaned the playfield.
We’re now both on a staycation and I’ve LED’d about half of the machine so far. I originally illuminated under the ball guides next to the flippers with some green LEDs, but we eventually decided that white ones were better (although the green ones do look cool).
I’m not happy with the LED lighting. The green LEDs are an unnatural lurid green, which doesn’t fit the fishing theme, and I find the contrast between the bright insert LEDs and weak playfield lighting visually unpleasant. I saw an Attack from Mars at Flip Out on Sunday that had strip lighting down the sides to provide extra playfield illumination. Hence, I’m considering adding strip LEDs for illumination of the centre of the playfield and, also, I’ve ordered some Comet extra-bright LEDs to try to brighten up the G.I as well.
I’m also considering an OCD LED to deal with the rapidly-moving insert lights in attract mode, but don’t have a PC to set the levels.
View attachment 144443
(Picture shows part-LED’ing. There were a couple of LEDS already when it arrived).
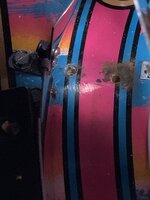
The bottom of the playfield seems to have water damage and there’s inexplicable white powdery gunk in some of the insert holes. I also found a *literal* spiders web inside the casing - not sure where it was being stored before I got hold of it. The game (currently) plays fine (cross fingers) though.
View attachment 144444View attachment 144445View attachment 144448
My four year old and toddler love it!
View attachment 144449
Unless you have an Afterglow (gi/nano) or ledocd right?DONT FORGET - Turn off ALLOW DIM ILLUMINATION in the menu. The LEDs do not like being dimmed.

Right, which this chap does not.Unless you have an Afterglow (gi/nano) or ledocd right?
I have both in my RS and I love the dimming


 Spotted Phil / Pinball Heaven, sells a 15cm LED strip light mod. Turns out that fits the cut out in the back panel of Diner perfectly above the cup. Easy connection by using one of the #555 sockets back there so it’s all neat and tidy. Now I just need to actually clean the dirty cup! (and the rest of the playfield for that matter)


In the picture of the cpu board, I see that the clear window of the Eprom chip is exposed. There's a faint risk of the contents being damaged unless the window's covered up; such chips are erased when required by taking off any label and putting them under uv light.

I think all it needs is a new reel belt as this keep slipping??
In case you didn't know you can use a 3.5" pinball rubber as a cheaper alternative belt replacement?
A black colour rubber one would be less noticeable.
Damn my timing sucks, hope it wasn't too expensive a purchase.I ordered replacement on Monday, but thanks for this, I didn’t know a 3.5” pinball rubber would fit, so it’s good to know for future reference .
No it’s cool, it was less than a tennerDamn my timing sucks, hope it wasn't too expensive a purchase.
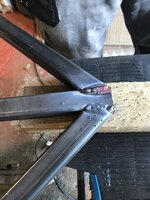
I’ll ask. he’s only here for another week, but i’m hoping i have learnt all the skills i need to be able to cut n weld metal by the time he leaves.@AlanJ , is he taking orders ?
I am looking at buying one at the moment.


 Big thanks to @Colywobbles for the plastic protectors
  They make a massive difference to the bottom of the playfield and are a must if you have a Turtles IMO! I also swapped the van around so it faces forward (another plastic from Col), updated the code plus a few other bits and pieces. Side blades still to install when they turn up plus I picked up the Krang and Shredder NECA figures so need to have a look at where they might fit in.


Is that camera wobbling due to you gulping another beer down ?Varnishing a pinroom door that I have put off, grubby hand marks on the door pushed me over the edge
3 coats each side to do though, won’t be long before I’m pouring myself a cold one!!!
View attachment 147085
Thanks, bloody thing run out after a couple of pintsIs that camera wobbling due to you gulping another beer down ?
Nice work by the way