What's new
Pinball info

Register a free account today to become a member! Once signed in, you'll be able to participate on this site by adding your own topics and posts, as well as connect with other members through your own private inbox!

Complete Tired old BoP to become BoP 2.0

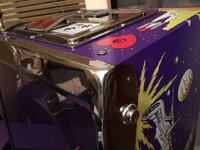
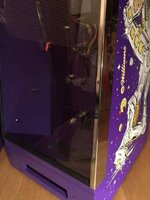
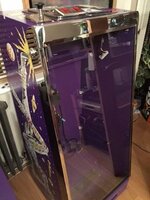
Manny's lock bars a polished by himself not chrome plated or shipped off.

Manny strips the coin doors of black paint, polished them until smooth then off to the platers
 
Manny's lock bars a polished by himself not chrome plated or shipped off.

Manny strips the coin doors of black paint, polished them until smooth then off to the platers

Indeed I was only on about the coin door which he himself said he stripped, polished and sent to get cromed
 
come on Peter - I've managed to get that kind of shine on a lockdown bar with just a polishing wheel and some of the usual polishing stuff!! :D
 
I shouldn't be following this thread, your pin is making my BoP look like a pile of poo! Maybe I should do something like this as well, I've owned her for 15 years now.
When are you expecting the conversion kit? I played Nigel's at the Lights on Sunday, but one game wasn't enough to convince me I should get one, considering the price...

Jim, I have been told about 4 weeks for the BoP 2.0 kit, Pinball Life are putting them together so I'd estimate 2 months, as I am still waiting for the new playfield, I have a bunch of parts for her;
Flipper rebuild kits, sling shot replacement parts, all new jet bumpers, new faces, mini playfield, plastic ramps, LEDs.
The sticking point may be the playfield as its not yet at the painters, but I'll keep with updates here.

Current playfield is pretty rough, so as much as I'd like to stick it in the new cabinet I may hold off as it really needs a huge strip & clean otherwise the new cabinet will become dirty inside in no time, speaking of which if I get time I may just crack on and clean it up I'll have to see if I can devote a couple of days to it.

When she done come and play BoP 2.0
 
HOLY ****! :eek: That's freakin' amazing!

I'm loving those chrome flipper buttons. Have you got a photo of the underside? Just curious to see what he did to that!
 
Looking super awesome Julian, will be good as new when you have finished her.
Looking forward to future progress and eventually playing with her :)
 
Looking super awesome Julian, will be good as new when you have finished her.
Looking forward to future progress and eventually playing with her :)

Cheers Chris, are you any good at playfield swap-outs!! :)
 
Jim, I have been told about 4 weeks for the BoP 2.0 kit, Pinball Life are putting them together so I'd estimate 2 months, as I am still waiting for the new playfield, I have a bunch of parts for her;
Flipper rebuild kits, sling shot replacement parts, all new jet bumpers, new faces, mini playfield, plastic ramps, LEDs.
The sticking point may be the playfield as its not yet at the painters, but I'll keep with updates here.

Current playfield is pretty rough, so as much as I'd like to stick it in the new cabinet I may hold off as it really needs a huge strip & clean otherwise the new cabinet will become dirty inside in no time, speaking of which if I get time I may just crack on and clean it up I'll have to see if I can devote a couple of days to it.

When she done come and play BoP 2.0
Thanks for the offer!
This makes me feel soooo bone idle. I bought flipper rebuild kits for my BoP from Phil at PH about 10 years ago and I STILL haven't put them in! I have tried the repair to the out-of-sync head, which worked, but my soldering always looks like welding.
Should you ever need a replacement for the head relay board, I bought a second-hand spare from a guy in the States a while back.
 
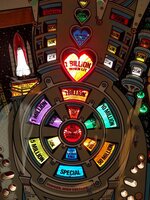
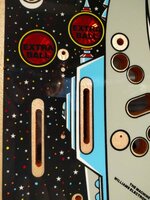
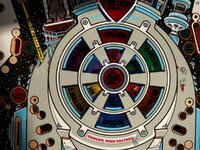
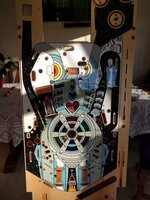
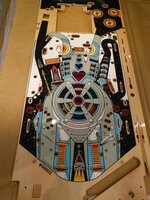
So I have the new playfield in, she's uber shiny.

Just waiting for the cabin to be built then I'll have some space to start the playfield swap over.

IMG_20151231_132950.jpg IMG_20151231_132853.jpg IMG_20151231_132844.jpg IMG_20151231_132759.jpg IMG_20151231_132713.jpg IMG_20151231_132647.jpg IMG_20151231_132618.jpg IMG_20151231_132609.jpg
 
Are you going to be building up the playfield from new parts? I'm in no rush to fit mine, so I was thinking of just taking my time and getting all new bits as and when I come across them (excluding unobtanium parts like ball guides)

Looking like yours is going to be awesome by the way! :thumbs:
 
Luke, a couple of years back when I had my bop, Andy heighway was breaking one and had loads of parts. Might be worth an ask
 
Ah, a trip to the chromers explains everything! I wondered how he gets his lock-down bars so such a good mirror polish. I got a pretty good finish on my PARAGON lock-down bar but had a feeling that the only way to achieve a true mirror-like polish was to chrome them.
Not necessarily. I've had loads of bits mirror polished by a chap near me called Gary Barton. Top bloke his works is excellent. I've taken pieces to him and you'd swear they were chromed. He has a contract with Norton motorcycles, they send him all their petrol tanks to be polished. His prices are good aswell. Check his website Gary Barton metal polishing services.
 
Are you going to be building up the playfield from new parts?

Yes, I am planning to replace say 95% of things, so new coils, complete new pop bumpers, new face, new helmet, super polish most metal ball guides and other metal parts, some new ball gates if a polish will not do the job.

Like you I'm not in a rush, but would like to get it done in a few months.
 
Soon, I'll have the space to start this project, hope to get it done in a month or two, more updates in a couple of weeks.
 
OK so now the Pin-Shed is complete, its time to rise this from the dead.

First question for my first ever playfield swap;
So I've stripped off as much as I can and I was about to make a start but during my preparation look-over the two playfields (new and existing) I have noticed some drill-holes off-center, these are for the wire ball 'guides' as such pretty important to be spot-on (I would have thought).

Does this matter?
Do I leave these to last, to make sure they line-up?

Also the holes are too small so I will need to drill them a little so do I use the actual hole and make it bigger or put a hole in the center of the art work?

IMG_20160319_192954b.jpg

Not a great photo of old dirty playfield, but you can see what I mean, as they are pretty much spot-on.

IMG_20160319_193013.jpg

Its the same further on down the playfield;

IMG_20160319_193033b.jpg
 
Annoying stuff. Did you try lining up the wire forms to see if they still fit already - that'd be the first thing to check I guess. If so, then its going to be a mainly cosmetic issue, but with the offset on nearly all of those holes, I guess it will be unnoticeable unless you really go looking for it.
 
I'd assume the artwork was applied slightly off as opposed to the holes, so personally I'd stick with the previous existing holes -I'm in no way knowledgeable in this let alone an expert, so pinch of salt applied here!

Sent from my E6653 using Tapatalk
 
I've only done one new repro playfield swap but quickly found that the dimpled holes needed to he used with a pinch of salt. They're a good guide to where things should be sometimes things needed to be moved slightly to work properly. You'll probably find quite a few bits will need drilling out before posts and screws will fit. Be especially careful when fitting screws as its easy to crack the clearcoat if it isn't drilled a little first. It will go back together in the end though, you just need to kinda crack on and work things out as you go. A couple of mm either way generally wont make much difference in most cases.
 
You're correct with the initial assumption.

They've seriously messed up. You will need to redo the holes in the center and then make them bigger. That is going to be a real PITA.
 
But yea don't be afraid to drill new holes where bits should clearly begin the middle of the art etc. I don't think its worth adjusting the whole playfield to suit though as most of the dimples are probably close enough. You'll need imperial drills!
 
Back
Top Bottom