What's new
Pinball info

Register a free account today to become a member! Once signed in, you'll be able to participate on this site by adding your own topics and posts, as well as connect with other members through your own private inbox!

Complete Terminator 2 Restoration

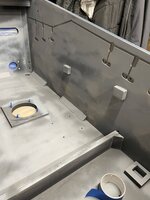
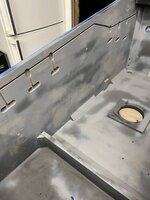
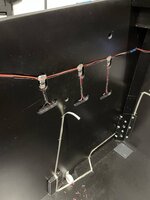
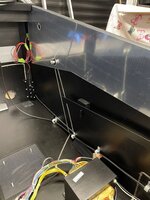
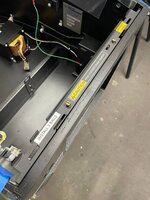
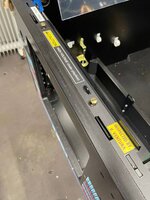
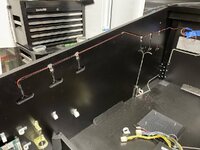
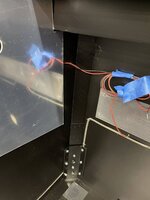
My initial idea was to sink all the wiring into the cabinet itself, then fill over them and paint. However even though the leds I used have a 100000 hour life, I wanted to be able to change any should I need to at any point in the future.

I took some measurements and my current SS side blades would hide all the wiring apart from rear. After abit of research I bought a sheet of 1mm Mirror HIPS so that I could make my own mirror blades to the sizes I need.

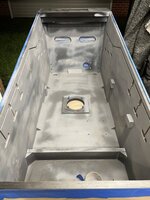
Next step was to remove the parts from the inside, mask everything on the outside and crack out the router.

Once I had cut all the channels for the wiring, I gave the inside a light undercoat and re-sprayed it in satin black.
61B94036-9E3D-4800-98EF-61535C7DFCCA.jpeg3271BA2E-2037-47ED-89B1-474FACD0C6E4.jpeg285568FF-C9C2-44C0-8848-35AB29E4CE0E.jpeg

After a a few days to let the paint harden, I wired everything up and tested it all. Thankfully everything worked 😀
E0EE271C-ABCC-45C8-A8D7-5AC18B67EBB8.jpeg
1591D407-B33F-49BE-9A18-CDF0C5BEA9EA.jpeg
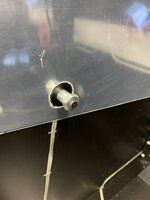
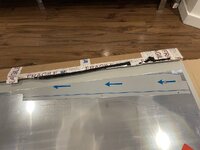
Next I moved onto measuring and cutting the mirror HIPS so that they could hide the wiring. It was pretty easy to do and only took a few runs with a sharp Stanley blade to cut. What took longer was measuring and re-measuring to make sure all the angles and holes lined up.
BC7FC4C1-B89E-4B03-BCF8-263C88FBC05A.jpeg
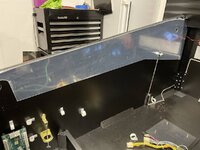
I used some ultra thin 3m tape to attach them to the sides. I re-fitted the playfield and while it is close, it does open without scratching the mirror HIPS.

I’ve left the protective film on the front of the mirror blades until I permanently re-install the playfield. I also plan to stick some thin felt to the side of the playfield just in case it gets to close.
5BB32386-A17F-4062-8461-BDA10381C553.jpegAFB9B4D3-B549-453A-9745-D2FEDDDF1887.jpeg9593A332-EE2C-4DFC-9FC6-12A72A4A3E67.jpeg224A9C05-9A7A-4D22-94EC-7C61E49A3254.jpeg
 
Last edited:
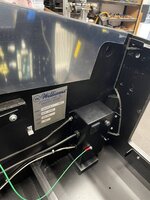
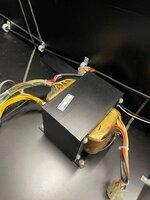
Final job was to finally fit some of my newly powered coated parts, new Williams warranty and lockdown mechanism stickers and re-wire and fit the main power box.

3712EBFC-4226-49DD-B0A6-847B78AC3B7B.jpegF9C980BE-D931-4079-8CB0-8A4F8AB41E61.jpeg4C3CBA70-B1DB-4E81-ACEC-9E1E48DEB425.jpegBBBCD265-6281-4D97-A210-17A8F4DF18E2.jpeg
 
Last edited:
Just been catching up on this build, absolutely incredible work. Those handmade chromed leg protectors are next level. Respect! 🤜🤛
 
Just been catching up on this build, absolutely incredible work. Those handmade chromed leg protectors are next level. Respect! 🤜🤛

Thanks mate, I really appreciate it.

Shaping actual protectors wasn’t to hard, but without a hydraulic press, it was getting the holes for the bolts lined up and neat with a dremal and file which was a complete bitch to do.
 
I got round and finished installing another mod today.

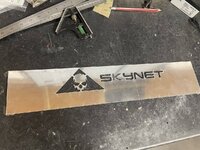
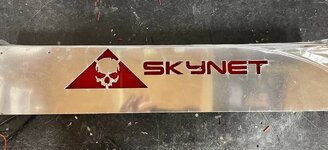
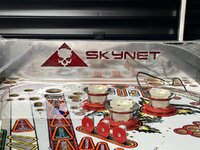
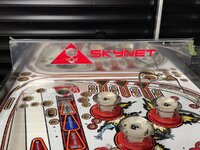
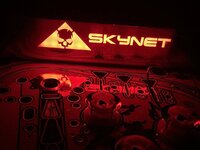
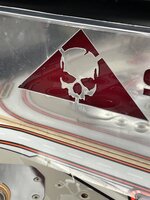
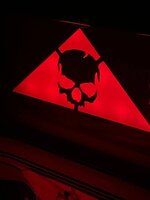
Big thank you to @Colywobbles who took my initial plan for my playfield backboard and transferred it to some mirror hips.

Once received I installed some red acrylic which I sank into the backboard for a flush fit then backlit it with a few red led strip lights. Ill remove the protective film when I’ve refitted the playfield back into the cabinet.

Should hopefully go really well with the new mirror blades I fitted.

BE435772-29EA-4B9E-A6EC-098CC37D70DC.jpeg32BCDABF-5D2F-407C-BAFC-7A5B8B188ACC.jpeg9D1777DB-077D-4C62-B2C4-95C6AD2D3398.jpegD8C585D1-059C-4E46-83A9-648C0E57DEFC.jpegBBA4D34A-0898-40F7-8D6C-83A26149FF52.jpegACC47AC1-CE9C-4550-83A4-87923EDFC0E0.jpeg
BF4A5F19-01DB-491A-AA02-B68196BA6CE0.jpeg
 
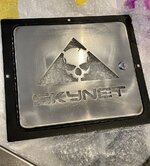
I'd wondered what that was for. Skynet meant T2, but I didn't think of an infill panel. It's a bit late to suggest now, but would a strobing bar of l.e.d's, as with a 'program loading' graphic, be too intrusive?
 
I'd wondered what that was for. Skynet meant T2, but I didn't think of an infill panel. It's a bit late to suggest now, but would a strobing bar of l.e.d's, as with a 'program loading' graphic, be too intrusive?
That’s cool idea. There’s so many ideas you can come up with around the Terminator theme.

To be honest, most of it won’t be seen as it will be hidden by a new skull mod I’ve got in mind.
It was sort of a side project that I thought I’d try out. Happy I did though.
 
Now that Christmas and new year is out the way, I’ve got some free time to work on T2. My plan is to have the playfield reassembled by the end of the month.

I picked up the last parts from the chrome platers. I have to say the quality of the chrome is outstanding. I would definitely recommend Douglas Metal Finishing if you need any plating done.

008ED8CB-C0FD-4AD2-A8C3-59687D8EE18F.jpeg2231D56A-8577-4532-B12D-30A4BCFBFB6D.jpeg341CFA5C-1196-40BF-870A-B05DF5FE7FC1.jpegE0224FD5-69E7-4A87-B8F1-70B1FA3CC770.jpeg
 
I would definitely recommend Douglas Metal Finishing if you need any plating done.
Would you mind me asking roughtly how much that was? I know chroming is usually very expensive... just want to get an idea of just how silly it is nowadays, since i have a few things i wouldnt mind getting done..

Cheers
 
Would you mind me asking roughtly how much that was? I know chroming is usually very expensive... just want to get an idea of just how silly it is nowadays, since i have a few things i wouldnt mind getting done..

No problem Paul. I shopped around for some quotes when I was looking to get my pats chromed. Douglas Metal wasn’t the cheapest but we’re also not the most expensive. One quote I had was for over £3k 😮😂

I did try a small local company to me who gave the lowest quote with a couple of small test parts, and I guess you get what you pay for. I wasn’t happy with the quality at all so went to Douglas Metal.

For all the chroming I had done by them they charged me £750. That was for the parts in the above photo, plus legs, leg protectors, top glass rail, and a few small bits I made. They also polished the parts I didn’t want to do myself, but that was a separate cost.

What I liked about them was the fact that when I collected they wanted me to inspect all the parts before I parted with the cash to make sure I was happy with everything.
 
Wow i knew it was pricey, but no idea. thanks for sharing.

No problem. Yeah it’s a real labour intensive process due to the polishing that has to be done before it can be plated. The £3k+ quote was ridiculous though.

For this resto, I think chroming was the way to go, but I can see why people go with powder coating. The huge choice it offers and at a fraction of the price.
 
As another data point, I also used Douglas Metal to gold-plate the wireform, a small ball guide and a couple small bits in my BK3 (incalux gold+nickel plating as discussed in another thread).

Cost was £250 + VAT. They also handled transport both ways for £40 each, so the total was just under £400. Not cheap but very pleased with the results.
 
No problem Paul. I shopped around for some quotes when I was looking to get my pats chromed. Douglas Metal wasn’t the cheapest but we’re also not the most expensive. One quote I had was for over £3k 😮😂

I did try a small local company to me who gave the lowest quote with a couple of small test parts, and I guess you get what you pay for. I wasn’t happy with the quality at all so went to Douglas Metal.

For all the chroming I had done by them they charged me £750. That was for the parts in the above photo, plus legs, leg protectors, top glass rail, and a few small bits I made. They also polished the parts I didn’t want to do myself, but that was a separate cost.

What I liked about them was the fact that when I collected they wanted me to inspect all the parts before I parted with the cash to make sure I was happy with everything.
This is good to know as it’s only 15 minutes from my home, will definitely be using them.
 
No problem. Yeah it’s a real labour intensive process due to the polishing that has to be done before it can be plated. The £3k+ quote was ridiculous though.

For this resto, I think chroming was the way to go, but I can see why people go with powder coating. The huge choice it offers and at a fraction of the price.
It's worth it, looks fantastic and if your planning on keeping it, why not, it only becomes a real problem if your taking a machine and then trying to flip it for a large profit. I was thinking about using them to plate my LOTR ramps and wireframes, I had read from old forums post that they where recommended but wasn't sure if they where still good as the post I think was 2015 :). Great to see recent results and good service. 3k sounds like they didn't won't to actually do the work, but if your stupid enough to pay it would :)
 
As another data point, I also used Douglas Metal to gold-plate the wireform, a small ball guide and a couple small bits in my BK3 (incalux gold+nickel plating as discussed in another thread).

Cost was £250 + VAT. They also handled transport both ways for £40 each, so the total was just under £400. Not cheap but very pleased with the results.
THanks Fubar, looking to do this on my LOTR, good to know a rough idea what sort of money we where talking and now two recent recommendations.
 
No problem. Yeah it’s a real labour intensive process due to the polishing that has to be done before it can be plated. The £3k+ quote was ridiculous though.

For this resto, I think chroming was the way to go, but I can see why people go with powder coating. The huge choice it offers and at a fraction of the price.
My wife was asking what I was looking at :) and was trying to bore her with the benifits of replatting my ramps, I showed her all your shiny chrome and terminator lights and she was very impressed. If you ever think of getting rid of it drop me a pm :) although to be honest I probably couldn't afford it! Still her approval makes the spend on shiny gold ramps easier to suddenly appear on my LOTR *lol* so thanks :)
 
This is good to know as it’s only 15 minutes from my home, will definitely be using them.

The guy you want to speak to is one of the bosses, Paul. Really helpful
and if it’s a bit you need doing, will do you a deal on the price 😉
 
It's worth it, looks fantastic and if your planning on keeping it, why not, it only becomes a real problem if your taking a machine and then trying to flip it for a large profit.

I agree, if I was planning on moving this on, then I definitely wouldn’t go to the lengths I am with it as the only person that will benefit would be the new owner. However if you have a pin that you know is a keeper, then why not.
 
I agree, if I was planning on moving this on, then I definitely wouldn’t go to the lengths I am with it as the only person that will benefit would be the new owner. However if you have a pin that you know is a keeper, then why not.
Totally agree. LOTR might be a keeper for me, although I can only have one, unless I move 🤭
 
3k sounds like they didn't won't to actually do the work, but if your stupid enough to pay it would

That’s exactly what I thought, but then they sent a couple of follow up emails a few weeks later asking for an update on my thoughts about the quote 😂
 
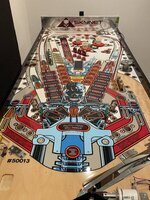
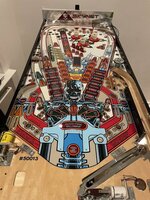
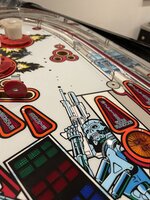
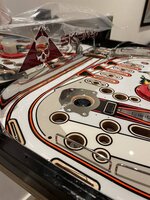
I’ve finally started to fit some parts back to the playfield.

The original black wooden side rails weren’t looking great, with the laminate peeling away in some spots.

I was planning on making some new ones myself, but then I found a guy on pinside that makes custom wooden rails from oak and paints them with a high gloss finish in what ever colour you want,
and at a good price imo. He also pre- drills the mounting holes and all the screw holes for the plastics and metal side rails, which are spot on to the originals.
If I would have done these myself they definitely wouldn’t have come out as good.

9525EB98-7DC7-46C8-9C1A-F1B6F21B2270.jpeg201E26F4-D010-426A-80C4-07C86938FAC0.jpeg5CCF511E-7C6B-4DDC-B5B0-921535D9D667.jpeg8167F072-6C27-4DDB-B00C-53D842564870.jpegE067D784-CBFD-4648-AE03-8860240A1D71.jpeg
 
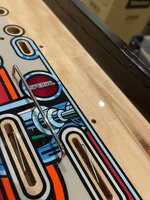
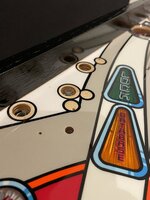
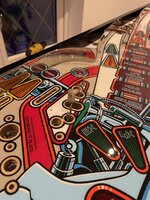
The next job I got round to doing was re-fitting the metal ball guides.

This took some time, as a few of the dimples on the new playfield were slightly out of place and there was a couple missing.
I also had to manipulate some of them a little from where I think they may have twisted due to the polishing.
Really pleased with the results though in the end.

Next job, is to fit the bulbs followed by all the posts.

E65EC384-A555-4405-A069-37CCC4703471.jpegADDCBCBB-85E2-498C-B6A8-A834C627F415.jpeg13DA7592-D948-49F5-A6EC-1B59B3474186.jpeg5EB16F41-64C5-49E1-BF42-76C07FA10577.jpeg
 
The guy you want to speak to is one of the bosses, Paul. Really helpful
and if it’s a bit you need doing, will do you a deal on the price 😉
Thank you.
I have ordered new decals for my WH20, as we know things can get carried away with restorations.
Loving your work
 
The next job I got round to doing was re-fitting the metal ball guides.

This took some time, as a few of the dimples on the new playfield were slightly out of place and there was a couple missing.
I also had to manipulate some of them a little from where I think they may have twisted due to the polishing.
Really pleased with the results though in the end.

Next job, is to fit the bulbs followed by all the posts.

View attachment 157164View attachment 157165View attachment 157166View attachment 157167
Looks amazing
 
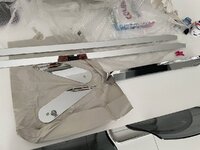
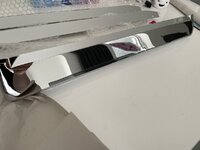
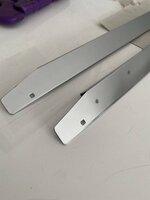
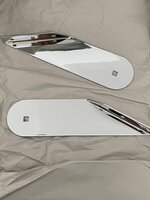
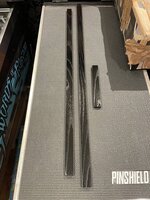
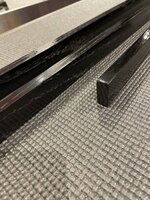
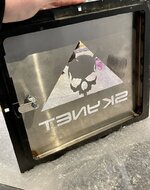
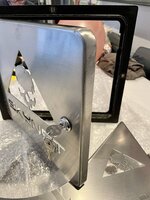
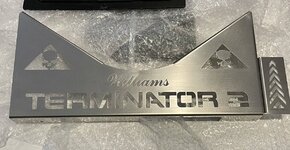
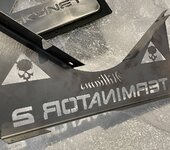
Just received these and am blown away with the quality.

Unfortunately I don’t have the equipment to do these myself, so I had them custom made by a guy that laser cuts pinball mods.
My original plan was to get them both powder coated in black, but I think another trip to the platers is in order instead.
63814FDC-71B3-43A0-8F57-F60BFE561596.jpegC79C6A79-6A51-4308-87C5-92CC560119C5.jpeg65FD738F-FB6F-4E9F-B526-F0802F9D4E8A.jpeg71814A60-319E-42FE-B377-55B7D5819C10.jpeg8517C2AF-D615-4F26-9ECC-1A50D30D9165.jpeg
 
Back
Top Bottom