I love a mod and this mod is fantasticI’ve been working on the cabinet a bit more over the last couple of days.
As the game will be placed on its own in my my games room when completed, I decided to install led in the eyes of all the T800’s on both sides of the cabinet to try and get the iconic look of the glowing red eyes from the films.
Due to the amount of wires, the plan is use a a small power distribution board that has an adjustment screw so the brightness can be turned up or down if needed. Power to this will come from a separate power board for that will run all the mods.
View attachment 148597View attachment 148598View attachment 148599View attachment 148600View attachment 148601View attachment 148603View attachment 148604
Pinball info
You are using an out of date browser. It may not display this or other websites correctly.
You should upgrade or use an alternative browser.
You should upgrade or use an alternative browser.
Complete Terminator 2 Restoration
- Thread starter Ant-H
- Start date
now thats impressive, the whole restoration is looking greatI’ve been working on the cabinet a bit more over the last couple of days.
As the game will be placed on its own in my my games room when completed, I decided to install led in the eyes of all the T800’s on both sides of the cabinet to try and get the iconic look of the glowing red eyes from the films.
Due to the amount of wires, the plan is use a a small power distribution board that has an adjustment screw so the brightness can be turned up or down if needed. Power to this will come from a separate power board for that will run all the mods.
View attachment 148597View attachment 148598View attachment 148599View attachment 148600View attachment 148601View attachment 148603View attachment 148604
Well I did the same thing with my flipper coils on STTNG I didnt realise my reference picture where reversed and when I soldered the coils back incorrectly , but I think my all time dumb mistake was this:Thanks again Jay! I’ve just checked my reference photos I took when I disassembled everything and it looks like I repeated someone else’s mistake. These are the little things that you learn for the next one

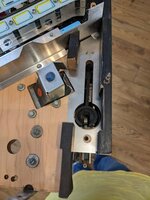
Fitted the glass back on and tried to play, then realised I had put the wood the wrong way round, the balls kept ejecting down the newly created drain hole *lmao
Ant-H
Site Supporter
Cheers Dave. Yeah I’ve reserved a space for it so that your be able to see the glow of the eyes.Coming on nicely!
Very cool LED eyes mod for the cabinet sides! Especially if you are having this game stand pride of place on its own in your room as you say
Ant-H
Site Supporter
Thanks a lot. I’ve been thinking about doing this mod for a while now but couldn’t bring myself to grab my dewalt and start drilling a load of holes through newly applied side art.I love a mod and this mod is fantastic
I had a few drinks last Friday night and I think I had a bit of Dutch courage as I just started measuring up and drilled away on one side.
It was only when I woke up on Saturday morning I remembered what I had done and absolutely shat myself hoping I’d not messed it up.
Luckily when I checked, it looked spot on. Decided to do the other side sober though
Ant-H
Site Supporter
Thanks a lot, I really appreciate it.now thats impressive, the whole restoration is looking great
I’m planning on doing the same to the larger T800’s on either side of the back box next.
I just need to make sure I get the measurements spot on as they have larger eyes. I need to drill the hole exactly in the middle to avoid giving them uneven looking eyes. The smaller ones were easier as the led was the exact size of the eyes printed on the decal.
Are there still huge l.e.d's available? Around 10 or 12 mm. I meant to ask if the backbox was also getting this treatment.
Last edited:
Ant-H
Site Supporter
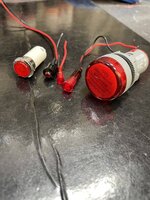
I bought a load of samples of different sizes to see what will look best and also ideally to have the same sort of glow when lit up.
The largest ones I found were either to big or slightly smaller than the eye. Ive settled on a few similar to the ones I used on the side that have a black lip that’s round the led. That way it covers the hole perfectly it gives it a nice finish.
The plan is to drill a hole to take the smallest and then keep going bigger until I’m happy with the look. Rather than go all in with the largest led and regret it after I’ve drilled a huge hole.

Ant-H
Site Supporter
I’ve not done much on T2 recently, but this week I plan on fitting the leds for the terminator eyes on the back box and tackle to warning text on the back as well.
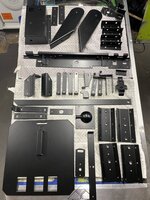
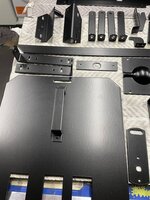
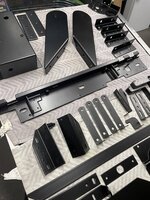
However I did collect a load of parts from the powder coaters.
I use a company in Aldershot. Great quality work and a fast turnaround. Was only £80 so I was well pleased
Going back on Thursday to collect the last few bits.
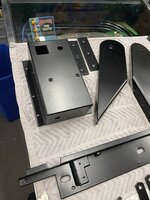
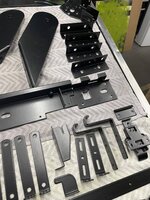
However I did collect a load of parts from the powder coaters.
I use a company in Aldershot. Great quality work and a fast turnaround. Was only £80 so I was well pleased
Going back on Thursday to collect the last few bits.


Ant-H
Site Supporter
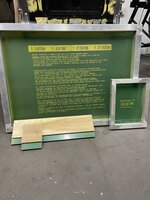
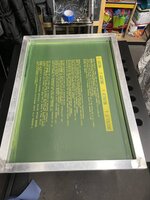
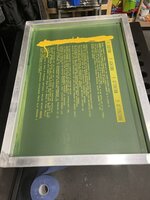
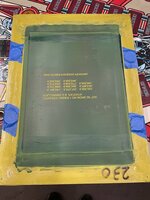
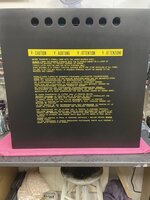
Thought I’d tackle the warning text on the back box and cabinet last night.
I was going to originally purchase the decal to stick that on the back, but decided to go the screen printing route, and I’m really glad I did.
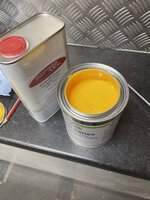
The kit was purchased from a member on pinside and I basically just followed the tutorial video on YouTube. It was actually a lot easier to do that I thought it would be.
The hardest thing was finding a supplier for the correct colour ink in the UK.
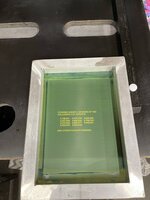
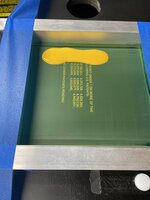
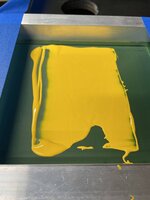
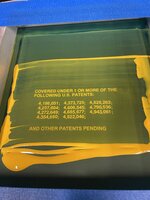
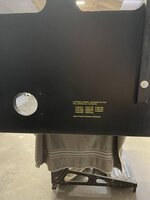


I always wondered how it was done, interestingThought I’d tackle the warning text on the back box and cabinet last night.
I was going to originally purchase the decal to stick that on the back, but decided to go the screen printing route, and I’m really glad I did.
The kit was purchased from a member on pinside and I basically just followed the tutorial video on YouTube. It was actually a lot easier to do that I thought it would be.
The hardest thing was finding a supplier for the correct colour ink in the UK.
View attachment 150201View attachment 150202View attachment 150203View attachment 150204View attachment 150205View attachment 150206View attachment 150207View attachment 150208View attachment 150209View attachment 150210View attachment 150212
Ant-H
Site Supporter
I always wondered how it was done, interesting
Check out the video on YouTube. It shows you step by step how to do it. And how to clear up the mess afterwards
ThanksCheck out the video on YouTube. It shows you step by step how to do it. And how to clear up the mess afterwards
Ant-H
Site Supporter
I’ve been working on wiring up all the leds for the Terminator eye’s on the cabinet today. Also re-fitted some of the newly powder coated hardware and some mirror blades.
Next job on the list is to sort out the led eyes for the back box and start to re-assemble it as well.
Next job on the list is to sort out the led eyes for the back box and start to re-assemble it as well.
Last edited:
Ant-H
Site Supporter
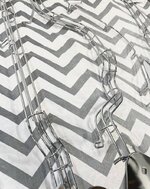
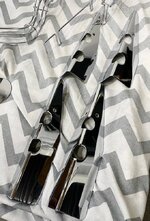
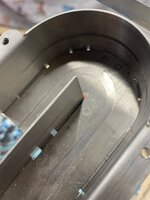
Picked up some of the playfield parts from the polishers today. Really pleased with the quality of the work.
The ramp and side rails all had heavy ball trails but they are completely gone now.
Everything came out better than expected. Just a few more bits to collect along with the chromed parts now
Before
After
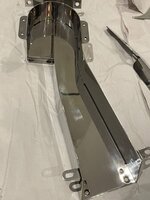
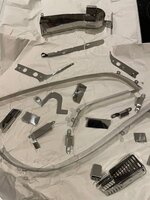
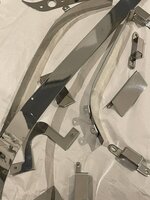
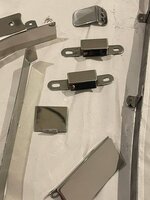
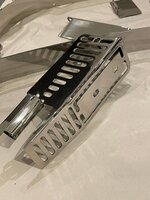
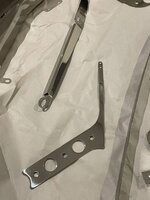
The ramp and side rails all had heavy ball trails but they are completely gone now.
Everything came out better than expected. Just a few more bits to collect along with the chromed parts now
Before

After


Last edited:
They have come out great are they chrome plated?Picked up some of the playfield parts from the polishers today. Really pleased with the quality of the work.
The ramp and side rails all had heavy ball trails but they are completely gone now.
Everything came out better than expected. Just a few more bits to collect along with the chromed parts now
View attachment 150829
View attachment 150827
View attachment 150823
View attachment 150824
View attachment 150825
View attachment 150828
View attachment 150826
Ant-H
Site Supporter
I hope I get to see this when completed being a Londoner, fabulous shine
Thanks mate. For sure, if you local to South London, pop by.
Ant-H
Site Supporter
They have come out great are they chrome plated?
No, all the playfield parts are just polished. Im hopefully picking up some of the chromed parts this weekend.
They actually came out so much better than I expected especially with the condition of some parts beforehand.
I have polished some other smaller bits myself, and I did start to polish this stuff but after a couple of hours I thought sod this, and took them to the professionals.
Holy hell! That stuff looks amazing! I've never tried polishing stainless, not like it would come out like that though, looks amazblaz!No, all the playfield parts are just polished. Im hopefully picking up some of the chromed parts this weekend.
They actually came out so much better than I expected especially with the condition of some parts beforehand.
I have polished some other smaller bits myself, and I did start to polish this stuff but after a couple of hours I thought sod this, and took them to the professionals.
Ant-H
Site Supporter
Earlier on in the build I made a slight f-up and installed the hidden leg protectors upside down  .
.
I refitted them the correct way, and probably could of got away with it as the legs covered most of the area which I trimmed the decal away to fit the protectors apart from about 10mm at the top of each leg.
No one could notice it when looking at the cabinet, but I knew it was there and I also knew it would bother me every time I look at it.
Plan B, I tried using red and then black plastic leg protectors. They covered the area perfectly but they just didn’t look right with the overall theme/look I’m going for.
So on to plan C, I decided I fabricate my own as that way I could make them bigger and more of a feature when combined with the chromed legs.
Firstly I folded a piece of 1.2mm mild steel sheet to a 90 degree angle.
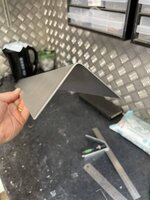
I marked out the shape I wanted and began cutting. I then rounded all the corners with a hand file.
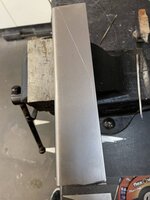
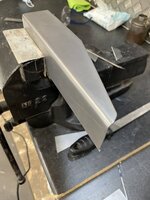
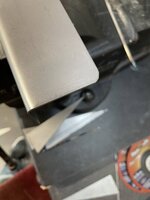
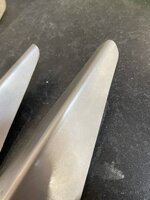
With the plastic leg protectors, I was never keen on how they are all the same length, with the ones of the back hanging down lower than the cabinet. So I deceived to cut the rear ones so that they would follow the shape of the cabinet instead.
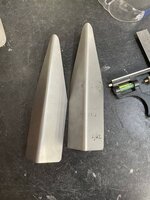
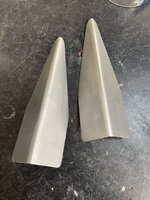
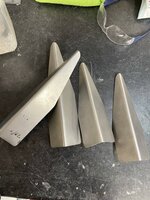
The next step was probably the most challenging as I had to come up with a way to make the holes for the leg bolts to go through. I marked out the position and drilled small holes along the line. I then cut this out and spent the following 3 hours with a dremal and my file set tidying them up.
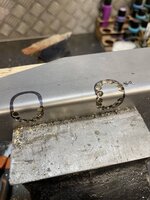
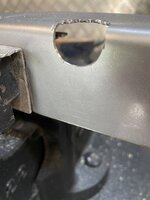
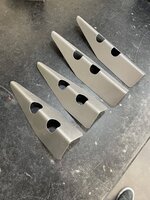
Final job was to drill mounting holes so that they could be attached to the cabinet and to get them chromed. I’ve trimmed the decals around them so that they don’t damage the artwork.
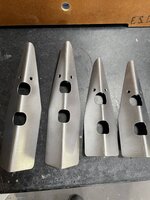
I’ve actually picked up some chromed parts from the platers this morning but haven’t got round to unwrapping everything yet. These should be in the box.
I refitted them the correct way, and probably could of got away with it as the legs covered most of the area which I trimmed the decal away to fit the protectors apart from about 10mm at the top of each leg.
No one could notice it when looking at the cabinet, but I knew it was there and I also knew it would bother me every time I look at it.
Plan B, I tried using red and then black plastic leg protectors. They covered the area perfectly but they just didn’t look right with the overall theme/look I’m going for.
So on to plan C, I decided I fabricate my own as that way I could make them bigger and more of a feature when combined with the chromed legs.
Firstly I folded a piece of 1.2mm mild steel sheet to a 90 degree angle.

I marked out the shape I wanted and began cutting. I then rounded all the corners with a hand file.


With the plastic leg protectors, I was never keen on how they are all the same length, with the ones of the back hanging down lower than the cabinet. So I deceived to cut the rear ones so that they would follow the shape of the cabinet instead.


The next step was probably the most challenging as I had to come up with a way to make the holes for the leg bolts to go through. I marked out the position and drilled small holes along the line. I then cut this out and spent the following 3 hours with a dremal and my file set tidying them up.


Final job was to drill mounting holes so that they could be attached to the cabinet and to get them chromed. I’ve trimmed the decals around them so that they don’t damage the artwork.

I’ve actually picked up some chromed parts from the platers this morning but haven’t got round to unwrapping everything yet. These should be in the box.
Ant-H
Site Supporter
Really pleased with how the leg protectors have come out. I added some black felt to back of them and plan to do the same with the legs before fitting them.
The larger front ones fit higher up on the cabinet due to where I cut the bolt hole on them, so your be able to see more of them underneath the legs. I think once the chrome legs are on top it should hopefully look pretty good.
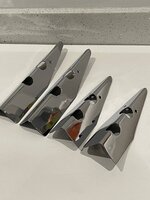
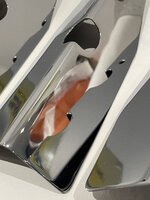
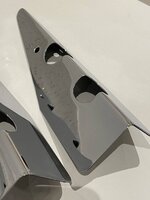
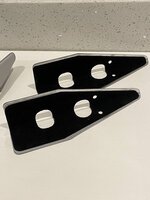
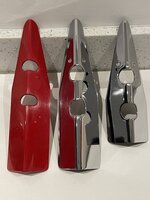
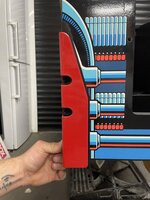
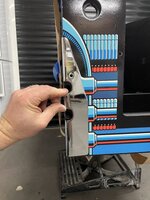
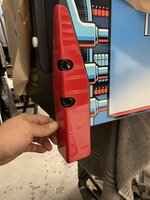
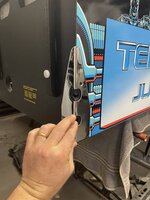
The larger front ones fit higher up on the cabinet due to where I cut the bolt hole on them, so your be able to see more of them underneath the legs. I think once the chrome legs are on top it should hopefully look pretty good.


Last edited:
Ant-H
Site Supporter
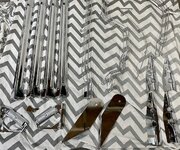
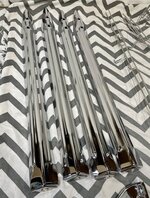
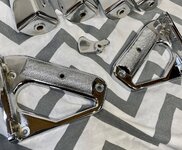
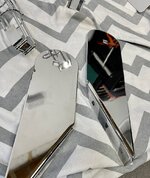
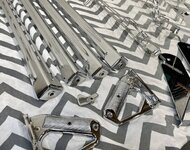
Wow!!! I did wonder how you was going to cover the corners, them home made leg protectors are fantasticFirst batch of Chromed parts collected. Just waiting for the rest of the cabinet armour to be done.
View attachment 150978View attachment 150979View attachment 150980View attachment 150981View attachment 150982View attachment 150983View attachment 150984
Ant-H
Site Supporter
Wow!!! I did wonder how you was going to cover the corners, them home made leg protectors are fantastic
Thanks mate. I’m really pleased with how they have turned out.
Ant-H
Site Supporter
I haven’t done much on the playfield rebuild since my last update as I’m waiting for a few parts and had to go back to the drawing board regarding my led eyes mod.
Once I’ve finished with that I’ll post the details of what I changed.
In between doing that I’d been thinking of ways to “dress up” my T2 abit more and came up with an idea of a surround for the start button, which I think is something that is missing on Bally/Williams games.
I did try 3D printing one using plans I found online but it didn’t look good, plus it was made from plastic, so I would be limited to what I could do with the finish etc.
So I bought a length of 303 stainless steel which I machined down to a 3mm thick ring to go around the start button on my T2. I’ll fix it in place with some thin 3m double sided tape.
I’m really pleased with how it turned out off and should protect the newly applied decals from wear to that area.
I’m going to add the other one to my JD to hide some cabinet damage.
I polished one up to see how it will look, but I’ll get the one for my T2 chromed to match everything else.
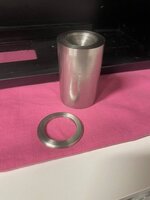
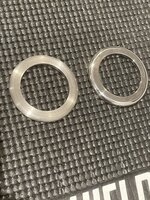
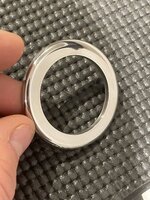
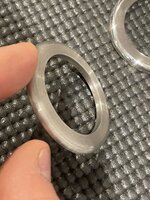
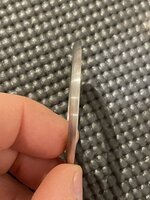
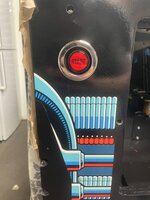
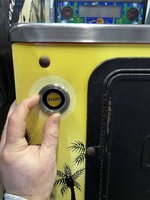


Last edited:
Excellent work 
Ant-H
Site Supporter
ly crap, do you sell your metal works such as the legs? These would like awesome on an Alien Pinball. Will this T2 go up for sale when its finished? Amazing work honestly.
Thanks mate. I think I’m gonna keep T2 when it’s done. I’m hoping it will be complete by the new year.
No Ive never sold any of the metalwork I’ve made.
However I have been asked if I’d sell any of the start button surrounds, so I think I’ll offer these, as the only thing I could find online similar to this were 3D printed versions which when I tried were not great at all.
Those leg protectors took me hours to make as I have limited tools now for sheet metal work.
It’s something I did for my first job when I left school and enjoy fabricating stuff as a hobby now.
Ant-H
Site Supporter
As I mentioned in a previous post, I had to go back to the drawing board in regards the Terminator eye mod.
I had neatly wired and fixed all the cabling to the sides of the cabinet, tested it and it all worked great.
I then fitted the playfield back just to double check it would still open. However when I did this, it was catching the back wires ever so slightly. It would open but over time, those wires would get damaged.
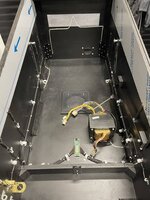
So I thought now is the time to sort this whilst everything is still in bits, but I had to come up with a plan b as there was no going back as I’d drilled 24 holes in the sides of freshly decaled cabinet
I had neatly wired and fixed all the cabling to the sides of the cabinet, tested it and it all worked great.
I then fitted the playfield back just to double check it would still open. However when I did this, it was catching the back wires ever so slightly. It would open but over time, those wires would get damaged.

So I thought now is the time to sort this whilst everything is still in bits, but I had to come up with a plan b as there was no going back as I’d drilled 24 holes in the sides of freshly decaled cabinet

