Pinball info
You are using an out of date browser. It may not display this or other websites correctly.
You should upgrade or use an alternative browser.
You should upgrade or use an alternative browser.
Complete STTNG the next one for the shop job!
- Thread starter newdos
- Start date
Judging by your other fantastic restores I eagerly await to see how this turns out, should be fab! 

Cheers budJudging by your other fantastic restores I eagerly await to see how this turns out, should be fab!
Getting one of these machines myself so be watching this thread... thanks for sharing your work on this, hope I learn some stuff...
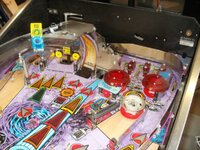
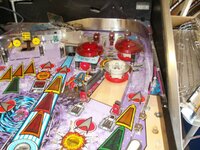
Tempted to do this myself... I thought my pop bumper was missing its cap, but seems thats by design 
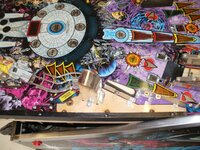
Nice to see it all stripped, I didn't realise the cannons had such an impressive metal base!
yes there are only 2 pop caps.Tempted to do this myself... I thought my pop bumper was missing its cap, but seems thats by design
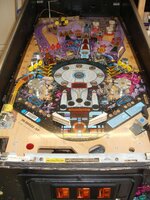
Cant take any more odd now until I lift playfield out and get it on the rotisserrie
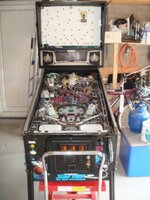
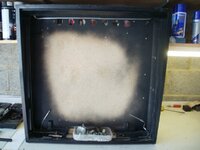
OK more progress today - here are pics of the cab and head befor4e I start the decal job for reference later....
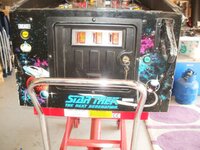
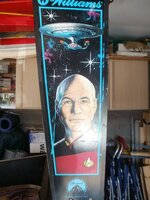
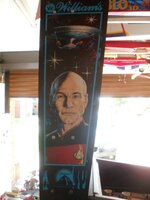
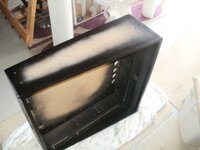
And here is the head stripped of all the boards ready for cleaning, sanding, filling, more sanding and then painting prior to start of re-decal job
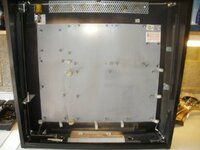
It is in pretty good nick so should take much work. Got to strip the PCB mount board off next and all the metal work then its good to sand and remove the decals. Never under estimate the amount of pics you need when doing this - so far I have took over a 150 and not really done much yet !!!
Watch this space for next update.....
Cheers Kev


And here is the head stripped of all the boards ready for cleaning, sanding, filling, more sanding and then painting prior to start of re-decal job

It is in pretty good nick so should take much work. Got to strip the PCB mount board off next and all the metal work then its good to sand and remove the decals. Never under estimate the amount of pics you need when doing this - so far I have took over a 150 and not really done much yet !!!
Watch this space for next update.....
Cheers Kev
Forgot to ask best method for re-painting the launch gun as its pretty battered ? Is it usual black paint and then perhaps a clearcoat on it - or hammerrte it ?
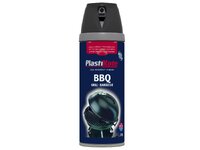
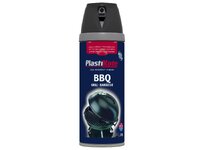
On my metalwork I'm trying the bar-b-q paint baked on with hot air gun that PeteB recommends over etch primer. I'm still stripping paint but intend to practice on parts of my Mame cab first.
Edit: this approach is reportedly well resistant to finger marks hence my thought regarding the gun
Edit: this approach is reportedly well resistant to finger marks hence my thought regarding the gun
Cabinet really doesn't look that bad.
Its not Carl but the head is, so new decals it is !!! I must be mad!!!!Cabinet really doesn't look that bad.
bar b q paint not tried that - any pics of results yet and where do you get it from ???On my metalwork I'm trying the bar-b-q paint baked on with hot air gun that PeteB recommends over etch primer. I'm still stripping paint but intend to practice on parts of my Mame cab first.
Edit: this approach is reportedly well resistant to finger marks hence my thought regarding the gun
I was thinking the same as Carl. You ARE mad 
Hi, Kev,
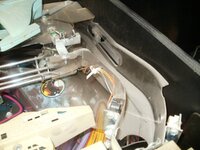
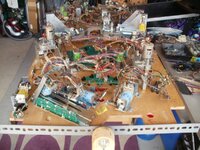
Unless you've got one handy, order a 'Frame & Eyelet' for the drop target. Your first picture shows that, as often happens with Next Gen, the retaining flange for the armature plate (with the target dropping 'finger' on it) seems to have broken off. Only the return spring is holding the plate roughly in place. Also, with the plate/finger so far away from the target, the relay coil could well get over-worked lowering the target. I've seen them burn out due to this.
Unless you've got one handy, order a 'Frame & Eyelet' for the drop target. Your first picture shows that, as often happens with Next Gen, the retaining flange for the armature plate (with the target dropping 'finger' on it) seems to have broken off. Only the return spring is holding the plate roughly in place. Also, with the plate/finger so far away from the target, the relay coil could well get over-worked lowering the target. I've seen them burn out due to this.
I agree with the comments about your sanity! Also how the he'll is the machine sitting on the trolley with the head up?!!
I have to say that the game's artwork looks in really good order. But before me also suggesting there is any madness involved in decalling it ......
I do recognise that games always look better on the forum than they do in the flesh. Especially on minor cabinet damage
I do recognise that games always look better on the forum than they do in the flesh. Especially on minor cabinet damage
Madder than a mad man from mad land
Yeah guys the art work isn't that bad but close of there are lots of scratches and dents that you cant see in the pics especially on the head, and if the head needs doing might as well do the lot and do the job right!!
cheers Daz!!!!Madder than a mad man from mad land
always does on the trolley if when in one piece!!! trolley goes back just far enough to get past centrepointI agree with the comments about your sanity! Also how the he'll is the machine sitting on the trolley with the head up?!!
I have one similar but have to have the heads down or they'll topple! Sttng is a beast of a machine too, glad to see you have a back saving trolley! Yours looks like it will clean up lovely, have fun!
Lot of work done on the head now all stripped fully sanded down to 400 grit and ready for decals
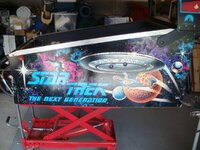
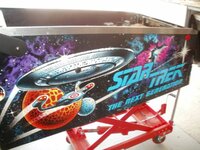
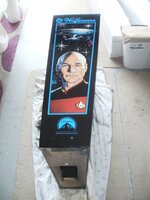
and now with decal on looking very nice!! and a before shot for those of you who said I was mad lol !!!! Hopefully you can see the difference and well worth it
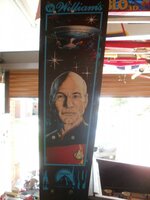
Won't bother with other side - next pic you will see will be head fully finished
Cheers Kev

and now with decal on looking very nice!! and a before shot for those of you who said I was mad lol !!!! Hopefully you can see the difference and well worth it


Won't bother with other side - next pic you will see will be head fully finished
Cheers Kev
Think he looks better with a few battle scars 
Looking at the original, there's a bit of blue on the outside of the blue border on the right. Why is this not on the repro?
Looking at the original, there's a bit of blue on the outside of the blue border on the right. Why is this not on the repro?
haha Phil thats because they were all scratches!!!!!Think he looks better with a few battle scars
Looking at the original, there's a bit of blue on the outside of the blue border on the right. Why is this not on the repro?

