What's new
Pinball info

Register a free account today to become a member! Once signed in, you'll be able to participate on this site by adding your own topics and posts, as well as connect with other members through your own private inbox!

Complete Revenge from Mars - Newb takes on the Martians

Jonwolf

Registered
Joined
Apr 4, 2016
Messages
1,134
Location
Wolverhampton
Received this machine this week. It fires up and quick inspection on purchase generally ok. It won't be a money pit - I hope.

Job 1 - clean the keys and add Mars alien key fobs - I know it seems sad but I'll be using these keys a lot so at least something looks shiny and new ;-) DONE

Job 2 - WD40 the locks. Now they are smooth and easier to open DONE

Job 3 - Inspect plastics and playfield wear more closely. It's ok! Nothing broken or missing. DONE

Time for bed. I suspect a hospital appointment is needed. May have had a hernia getting the damn thing in the house ;-)

More updates later


Sent from my iPad using Tapatalk
 
I already own a TZ - so I guess calling myself a Newb isn't entirely accurate - although I'm a lot closer to the clueless end of the spectrum than the expert.
Not playing this machine too much until I replace the fan at the back.

Job 4 begin the clean of the apron and flipper end of the machine. I'll work my way up the playfield.
One word - Millwax. I own some of this stuff and am aware of the debate. I only used it once years ago. Did the job but now I use Novus products and wax.
It's a shame the previous owner used Millwax. It's bloody everywhere. I'm an OCD person so it has to be clean. Gonna take ages.

I've put in the first pair of convolux plastics after that area cleaned. It's not as easy as I thought - the plastic separators don't accommodate them easily. After 20 mins of fiddling I took a craft knife and shaved the tips of the separators - job took minutes after that.


Sent from my iPad using Tapatalk
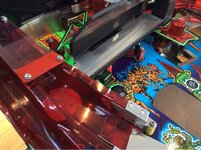
 
Pictures please!! And good luck with it, I've done 2 refurb a tommy and a family guy and I have to say its a learning experience but so rewarding!
 
Job 2 - WD40 the locks. Now they are smooth and easier to open DONE

Hmm. Remember WD40 is a cleaner and while good for freeing up locked parts it's still not a lubricator.

I always say WD40 and any lubricators should be kept far, far away from pinball machines! :p
 
General rule is no lubricants on pinball machines

The manuals (link on the web address below) tell you the one or two areas where it may be used ...

http://mirror2.ipdb.org/files/4446/Bally_1999_Revenge_From_Mars_Manual.pdf

I would not advise the use of wd40 anywhere. It was designed for water displacement (wd). Over time it merges with the dust you always get in pinball. This then solidifies to leave a nasty baked on residue

For "off manual" lubrication, this it better - GT85
 
  • Like
Reactions: JT.
It was just a tiny squirt ;-) Thanks for the advice chaps. I'll check out the manual. Whilst I'm at it, I'll ask my wife where her lubrication points are ...


Sent from my iPad using Tapatalk
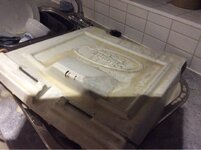
 
It's a bank holiday weekend so I spent some time on the machine. Just cleaning the playfield. It's had a once over but now I'm deep cleaning from the front to back.
Put some super bands on the flippers and convolux plastics which look quite fetching.


Sent from my iPad using Tapatalk
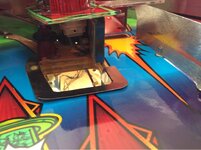
 
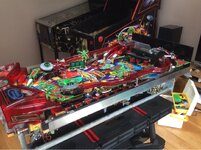
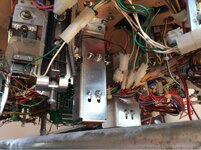
It's pretty easy to work on with the playfield out. Removing playfield easy too. Just unplug these:uploads.tapatalk_cdn.com_20160430_14030a58b6c7086e8ba6d66b1558a559.jpg


Sent from my iPad using Tapatalk
 
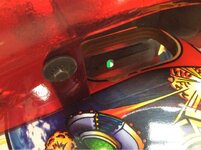
Cliffy previously installed on the Stroke of Luck hole is not a good job. The edge is raised - that will need sortinguploads.tapatalk_cdn.com_20160430_52b6538e4e533a97ed85390b3116c1c3.jpg


Sent from my iPad using Tapatalk
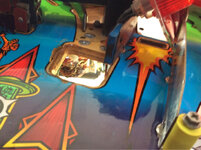
 
Note the Millwax build up at the edge in the previous picture. It was everywhere - and still is. I'm using Novus 2 (carefully) and Novus 1 to clean


Sent from my iPad using Tapatalk
 
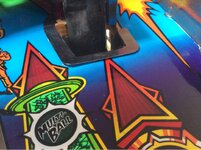
Whilst I'm on Cliffy protectors, is there one that will cover this wear ?uploads.tapatalk_cdn.com_20160430_f5df72026c875086e0c01c3911879151.jpg


Sent from my iPad using Tapatalk
 
uploads.tapatalk_cdn.com_20160502_43bcce27c19435e9330c20b4b26b98ad.jpguploads.tapatalk_cdn.com_20160502_8dd25f9c435faef2251fd6caaff9e78f.jpg

Playfield cleaned - all corrosion removed. I didn't want high polish on the nuts and screws so I soaked em in vinegar for an hour an cleaned with washing up liquid and a toothbrush. I could have bought new nuts and screws but My ocd tells me to restore. Plastics polished. All parts removed and the dirt gone.
I'll install the new Martians with lit eyes next weekend and replace cpu fan and batteries.
The cabinet will have to wait until the summer.


Sent from my iPad using Tapatalk
 
Oh, and LEDs fitted throughout - I want this machine to burn retinas. I think it suits the game.


Sent from my iPad using Tapatalk
 
Looking good! You may want to install the video amplifier mod if you plan on putting LED's throughout the game as the extra brightness will wash out the hologram effect on the glass. It's worthwhile doing anyway just for the better picture but an absolute must if you're LED'ing. It's a cheap mod too! :)
 
I've read about the video amplifier mod. All sorts of stuff about wires needing to be sorted in the moles connectors etc. Is there an amplifier that I can just plug in ?


Sent from my iPad using Tapatalk
 
I haven't even been in the back yet. Could be there is an amplifier installed ! I'll check this weekend. Haven't had the game long but I'm getting along fast with the improvement


Sent from my iPad using Tapatalk
 
Jon. Did you strip the playfield before cleaning? Or did you work around ?

Just interested. I have @Paul RFM project and to this point I am playing rather than fixing learning what is working and what is not prior to ordering and fixing bits

Since I broke the lock down mechanism handle the glass is held in by beer mats an ncc1701 bottle opener. But replacement on the way!
 
I stripped it, but not all at once. Started at the flipper end to do the apron. Then the flippers, slingshots, right ramp and plastics beneath, left ramp and plastics beneath. Then with left ramp off I did the rear. Back board comes off easily and helps with access to the rear. Pretty easy, I take pics of what comes off with bolts and nuts beside. Glad I did cos remembering what goes where is much easier.
The sticker on the back of the clear Perspex shield was knackered so I removed it and painted with Matt black enamel. Works well.

My lock mechanism is dodgy too. It needs 'persuasion' to engage and release - bashing the lock bar scares the crap out of me - if the glass breaks the machine is useless as I have read the the playfield glass is near impossible to replace


Sent from my iPad using Tapatalk
 
With the playfield done except the stroke of luck dodgy Cliffy and popper assembly still to be removed and corrosion sorted then polished, I decided to take a better look inside the cabinet.
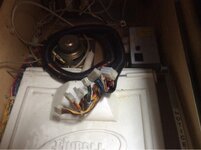
More cleaning undertaken:uploads.tapatalk_cdn.com_20160504_f0f0934990428e1ceac5fe9f53d7d91b.jpg


Sent from my iPad using Tapatalk
 
Take out the metal rods and either polish them or rub over with wire wool to make shiny :D
 
Ok, time to take a look at that Stroke of Luck Cliffy protector that was liftinguploads.tapatalk_cdn.com_20160508_699d5865706477c60d6c1f801b9026d1.jpg


Sent from my iPad using Tapatalk
 
Removed the plastic on the playfield, fetched the Cliffy out to reveal this:uploads.tapatalk_cdn.com_20160508_4415b04cfa7f79deeb0cde1e60116206.jpg


Sent from my iPad using Tapatalk
 
Not a great state of affairs - I was wondering what tips you guys have. I have a new Cliffy to put in but is there anything that can be done to repair the hole before so ?


Sent from my iPad using Tapatalk
 
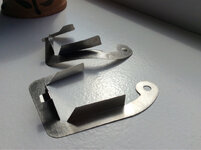
The old Cliffy was in a bit of a state. See comparison with new replacement:uploads.tapatalk_cdn.com_20160508_33c921874ece8d7f32c97ac0b01a74b8.jpg


Sent from my iPad using Tapatalk
 
Only to check the dinged wood isn't kicking up as the cliffy won't sit flush, might have been the problem with the old one. Check the edges are flush with the playfield with a straight edge and sand down any bits that aren't.
 
Back
Top Bottom