What's new
Pinball info

Register a free account today to become a member! Once signed in, you'll be able to participate on this site by adding your own topics and posts, as well as connect with other members through your own private inbox!

In Progress PnP Homebrew build topic

since the epoxy worked nicely as glue, why not try the rest with epoxy as well, makes it a little bit easier to close most gaps as well

first test fitting all the inserts and numbering them and also marking orientation

aHR0cHM6Ly9vLnBpbnNpZGUuY29tL2EvNzIvNDkvYTcyNDlhZGE4ZmY3NDU0ZWRkMzg3M2VlZTUwMWI0YWVlZDQwZmFmZi5qcGc


fixing the epoxy with UV light

aHR0cHM6Ly9vLnBpbnNpZGUuY29tLzIvZmMvODUvMmZjODVjNTdhZjM1ZWEyODI1NTE4YzAxYzNiN2ZjNTcwZjhkNjEyNC5qcGc


first batch fitted, next up sanding them flat (while printing some more inserts icon_razz.gif)

aHR0cHM6Ly9vLnBpbnNpZGUuY29tL2EvMWMvYjgvYTFjYjhjODRjMGM2NTZmZWFkNGNhNTZiNTRhNTUzYWNhYmFkYmJjNS5qcGc


aHR0cHM6Ly9vLnBpbnNpZGUuY29tL2UvZDQvOWUvZWQ0OWUyNjVlZTU5NmNiM2Y0M2QzN2QyZThlNDE2MmY1MjhjZWU5NS5qcGc


aHR0cHM6Ly9vLnBpbnNpZGUuY29tLzUvYTYvMGQvNWE2MGQ0NzE2MWEyYmU5MjVjYWM4ZTRlNTVmYjA4ZTgyMzhjYWJkYi5qcGc


aHR0cHM6Ly9vLnBpbnNpZGUuY29tLzAvNDEvNzgvMDQxNzg5YTlmMzk5OGVkY2I0YTBiZDAxZjY0NDNhZGY5ZDcxYzcxYi5qcGc


getting all the inserts in and starting with sanding

aHR0cHM6Ly9vLnBpbnNpZGUuY29tL2EvMDkvOTcvYTA5OTczY2NkZmVkYjRiN2E5NWRlZjcxYTU1NGI5ZjgwODYzOGFkMC5qcGc


aHR0cHM6Ly9vLnBpbnNpZGUuY29tLzQvNmUvYTIvNDZlYTIxZDQ3ZTE1N2NhY2YxNjhmZTU0ZDdhMjRlN2RlYjI4ZDZmZC5qcGc


aHR0cHM6Ly9vLnBpbnNpZGUuY29tL2MvOGYvMWYvYzhmMWYwNTMwOWM2MjcwMmNiNmMzMTY5OGU2MzAzNzYyZDAwMGMwNy5qcGc


Almost ready sanding, the inserts are flush with the playfield, all large gaps filled.

now i just need to fill the last tiny gaps

aHR0cHM6Ly9vLnBpbnNpZGUuY29tLzYvMzYvMGUvNjM2MGU0MzhmZjhkMjZkNzYxZmQ0N2Y4MWI3OTg0MTAxNGNlZWRkNi5qcGc


aHR0cHM6Ly9vLnBpbnNpZGUuY29tL2QvMzYvZTIvZDM2ZTJkNmJmMGIwMDQ5YmJjZDc4MGY5YmRhNTY0NDE0NDFhMmEwOS5qcGc


aHR0cHM6Ly9vLnBpbnNpZGUuY29tL2MvNDUvNTQvYzQ1NTRkYzRiNWY3NWNjMGQzZTBlY2ZiNGUzMWFkNDAwM2Q0ZjAxYS5qcGc


aHR0cHM6Ly9vLnBpbnNpZGUuY29tLzIvNTkvYWIvMjU5YWJkZWVmNDI3YzRiMjcxZGU0Yzc3ZTc0NjQyMzcyMWYzNWE3Yy5qcGc


aHR0cHM6Ly9vLnBpbnNpZGUuY29tLzUvZWMvNTgvNWVjNTg0ZjQ2NDI3ODdlOTRhMjBlMjc0MjdkZGMwYmUzZjRjMzI5MC5qcGc


aHR0cHM6Ly9vLnBpbnNpZGUuY29tL2EvZmQvM2IvYWZkM2I4MDNhNWMyNTY3MTc2ODEwNDY0NTQ4OGMwOGE0YmJmZGI3My5qcGc


aHR0cHM6Ly9vLnBpbnNpZGUuY29tLzAvMTAvNzEvMDEwNzE3MjY2ZjJlMmFjNzAxOGRkZjNjN2YwMTQ5OGYxYzNlMmM4YS5qcGc
 
reassembling the playfield

the targets on the left are being replaced with droptargets

aHR0cHM6Ly9vLnBpbnNpZGUuY29tLzEvNGUvMjgvMTRlMjgyMDg5MjdmMjNlNWI3N2VkYmM5NjUwZGMxZWY0ZGQyN2IyOC5qcGc


assembled the subway and scoop. i had to modify the assemblies a bit so they would fit.
the subway goes under the playfield where some of the inserts are at, i'll have to make some changes to the subway later to make some room to fit the LED's there. and i also need to make a switch near the entrance to register the ball entering of that side.

2021-11-04 16.04.13.jpg
2021-11-04 16.04.17.jpg

it does all fit after some modifications, but next time i'd better keep a little more room for all the assemblies when designing icon_twisted.gif


2021-11-05 09.09.30.jpg2021-11-05 09.32.50.jpg2021-11-05 09.56.47.jpg2021-11-05 09.56.58.jpg2021-11-05 10.13.20.jpg2021-11-05 10.13.27.jpg
 

Attachments

  • 2021-11-04 16.04.13.jpg
    2021-11-04 16.04.13.jpg
    119.8 KB · Views: 1
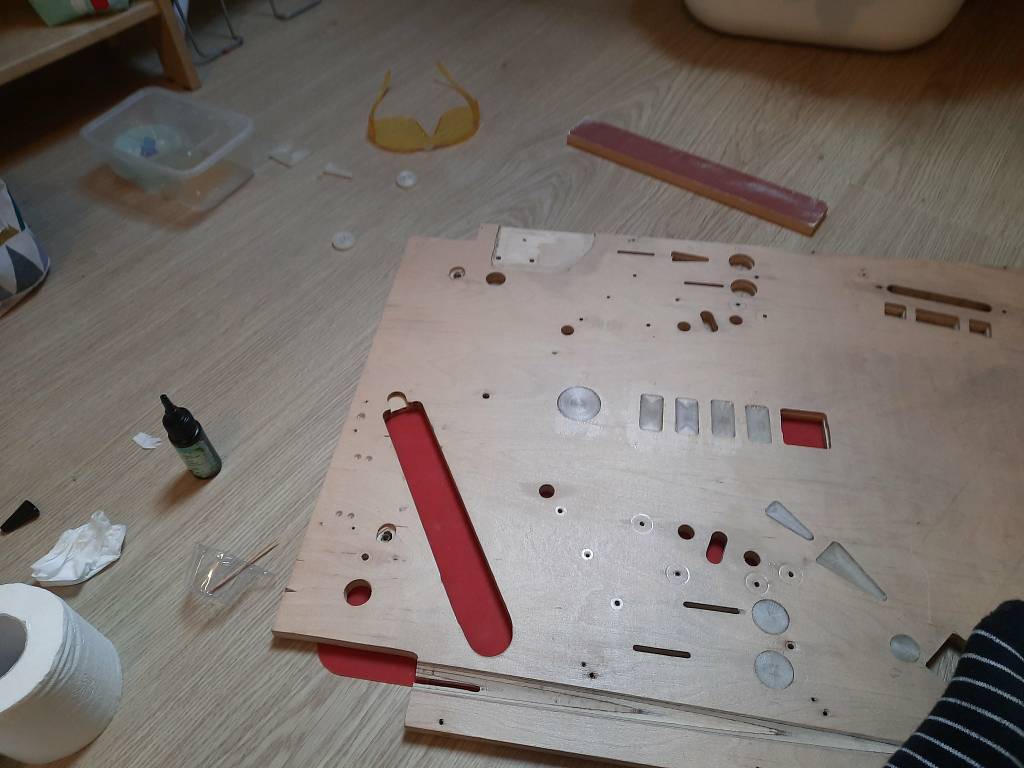
it was time to disassemble and get ready for the next phase, getting all of the playfield holes in and start on getting the game elements in.

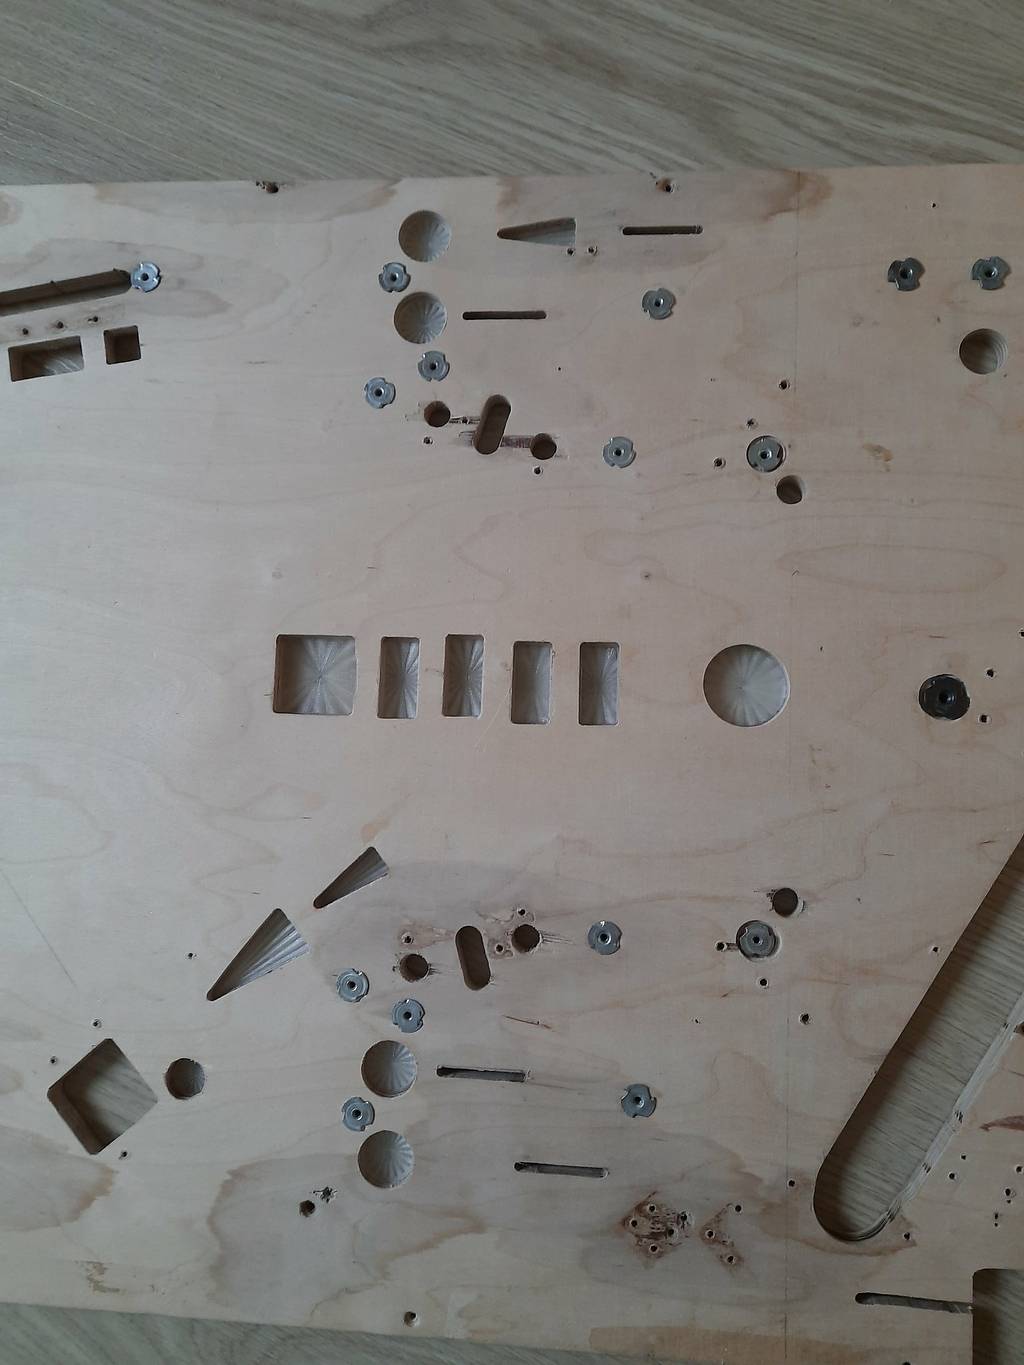
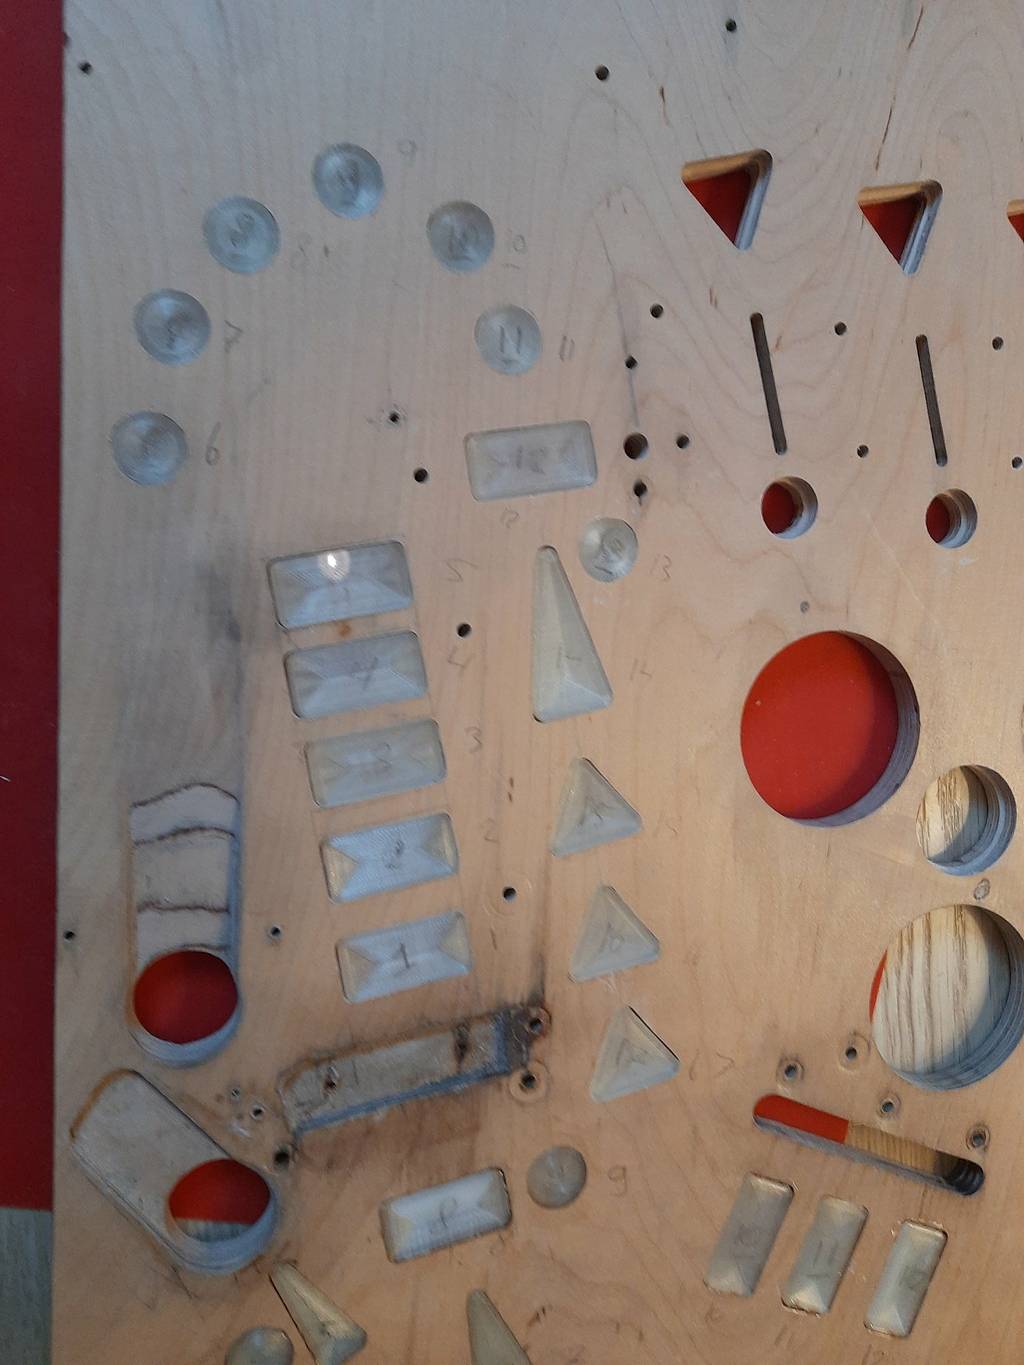
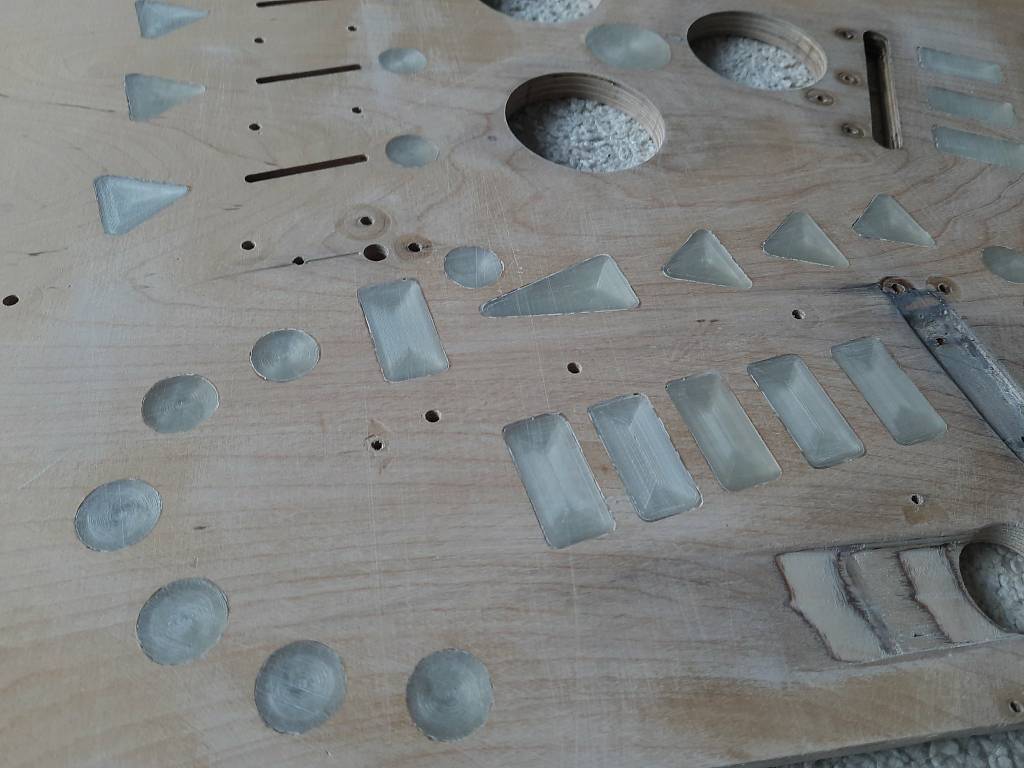
took everything off untill the bare wood, and i've been busy on making all the holes in the board with a router. i've made some slight changes , mostly to the popbumper layout and the target bank in front of it because i didn't like the original dynamic, so i've put those a little closer together and the target bank at a slightly different angle.

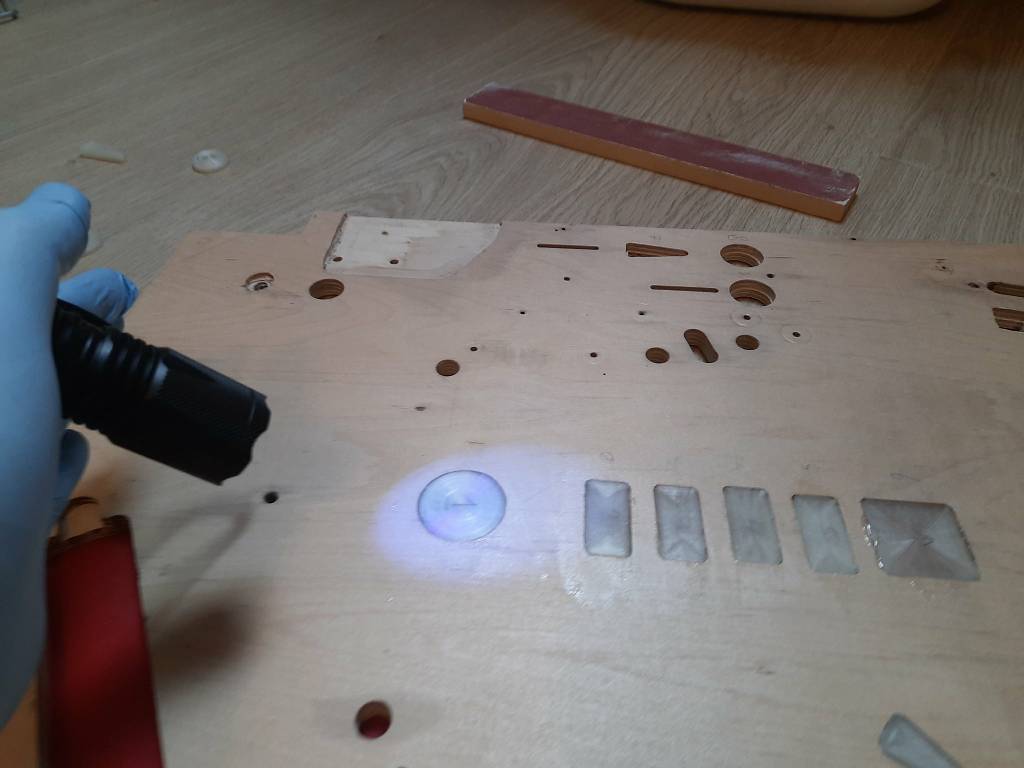
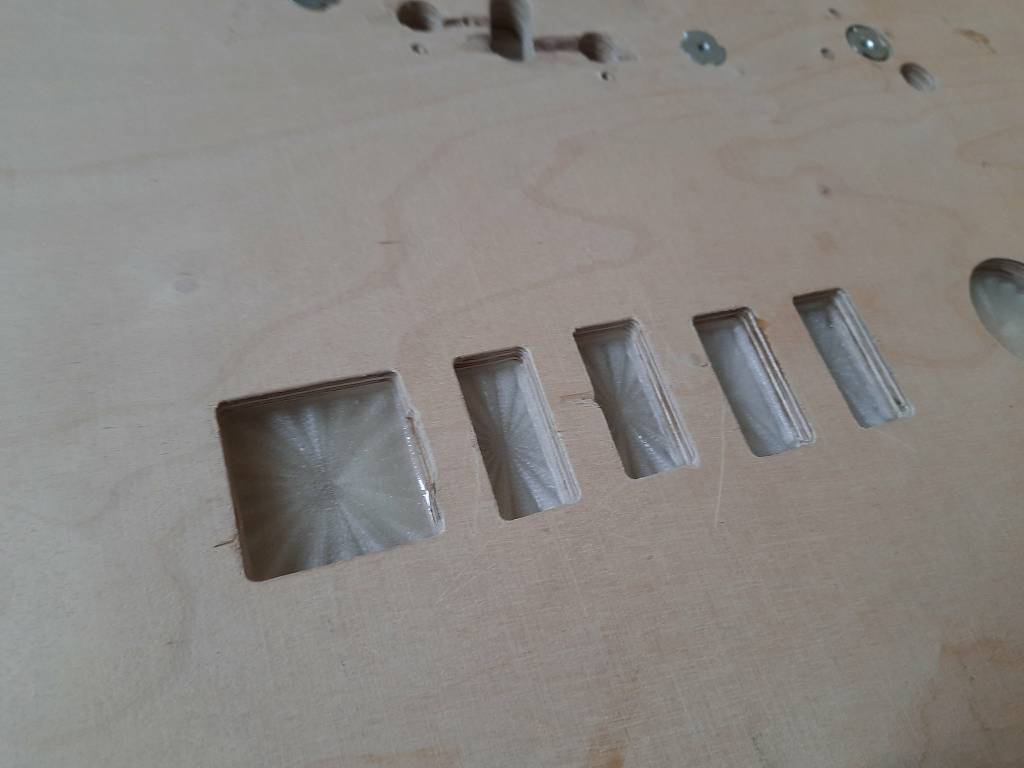
i know it would've been easier to sand the simpsons board but i really wanted to learn how to make my own board, since i'm hoping there will be more after this first version. i did make some slight errors while routing but nothing serious. also i didn't make the holes for the lighting yet since im not doing those (yet) and before i'm drilling all the holes for mounting all the parts and screws i'll first be checking fitment and how things work out with my changes.

making the shooter lane took a few tries with a normal straight milling jig, put some small blocks under it to give it a slight angle since the start is about 6mm lower then the end, and it came out pretty nice.

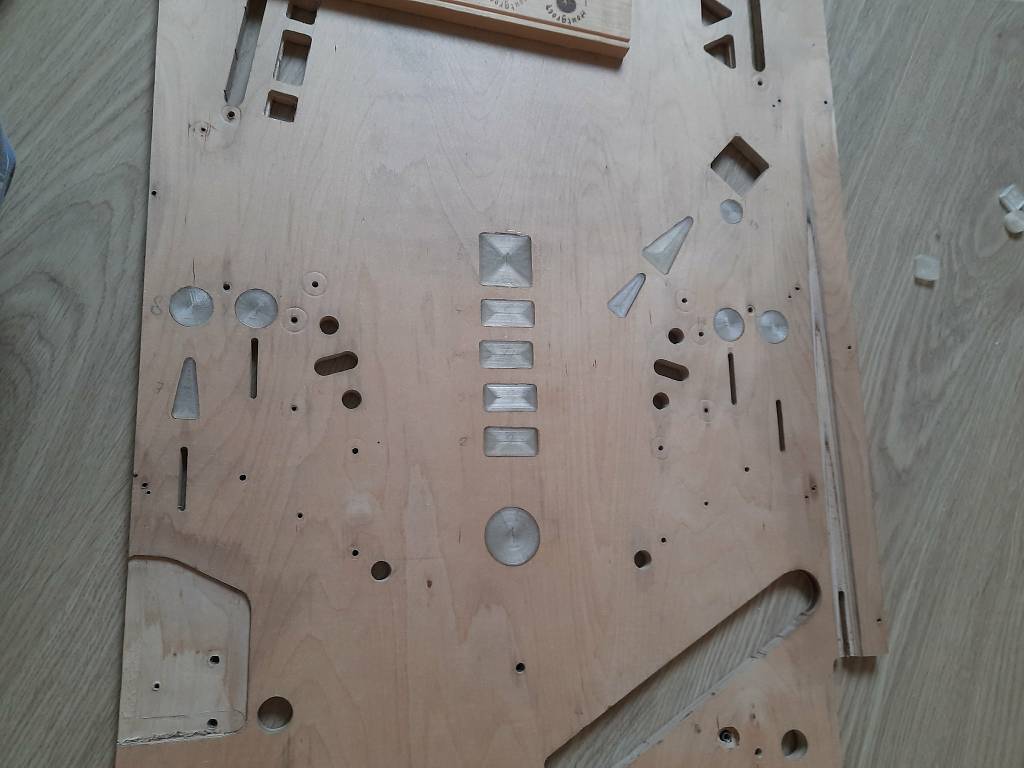
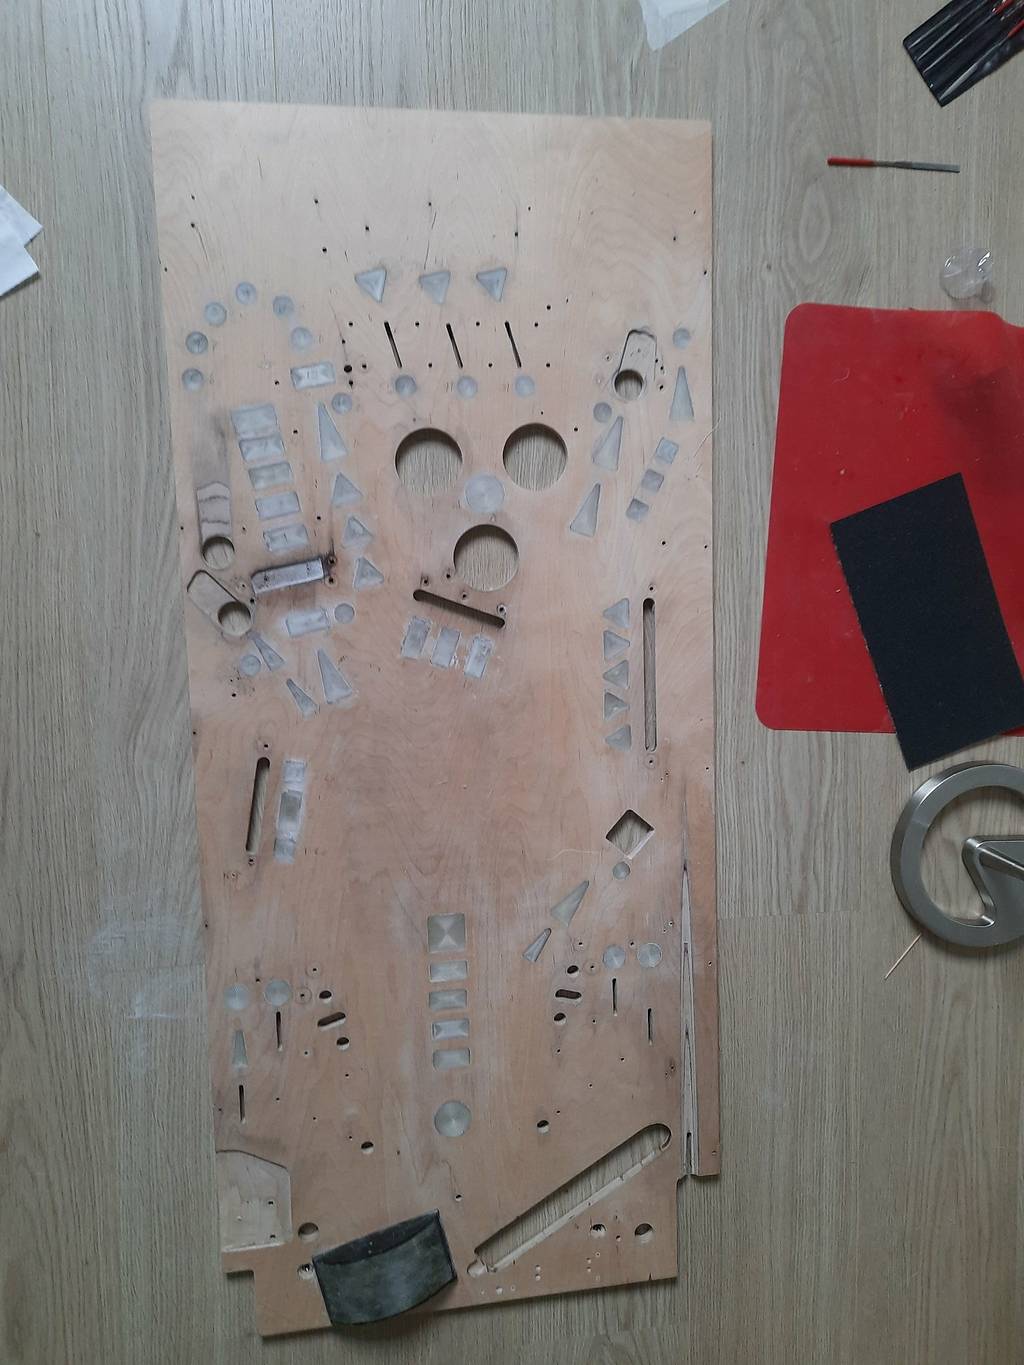
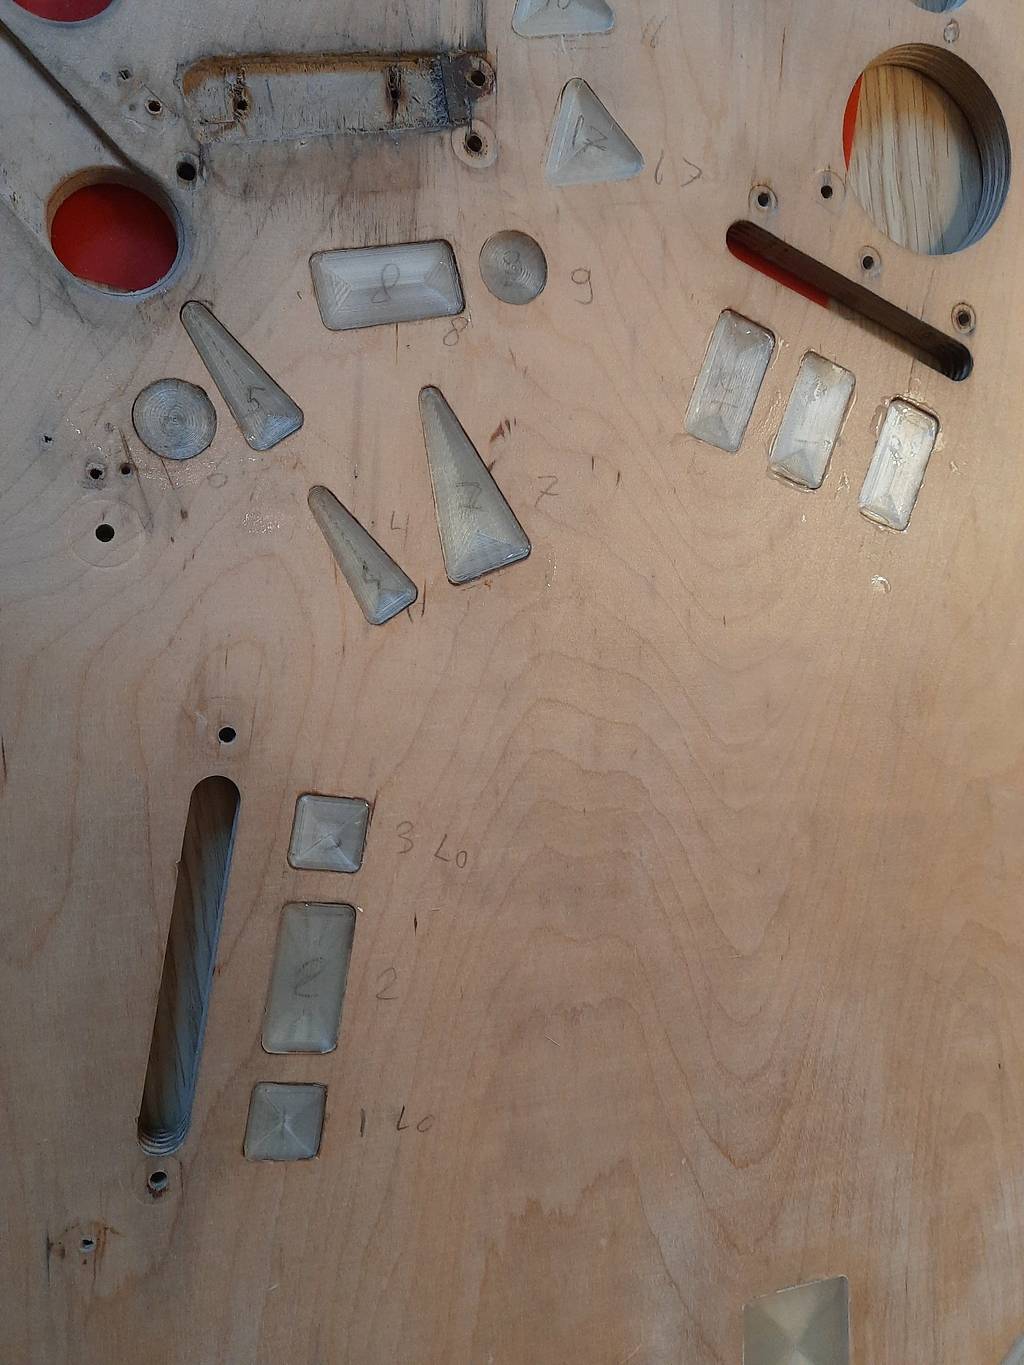
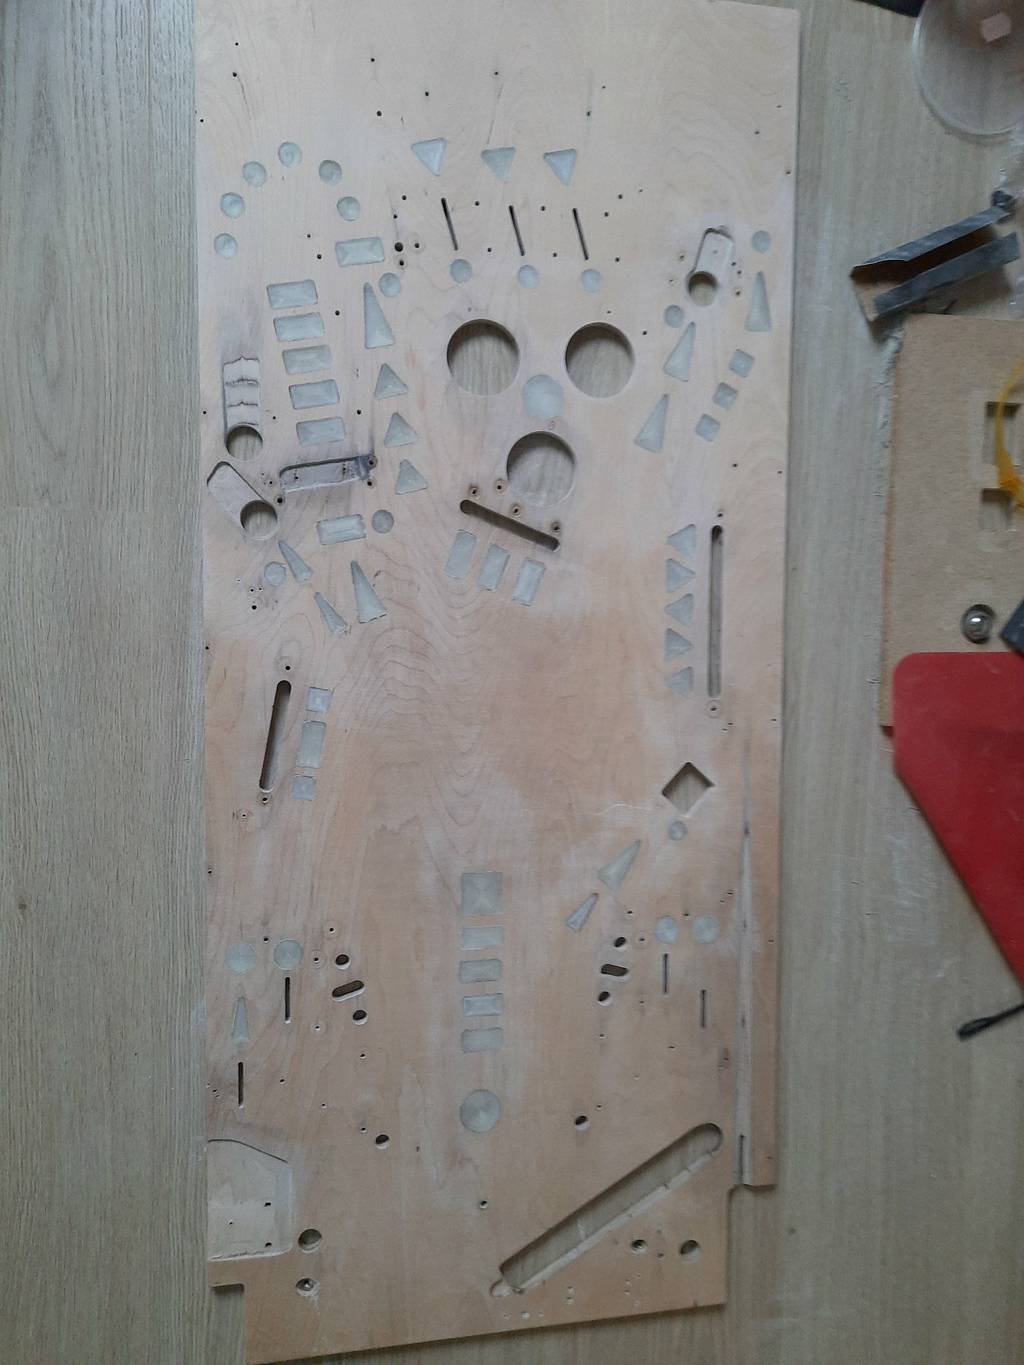
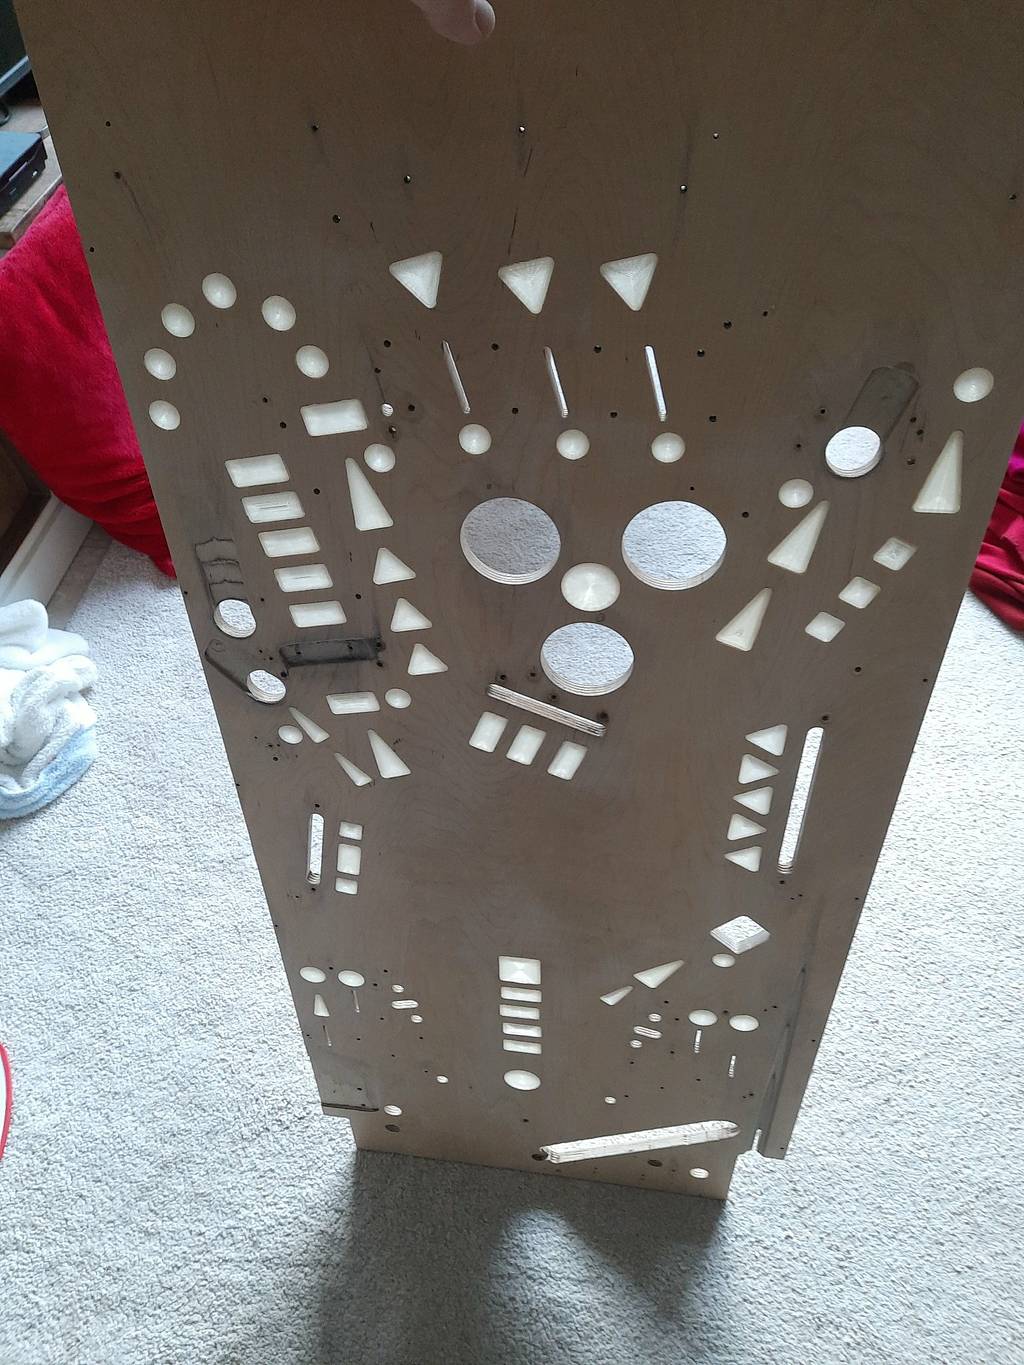
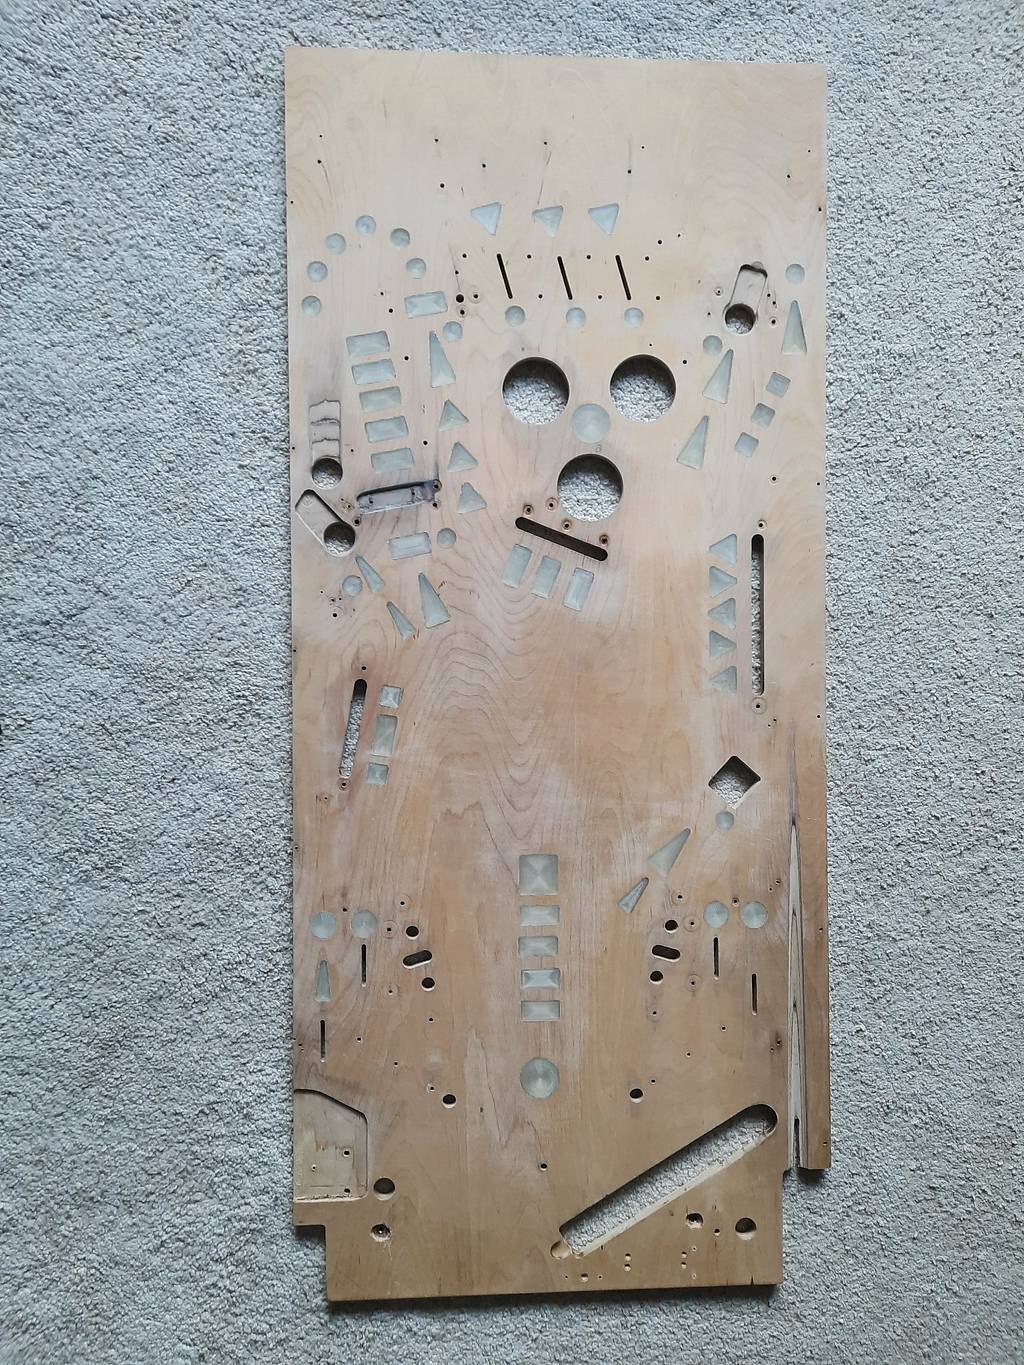
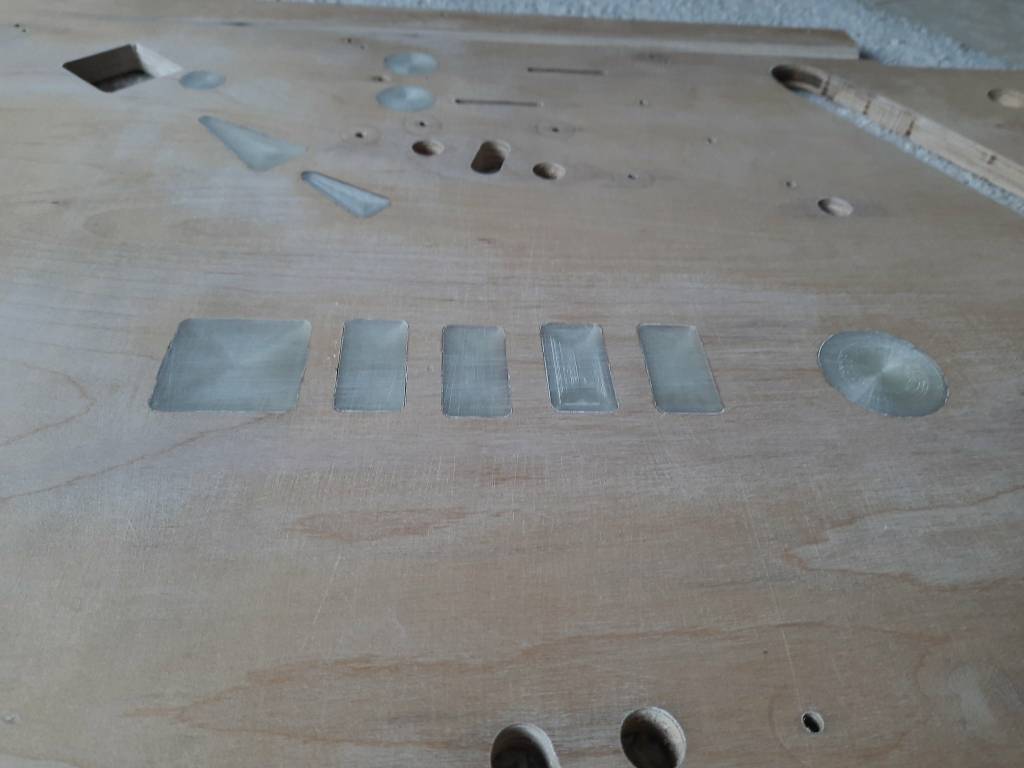
so next up is sanding the board to get some smoother edges, making some corrections to the small errors i made, and then fitting all the parts so i can start drilling some more holes


aHR0cHM6Ly9vLnBpbnNpZGUuY29tL2UvMzYvYjgvZTM2Yjg5YjQ4YzQyNGI0NGU5MmQwNzJiZTg1MTBlYWVlMThkZWVkMS5qcGc
aHR0cHM6Ly9vLnBpbnNpZGUuY29tLzEvNTUvZTUvMTU1ZTUyYjI3YTQ3Yjg1ZmQ3MTdkZGExMTk5ZmVmNTk4NTdlNmFmZS5qcGc
aHR0cHM6Ly9vLnBpbnNpZGUuY29tL2YvZDQvMzIvZmQ0MzI1ZjZiNzQ5MmQzZTk5MGJlNmViMzMyMzI4MzRjODY4ZGEzYy5qcGc


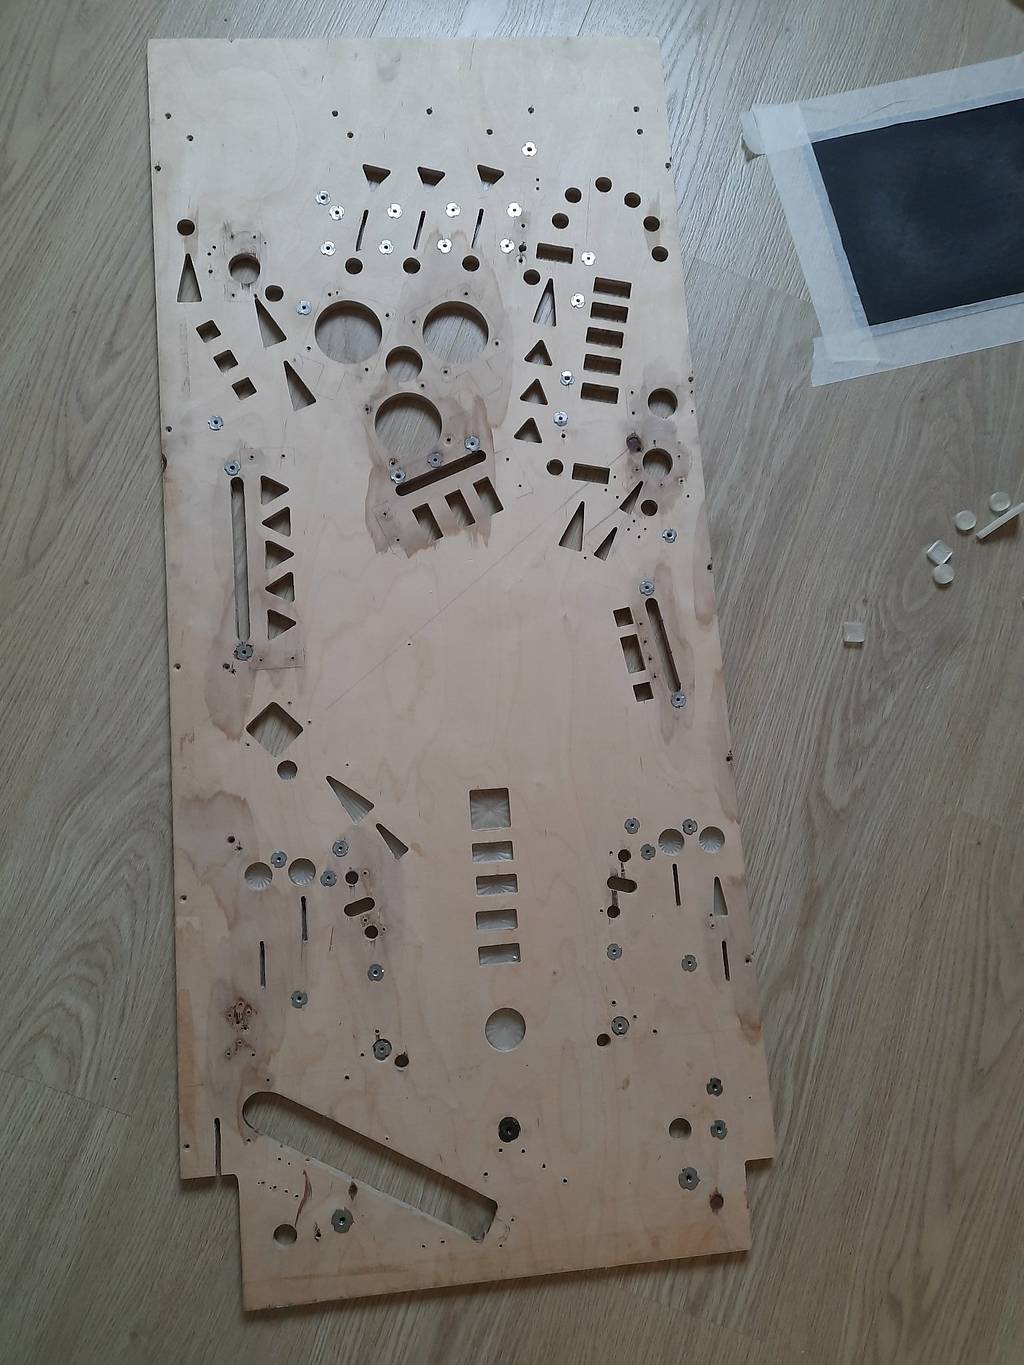
after that i've been busy mounting some ballguides and stuff, making it fit nicely looks easier than it actually is icon_lol.gif

also picked up a nice empty maverick cabinet to fit my project in, i'll need to source some more parts to make it complete but that'll come later

aHR0cHM6Ly9vLnBpbnNpZGUuY29tLzkvMjAvMzgvOTIwMzgzOGU0MDM2OTBhYmYyOTU0YjU4OTk4ZjZmNGQ5NmQzYTUwYi5qcGc


aHR0cHM6Ly9vLnBpbnNpZGUuY29tLzAvN2MvYmMvMDdjYmNhNDNkMTcwNDI5ZDBlYjNkOTZlMTVjYThjMjU5Yjg0N2UyOS5qcGc


my cabinet didn't have hinges, and late data east / early sega hinges are apparently unobtanium, so ive made a cardboard model so i can cut make my own sometime. also repainted the rusty old coin door i already had, so i can use that on my cabinet

aHR0cHM6Ly9vLnBpbnNpZGUuY29tL2YvODAvNmMvZjgwNmM1ZGE0NzZmN2E4Njg2NThmNGUyNzBhNTg4YWRmZjM3MDNmZC5qcGc


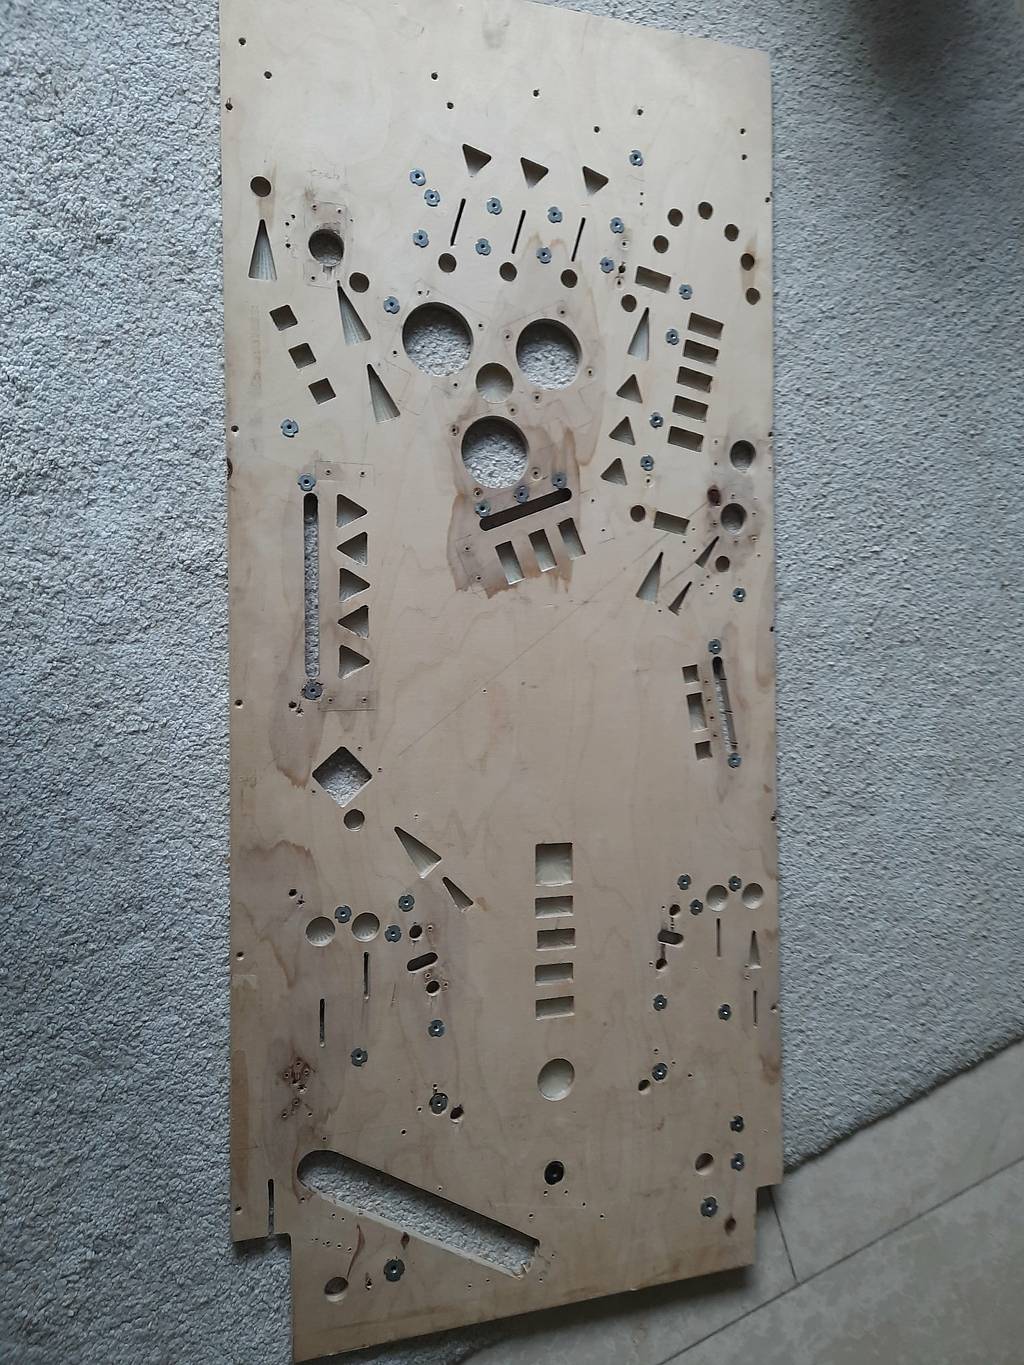
and been busy building up the playfield, i already regret some of the adjustments i've made to the popbumbers, because now i'll have to make all sort of changes to the mounting of the ramps, ballguides etc

also found out that sometimes the location of a part on top of the playfield doesnt have to be precise, but is has to be to fit it all right on the bottom icon_rolleyes.gif

anyways, sometimes im thinking "why didn't i just sand off the simpsons playfield" and offcourse i still can, but i'm learning a lot and im not planning on this first playfield to be the final version for my game.

aHR0cHM6Ly9vLnBpbnNpZGUuY29tLzMvOTAvOTEvMzkwOTE3MTIzNjQ0MzhiMzNkZmIzYTAxMGNlN2NiNjMzNGE2NWY1OC5qcGc


aHR0cHM6Ly9vLnBpbnNpZGUuY29tLzQvOTIvZGIvNDkyZGJjZDQyYmNhNTJjYmM5NDhlMWRmYjMyZjU5ODc1YzViNDRmZi5qcGc
Great project. I have loads of parts from several baywatch I parted out years ago including hinges lock bar and mechanism side rails power switches and box transformer basically everything other than the wooden cabinets. The lock bar and side rails were newly powder coated too as I had a huge batch done at once and put these in at same time. Let me know what you need and I will get pics and prices. Also playfield parts too.
 
Great project. I have loads of parts from several baywatch I parted out years ago including hinges lock bar and mechanism side rails power switches and box transformer basically everything other than the wooden cabinets. The lock bar and side rails were newly powder coated too as I had a huge batch done at once and put these in at same time. Let me know what you need and I will get pics and prices. Also playfield parts too.
ooh sounds exciting. i’m after cab parts too if any left over please
 
ooh sounds exciting. i’m after cab parts too if any left over please
Alan,

Just PM me a list of what you need as there is plenty so no issue about waiting for stuff to be left over. I parted out 4x Baywatch and 3x Batman Forever when I lived in Malaysia. The cabinets had been eaten away by termites but everything else was good. It is easier to list what I don't have (i.e. just cabinets, MPU boards unless you want battery leakage damaged ones and I don't think I have any DMDs left as I sold them years ago and literally a bucket of playfield metal went AWOL in the move home). Surprisingly the playfields were OK too - clearly termites don't like hardwood ply.

I will also start a new thread rather than hijack this one.

Paul
 
almost everything back together
2021-11-12 16.12.26.jpg

mounting a lot of new sensors, just need to make a sensor on my 3d printed subway and another 1 or 2 in the ballthrough.
dismantled the old arduino wiring so i can use that to connect my cobrapin controller

i have an autokicker but since i'll have to line that up with the plunger and also need to make some cuts in the playfield i'll leave that for now, maybe i'll add it later if i miss it.

next up adding the lights where i can, modyfying the subway so i can fit some lights above it and wiring up all switches

2021-11-12 16.12.19.jpg
2021-11-12 16.12.12.jpg


2021-11-12 16.14.20.jpg
 
Been a while since the last update, not much progress lately.

aHR0cHM6Ly9vLnBpbnNpZGUuY29tLzcvZDAvODAvN2QwODA5ZDA2ZmY0ZDdmZTUxOTVlN2JlOTdjNWZiMmY2NDVmZjM4My5qcGc


I had already made some simple setup in MPF, last week i've been testing with setting up the cobrapin and a single solenoid and switch.
now that i got that working i can get some more configuration done and start wiring the complete playfield to the cobrapin.

I've also settled on the theme as some of you may notice

 
The pinball theme i really wanted to build was the Stargate series.
But i decided to keep to the playfield layout mostly like the original data east playfield for this first build. And i just didn't had the feel with the Stargate theme for this layout.
I do have another playfield laying around to be the basis for a more complex second, stargate themed, playfield. so still planning to make a second stargate themed playfield, but not this one.

As for this one, i have decided to go with beverly hills cop

One of the current sketch idea's of the playfield art.

Irmv0OLJqYt3tF3yBIj8apvP.jpg

I have made the inserts in the playfield matching up with the tower of the police station so i can add modes etc on there, and axel as ballsaver

also been ripping some sounds and vocals from the movie to use as callouts in the game.

but first i'll be focussing now on getting the playfield working well with MPF, adding the insert lighting, and then to create some game modes.
will be a while before i go further into the artwork.
I've also sketched some artwork for the cabinet, but nothing i'm really happy with yet.

Any ideas or sketches for the artwork side is always helpfull though :)
 
Last edited:
testing some brackets for my new WS2812 leds i got from china

i wanted something i could easily make onto a printed bracket and which can fit connectors onto.
these looked nice and cheap :D

a1Imkc6u233A2Tz4hhvBuk9y.jpgX2mzSCAb5ZKWSqDMPWhxMspO.jpgNsyRdKnFdSET1YpAbhkusouV.jpg6khZ7MviXiNoSVsIdX4d94Vy.jpgQgkn4efpxdlfkm1RLHEOjJPq.jpg
 
I like those ws2812 led pcbs and the grey bracket. are these off the shelf products or have you had those made ?

The WS2812 are like 30-40cts a piece on aliexpress search for WS2812 breakout

the bracket is 3d printed. i made those today. thought if i added 2 pegs that i could fix it solid by heating them with my 3d pen (or a soldering iron for example)

it was still a little wiggly at the front so i made another version that kind of clips in at the front, then heat up the 2 pegs and its good to go.

When i've finalized the design i'll share the brackets on my thingiverse
 
Last edited:
The WS2812 are like 30-40cts a piece on aliexpress search for WS2812 breakout

the bracket is 3d printed. i made those today. thought if i added 2 pegs that i could fix it solid by heating them with my 3d pen (or a soldering iron for example)

it was still a little wiggly at the front so i made another version that kind of clips in at the front, then heat up the 2 pegs and its good to go.

When i've finalized the design i'll share the brackets on my thingiverse
Perfect thank you for a quick reply
 
making the shooter lane took a few tries with a normal straight milling jig, put some small blocks under it to give it a slight angle since the start is about 6mm lower then the end, and it came out pretty nice.


aHR0cHM6Ly9vLnBpbnNpZGUuY29tL2UvMzYvYjgvZTM2Yjg5YjQ4YzQyNGI0NGU5MmQwNzJiZTg1MTBlYWVlMThkZWVkMS5qcGc
aHR0cHM6Ly9vLnBpbnNpZGUuY29tL2YvZDQvMzIvZmQ0MzI1ZjZiNzQ5MmQzZTk5MGJlNmViMzMyMzI4MzRjODY4ZGEzYy5qcGc

Not bad at all, that's given me some ideas to sort mine out, I skipped over this when I cut playfield yesterday because I knew I would need to cut at least 2 anyway.
 
Not bad at all, that's given me some ideas to sort mine out, I skipped over this when I cut playfield yesterday because I knew I would need to cut at least 2 anyway.

i used a round shank similar to below , i'm not sure what exact size i used but i believe it was 25mm or so

8mm-shank-x-d18-32mm-round-cnc-router-bit.jpg

what are you making your playfield for?
 
I've got most mechanical things working, still very basic with some simple scoring and music but running nontheless.

next up going to get some more into the game design and getting the lights fixed and such.

 
Most mechanical stuff is now connected and seems to be working.

The programming in MPF is still very basic, direct switch responses and simple scoring/music

still need to sort out some issues and adding some more posts/rubbers etc

after that i can focus more on the lighting and game design

 
Back
Top Bottom