Some of you might remember that at the very end of last year I posted a thread looking for advice on converting an outbuilding into a games room:
It’s taken longer than I’d anticipated / hoped to actually get underway, but work finally starts tomorrow morning and as a couple of people asked I thought I’d put up a build thread to track progress. Hope this is the right forum for this thread, mods please feel free to move if not.
Since my last post I got a few local firms in to talk it through and provide a quote and one really stood out - he seemed to really get what I was trying to achieve, understood how important the floor was and noted problems the others didn’t pick up on In terms of how the floor was done. The others all suggested installing a floating floor but after measuring he pointed out that given the height of the beams, the slant of the current floor, and the height that would be added if a floating floor was installed, there would be headroom issues with the beams and the floor prob wouldn’t be fit for the intended purpose. He instead said that for the best results they’d instead need to dig out the floor on the side of the room which is higher to make it level with the lowest point and build a solid floor from there.
He also had some good ideas / suggested changes to my original plan, so by the time he left I was convinced. As you’d expect, his quote came in the highest - but as I’d rather do this properly I decided to bite the bullet and go ahead.
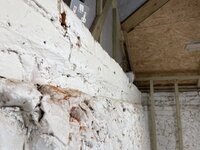
So, the job starts tomorrow. First steps are going to be tearing out the partition wall and toilet, digging the floor out, and fixing a small exterior crack on the East wall of the building. After the exterior and floor is sorted, the doors and windows will be replaced, electrics / insulation installed, and finally interior fit out work will get underway.
The end goal is an entirely open plan room. I’m keeping the pitched ceiling and going for white walls and ceiling, dark grey support beams for contrast, and a light grey wood effect vinyl floor. Heating / cooling will be via a 5Kw Mitsubishi inverter heat pump on the East wall. I went with the black model of the below:
 les.mitsubishielectric.co.uk
For lighting I’ve decided to go with Hue LED strips across each beam - these will throw light up towards the ceiling to avoid glare on the games. Here’s a short proof of concept video I did a while back using 3m of led strips across just one beam - the final product will have closer to 4m across all seven beams:
View attachment 31283665-44BE-4CC4-A963-3DCDC0993DA8.MOV
I’m also going to have three pendant lights dropped from the ceiling over the aisle in the middle of the room between the pins with filament hue bulbs installed, but those will mainly be for ambience as opposed to lighting the space. I’ve gone for these in black from John Lewis:
The toilet in the corner is being ripped out and a carpenter friend of mine is going to build me a small back bar unit with a sink, counter space for the Perfect Draft and Beer Blade, and room underneath for a double beer fridge. I may also add a little lean to coming off the bar and down the wall with a few bar stools depending on how it feels in terms of space when everything else is in. I’ve also decided to mount Sonos One SLs in each corner or the room which I’ll control via an Echo device.
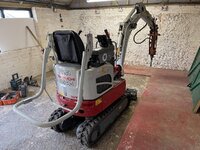
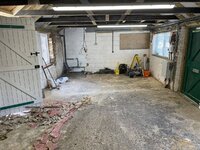
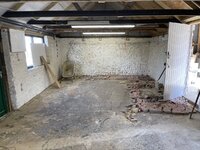
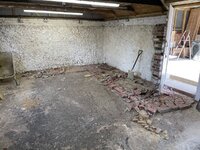
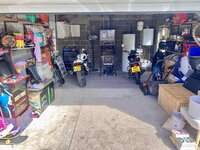
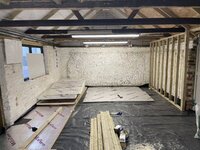
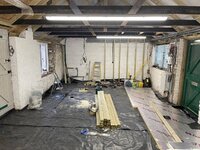
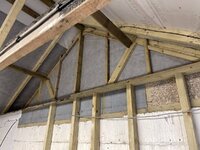
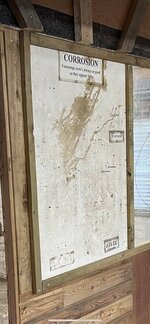
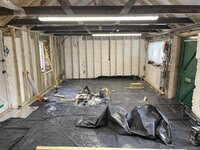
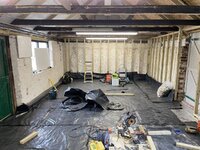
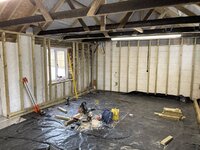
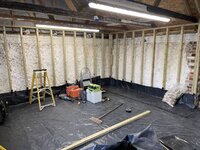
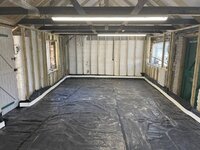
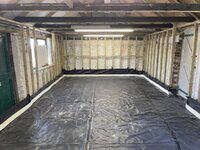
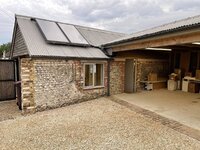
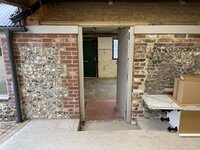
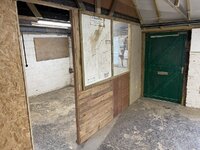
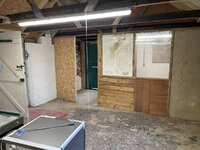
There are other small details, but I think that covers the basics of the plan. I’ll do my best to update the thread with photos as work progresses. I’ve spent the past couple of hours clearing everything out, so here are the before shots:
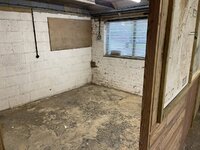
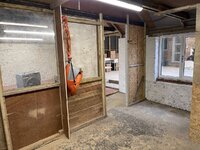
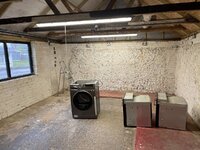
It looks like the whole project is likely to take four or five weeks. Unfortunately due to a family emergency my wife and I are going to have to fly to Hong Kong in three weeks time, so I won’t be here for the last week or two of the build. Not ideal, but my parents live close enough to stop in to check up on progress / send me photos etc and the director of the firm understands our situation and has kindly offered to do daily video calls to keep me updated / discuss anything that comes up. At least when we get back it should be finished and ready to start moving the pins in!
Advice on Converting an Outbuilding
We're hoping to exchange and complete on a new home early in the New Year, and it just so happens to have an outbuilding connected to the house via a car port that I'll need to convert into a games room pretty much immediately due to lack of space for pins in the house itself. It'll be worth it...
www.pinballinfo.com
It’s taken longer than I’d anticipated / hoped to actually get underway, but work finally starts tomorrow morning and as a couple of people asked I thought I’d put up a build thread to track progress. Hope this is the right forum for this thread, mods please feel free to move if not.
Since my last post I got a few local firms in to talk it through and provide a quote and one really stood out - he seemed to really get what I was trying to achieve, understood how important the floor was and noted problems the others didn’t pick up on In terms of how the floor was done. The others all suggested installing a floating floor but after measuring he pointed out that given the height of the beams, the slant of the current floor, and the height that would be added if a floating floor was installed, there would be headroom issues with the beams and the floor prob wouldn’t be fit for the intended purpose. He instead said that for the best results they’d instead need to dig out the floor on the side of the room which is higher to make it level with the lowest point and build a solid floor from there.
He also had some good ideas / suggested changes to my original plan, so by the time he left I was convinced. As you’d expect, his quote came in the highest - but as I’d rather do this properly I decided to bite the bullet and go ahead.
So, the job starts tomorrow. First steps are going to be tearing out the partition wall and toilet, digging the floor out, and fixing a small exterior crack on the East wall of the building. After the exterior and floor is sorted, the doors and windows will be replaced, electrics / insulation installed, and finally interior fit out work will get underway.
The end goal is an entirely open plan room. I’m keeping the pitched ceiling and going for white walls and ceiling, dark grey support beams for contrast, and a light grey wood effect vinyl floor. Heating / cooling will be via a 5Kw Mitsubishi inverter heat pump on the East wall. I went with the black model of the below:
MSZ-LN R32 Inverter Heat Pump
The MSZ-LN range is a wall mounted system that blends energy efficiency with a sophisticated streamlined design. Finished with a range of deep, rich colours and a premium quality feel, this range features the latest product innovations, all designed to enhance the user experience.
For lighting I’ve decided to go with Hue LED strips across each beam - these will throw light up towards the ceiling to avoid glare on the games. Here’s a short proof of concept video I did a while back using 3m of led strips across just one beam - the final product will have closer to 4m across all seven beams:
View attachment 31283665-44BE-4CC4-A963-3DCDC0993DA8.MOV
I’m also going to have three pendant lights dropped from the ceiling over the aisle in the middle of the room between the pins with filament hue bulbs installed, but those will mainly be for ambience as opposed to lighting the space. I’ve gone for these in black from John Lewis:
John Lewis Baldwin Large Pendant Ceiling Light, Pewter/Copper
Buy John Lewis Baldwin Large Pendant Ceiling Light from our Ceiling Lighting range at John Lewis & Partners. Free Delivery on orders over £50.
www.johnlewis.com
The toilet in the corner is being ripped out and a carpenter friend of mine is going to build me a small back bar unit with a sink, counter space for the Perfect Draft and Beer Blade, and room underneath for a double beer fridge. I may also add a little lean to coming off the bar and down the wall with a few bar stools depending on how it feels in terms of space when everything else is in. I’ve also decided to mount Sonos One SLs in each corner or the room which I’ll control via an Echo device.
There are other small details, but I think that covers the basics of the plan. I’ll do my best to update the thread with photos as work progresses. I’ve spent the past couple of hours clearing everything out, so here are the before shots:


It looks like the whole project is likely to take four or five weeks. Unfortunately due to a family emergency my wife and I are going to have to fly to Hong Kong in three weeks time, so I won’t be here for the last week or two of the build. Not ideal, but my parents live close enough to stop in to check up on progress / send me photos etc and the director of the firm understands our situation and has kindly offered to do daily video calls to keep me updated / discuss anything that comes up. At least when we get back it should be finished and ready to start moving the pins in!
Last edited:

