OP
OP
OK time for an update.
So the last thing I wrote was about the Friday-arrival day.
On Saturday I awoke to grey skies, although not yet raining I could tell that a down pour was imminent. A friend of mine who lives just round the corner gave me a call and asked if I was going to do any work on the cabin that day if so he would give me a hand. I thought might as well try and get some more done. I called my dad and said the cabin build was on and he came over as well.
This is where the trouble started.
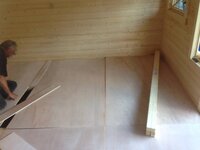
We continued with the build. First putting the 6m long log above the front door frame, jostling with the log and lining up the 4 widows and double door frame. It went in pretty quick no problem. We continued to build up the sides and back.
This would prove to be an learning curve. When we came to put the 6m log across the back, above the door frame we found that it would not fit. It was approximately 10mm out, meaning one of the ends of the log notched out was resting on the inside of the joining log. Confused at how this could be we concluded that the bearers were the culprit as they were warped and although the concreate base was only a few mm out the torque on the bearers and the gap between the base and bearers was about 20mm. this we concluded the cabin was twisting. We decided to pack up the base with wood and level the floor this would surely sort this problem out.... WRONG!
Packing up the floor actually made this worse. Putting the back wall log interlocking notch out by 25mm a whole inch. Scratching our heads we took out the packing under the bearers. It was then that my dad had an idea. We would "modify" the log by cutting out the locking section by 5mil each side to make the log fit. Making a face like that bloody meerkat on the telly SIMPLES!
It could only get worse. We spent the next hr shaving wood off this log and trying it, cutting more then trying it again only then to discover that if we did this in turn would have a knock on effect on the rest of the upward build as the next log would not fit and would have to be "modified". At this point I can only describe my actions as A 3yr old...I threw a WOBBLER! We had just spent 2hrs packing, un packing the floor, shaving, cutting, pushing & pulling this one log to make it fit and then the rest of the cabin would not fit!
At point I had a moment of clarity. Like a child having a tantrum and then stopping dead mid flow because it was offered a chocolate bar. Staring up at that tall figure that would have been an adult but in this case it was the door frame at the back of the cabin. I got up on a ladder and looked down the side of the frame. There was a good 25mm gap between one side of the frame and the right side back wall. Obviously as we had cut a hole the back wall was now a left and right side with door frame in middle.
We had cut down the back log relatively straight and the door frame was a snug fit. But too sung. I now realise that this is why you get that extra 40mm each side of the door frame in the bezel so that expansion/settlement or some plonker not cutting the wood dead straight would have a little bit of give.
This meant that the door frame had to come out. By this time the rain was coming down hard. The damp proof membrane for keeping the damp out was doing a great job of keeping it in, with the sections of floor barers filling up with water fast.
Soaked to the core we dismantled the cabin. All the progress made on the Friday was being undone. We took off the 6m log from the front and then took down the right side of the Cabin. This only took 30mins as the cabin was not interlocked all way round because we had cut the back logs for the door frame. Getting the door frame out we then rebuilt the right side of the cabin up level to the left. We then trimmed another 20mm off the right side and then standing on ladders lowered the door frame back into the hole.
Taking a mallet (the pursuader) and a block of wood I then went round to the back right corner of the side wall and pursuaded the feck out of it, pushing it into the door frame. This worked very well.
VERY LUCKLY the manufacturer gives you ONE spare 6m back log, don't know why they just do. And we put it across the top of the back door frame and it went straight in!.
So the last thing I wrote was about the Friday-arrival day.
On Saturday I awoke to grey skies, although not yet raining I could tell that a down pour was imminent. A friend of mine who lives just round the corner gave me a call and asked if I was going to do any work on the cabin that day if so he would give me a hand. I thought might as well try and get some more done. I called my dad and said the cabin build was on and he came over as well.
This is where the trouble started.
We continued with the build. First putting the 6m long log above the front door frame, jostling with the log and lining up the 4 widows and double door frame. It went in pretty quick no problem. We continued to build up the sides and back.
This would prove to be an learning curve. When we came to put the 6m log across the back, above the door frame we found that it would not fit. It was approximately 10mm out, meaning one of the ends of the log notched out was resting on the inside of the joining log. Confused at how this could be we concluded that the bearers were the culprit as they were warped and although the concreate base was only a few mm out the torque on the bearers and the gap between the base and bearers was about 20mm. this we concluded the cabin was twisting. We decided to pack up the base with wood and level the floor this would surely sort this problem out.... WRONG!
Packing up the floor actually made this worse. Putting the back wall log interlocking notch out by 25mm a whole inch. Scratching our heads we took out the packing under the bearers. It was then that my dad had an idea. We would "modify" the log by cutting out the locking section by 5mil each side to make the log fit. Making a face like that bloody meerkat on the telly SIMPLES!
It could only get worse. We spent the next hr shaving wood off this log and trying it, cutting more then trying it again only then to discover that if we did this in turn would have a knock on effect on the rest of the upward build as the next log would not fit and would have to be "modified". At this point I can only describe my actions as A 3yr old...I threw a WOBBLER! We had just spent 2hrs packing, un packing the floor, shaving, cutting, pushing & pulling this one log to make it fit and then the rest of the cabin would not fit!
At point I had a moment of clarity. Like a child having a tantrum and then stopping dead mid flow because it was offered a chocolate bar. Staring up at that tall figure that would have been an adult but in this case it was the door frame at the back of the cabin. I got up on a ladder and looked down the side of the frame. There was a good 25mm gap between one side of the frame and the right side back wall. Obviously as we had cut a hole the back wall was now a left and right side with door frame in middle.
We had cut down the back log relatively straight and the door frame was a snug fit. But too sung. I now realise that this is why you get that extra 40mm each side of the door frame in the bezel so that expansion/settlement or some plonker not cutting the wood dead straight would have a little bit of give.
This meant that the door frame had to come out. By this time the rain was coming down hard. The damp proof membrane for keeping the damp out was doing a great job of keeping it in, with the sections of floor barers filling up with water fast.
Soaked to the core we dismantled the cabin. All the progress made on the Friday was being undone. We took off the 6m log from the front and then took down the right side of the Cabin. This only took 30mins as the cabin was not interlocked all way round because we had cut the back logs for the door frame. Getting the door frame out we then rebuilt the right side of the cabin up level to the left. We then trimmed another 20mm off the right side and then standing on ladders lowered the door frame back into the hole.
Taking a mallet (the pursuader) and a block of wood I then went round to the back right corner of the side wall and pursuaded the feck out of it, pushing it into the door frame. This worked very well.
VERY LUCKLY the manufacturer gives you ONE spare 6m back log, don't know why they just do. And we put it across the top of the back door frame and it went straight in!.


")


")


