What's new
Pinball info

Register a free account today to become a member! Once signed in, you'll be able to participate on this site by adding your own topics and posts, as well as connect with other members through your own private inbox!

My Life With An Ex-Arcade TAF

Last week was filled with a lot of work, a fair amount of a horrible cold and then a long weekend in Poland. No time at all to play or fix anything.

Some conductive epoxy arrived last week for me to try to fix the DMD which had a missing line at the bottom.


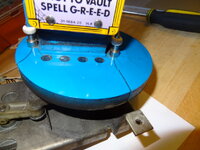
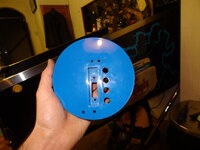
Removal was easy, undo the four retaining bolts and remove the washers, then remove the carboard protector:


DSC01782-1.jpg


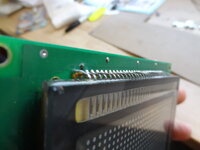
Identifying the problem was simple as well:


DSC01783-1.jpg


The closest leg (the blurry one) is not connected to the display, it has been repaired before and looks messy with glue and solder. I removed the extra solder so I could manipulate the leg better and cleaned up the display surface with a file and contact cleaner. I then added some extra solder to the end of the leg to give it more contact put some epoxy on the display and pushed on the leg, then applied another layer of epoxy for good luck. The glue doesn't go off quickly so I had to wait an hour to test it.


DSC01784-1.jpg


Lets see how long that holds.
smile-1.png
 
Yesterday somehow turned into bookcase fixing day. The actual removal process would have been quite simple had a not missed a step. By missing that step I snapped the plastic arm going to the gears. Luckily it was the sort of area that glues back together very well. Including gluing time, the whole job took less that two hours with a lot of cleaning.


Old and dirty:


DSC01790-1.jpg


DSC01793-1.jpg


It was being held together with bathroom sealant so at least it was also water tight.


New:


DSC01794-1.jpg


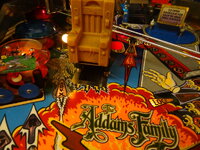
The hard part is getting the bookcase level with the table. I found one shim on dismantling and returning it to where I found it has not been ideal. Looking at playfield wear, I don't think it was perfect before as the lip on the table before the vault hole is worn. After a fair amount of tweaking I think it is much better now and know another part is clean.


Other than some replacement targets on the swamp, I set about making a key fit the backbox lock which the previous owner never found.

These locks are simple to dismantle and rebuild with new pins but I didn't have enough of the right ones or a perfect key to fit. At the moment it has only 3 pins not 5 and can probably be opened by and right size key. So if any one has any Bally/Williams back box locks with no keys or keys with no locks then I am interested in them.
wink-1.png


Also found that Sharpie red permanent markers are a close match to the table but the orange and yellow suck.
rolleyes-1.gif
 
Recent work, changes and stuff.


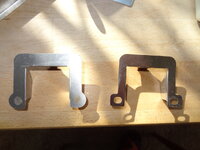
I spoke to Cliffy and he sells extended scoop protectors plus the missing ramp protector so it took a few weeks for him to make up the bits but they arrived with no extra tax.


This indicates how much bigger they are

DSC01810-1.jpg


This is the set fitted:


DSC01857-1.jpg


DSC01858-1.jpg


DSC01859-1.jpg


The wear is not 100% covered but the wear will be protected/hidden until I can find a playfield and do a swap.


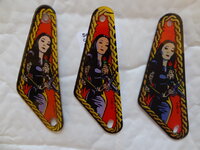
I bought some replacement slingshot plastics from PH which were poor reproductions and for £24 quite a disappointment. A few weeks ago someone was selling some possible NOS ones on ebay and I secured them for £13.50 with delivery, bit of a gamble but I enjoy that sort of thing. On arrival they were much better than the repro ones but also a little different from the originals, more yellow around the side and gold in the rope work on Morticia .


In the following shot, the left is the new one, Gomez on the right is the PH repro:


DSC01863-1.jpg


The three Morticia's side by side, left to right: Orig, newly bought, repro


DSC01862-1.jpg


If anyone can tell me what version or repros these are I would be very interested.


Gomez looked very similar to the original, maybe a little darker in the face.


DSC01864-1.jpg


The last shot is the new ones fitted, it looks much better in an area I often look at so I am happy with that.


Finally a spot the ball competition, I have no idea what shot I was trying to make but this is just wrong:


DSC01811-1.jpg
 
You have her looking pretty sweet now after all that work.

More important how much better does she play now ?
 
The play is much better, smoother and consistent. Along the way I have become more accurate but I think also there is less defects to deflect the ball so each shot can be very similar.

When I am not playing, my eyes are drawn to the playfield defects but when playing you quickly forget there is anything else other than targets, scopes and ramps.
wink-1.png
 
You mention doing a playfield swap. Is the cab *good* enough to warrant a new playfield and all the work involved ?


I'm sure you would be like a pig in sh*t doing it
wink-1.png
and so perhaps a redundant question.


Also ...just to play devils advocate here
rolleyes-1.gif
- I remember Will having a TAF with a new playfield in and believe me, for whatever reason, that machine played like cr*p. Dont know whether it was the clearcoating or what but it just never felt right.
 
I'm in the process of stripping and cleaning my Addams - everything done except to clean the under play field scoops and troughs. My bookcase is also not level and has caused some damage to the play field. Can you give a bit more info on the location of the shims. I had a look at the screws that hold it to the play field and there don't seem to be any shims - I thought I'd use a few washers here to level it and raise the bookcase using the adjuster to get it flush. Any help appreciated. Cheers.


Your table is looking really nice now.
 
GrizZ, I understand your point, especially if this was a machine to be done up and sold. If it was to live in my (future) games room then I might place it so the cab doesn't matter.

As it happens I sourced some cab artwork which I plan to fit at some point, all part of testing if I can restore a well used machine. The cab refurb will go ahead before a playfield swap and the GF wants to help as she enjoys that sort of thing.

I don't really fancy a "new" playfield, an older, used one that still looks better than mine would be appreciated. I do rather fancy the challenge, plus it will get me to know the machine even better.
wink-1.png
 
DrPinball' date=' post: 1694249 said:
I'm in the process of stripping and cleaning my Addams - everything done except to clean the under play field scoops and troughs. My bookcase is also not level and has caused some damage to the play field. Can you give a bit more info on the location of the shims. I had a look at the screws that hold it to the play field and there don't seem to be any shims - I thought I'd use a few washers here to level it and raise the bookcase using the adjuster to get it flush. Any help appreciated.

I used washers as well, plus a bit of a business card but I rebuilt something else and had to move it so it is not as good as it was. It is an awkward job indeed.
 
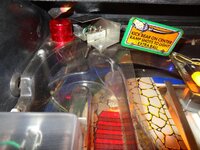
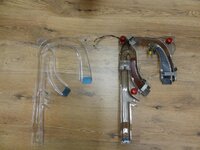
Where were we. Oh yes, I decided to clean all the ramps and scopes underneath as this was not properly cleaned before. Getting off the clear underneath ramp was hard as I didn't have a tool initially that would reach some of the bolts.


Dirty
DSC01869-1.jpg


Clean

DSC01870-1.jpg


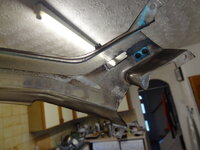
The THING kickout solenoid plate was held together with cable ties because it has broken off at some point
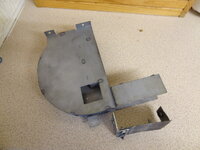


DSC01871-1.jpg


I plan to borrow a welder and see what I can do with all of my weldments but for now I cleaned it and cable tied it back.


Stripped out to the wood:
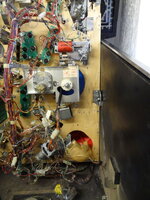
DSC01873-1.jpg


Clean stuff back on:

DSC01874-1.jpg


That should keep the balls clean and stop them messing up the clean playfield and rubbers.


The next part was posted in another thread, as I was putting it all back together again I hit a bit of an issue. The THING kickout switch was faulty as it didn't have the metal plate that activates the switch. As I was putting it all back together I also lost the screws to hold it in place to cabled tied it out of the way. It wasn't enough out of the way and when tinkering with the THING cover I must have knocked it, it then made contact with the kickout solenoid and blew the switch matrix.

Multiple ground shorts rows were tracked back to the chip at U20, a ULN2803 chip on the main board by use of a logic probe. It hadn't been socketed so the only way to deal with it was to cut it off and put in a new one and I was way out of my depth. Johnnyo offered to give me a hand so I took the board to his place and he showed me what to do. Showed me again the knowledge and generosity of the community.

Back home and plugged up, the ground short problem was solved but there was still weird goings on with the optics from the bookcase and THING as the Opto board has a problem with the two LM339. If that was disconnected I could have a game. Johnnyo had give me an old fruit machine circuit board to practice on and it was a massive help with my confidence. He had showed me how to do it so I need to practice and my first attempt was pretty perfect so I decided to do the opto board.


Here it is in situ:
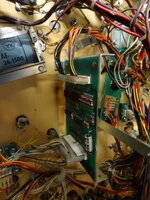


DSC01877-1.jpg


This is a shot of the board and offending chips:
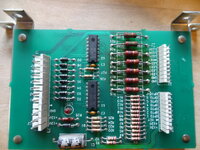


DSC01878-1.jpg


Chip cut off using a dremel, leaving the legs and not destroying the board:
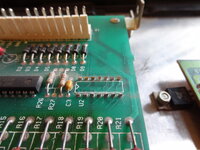


DSC01883-1.jpg


One chip location socketed and the other with the legs and solder removed waiting to be socketed:
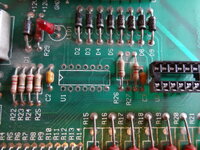


DSC01885-1.jpg


I did one at a time because it meant I could check and double check the way round the socket goes though the board clearly has a triangle to show you were the indentation is. The socket probably doesn't care about which way but the chip will.


Once they were both socketed, sliding the new LM339 chips in is simple and they can be removed later. I bought mine from RS supplies because I already have an account, they really are cheap as chips with £10 buying be five LM339's and ULN2803AN with next day delivery. Johnnyo gave me some sockets for the LM339's and I have since bought some from ebay for a very cheap price.


I hope one day to be able to pass on and help someone like Johnnyo helped me.


Fitted back up and everything worked perfectly. New screws and a few switches from CoolDan solved the original switch issue and the machine has no errors during testing for the first time since I got her home. It only took a few days for me to want to get my new soldering temperature controlled iron hot again and some raw LED's had arrived so it was time to add some extra light. There are also some new pillar posts to clean some areas up.
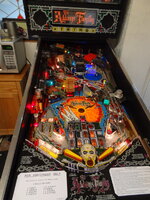


DSC01914-1.jpg


One areas that was too dark that bothered me, the plunger gauge. I can't get a good picture but this now has three little LED's giving some gentle illumination.

The bookcase has a blue accent, as does the vault. I am fighting to route an LED at the top of the graveyard back through the left loop but I have a plan on doing something when the ramp next comes off.
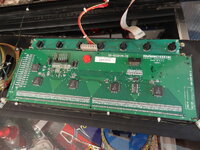
 
Super impressive job mate, especially that chip sawn off at the knees and replaced by a socket.


Makes me wonder if new companies like Jersey Jack and Andy 'I've got a girlfriend' Heighway would consider socketed chips to make easier replacement if/when the chips fail


Oh, and the more you pimp your machine, the more you will have to pimp it. The top left now looks dark, sort it out please
 
The decal for the apron will be ordered shortly, it is an area I see and get annoyed at so has to be done.

I was pleased with my chip sawing, good shot to show people how I did it.


Lighting the top left has been held up by access problems as there are few holes to push new lights up through. The ramp is coming off soon when I fit one I bought off Rav, then I plan to run some wires through the back that then turn back into the dark area. There is one behind the ramp multiball sign but you can't see it in the picture.

That lonely post could have a light on it... Great idea GrizZ. Blue or white... or both....?


Not sure about the castle wall backboard at the moment, I have toyed with the idea of doing my own based on a grave yard or the house.

Patio is ordered but not yet here. Taking the bookcase apart doesn't phase me but balancing the table again does.


I also have considered fitting a dry ice machine to make the vault and THING more interesting....
wink-1.png


There was also an attempt to make THING have a red glowing finger like ET but I saw some sense.
rolleyes-1.gif
 
Calimori' date=' post: 1695447 said:
I also have considered fitting a dry ice machine to make the vault and THING more interesting....
wink-1.png


I remember people talking about this before ...specifically for BSD Mist Multiball. Think there were some concerns over residue

, I don't know if this is an issue or not, or if anyone ever did it. Would be cool if it worked/was practical.
 
If it was a fog machine you could make it from a liquid that would give minimal residue butI think the idea is a step too far. Any moisture would not do the machine any good and would collect under the glass making it foggy, plus getting the levels right in the THING box would be hard as it is full of holes. Too much and it would be hilarious how much smoke was all over the table.

Dry ice would obviously be very cold and not create around a metal ball and surroundings. I am going to let the idea go.
smile-1.png
 
Did you rent the fog machine you used for the Tommy Tent or do you own one?

If you could run the machine with the glass off, that would be cleaner...
 
I like the idea of the smoke machine,
biggrin-1.png
however, any moisture in the machine when in use will encourage fried coils...
sad-1.png
moisture rising from the cabinet in to the backbox means fried transistors and possibly coils too... :eek:
 
I think we might leave the smoke machine idea well alone.


The lone pillar light idea didnt work out. The wires started off getting fouled by THING's box and then shone in a bad place. Now they are routed under the ramp and give the corner a nice blue hint, pictures do it no justice so I won't be posting one.
 
Any chance of a quick tutorial on how you mounted and connected the additional lighting - the 3 lights you added under the table look quite cool. I'm not normally interested in modding but yours looks pretty good. Feel free to start another thread with your thougths - I believe in learning from other people's mistakes!
 
I think Judge Dread is the Mod Master and I wouldn't want to step on his toes. Plus the only mistakes I have made so far are that reds are really dim so you need more and that I overheated the shrink wrap and crushed the wires on one attempt. Other than that, it is R=V/I.
smile-1.png
 
Now that Creech is in the Man Cave, it means I can work on TAF and still have a machine to play. I wanted to get a magnet burn protection kits but they weren't for sale in the UK, they seemed to cost a lot of money to have imported and as making stuff is part of the fun I decided to give it a go. These protector kits use the original connectors and so effectively you can disconnect the magnets and fit these in-line without any soldering or wiring changes.
I am not sure how much the fuse would save the playfield from damage because I don't know if the amps rise significantly when the magnets lock on but I have used the same fuses referenced in other kits (3A Slowblow).

Parts:
3 in-line fuse holders, 1 1/4" RC70M (Maplins £1.99)
3 male housing molex 03-06-1032 (RS 10 pack, £1.50)
3 female housing molex 03-06-2032 (RS 10 pack, £1.40)
6 male pins molex 02-06-2101 (RS 100 pack, £3.00)
6 female pins molex 02-06-1101 (RS 100 pack, £4.00)
Wire
3A Slowblow fuses (will be testing)

Tools:
Molex Crimping tool
Wire cutter/stripper

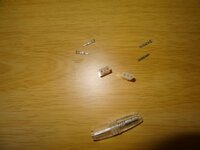
The parts lined up.
DSC03251_zps630d7eab-1.jpg

The Maplin in line fuse holders have a screw to clamp the wires, this makes it easier/quicker as you don't need to solder. I cut one long wire and two shorter wires to be connected to the inline fuse, I kept them all as short as I thought sensible as I didn't want them to be two long.
I crimped the pins on to the ends of the wires but didn't click them into the housing, this was the point to check which way round the machines connectors needed to be. The is because you can have female pins in male connectors, male pins in female connectors, male pins in male connectors and female pins in female connectors. Hell, you could have one of each in either or a combination over the 3 connectors for the magnets so it is worth checking your machine. Mine were all the same so I could make three identical connectors.

DSC03252_zpsf505ee68-1.jpg

The three magnet connectors under the playfield:

DSC03254_zpsb33b4731-1.jpg

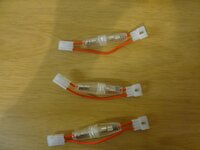
Connected up:

DSC03256_zpsc6696bf6-1.jpg

Then tidy up the wires so they are not hanging about.

Simple and the total cost was £7.26 for the three but I had to buy larger packs of some items so spent £15.96 and have spares for other connectors. I used this as a way to practice crimping pins for molex connectors and will use the remaining parts to fix some dirty or tired looking wiring under the playfield.
 
Looks like you are well on your way to pinball fixing mastery. Perhaps we should arrange badges? hehe. Anything you feel you could offer here would always be accepted with the best kudos, so dont feel like you would be stepping on anyones toes by offering ideas on anything at all. Good job sir!
 
Time to Ramp it up.

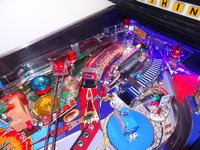
The old smoked ramp in my TAF was not looking great, it has several broken areas including where the wire ramps connected to the plastics which made an angle the ball would occasionally fall off. Plus the usual crack at the top of the left ramp (millions ramp) that would sometimes fire the ball back down the ramp and this deprive me of double jackpot.
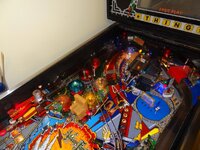
DSC03238_zps5c44ca78-1.jpg

It looks so gloomy in that area despite several added under lights to make it brighter.

DSC03239_zpsd6643d8d-1.jpg

Rav supplied me a better one but it had all the entry metal flaps removed and I didn't know where to start so in the end I treated the machine to a new clear one sourced from Pinbal Mania. It came with all the bulb holders and metal flaps included, plus the decals for a price that was very good so thanks to Andy.

DSC03243_zps210126f4-1.jpg

The time was in swapping the bits over from the old to the new one and giving them a clean.
I liked the smoke effect of the original but the clear one is much cleaner looking and makes the machine look a lot brighter.

DSC03246_zpsc73631b7-1.jpg

It plays so much smoother as the ball doen't have to contend with the odd shape the old one had assumed, the left ramp is so much easier and the centre ramp seems to be made more often with less roll back from gentle shots. Very happy with how it looks. There are now a few LED strips of Blue and Red at the back of the cab, which highlights that I need a backboard so that is on the list.
 
That's a great post that Geoff. Well worthy of its own thread really (in Tips/Tricks maybe?). Slight chance it might get lost in this thread
(edit - regarding the fuses for protection against magnet burn)
 
Back
Top Bottom