What's new
Pinball info

Register a free account today to become a member! Once signed in, you'll be able to participate on this site by adding your own topics and posts, as well as connect with other members through your own private inbox!

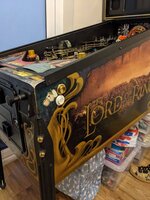
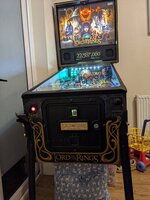
Complete LOTR "One Ring Edition" translated as "lets waste money and don't tell the wife edition" fitting lots of parts, mods, rubbers, and cleaning

cmrl9

Site Supporter
Joined
Apr 16, 2020
Messages
1,845
Location
Belfast
Alias
cmrl
Since picking up a LOTR earlier in the year I have been slowly collecting replacement parts for it. Most of them pointless *lol* as the machine is mechanically sound.

I Believe originally Neil McRae had it briefly, then James and before myself, mplayfiled who kindly agreed to trade for my STTNG.

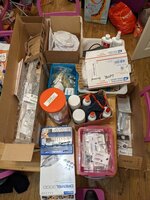
This weekend I started work on it as I just received this order:
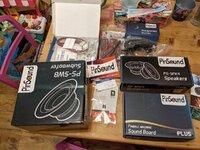
1.jpg

From pinsound:

Pinsound Plus board
Subwoofer
Speakers
Headphone station

I didn't go for the shaker motor as I personally don't like them.
 
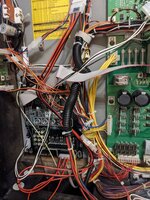
When fitting the pinsound I had the following problems:

1) Getting the CPU chip out was hard as it hadn't been moved since new, word of warning to all, make sure you ease out both the top and bottom a little way gently first. I nearly bent the pins trying to prise it from the bottom.

2) The machine wouldn't boot, only the lights stayed on. This turned out to be the ribbon cable between the cpu chip adpator and the pinsound card. Re-seating and swapping the cable it arround resolved.

3) No sound at all from the pinsound card. There 4 things that aren't clear in the video (its the old card there showing) and the non-existent instructions

a) The pinsound + card has a gain knob, its the first one one the left, turning it right down means no sound. BEing careful with elerctonics my default setting is low, however with this card it = no sound
b) The volume on the machine setting has to be turned up very high at least 17
c) The most important one, the fitting video indicates the cable going from the power driver adaptor goes into the bottom right slot of the card, it doesn't it goes in the bottom left. The bottom right goes to the speakers.
d) Don't play around with the volume control on the headphone station until the pinsound card has intiated, it makes a jingle sound

2.jpg

Card fitted :)
 
Good luck, a great game and well worth hearing the fantastic audio through better kit.
 
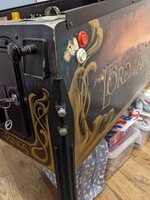
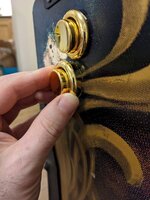
bought some gold buttons from Ministry of Pinball


Shipping was expensive :(

Tried to fit them, they won't fit in the holes :( :(

Managed to bang it in the flipper holes, but impossible to get it in the UK skill post holes.

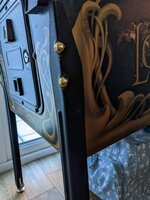
4.jpg
 
Gold buttons and leg bolts make a difference (shame about not being able to fit the bottom) still good to have a spare pair, my guess is they will wear.

5.jpg
 
Thanks, it is better and surprisingly an noticeable improvement

Christopher Lee and Ian McKellen is about as good as it gets for pinball callouts and Howard Shore on the music . . . . ridiculous quality
 
Colywobbles made me two parts:

1) a front plate

7.jpg

Where the "0ne ring Edition" name goes :)

Very happy with it, (although it did fall off by the morning, double sided tape doesn't like the northern ireland weather!) I'm going to glue it properly as no damage done.
 
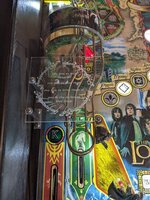
and a custom Ball guard

8.jpg

which turned out great, because its slighlty thicker than the orignal when fitting it you will need two small washers to replace the bolts underneath the plastic, otherwise ou can't srew it down.
 
and I also fitted a new starter for the backbox bulb and a replacement lamp, looks much brighter and not buzzing any more.
 
Christopher Lee and Ian McKellen is about as good as it gets for pinball callouts and Howard Shore on the music . . . . ridiculous quality
Yes, its great the cast agreed to it, altough they might not have had a choice, unlike Michael J fox with Back to the future, although he might have played a prototype and said im not f**g putting my voice and image on that piece of S**t "lol"
 
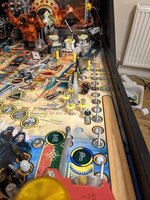
have you thought about getting “lolly pop“ style side rails to cover the wear around the flipper buttons and you can also cover the extra flipper buttons? I think you can get versions with extra holes if you want to keep the skill shot flipper buttons.
 
have you thought about getting “lolly pop“ style side rails to cover the wear around the flipper buttons and you can also cover the extra flipper buttons? I think you can get versions with extra holes if you want to keep the skill shot flipper buttons.
Thanks, no I didn't, had a quick look reasonably priced, however I do use the UK skill button and I can't seem to find one that has both holes.
 
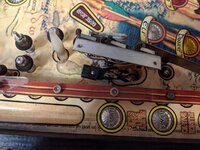
Help please...

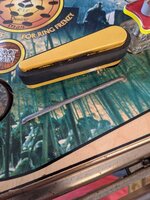
How do you take out flipper snubber wire?

Is there a tool or do you just pull out
 
Are you meaning to take out that metal wire just below the flipper on your photo? Don't.
 
Biff bars. To prevent bangbacks as you suggest. Ditch the extra skill buttons and fit some custom side rails, there some nice ones with writing on, lollipop style.
 
HELP PLEASE :)

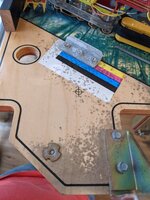
I have been stripping the playfield today and one playfield T Nut that pushes into the playfiled that a bolts screws through, the screw has totally got stuck Ive tried hard to get it out, I bent it slightly so I could hold it with some pliers but it won't budge. It is unscrewed by about 1/2 a centemter so I could get a cutter underneath at the screw head end underneath the playfield to get it out. HOwever having never done this before what the best way to do it? Dremmel, but lots of sparks seem to fly which would't be good, wire cutters?

Pic below of the sucker

PXL_20211202_232713681[2236].jpg
 
Start work underneath the instruction cover (I'm sure its called something else)

Not looking too pretty

1.jpg

2.jpg

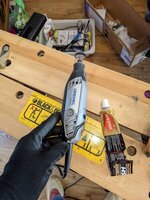
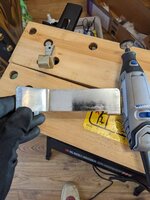
Decided to get the drimmel out for the first time, bought it for this :)

3.jpg

Practiced on a ball gaurd I'm replacing

Not too bad, got the ball marks off, looks a little bad bottom but that was me trying various ends and pressures

4.jpg

TIme for a polish, spot the polished one :)

5.jpg

FInished.

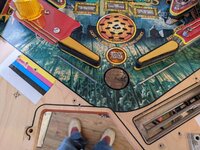
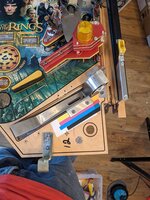
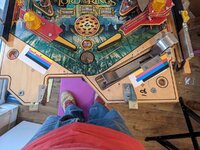
Fitted Ball kickback guard

Fitted Ball kickback protector

Polished the stuff

6.jpg

7.jpg


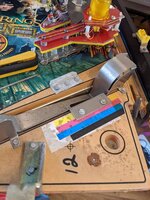
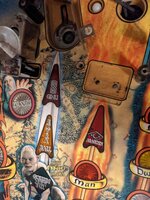
Started work on taking the sword ball lock apart.....

8.jpg

9.jpg

Cleaned the area and changed U nuts, screws, rubbers

Stuck with one bot I cant get out as previously asked for help with :)

Looking not to bad

10.jpg

Only took 16 hours labour *lol*

Realised I needed some other parts, bought a load more from MArco pinball and fitted teh new metal plate for the ball lock.

Order a small hacksaw from B&Q I think this mightcut the bolt off.

Ordered some rubbers from Pinball bizaar was missing some small ones.
 
A worthy project for sure. Hope you have a lot of fun with it.

If you havent heard of one before, using a vibratory tumbler or rock polishing tumbler will be very efficient for all your metal polishing needs. Just bang a load of your metal bits in it, some walnut shells (or ceramic media first if very rusty) and set it off while you get on with other jobs. Great results everytime.

They are on ebay for £50 or so.
 
Back
Top Bottom