What's new
Pinball info

Register a free account today to become a member! Once signed in, you'll be able to participate on this site by adding your own topics and posts, as well as connect with other members through your own private inbox!

Judge Dredd

jack burton

Site Supporter
Joined
Jan 30, 2014
Messages
424
Location
Waterford
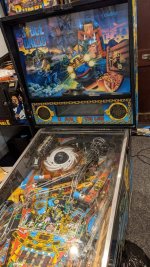
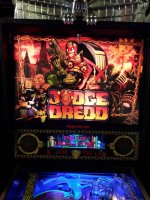
My new judge dredd arrived today.

Needs a good cleaning first off and a conversion to LED which is all good

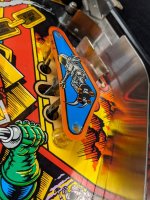
Artwork is a bit faded but I'm not too concerned with having this as a minty machine so just want to have it playing solid and looking good.

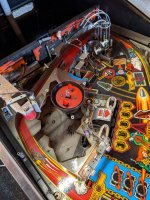
Gotten it up on legs just now and a quick power on. So here's what I've spotted so far:

1) F104 blowing on startup, changed the fuse and happened again. So no ball through so looks like I'll be waiting till I play it. Upper right flipper gone so I'd guess that's on the same circuit for F104

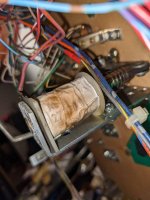
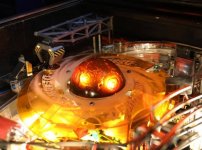
2) Crane is super loud, sounds like an old tap. Ice attached a video, so any tips on what to do here? Does the mech for this need lube under the pf?

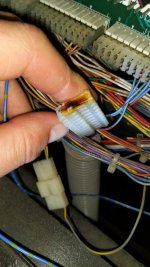
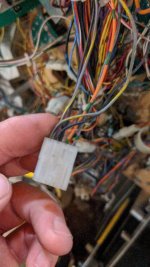
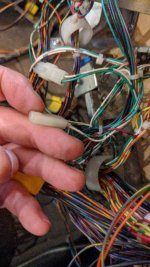
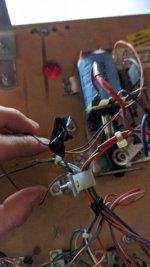
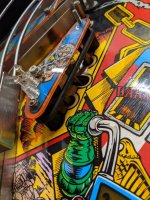
3) A few switches etc. Need replacing

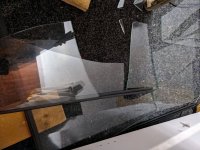
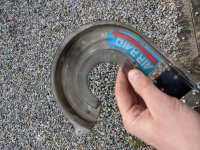
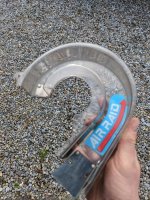
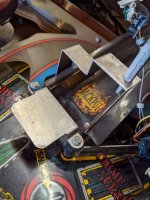
4) Clip for the speaker on the left side is missing and a chunk of the mdf is gone too so probably have to get a new piece of timber cut and switch all the parts over.

5) I have a pin2dmd to go into this, is there a file available for it?

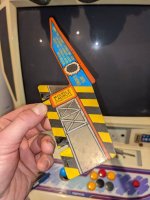
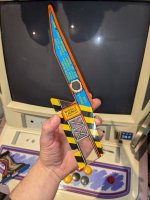
6) Topper is missing, now I know a new one is like hens teeth but is anyone 3D printing them? Have a friend who got a good machine so that's an option for me

7) Legs are pretty rusted so I'll get those scrubbed up. They are the gold tint ones, are they the original?

I'll update with more pics as soon as I have them

Cant wait to get this ready to play
 

Attachments

  • IMG_20210120_154613_203.jpg
    IMG_20210120_154613_203.jpg
    138.4 KB · Views: 57
  • VID-20210120-WA0032.mp4
    5.6 MB
A really good game and an awful lot of machine packed into that cabinet. Good luck with it, certainly the most fun I've ever had pimping a pinball machine.
 
Yeah great game, I am in the process of fixing my one up. The crane mech does sound loud, I just rebuilt mine didn't need any lube but did need a damn good clean as it was caked in dirt.
As for pin2dmd I couldn't find a file, there seemed to be some people who had started but not finished. I am waiting for the led panels to arrive from China to build myself one, then might attempt to make a file!
 
Yeah I had a look at that. No updates in a while. Suppose the pin2dmd with a nice colour pallet will have to do for a the time being
 
Have a spare apron and a few other bits I’ll bring down the next time I’m down that way (when the zombies give up and leave us alone) nothing very exciting but you might as well have them..

yeah put the pin2dmd in on one of the colour palletes that are available or just set it to A different single colour like blue
 
It’s one of the string of solenoids that the kick back is on, can’t remember what else is on with it. Will get a look in the manual later hopefully.
 
So I have to get a manual printed out and not having much time to get at this tonight.

Lifted the pf and seen some taped wires, what looks to be a crispy coil and a few other "ohhs" and "ahhs"

There's 2 connector's not connected to anything too so that's odd

Pictures attached. I'll hopefully get more time over the weekend and get a good suss on what's wrong and get parts ordered up.

F104 is blowing on power up. Disconnected the fliptronix board and still happening

I did take off one plastic and give it a clean so at least I got something done
 

Attachments

  • IMG-20210121-WA0051.jpeg
    IMG-20210121-WA0051.jpeg
    88.2 KB · Views: 35
  • PXL_20210121_220246576.jpg
    PXL_20210121_220246576.jpg
    86.6 KB · Views: 29
  • IMG-20210121-WA0046.jpeg
    IMG-20210121-WA0046.jpeg
    90.1 KB · Views: 29
  • IMG-20210121-WA0044.jpeg
    IMG-20210121-WA0044.jpeg
    101.2 KB · Views: 28
  • IMG-20210121-WA0038.jpeg
    IMG-20210121-WA0038.jpeg
    58.5 KB · Views: 30
  • PXL_20210121_220812213.jpg
    PXL_20210121_220812213.jpg
    78.5 KB · Views: 30
  • PXL_20210121_220917382.jpg
    PXL_20210121_220917382.jpg
    83.5 KB · Views: 36
Re. pin2dmd colouring, the scenes posted on vpuniverse look good and the guy was offering to share the project and dump which is a good start, Just colouring the scoring display is a big win as this is displayed most of the time in game anyway. I'm set up with the editor if you need any help. :thumbs:
 
Re. pin2dmd colouring, the scenes posted on vpuniverse look good and the guy was offering to share the project and dump which is a good start, Just colouring the scoring display is a big win as this is displayed most of the time in game anyway. I'm set up with the editor if you need any help. :thumbs:

That's brilliant man. I'll be in touch with that. TBH I have a pin2dmd in my sttng on just a colour pallet for a few years now and it's great.

Ignore the unconnected connectors. Same on all JDs, was for a switch that was removed from production, had me scratching my head same as you a while back!!

Ah that's brilliant. Thank you. Those were going to be headscratchers for my too.

Whenever I fix a problem, or in this case realize there isn't one, this plays in my head

 
Some good news tonight.

Found out what was causing the fuse to blow. The left sling had a pretty toasty coil, disconnected it and all good. Managed to get a test game and all.

Dead world and the crane need adjustment. I need to go to the manual to see what way they are ment to be setup.

Decided to get into the drop targets since they were very sticky. Got the mech apart and cleaned everything including springs. And cleaned off any crud. Even cleaned the metal parts in isopropyl alcohol to get them free from any ****e. Tested out one and with no clips or springs on it works great and snappy. I put the springs and C clips on and it's barely working now. I've attached 2 videos.

Are those targets run dry? Or do they need to be lubed? I know some of the clips for the mental rod are broken, someone has been at this mech before but not for a long time I'd think
 

Attachments

  • PXL_20210122_230502652.mp4
    19.7 MB
  • PXL_20210122_230416911.mp4
    4.1 MB
Is that washer under the lower circlip snagging on the drop target plastic ?

that looks really tight. (not in a good way) is the washer too thick? Could you put a thinner one on ?


that second video is the way it should be (obviously) so has to be something to do with the circlips or the washers, maybe there should be a washer between the plastic and the metal of the mech..

actually scrap that, it looks like the top circlip (rhs one) isn’t tight as you can move the plastic up and down, the bottom (Lhs one) looks like it’s the problem. Try it with just the top on and see, is the plastic still a bit gunked up ? it does look like oil that has gunked up. Had that on star wars, had to strip and clean it a few time before it snapped up rather than the slow sticky way your first video went. Even after I thought I had removed all the gunk

oh and great news on the fuse culprit. What’s the toasty solenoid ? might have one I can send you down
 
Last edited:
You need to get the right springs and washers on those targets. They are a right pain in the backside.

You will get them working going down and put it all back together and they wont reset properly unless you do the job as in the manual. The centre target is also different to the other 4.
 
Yeah I copped the centre one was different for the subway entrance.

Yeah it's been ****ed with anyway. There was washers on the lower part aswell for 2 and not on the rest so I'm not sure what way they were originally. None of my other Williams games have drops so can't compare . At least everything is cleaned now, they had been greased before. Ill have a read of the manual. (Have a physical one on the way too)
 
i would say don’t grease or oil them, they never need lubing, think I’m right in saying only the really old stuff needed any lube..

also you do know there are colour files for sttng ? Done by slippifishi just down the road from me a few miles

watch this, might help, even just the way it all goes together. Seems like your sort of bloke also, with all those carts on the shelves

splits it all apart from about 6 mins in
 
Page 2-23 of the manual (91 of 148 of the pdf on ipdb) shows that the lower washer (and circlip) doesn't sit flush with the target instead it holds the cover plate in place and that there is nothing holding the lower part of the target so it moves freely like your video with no spring or circlips in place. Highlighted in the manual as DETAIL "A" to avoid falling in to the trap that you have.
 
Yeah I just had a look at the pdf there. Looks like whoever did this before me put it back together a bit wrong.

I'll have a proper look when I'm home from work and have the mech in hand. Find it hard to make sense of it trying to remember the assembly of it when I'm having a coffee in work 😂
 
Got an hour with this tonight.

Drop targets all fixed, snappy and back in place. I think there was extra washers in front of the springs and causing too much compression.

Next up is the crane and deadworld. Crane is making a lot of noise so my plan is to take out the motor and mech and just give everything a good clean and make sure there's no gunk and ****e in there.

Looks like both crane and deadworld need to be adjusted.

Theres a 3D printed crane mod I'm going to get too, pic attached

Any other mods etc that people think are essential? I've looked into the deadworld mod and I might do it eventually but going to leave that the way it is for the moment
 

Attachments

  • 292a22a8546f7437c9b119fef5dd8ef8e214a827.jpg
    292a22a8546f7437c9b119fef5dd8ef8e214a827.jpg
    55.3 KB · Views: 23
It was a sling solenoid, not to worry though. I'll be ordering parts tomorrow so I'll get a new one
 
Got a bit more done last night.

Started to strip back the PF and clean a few bits. I want to wait till my LEDs arrive though so I can change them out as I go.

Have white rubbers on the way, white rubbers on yellow posts? Instead of the black on black that's there now. Or is there another combo works well for JD?

Also clipped the translight with my foot and it shattered, no damage though thank ****! Good thing there's a glazers 3 mins from my house haha
 

Attachments

  • PXL_20210126_215032958.jpg
    PXL_20210126_215032958.jpg
    151.8 KB · Views: 23
  • PXL_20210126_215023443.jpg
    PXL_20210126_215023443.jpg
    123 KB · Views: 23
  • PXL_20210126_215027265.jpg
    PXL_20210126_215027265.jpg
    143 KB · Views: 24
Lots of stuff for Dredd
Check the judge dredd pinball owners page of Facebook
 

Attachments

  • 20201001_085757.jpg
    20201001_085757.jpg
    117.3 KB · Views: 23
Few more updates.

My parts and LEDs will be arriving next week...shipping is still very delayed. So I've taken the pf pretty much apart and been cleaning everything and waxing the pf.

IMG-20210203-WA0032.jpeg

Backbox is now LEDs, just need to get flashers for there too
IMG-20210201-WA0015.jpeg


Absolutely filthy towards the back but really looking forward to getting this playing.

PXL_20210203_131921056.PORTRAIT.jpgPXL_20210203_133203101.jpg

I still have a few switches due to be changed which are on the way with my order

There was the very tip of something poking through the pf on the right orbit...checked underneath and someone put a ****ing timber screw in there, such a shame
PXL_20210203_131824111.jpgPXL_20210203_131848469.jpg
Still trying to find a cheaper alternative topper than buying the eagle. A friend has a very good 3D printer so seeing if there's any files for it but can't find any yet
 

Attachments

  • PXL_20210203_131039490.jpg
    PXL_20210203_131039490.jpg
    156.2 KB · Views: 27
  • PXL_20210203_125709067.jpg
    PXL_20210203_125709067.jpg
    268.1 KB · Views: 24
  • PXL_20210203_130013213.jpg
    PXL_20210203_130013213.jpg
    207.8 KB · Views: 22
  • PXL_20210203_130516268.jpg
    PXL_20210203_130516268.jpg
    119.9 KB · Views: 23
Back
Top Bottom