What's new
Pinball info

Register a free account today to become a member! Once signed in, you'll be able to participate on this site by adding your own topics and posts, as well as connect with other members through your own private inbox!

Getaway HS2

biglouieuk

Site Supporter
Joined
Dec 22, 2019
Messages
565
Location
Kent
Alias
robllewellynuk
I thought I'd use the forum to log some of the things I do to my Getaway. As this is my first time pin I suspect some of this will be boring to many, but might have some interest to other newbies like myself

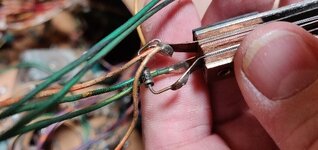
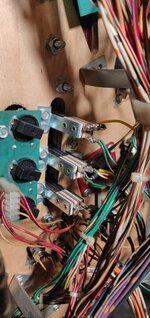
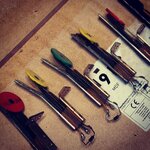
We swapped out some old traffic light targets for new over the weekend. This might be a little ott on my part, but the central targets were bent far back on the back support (could probably straighten) but the switches were black and bent out of shape too, so o thought I'd swap the lot.

On a scale of 1 through 5 with 5 being advanced and 1 being easy...I'd say this was a 2.5 difficulty job for a noob.

Flux, a decent soldering iron, solder, wire strippers and wire snips.

This turned into a two man job! But the pin has become a bit of a father and son project with my 15 year old and 12 year old lads.

Anyway, targets came out, targets went in, tests were done.. 2 of the 3 traffic light sets done.. getting the solder on the new targets wasn't super easy with my soldering iron.. I wonder if it's a bit under power. We reflowed solder onto the terminals first which helps a great deal, also tinning new wire and having a glob of solder on the iron is handy.

We will do the rest this week after we've made up! So stressful doing things with your dad...

Few pics attached. I'm not sure I'm ready to show my soldering skills to the world tho! Forgot to take after shots, will do that tonight.

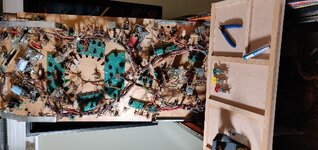
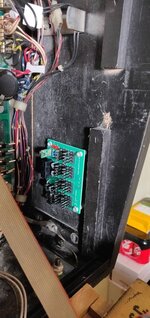
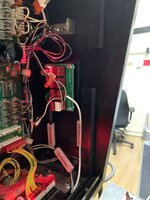
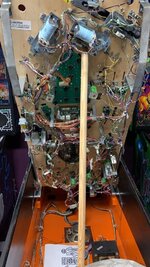
We also made v1 of the pinball maintenance tray. V2 will feature legs on the lower side to make the bloody thing flat. Duh (this was teenagers input)a54bbfc6caf4b7d8edd0c8984684a306.jpge3eaa4a437eb2ec9552495421ace99b3.jpg2be9079fc561e6b64b1371f89128b5ec.jpg
Sent from my ONEPLUS A6003 using Tapatalk
 
Run out for the new soldering iron this evening. One less excuse for my dross soldering...

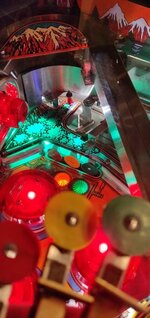
Replaced the final 3 of 9 RAG targets and dropped a bit of green led under the plastic.

IMG_20200114_220109.jpgIMG_20200114_214456.jpg

Next job will be this rubber I noticed earlier..

IMG_20200114_215945.jpg

And I think I'll put a couple of spots on that plastic to light up the Getaway artwork in the middle. It's actually quite dark in there.
 
Rebuilt left flipper last night as it was sticking up (mechanical), wired it backwards. Blew transistor. More cash. Won't do that again.
Easily done. Always handy to have the transistors for pinball coils to hand so that it's a net loss of a couple of quid, a bit of injured pride, some swearing, and a couple of soldering supplies - and of course time.

Can you tell I'm familiar with the feeling?
 
Nice to see some of the more basic stuff and done by a newbie to the hobby. I'll keep an eye on this as I'll have all this to come!

Sent from my SM-G973F using Tapatalk
 
Nice to see some of the more basic stuff and done by a newbie to the hobby. I'll keep an eye on this as I'll have all this to come!

Sent from my SM-G973F using Tapatalk

Rob (biglouie)..making the mistakes so you don't have to (but you almost certainly will anyway..) :)
 
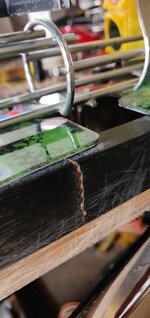
So this one's interesting. Hadn't noticed this before now.

IMG_20200122_200002.jpg

I can make a new rail, for the right hand side. Looks to be snapped where the force of being up on the right hand stantion has taken its toll.

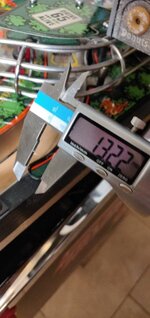
Anyone done anything like this before. I'm going to get a piece of hardwood (oak perhaps but I'll check what they are normally made of somehow) and get it down to 1/2" x 40" in length and an inch and 1/16 high...

IMG_20200122_200214.jpg

If anyone has any experience or tips for this, much appreciated. Going to have to take a few things off to do this job. :)
 
Does that really need replacing though? If gameplay isn’t affected etc?
 
Probably not, other than when you lift the playfield it bends in the middle as it's lacking the structural strength of that piece of wood. But no, not really I guess.
 
For a working repair that was good enough for anything but restoration grade - I honestly would just fill that with woodglue and repaint the entire rail. Applied properly, a decent white/yellow wood glue is stronger than the wood.
 
So this one's interesting. Hadn't noticed this before now.

View attachment 100370

I can make a new rail, for the right hand side. Looks to be snapped where the force of being up on the right hand stantion has taken its toll.
I would personally refrain from using that playfield stantion unless absolutely necessary. It is such a poor design.

When I got TZ, a widebody pin with lots of stuff on the playfield, it was my first pin. I tried using that stantion - thinking that was the right way to prop up the playfield - and I could see when I let it start to take the weight that it was twisting and creaking something terrible.

I’ve never used them again, except in emergencies and never more than for 30 seconds or so.

If you need to work on the PF just put it up vertical. It’s a bit more effort, and you will have to secure the balls (or remove them), but much kinder to your PF.
 
By the way I like where you positioned the board, I put mine in the same location. Means you save the space at the bottom for LED OCD if you ever wanted it :) (the mods never end)

8AE850E9-2B54-47EE-A94E-65ADA7CB4C30.jpeg
 
I'll have a read about led OCD ... For now, I'd like to get this thing working, reliably and play some pinball. I'm starting to get a bit fed up with finding small niggly things that on investing turn out to need bigger jobs. The motor not working, finding out it's DC not AC, finding out it's wired wrong, finding the board connection is a hack..

Same with the powerboard..should be simple but as soon as I start, I find its wired for wrong vac so need to sort that first.

I'm buying a NIB next time. Haha (I won't)
 
I fitted oak rails to my Fish Tails only because they had been made by Manny (well known cab maker) and a good price as he was clearing out.
I use a broom handle if I can wedge it in the right place, never use that prop it’s just wrong.
BFA51F31-895F-4C62-979F-6B508E3B772A.jpeg
 
biglouieuk asked re. the broken side rail;
Anyone done anything like this before. I'm going to get a piece of hardwood (oak perhaps but I'll check what they are normally made of somehow) and get it down to 1/2" x 40" in length and an inch and 1/16 high...

AIR the side rails are ply, covered with a black woodgrain plastic. A new Black Rose I unpacked had that rail broken out of the carton.
 
My football table has gas struts (like a hatchback car) with quick release pins for lifting the upper section. Always thought that would be the ideal solution for lifting pinball playfields too.
 
AIR the side rails are ply, covered with a black woodgrain plastic. A new Black Rose I unpacked had that rail broken out of the carton.
Ok, so hardwood sprayed black will do the trick no probably then..

Thank you for letting me know. Appreciate it.
 
My football table has gas struts (like a hatchback car) with quick release pins for lifting the upper section. Always thought that would be the ideal solution for lifting pinball playfields too.
It really would tho!
 
Unless you want it to rest against the back box or if you wanted to remove the playfield etc
There are quick release pins at the bottom of the gas struts, you can unhook and detach the struts one-handed in a couple of seconds.
 
Back
Top Bottom