Really patient work - enjoying following along.
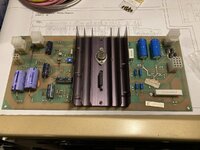
The power brick remake looks solid and heavy! Is it quite a bit bigger than the original?
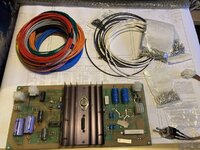
What’s the plan for the main board and sound boards Jim?
Are you considering the FPGA approach similar to this:
What are you thinking monitor wise?
Cheers
The power brick remake looks solid and heavy! Is it quite a bit bigger than the original?
What’s the plan for the main board and sound boards Jim?
Are you considering the FPGA approach similar to this:
What are you thinking monitor wise?
Cheers


")


