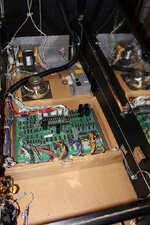
Isn't it funny how i really want to buy an RFM now!
Pinball info
You are using an out of date browser. It may not display this or other websites correctly.
You should upgrade or use an alternative browser.
You should upgrade or use an alternative browser.
Complete Revenge From Mars - High End Restore
- Thread starter PeteB
- Start date
Care to share more here? What's your favourite blend and what method did you use?
I've tried the Treasure Cove kit on my R&B but as it's not clear coated i'm a bit reluctant to be too agressive with it. I'm planning a full playfield strip down on mine at some point in the summer so it'd be nice to give it a good cleanup whilst i've got everything off the playfield.
It requires a machine buffer. A proper one like what's used in car spray shops. The kits that fit on drills are useless in my opinion, also most of the machine buffers you'll find just simply spin. Mine seems to be dual action, a bit like a random orbital sander. Speed control is important too.
I can't find it online but this one is very similar, it's also not too large which is ideal for pinball work: http://www.amazon.co.uk/Dodo-Juice-...&qid=1427374332&sr=8-11&keywords=car+polisher
Different polishing products will need different sponge pads, and I work from the hardest to softest: http://www.amazon.co.uk/Generic-Waf...qid=1427374794&sr=8-22&keywords=polisher+pads
As for the actual polishing compounds, starting with the orange buffing pad and moving to softer ones with each step:
Step 1 - Farcela G3: http://www.amazon.co.uk/Farecla-AG3...TF8&qid=1427374942&sr=8-4&keywords=farcela+g3
Step 2 - Farcela G10: http://www.amazon.co.uk/Farecla-G10...=1427374978&sr=8-1-spell&keywords=farcela+g10
Step 3 - Meguiars Paint Cleaner: http://www.amazon.co.uk/Deep-Crysta...id=1427375016&sr=8-1&keywords=meguiars+step+1
Step 4 - Autoglym Super Resin Polish: http://www.amazon.co.uk/Autoglym-Su...427375111&sr=8-10&keywords=super+resin+polish
Step 5 - California Gold Synthetic Wax (2 coats): http://www.amazon.co.uk/Mothers-Cal...qid=1427375184&sr=8-11&keywords=synthetic+wax
That's the last time I wax the playfield too. From then on I will only use Pledge.
For playfields which aren't clear coated I start from Step 3 above. Unless it's really bad then I might lightly use Step 2.
Isn't it funny how i really want to buy an RFM now!
Am I making it look desirable haha?
Pete, do you use this same piece of kit as a sander?Mine seems to be dual action, a bit like a random orbital sander. Speed control is important too.
Also, what wood filler product do you use?
I'm glad your log has caught up real time, the progress in the first few pages tired me out.
Pete, do you use this same piece of kit as a sander?
Also, what wood filler product do you use?
I'm glad your log has caught up real time, the progress in the first few pages tired me out.
No, I use a random orbital sander for that. They're a bit different in the way they work, a polisher wouldn't be hardy enough to take on all the pressure (and dust too).
Ronseal High Performance Wood Filler - it's available from B&Q but also http://www.amazon.co.uk/Ronseal-HPW...427377063&sr=8-1&keywords=ronseal+wood+filler
That's a 2 part filler which you have to mix the hardener with. Very good stuff, extremely hard but easy to sand. Again watch Matt's video to see how it's used.
Tired of shop logs? Not possible!
Thanks for the insight Peter. I might be tempted to invest in a polisher similar to the one you've linked to. More money for me to spend on toys... ;-)
I've used that High Performance Wood Filler too and have to say it's lovely stuff. Really easy to work with and sands down to a nice finish. It made me almost look like I knew what I was doing. ;-)
I've used that High Performance Wood Filler too and have to say it's lovely stuff. Really easy to work with and sands down to a nice finish. It made me almost look like I knew what I was doing. ;-)
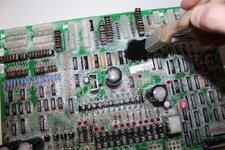
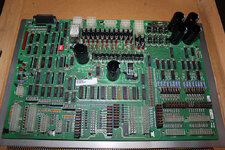
I Polish slam tilts pete !!!!! sad I know !!!There's nothing more fun than watching paint dry [/sarcasm], so it's off to the bathroom I go with a bunch of circuit boards in hand to wash:
I made a post about washing boards on here, it's in the Tips & Tricks section: http://www.pinballinfo.com/community/threads/petes-guide-cleaning-circuit-boards-like-a-boss.18644/
That's better:
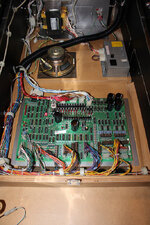
After putting all new ground braid around the cabinet and making it 100 times neater than the factory did (sorry don't have a pic), the rebuild is now in full swing:
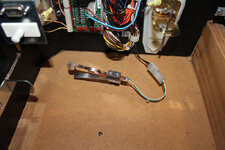
Wiring loom has been cleaned and is going back in. Polishing lots of parts as I go. I even polished the slam switch, because no body ever gives the slam switch some love:
Internal assembly completed. The metal plates were cleaned up with Scotch Brite and then painted with an argent silver alloy wheel paint, then clear coated. It's important to scrape away paint from any points which are grounded to circuit boards or ground braid.
Those side mirrors were an experiment which didn't work out well. I made a post about this in General and seems we all agreed they look turd. So they'll be coming out soon.
Now with the main internal parts reassembled, there's no need for me to be leaning into the cabinet any more. Some final preparation is done to the outside and it's time to fit the new decals.
To be continued...
Cheers Kev
I Polish slam tilts pete !!!!! sad I know !!!
Cheers Kev
Haha it's all good man, attention to detail!
yeah looking very minty though Pete - hows the CFTBL coming along ?Haha it's all good man, attention to detail!
yeah looking very minty though Pete - hows the CFTBL coming along ?
Thanks mate!
CFTBL is exactly the same as when it left you. Sitting in the corner, I keep putting a few games on it but tbh I'm struggling to see what all the fuss was about - as in how can it be a top 10 game? Sure it's pretty to look at and the music really good but, I dunno. I'll keep at it because it might grow on me.
Still in two minds about doing the cabinet decals. It really isn't that bad, I think maybe just a few touch ups in the black areas and give it a polish.
seconded.... Another game that just aint my cup of teaThanks mate!
I keep putting a few games on it but tbh I'm struggling to see what all the fuss was about - as in how can it be a top 10 game?
Yeah I waa the same pete - dont know what all the fuss is about - I just didnt find it that good at all - prefer WH20 any day!!!Thanks mate!
CFTBL is exactly the same as when it left you. Sitting in the corner, I keep putting a few games on it but tbh I'm struggling to see what all the fuss was about - as in how can it be a top 10 game? Sure it's pretty to look at and the music really good but, I dunno. I'll keep at it because it might grow on me.
Still in two minds about doing the cabinet decals. It really isn't that bad, I think maybe just a few touch ups in the black areas and give it a polish.
Cheers Kev
Isn't it funny how i really want to buy an RFM now!
I suggest you play one first
Played one dozens of times Rudy....
The one at last years Revival was the nicest one I've seen so far.
The one at last years Revival was the nicest one I've seen so far.
Played one dozens of times Rudy....
The one at last years Revival was the nicest one I've seen so far.
Got pics by any chance?
Played one dozens of times Rudy....
The one at last years Revival was the nicest one I've seen so far.
I just find it abit meh
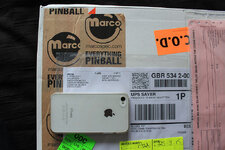
Goodies arriving today. Some parts from marco:
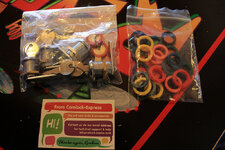
New cam locks, all unique. Also picked up some of these nice little coloured bands which fit over the keys to identify them:
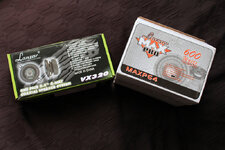
My beloved Rockford Fosgate audio gear wasn't available, so I got Lanzar brand instead:
Fitted. Not happy about the logos being rotated to one side, but meh!
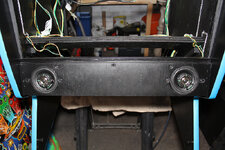
Blasted and repainted the rusty old speaker grill. Now it's beautiful again:
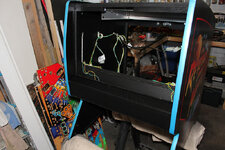
Also fitted the subwoofer:
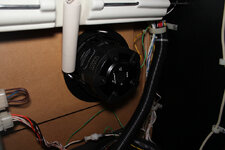

New cam locks, all unique. Also picked up some of these nice little coloured bands which fit over the keys to identify them:

My beloved Rockford Fosgate audio gear wasn't available, so I got Lanzar brand instead:

Fitted. Not happy about the logos being rotated to one side, but meh!

Blasted and repainted the rusty old speaker grill. Now it's beautiful again:

Also fitted the subwoofer:

Good progress it's looking better than new
Re: polishing
I have a meguiars dual action polisher, would that be OK for use on playfields?
I have a meguiars dual action polisher, would that be OK for use on playfields?
Re: polishing
I have a meguiars dual action polisher, would that be OK for use on playfields?
Spot on. Mine is more or less exactly the same just a different brand. Meguiars make good stuff, but quite expensive. Handy when you can share these tools with your car though!
I'm just worried that if I buy one the missus is going to expect me to clean the car as well ;-)
Easy as 1, 2, 3.
Missus: "will you clean and polish my car with it?"
You: "yes dear"
Go pretend to do it, read the instructions, and then come back with "ahh sorry babes, your car has the wrong type of paint, this will damage it so I'll just give the car a wash".
Sorted. Stay cool.
Got a few small jobs done today.
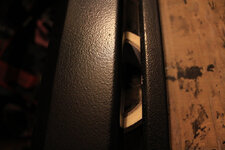
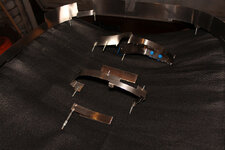
Finally mastered the textured finish on Pinball 2000 cabinet armour. Refurbished lock bar on the left, original chipped & dirty side rail on the right:
Re-grained the ball guides:
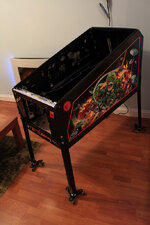
Legs are done, got them put on the cabinet to get it stood up. New bolts and leg levellers of course:
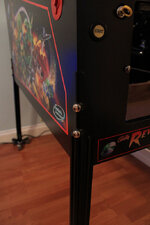
^^ Also pulled off the crappy mirror film and it's left the sides a right old mess! Gonna have to mask that off, sand, and re-paint.
New leg bolts were pretty shiny but I knew they could be better, so polished them to a mirror finish:
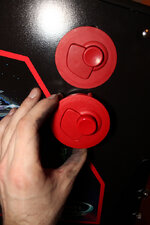
New buttons arrived. You can see here the colour difference but I should have taken the photo in daylight as they are a lot more vibrant than shown here. They work and feel so much better when pressed too!
Finally mastered the textured finish on Pinball 2000 cabinet armour. Refurbished lock bar on the left, original chipped & dirty side rail on the right:

Re-grained the ball guides:

Legs are done, got them put on the cabinet to get it stood up. New bolts and leg levellers of course:

^^ Also pulled off the crappy mirror film and it's left the sides a right old mess! Gonna have to mask that off, sand, and re-paint.
New leg bolts were pretty shiny but I knew they could be better, so polished them to a mirror finish:

New buttons arrived. You can see here the colour difference but I should have taken the photo in daylight as they are a lot more vibrant than shown here. They work and feel so much better when pressed too!

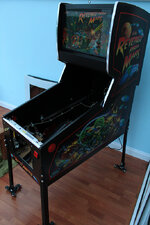
Got the interior repainted, side rails done, new cabinet buttons installed and the head is now back on. Starting to look much better:
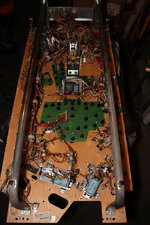
Got the joys of working on the under side of the playfield now. Lots of polishing and cleaning to be done yet. LED's installed, all lamp boards removed and cleaned, and solder reflowed on the connectors:
Every mech is being taken apart, cleaned, having parts polished (or new parts installed), and replacing all of the coil sleeves:
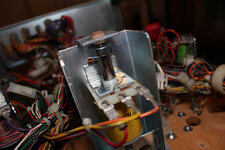
More:
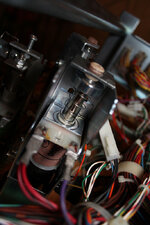
Full flipper rebuild kit done and installed:
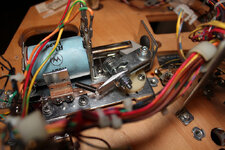
Cleaned up the plates too while I was at it. Tried to clean the coils but I think I'm gonna have to replace the wrappers as they look dirty still:
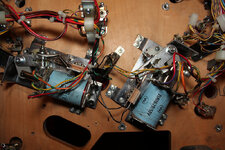
New flipper bats to complete the rebuild:
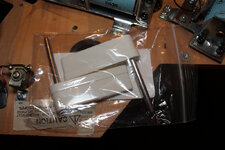
My plastics are all in great condition but I had 1 broken one, and was almost ready to buy a full new plastics set when I found Marco had the one which was broken. That's saved me a fair bit of money:
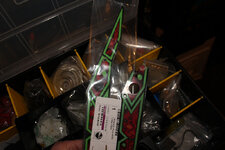

Got the joys of working on the under side of the playfield now. Lots of polishing and cleaning to be done yet. LED's installed, all lamp boards removed and cleaned, and solder reflowed on the connectors:

Every mech is being taken apart, cleaned, having parts polished (or new parts installed), and replacing all of the coil sleeves:

More:

Full flipper rebuild kit done and installed:

Cleaned up the plates too while I was at it. Tried to clean the coils but I think I'm gonna have to replace the wrappers as they look dirty still:

New flipper bats to complete the rebuild:

My plastics are all in great condition but I had 1 broken one, and was almost ready to buy a full new plastics set when I found Marco had the one which was broken. That's saved me a fair bit of money:

Finished up cleaning all of the mechs under the playfield, and today finally got started on rebuilding the topside. Got the basics in like ball guides, posts, the GI LED's:
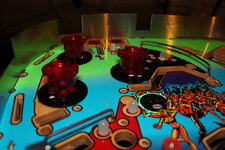
Rebuilding the pop bumpers with new skirts, bodies, springs, lamp sockets and coil sleeves. I've decided to change from the standard white bodies, and go for translucent red. I'm not one for modifying games but did this for 3 reasons - firstly, they are darker than white which is good for this section of the game where we need a crisp monitor reflection, secondly with being translucent they should give off a little red glow from the LED's, and thirdly because they just look far cooler than boring white:
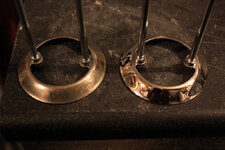
I always polish the plungers (helps with 'snappier' action) and also polish the Ring & Rod assembly. Here's a before and after comparison. Pops are gonna be super snappy:
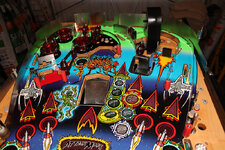
Also got my Cliffy protector installed around the scoop. What an absolute bitch those things are to get fitted right:
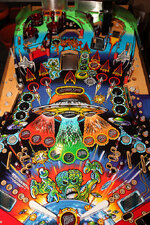
So overall not great progress today, but at least it's starting to come together.

Rebuilding the pop bumpers with new skirts, bodies, springs, lamp sockets and coil sleeves. I've decided to change from the standard white bodies, and go for translucent red. I'm not one for modifying games but did this for 3 reasons - firstly, they are darker than white which is good for this section of the game where we need a crisp monitor reflection, secondly with being translucent they should give off a little red glow from the LED's, and thirdly because they just look far cooler than boring white:

I always polish the plungers (helps with 'snappier' action) and also polish the Ring & Rod assembly. Here's a before and after comparison. Pops are gonna be super snappy:

Also got my Cliffy protector installed around the scoop. What an absolute bitch those things are to get fitted right:

So overall not great progress today, but at least it's starting to come together.
Rebuild continues. I've had the half built playfield in and out of the cabinet a few times testing/adjusting/replacing switches (total nightmare) and also tinkering with the LED lighting until I was happy.
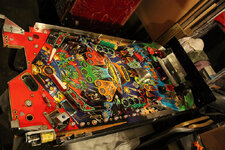
A problem with Pinball 2000 is that some of the GI around the screen area has dimming effects. I've used Noflix PLUS throughout the entire machine and while they completely eliminate flicker under normal operation, you can just see them starting to softly ripple on the dimming circuits. Regular cheap LED's are a complete waste of time on this machine. More strobe than an 80's disco. Anyways, this soft ripple would be fine for most people, but it just wasn't quite good enough for me so I've put new incandescent bulbs on the dimming circuit. It's only 5 bulbs and with the game completely rebuilt it isn't noticeable. All you see is LED's.
So with that done. Full rebuild is completed:
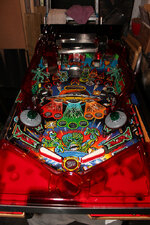
Very happy with the way the ramps and other plastics turned out after flame polishing:
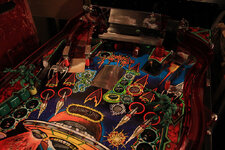
It's put back in the cabinet, glass on, and we're up and running:
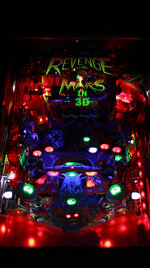
I feel like a proud father:
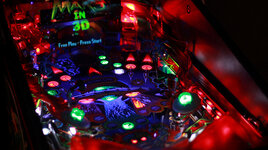
Super bands look sexy on new flippers:

Judge Dredds supplied the new LED eye martians:
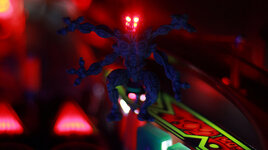
Dat uber clean ramp though:
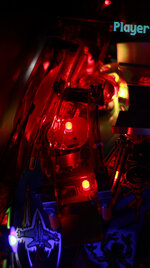
And this one:
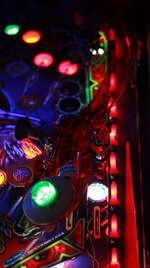
Under all this LED lighting the monitor is a little washed out, but that's ok because I've not installed the video amplifier yet. It's still clearly visible but needs improvement:

Another photo, just because:
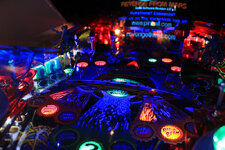
So tonight I've played my first proper game since starting on the restore and all I can say is WOW! I'm totally blown away. The game experience is so much improved, not just by the clean and better lit playfield, but every mech from the flippers to pop bumpers and targets are just so responsive. It plays super fast.
A freshly rebuilt pair of Williams flippers, highly tuned, and with Super Bands on them are an absolute joy to play with. I really love this game!
The Lanzar speakers and sub have made a huge difference too, with some bottom end you can actually feel when the volume is cranked up. I was dubious about using this brand but it's turned out far better than expected and they weren't expensive.
It's not finished though, some things still to do:
- update code from 1.5 to 1.8
- coin door and coin mech refurb
- video amplifier
- general computer refurb, new power supply, cpu fan, new coin batteries and ram upgrade.
- head/back box light
- install myPinballs UFO mod
- apron decals
- various labels and stickers around/inside the cabinet
- whole bunch of snagging and adjustments
A proper photo shoot is in order now I think. Soon. Also a game play video.
The end is near.

A problem with Pinball 2000 is that some of the GI around the screen area has dimming effects. I've used Noflix PLUS throughout the entire machine and while they completely eliminate flicker under normal operation, you can just see them starting to softly ripple on the dimming circuits. Regular cheap LED's are a complete waste of time on this machine. More strobe than an 80's disco. Anyways, this soft ripple would be fine for most people, but it just wasn't quite good enough for me so I've put new incandescent bulbs on the dimming circuit. It's only 5 bulbs and with the game completely rebuilt it isn't noticeable. All you see is LED's.
So with that done. Full rebuild is completed:

Very happy with the way the ramps and other plastics turned out after flame polishing:

It's put back in the cabinet, glass on, and we're up and running:

I feel like a proud father:

Super bands look sexy on new flippers:

Judge Dredds supplied the new LED eye martians:

Dat uber clean ramp though:

And this one:

Under all this LED lighting the monitor is a little washed out, but that's ok because I've not installed the video amplifier yet. It's still clearly visible but needs improvement:

Another photo, just because:

So tonight I've played my first proper game since starting on the restore and all I can say is WOW! I'm totally blown away. The game experience is so much improved, not just by the clean and better lit playfield, but every mech from the flippers to pop bumpers and targets are just so responsive. It plays super fast.
A freshly rebuilt pair of Williams flippers, highly tuned, and with Super Bands on them are an absolute joy to play with. I really love this game!
The Lanzar speakers and sub have made a huge difference too, with some bottom end you can actually feel when the volume is cranked up. I was dubious about using this brand but it's turned out far better than expected and they weren't expensive.
It's not finished though, some things still to do:
- update code from 1.5 to 1.8
- coin door and coin mech refurb
- video amplifier
- general computer refurb, new power supply, cpu fan, new coin batteries and ram upgrade.
- head/back box light
- install myPinballs UFO mod
- apron decals
- various labels and stickers around/inside the cabinet
- whole bunch of snagging and adjustments
A proper photo shoot is in order now I think. Soon. Also a game play video.
The end is near.
Pete,
Looking good
Just wondering... how are you going to update code from 1.5 to 1.8???
Looking good
Just wondering... how are you going to update code from 1.5 to 1.8???
Oh indeed, however the last "public" release is 1.5 (1.6 prizm)... i know @myPinballs has 1.8 which i believe is only installable physically i.e. not via a file via the pc AFAIK...
1.6 was the last official release. 1.8 also requires more RAM in the PC I believe.
I did track down a download link which allegedly was for the v1.8 binaries but it was pointing to a file on RapidShare who have since shut down. It suggests that the files are maybe available and i'm wondering if the hardware requirement for it is simply the adding of more RAM to the PC?
Interesting stuff.

