What's new
Pinball info

Register a free account today to become a member! Once signed in, you'll be able to participate on this site by adding your own topics and posts, as well as connect with other members through your own private inbox!

Complete Revenge From Mars - High End Restore

PeteB

Registered
Joined
Jun 28, 2014
Messages
1,455
Location
Global
Alias
Random Username
Have you got a yearning desire to see pinballs shopped out?

Do you crave those laborious forum posts of crappy junk getting the grime wiped away?


In this new series of "I've Got Time to Kill" shop logs we'll see what it takes to bring a Revenge From Mars back to life and how you can easily get ripped off paying far too much money for neglected junk which should have been put in a skip.

That's right, we're doing a SHOP LOG... I've restored quite a few pins over the last few years but never documented my process (and progress) so I thought it might be fun to try it.

First things first, due to being anally retentive or having some kind of OCD, I have a certain order of doing things. When a new project arrives, I like to examine the machine and then get it working to a reasonable level of playability. If these steps prove too difficult then the pin probably isn't worth saving and spending 100+ hours on the restore. This gives me a good chance to make a list of things which need replacing and how much it's going to cost. Once that's done I start with the full top to bottom restoration, in the order of:

1. Electronics - getting all circuit boards cleaned, serviced, modified, replaced, etc. This includes tackling wiring issues, switch problems, coil issues and diodes. It's important to do ROM updates at this point too because I don't want to be chasing down problems after putting the machine back together which could have been due to software bugs. Make sure the game works as it should.

2. Cabinet - The most boring part. Repaints, touch ups, new decals are the order of things here but also includes repairs, deep cleaning, refurbishing side rails, legs, coin door, lock bar and new feet/levellers, key locks etc. You get the idea. I used to do this last (to avoid scuffing), but now I always work on the playfield out of the machine. It's also nice to get the boring stuff out of the way first so the project gets progressively more exciting.

3. Playfield - topside stripdown, clean, polish, repair, replace, install the LED conversion. I take everything off and go through each individual item. I have a certain way of doing LED's too. I'm a big fan of LED's, but hate the "rainbow" pins you quite often see these days where every area is coloured.

4. Mechanics - It's really the underside of the playfield but also any topside toys and even the coin mech. Pops, slings, VUK's, flippers, magnets and drop targets are all standard items on the job list.


Incoming...

So, here's what I bought, as photographed by the seller:
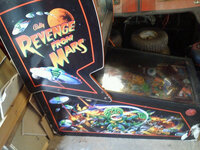
farm8.staticflickr.com_7624_16304815344_3031551e31_c.jpg

Oh it's a beauty. Seller couldn't even be bothered to wipe the glass for a better photo:
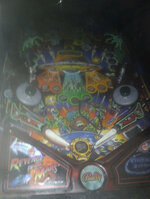
farm9.staticflickr.com_8701_16304814264_e22f7ccca3_c.jpg

Rusty junk:

farm9.staticflickr.com_8713_16307161223_cf9d6003a1_c.jpg

At least it lights up:

farm9.staticflickr.com_8744_16740997559_24b4a366c1_c.jpg


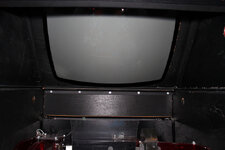
This was sold to me as fully working except the monitor doesn't come on. The seller told me "the game seems to be playing better each day". Looks like he was batting the balls around with no rubbers.

So, the game finally arrives in my little pin workshop and we can take a good look now to see what we're up against:
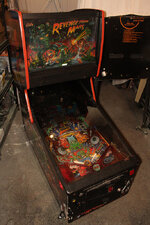
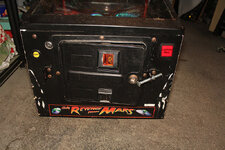
farm8.staticflickr.com_7538_15882498657_1b8bdb2a0e_c.jpg
farm8.staticflickr.com_7542_16042463466_3b6f603121_c.jpg
farm9.staticflickr.com_8676_15880818048_fb1624eaf2_c.jpg
farm8.staticflickr.com_7519_16066277891_5289a2d11e_c.jpg
farm8.staticflickr.com_7505_16068250045_f82c9685de_c.jpg
farm8.staticflickr.com_7582_15882156399_0bbabfc8ff_c.jpg

Doesn't look like there's any burn. That's a good sign at least.
farm8.staticflickr.com_7620_16631766669_5bba60cedc_c.jpg
farm8.staticflickr.com_7579_16067514682_e53eaaa63d_c.jpg

That there, gentlemen, is 69,189 coin credits on the clock. This is a heavily routed game:
farm8.staticflickr.com_7500_16066285401_e5c35f953c_c.jpg

Gonna have to break this post up in to more parts. To be continued...
 
Last edited:
Please note, the photo above with the glass off - I'd already hoovered the playfield and gave it a wipe down at that point so I don't have a photo to show how scruffy it was. Oops!

Moving on. Doesn't look as bad in there as I was expecting:

farm8.staticflickr.com_7484_15880782308_0a863e65d5_c.jpg

Playfield out:

farm8.staticflickr.com_7482_15880789658_f71d12ccfd_c.jpg
farm9.staticflickr.com_8612_15448555813_2b12b89982_c.jpg

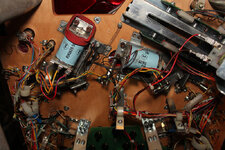
Errrr, just what is going on here exactly. A flipper rubber hold in a coil. Two springs, with one stretched and screwed to the playfield. Oh and there's a random bunch of black wires twisted together:

farm8.staticflickr.com_7474_16068242755_070723c205_c.jpg

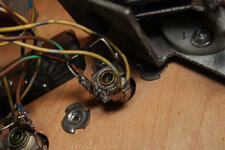
I would love to know why there's half a spring wedged between two tabs of a lamp socket:

farm8.staticflickr.com_7465_16068199425_46f8117ae8_c.jpg

After tidying up that little mess, it's time to get the game on it's legs and start testing.

What happened to the leg levellers?

farm8.staticflickr.com_7494_15880980530_813cbe2a4f_c.jpg

Luckily, I haz spares:

farm9.staticflickr.com_8598_15880919210_4e9766b395_c.jpg

Oh, it seems the seller only gave me 5 leg bolts. Luckily I haz spares:

farm8.staticflickr.com_7481_15882500797_c4117f9ff0_c.jpg

This douche bag didn't even include the power cable. Luckily, I haz spares:

farm8.staticflickr.com_7510_16068246115_60253540e5_c.jpg

I love these little things. Makes moving games around in the workshop so much easier:

farm9.staticflickr.com_8580_15880915940_2cde273683_c.jpg

Now, remember I said the seller told me that the game was "getting better every day"? Well he also said that he took the balls out and gave them a polish. Oh really? I don't believe you...

farm8.staticflickr.com_7517_15448565393_aefb8cb044_c.jpg

To add to that further, the lockdown bar was completely seized so I do wonder how he was able to remove the balls in the first place.

To be continued...
 
Last edited:
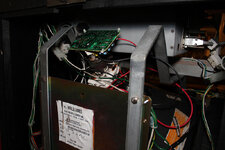
Before turning on the game, I had to check the computer and it's power supply. Seems there was a cable stuck in the CPU cooler. Moved stuff around and gave it a quick blow out with the air gun:

farm8.staticflickr.com_7551_15448538673_3753397787_c.jpg

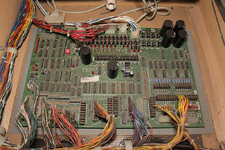
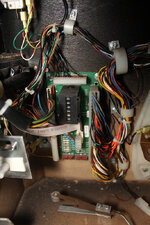
The main driver board looks ok, although a bit dusty:

farm8.staticflickr.com_7542_15882126899_2bc942ce8e_c.jpg

Game works reasonably well, I had some old rubbers to stick on the flippers and give it a test. Obviously no picture on the monitor but sound and lights work. Got a load of bulbs out, few dead switches and a lot of the mechanisms are sticky, but most importantly it works. If I can get that monitor working, we're good to go with a full high end restore....

Time to get the monitor out and see if it can be fixed:

farm8.staticflickr.com_7632_16195552544_77863effed_c.jpg

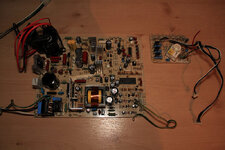
Ordered a new flyback and put that on the monitor bored. Replaced all capacitors, all transistors, a few resistors and diodes. Then gave it all a good wash before installing it back in the chassis:

farm9.staticflickr.com_8586_16272777087_cc8a2cf595_c.jpg

Monitor back in, so now the moment of truth:

farm8.staticflickr.com_7379_16457736832_92fcc2c096_c.jpg

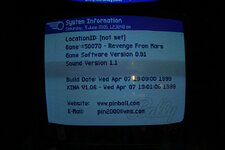
Success! It works perfectly. I see I have version 0.91 haha! Will get that updated shortly:

farm9.staticflickr.com_8591_16272782847_97d07ded54_c.jpg

I should point out here, that although the image looks a little dull on the photo the monitor was actually very bright with a perfect picture. After spending some time on adjusting all the colour balancing, brightness and contrast, I am actually wondering if it's worth installing the Video Amplifier mod. I'll take another look at that after the restore is done.

To be continued...
 
Last edited:
When a new project arrives, I like to examine the machine and then get it working to a reasonable level of playability.
I like your general modus operandi ;) Only difference for me is that I've easily exceeded 100+ hours on a pin but I'm in no rush and have little money to buy working pins. And I'm leaving the cabinet till last (Electronics > Playfield > Mechanics > Cabinet) due to lack of space as if I fixed the cabinet first I'd probably ding it fixing the playfield (I also need to do it outdoors so need the nice weather).

My OCD is also great :p

Looking forward to this shop log. I like that you're frank and speak your mind :thumbs:
 
Post #3 updated. More to come later today. Got a backlog of photos to catch up to present day.
 
I like this too, kind of the 'how to do it properly' vs my Hook log. Definitely agree with the approach of getting the machine playable to assess overall viability and have some fun playing it.

I hope you're going to demonstrate advanced wood filling!
 
It's time to begin the tear down. I've started by giving the interior a quick hoover. Can't stand working in mess, and I also need to see what goes where. I'm taking notes.

farm8.staticflickr.com_7592_16631750049_a407ef5126_c.jpg

I find applying labels near wire connectors really speeds up the rebuild process, lessens the chance of making mistakes, and means I don't have to engage my brain much. Anything for an easy ride really:

farm8.staticflickr.com_7604_16630278428_403d61187c_c.jpg

For a proper restore job, you have to put all the labels back. I photograph them before removing in case they have to be recreated in Photoshop. Although I'm careful to remove them, most of the time they need to be replaced. This one's a bit scruffy:

farm8.staticflickr.com_7625_16816718232_fa69850b9c_c.jpg

That's most of the internal parts ripped out. Time to make notes of exactly where the ground braid goes, and take lots of pics along the way:

farm9.staticflickr.com_8717_16816685902_15437b4c17_c.jpg

Looking around the cabinet, there's a few fixes needed. Noticed at the back the wood rails are missing as well as the glide tacks.

farm8.staticflickr.com_7631_16631653509_6a3705ca58_c.jpg

Fast forward a few steps and I've now sanded the interior, filled little scrapes, repainted the sides black, and sealed it all with a satin clear. Those playfield rails came out and have been polished. The leg bolt plates are brand new, upgraded to heavy duty:

farm8.staticflickr.com_7602_16791893806_bdc5440a0e_c.jpg
farm9.staticflickr.com_8608_16195414694_6fbe91deeb_c.jpg

Working on the outside, the cabinet has had it's artwork completely stripped and cleaned up. Unfortunately I didn't take any photos of this but the process is exactly the same as what Matt Adams does in this video:


That technique of cleaning off the glue with white spirit works really well.

Now the cabinet has been primed and had a first fill. I replaced the wood rails at the back too:

farm9.staticflickr.com_8753_16661145500_113c4cbb6a_c.jpg

As you can see I filled over the ugly sunken bolts which hold the playfield supports in. The decals would never have gone over them nicely. Here you can see I still have a lot of work to do in tidying that up. Needs a 2nd fill, sand, and paint again. Then it'll be sealed with clear.

farm9.staticflickr.com_8621_16228549413_5ce09879e9_c.jpg

To be continued...
 
Last edited:
I hope you're going to demonstrate advanced wood filling!

Sorry, I completely skipped taking photos of this. It wasn't exciting anyway. Just filling, sanding, filling again, sanding again. The video I linked to above shows how to patch up a cabinet. I used exactly the same products and procedures.
 
There's nothing more fun than watching paint dry [/sarcasm], so it's off to the bathroom I go with a bunch of circuit boards in hand to wash:

farm8.staticflickr.com_7633_16837103555_30a2a62285_c.jpg

I made a post about washing boards on here, it's in the Tips & Tricks section: http://www.pinballinfo.com/community/threads/petes-guide-cleaning-circuit-boards-like-a-boss.18644/

That's better:

farm9.staticflickr.com_8615_16649720030_48c6ff8607_c.jpg

After putting all new ground braid around the cabinet and making it 100 times neater than the factory did (sorry don't have a pic), the rebuild is now in full swing:

farm8.staticflickr.com_7592_16661182290_f1f04cfd23_c.jpg

Wiring loom has been cleaned and is going back in. Polishing lots of parts as I go. I even polished the slam switch, because no body ever gives the slam switch some love:

farm9.staticflickr.com_8680_16661178180_3f2f4d2db7_c.jpg

Internal assembly completed. The metal plates were cleaned up with Scotch Brite and then painted with an argent silver alloy wheel paint, then clear coated. It's important to scrape away paint from any points which are grounded to circuit boards or ground braid.

farm8.staticflickr.com_7612_16847407122_c4c1dcb5a6_c.jpg

Those side mirrors were an experiment which didn't work out well. I made a post about this in General and seems we all agreed they look turd. So they'll be coming out soon.


Now with the main internal parts reassembled, there's no need for me to be leaning into the cabinet any more. Some final preparation is done to the outside and it's time to fit the new decals.

To be continued...
 
He mentioned about removing the clear on the sections which maintain the ground.

Paul also mentions the same thing in his (unfinished) article on doing a cabinet restore. :)

Any chance you can post more photos of the plates Peter? Also do you have a link to the paint you used?

The back plates in the backbox on my R&B were a horrible grey dull colour but after a bit of polishing they're a bit more shiny. Still not as much as i'd like but then I guess for a part which is hardly going to be seen I might be nit picking a bit too much. ;-)
 
Paul also mentions the same thing in his (unfinished) article on doing a cabinet restore.

I'll get it finished when i manage to make it to @replicas place to pick up the screened backbox :D Oh and when it's warmed up a bit!! ;)

But, yes, you MUST remember to remove any clear on contact points. Some Boards are earthed Via the Standoffs, so there must be a continuity path to Ground..
 
dude it's your machine, you can replace all the working stuff with new stuff if you like. yes. yes i am.

I only replace stuff which has to be replaced. The leg bolt plates for example, while technically they still work there's no point putting old ones back in when some threads are stripped. I'm on the fence with the side rails though, but the way I look at it is this - I could spend 10 hours stripping, repairing, cleaning, and repainting with multiple coats to get the right texture finish, OR, I could go buy new ones for less than £50 and spend those 10 hours doing something else. If I was doing this on minimum wage I'd be crazy to refurb the old side rails.

That label however was dirty. It can't be cleaned, plus getting the new staples back in the old holes isn't gonna be fun.

He mentioned about removing the clear on the sections which maintain the ground.

Paul also mentions the same thing in his (unfinished) article on doing a cabinet restore. :)

Any chance you can post more photos of the plates Peter? Also do you have a link to the paint you used?

The back plates in the backbox on my R&B were a horrible grey dull colour but after a bit of polishing they're a bit more shiny. Still not as much as i'd like but then I guess for a part which is hardly going to be seen I might be nit picking a bit too much. ;-)

Sure, here: http://www.amazon.co.uk/Metallic-Si...1427321139&sr=8-6&keywords=silver+wheel+paint

Plus your choice of clear coat. Clearing is optional but I find it stops things from getting scratched. I usually do everything with 2k from the spray gun but in this instance I used clear from a rattle can.

Didn't take any pics of the plates, sorry.

But, yes, you MUST remember to remove any clear on contact points. Some Boards are earthed Via the Standoffs, so there must be a continuity path to Ground..

Exactly. I always test for ground continuity as I go, and it's all good so no issue.
 
I'll get it finished when i manage to make it to @replicas place to pick up the screened backbox :D Oh and when it's warmed up a bit!! ;)
Haha, I did wonder if you'd take the bait Paul. I really can't talk as it's taken me almost 6 months to finally get outside and get cracking.

Thanks for the Amazon link Peter. I've actually got two back plates now so I might get some of that and give it a go to see how it looks.
 
We continue...

So the exterior of the cabinet is now nearing completion. I even sanded and cleared (with satin) the underside of the cabinet. Yes, yes, I know - no body ever sees it but still I had to do it. Still have some finishing off to do on the edges because it looks a little tatty. Might paint them black, we'll see.

farm9.staticflickr.com_8713_16742978958_9d0545d8d4_c.jpg

Cabinet decals applied. Again didn't bother covering this as I do it exactly the way Matt Adams shows in his video. With the sides sanding smooth like glass, the decals went on perfectly and look stunning.

farm8.staticflickr.com_7589_16743201830_449b4f0171_c.jpg

You can see here I touched up the edges to make it look neat. Also installed metal cabinet protectors for the legs:

farm8.staticflickr.com_7599_16743198510_8876e63b20_c.jpg

I've noticed now that the fllipper buttons are quite faded. Despite my best efforts at cleaning them, they will have to be replaced:
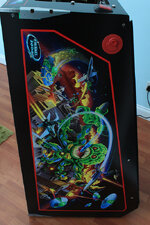
farm9.staticflickr.com_8723_16744429289_ef6d75ba58_c.jpg

Moving on to the head, it's more of the same although a lot less work. Those speakers will be getting replaced:
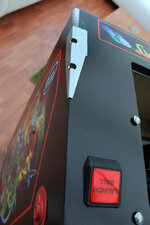
farm9.staticflickr.com_8723_16735785299_667b9bd47a_c.jpg

It isn't all that bad both internally and externally, but it's gonna get stripped, filled, sanding and repainting anyway. New ground braid too:
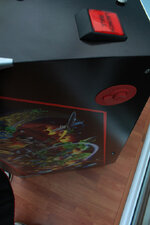
farm9.staticflickr.com_8752_16734289158_c9dc54db87_c.jpg

Repainting done. Decals done. New T-Molding done. Seems like Chrome T-Molding is the flavour of the month:

farm9.staticflickr.com_8686_16930629065_7e4df35992_c.jpg

As I had spare left over, it seemed only right to put a strip of it below the lock bar receiver rather than the standard black. Oh and looks like I forgot to show the polished lock bar receiver earlier. That came up nice and had new labels put on it:

farm8.staticflickr.com_7590_16929342722_911ca352c6_c.jpg

We're getting to the good parts now. To be continued...
 
Stunning work Peter.

Have you already done this work and are posting retrospectively or are you really churning through the work so fast?
 
With the cabinet 90% sorted, I'm moving on to the playfield.

Who else enjoys a strip tease?

farm8.staticflickr.com_7646_16895959506_8eca5f1962_c.jpg

Oh baby, moaarrrrrr:

farm9.staticflickr.com_8717_16920605782_296c3790d1_c.jpg

Got a wear spot near the green target which will have to be fixed. The target was actually missing, but I later found it dangling under the playfield:

farm8.staticflickr.com_7586_16301824773_0842117856_c.jpg

Completely naked topside. Gave it a quick wipe over to see what I'm dealing with here:

farm9.staticflickr.com_8741_16734373560_b1f55151ef_c.jpg

More cleaning. At this point I'm getting ready to sand it and clear coat it, BUT, after some lengthy discussion with Mike at GRC he has convinced me NOT to clear coat it, but instead just give it a good clean and polish. Hmm:

farm9.staticflickr.com_8685_16920806421_ae51a0e2f0_c.jpg

Out come the polishing tools and my favourite blend of products. I have to be honest, I'm not all that happy with the level of shine achieved here. Damn you Mike! Why couldn't you just let me clear coat it? Tomorrow I'm gonna go at it again:

farm9.staticflickr.com_8738_16921956632_7ccef1db31_c.jpg

Tomorrow came and went. Did it again. Do you think we're getting there yet? I really just don't know.

farm8.staticflickr.com_7655_16743212110_cc434405a7_c.jpg

And that's all for today folks. To be continued...
 
Stunning work Peter.

Have you already done this work and are posting retrospectively or are you really churning through the work so fast?

I started around the first week of February. The last post above with the playfield brings us up to date, from here on the updates will be less frequent.

I've already put 80 hours on this thing and it's no where near complete.
 
Nowhere near complete but already a huge improvement.

Hats off to you. I aspire to do mine to this level.
 
Do you think we're getting there yet? I really just don't know.

That's far superior shine to what will have come out of the factory when new. It will never match a freshly applied clear coat but after a few games the clear coats probably going to look like what you have now....
 
Out come the polishing tools and my favourite blend of products.
Care to share more here? What's your favourite blend and what method did you use?

I've tried the Treasure Cove kit on my R&B but as it's not clear coated i'm a bit reluctant to be too agressive with it. I'm planning a full playfield strip down on mine at some point in the summer so it'd be nice to give it a good cleanup whilst i've got everything off the playfield.
 
Back
Top Bottom