Thats a lot of those 8x8 deelys. Is there no way to control a "regular" dmd from an Ardunio. Something ive thought about once or twice but not actually looked into.
Pinball info
You are using an out of date browser. It may not display this or other websites correctly.
You should upgrade or use an alternative browser.
You should upgrade or use an alternative browser.
In Progress Mishmash Homebrew - Pt II
- Thread starter Ashbo
- Start date
OP
OP
Ashbo
Site Supporter
I'd expect it would be cpu intensive work, so you'd probably want a controller handling the DMD directly and then sending instructions from the main Arduino to the secondary DMD controller.
Quite likely. However based on the fiddling around with those 8x8 displays I did with my Roadshow lock mod (which ive not forgotten about - still in the queue but low down - need to get my extension finished amonth other thingsI'd expect it would be cpu intensive work, so you'd probably want a controller handling the DMD directly and then sending instructions from the main Arduino to the secondary DMD controller.
") ) updating that many 8x8 displays isnt quick. (This will certainly depend on which library you use to control them I guess - though I think you *can* do it all manually not sure you would want to. lots of wheel reinvention there.
) updating that many 8x8 displays isnt quick. (This will certainly depend on which library you use to control them I guess - though I think you *can* do it all manually not sure you would want to. lots of wheel reinvention there.
OP
OP
Ashbo
Site Supporter
The new printed circuit boards arrived earlier this week so will look to have a go with those this weekend, all being well.
What this does mean is a modification of the working code. I want to completely separate the switch matrix processing from everything else, and as the original board has four shift registers working together, I was (perhaps incorrectly) concerned about a possible conflict of writing to them when switch matrix scanning and coil firing are happening at the same time. I hadn't seen it in the original code or my latest code because everything happens in sequence, but as I intend to things break into threads, interrupts and timed processes it becomes more and more likely, The impact would be misreads of switches, coils failing to fire, or worse, coils not releasing.
I've started to modify the code in anticipation, which is always a bit silly as it means an extended debugging session is to be expected once I get to test on the new board.
I also designed the new schematic without bread boarding it out, and given electronics is new to me I'm likely to have made some mistakes when connecting up the shift registers. It's all a learning curve so que-cerra!

I have attached my new schematic. Already I think I could do well to add a capacitor between 5v and the input lines on the input shift registers. Also, adding in some MOSFETs onto the board for the coil controls would remove the need for the separate boards, however this is a bit beyond me at the moment. Reading through some blogs online like the excellent Modern Firepower Pinball Project, I realise I need to slow down my ambitions and let my knowledge catch up.
Fingers crossed for this weekend, hopefully I have a positive update on the other side
Edit: link to nice article on using MOSFETs with Arduino and pinball coils. https://projecthub.arduino.cc/Frogger1108/arduino-conversion-of-an-em-pinball-machine-d425b2
What this does mean is a modification of the working code. I want to completely separate the switch matrix processing from everything else, and as the original board has four shift registers working together, I was (perhaps incorrectly) concerned about a possible conflict of writing to them when switch matrix scanning and coil firing are happening at the same time. I hadn't seen it in the original code or my latest code because everything happens in sequence, but as I intend to things break into threads, interrupts and timed processes it becomes more and more likely, The impact would be misreads of switches, coils failing to fire, or worse, coils not releasing.
I've started to modify the code in anticipation, which is always a bit silly as it means an extended debugging session is to be expected once I get to test on the new board.
I also designed the new schematic without bread boarding it out, and given electronics is new to me I'm likely to have made some mistakes when connecting up the shift registers. It's all a learning curve so que-cerra!
I have attached my new schematic. Already I think I could do well to add a capacitor between 5v and the input lines on the input shift registers. Also, adding in some MOSFETs onto the board for the coil controls would remove the need for the separate boards, however this is a bit beyond me at the moment. Reading through some blogs online like the excellent Modern Firepower Pinball Project, I realise I need to slow down my ambitions and let my knowledge catch up.
Fingers crossed for this weekend, hopefully I have a positive update on the other side
Edit: link to nice article on using MOSFETs with Arduino and pinball coils. https://projecthub.arduino.cc/Frogger1108/arduino-conversion-of-an-em-pinball-machine-d425b2
Attachments
Last edited:
OP
OP
Ashbo
Site Supporter
Ok, so getting closer to testing.
Headers, chips and resistors in, next I need to connect up some wires....

Headers, chips and resistors in, next I need to connect up some wires....
OP
OP
Ashbo
Site Supporter
Oh balls, I knew I'd make a mistake somewhere - used the Serial pins on the ESP32 for Output Shift register pair driving the coil Mosfets.....doh!
if the pin you wired to wont do what you want, and you dont need that pin for anything else, maybe you can connect that pin to one that will work for you.
OP
OP
Ashbo
Site Supporter
I think that's the answer. For now I'll scratch the trace and run a jumper. If that works, I'll get a new PCB made upif the pin you wired to wont do what you want, and you dont need that pin for anything else, maybe you can connect that pin to one that will work for you.
OP
OP
Ashbo
Site Supporter
So cut the traces to IO1 and IO3 used IO15 and IO2 instead by soldering in a couple of jumpers.

It's hacky, but it saves me ordering a new set of boards just yet.
Using a logic probe to debug the code. Back on track

It's hacky, but it saves me ordering a new set of boards just yet.
Using a logic probe to debug the code. Back on track
OP
OP
Ashbo
Site Supporter


i am watching this closely. Very interested.
I have virtually given up building a machine due to me not even been able to get Fast pinball installed and working with cobrapin boards.
I am thinking this is the way to go.
Out of interest - do you intend to run LCD screen/audio or just keep basic sounds and the LED matrix for display?
I have virtually given up building a machine due to me not even been able to get Fast pinball installed and working with cobrapin boards.
I am thinking this is the way to go.
Out of interest - do you intend to run LCD screen/audio or just keep basic sounds and the LED matrix for display?
OP
OP
Ashbo
Site Supporter
At the moment planning on led matrix and adding a second sound card for background music. Also, may be very possible to send control messages to another controller over serial if needed, or even a simple app on a PC driving video.....but, that's a long way forward for me. You are welcome to one of my pcbs if you want it, I have four that need jumper wires as in the thread above, i'll never use them, but the code is a little way away from being ready just yet.i am watching this closely. Very interested.
I have virtually given up building a machine due to me not even been able to get Fast pinball installed and working with cobrapin boards.
I am thinking this is the way to go.
Out of interest - do you intend to run LCD screen/audio or just keep basic sounds and the LED matrix for display?
Life gets in the way of fast progress of projects like this, but it's all looking very possible from where I am looking at it at the moment
That would be great actually having a PCB off you.At the moment planning on led matrix and adding a second sound card for background music. Also, may be very possible to send control messages to another controller over serial if needed, or even a simple app on a PC driving video.....but, that's a long way forward for me. You are welcome to one of my pcbs if you want it, I have four that need jumper wires as in the thread above, i'll never use them, but the code is a little way away from being ready just yet.
Life gets in the way of fast progress of projects like this, but it's all looking very possible from where I am looking at it at the moment
I just find fast absolutely alien language. Think I have to take a step back.
At the moment I can not even get the basic software working and 'talking' to the cobra pin boards.
I have 95% given up but got inspired looking at this!
OP
OP
Ashbo
Site Supporter
I'll drop you a pm sirThat would be great actually having a PCB off you.
I just find fast absolutely alien language. Think I have to take a step back.
At the moment I can not even get the basic software working and 'talking' to the cobra pin boards.
I have 95% given up but got inspired looking at this!

OP
OP
Ashbo
Site Supporter
Just leaving this here for urgent attention by me.
 randomnerdtutorials.com
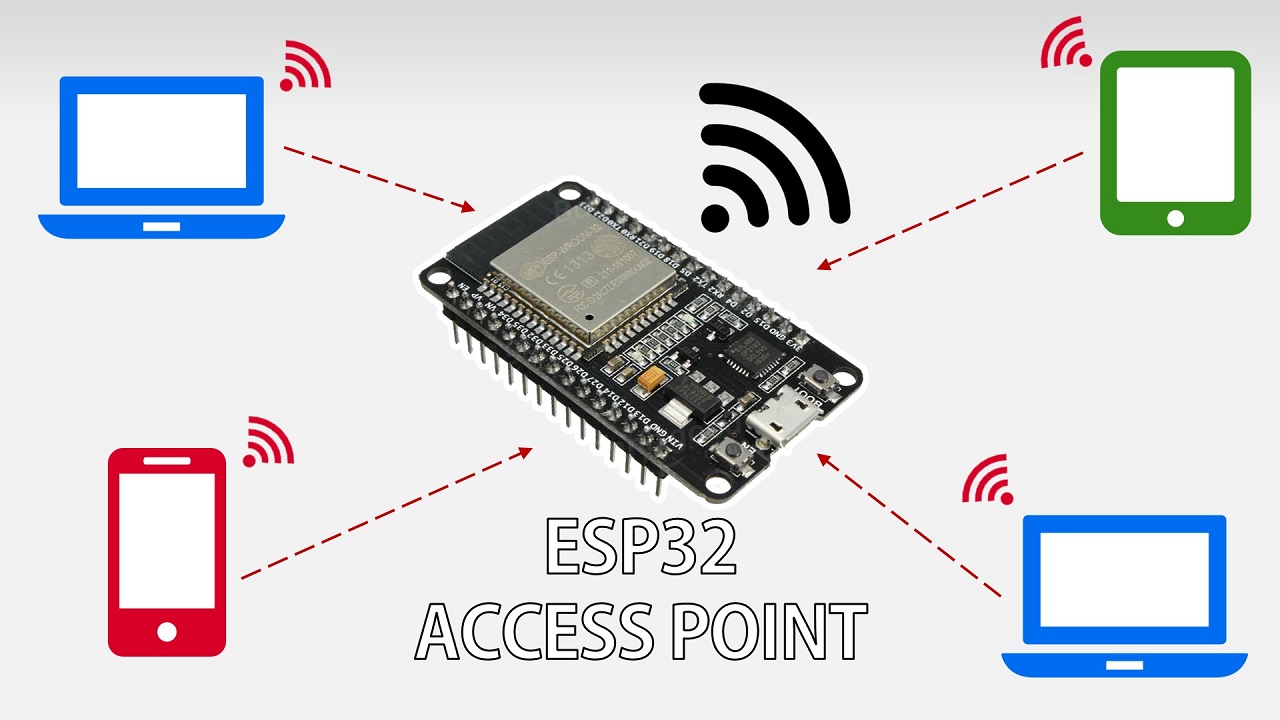
When device can't connect to the local wifi, set up as an access point so it can be connected to.
Also, allow storage of local wifi details on the device will be needed
ESP32 Access Point (AP) for Web Server | Random Nerd Tutorials
The ESP32 can act as a Wi-Fi station, as an AP (Access Point), or both. In this tutorial you'll set the ESP32 as an access point using the Arduino IDE.
randomnerdtutorials.com
When device can't connect to the local wifi, set up as an access point so it can be connected to.
Also, allow storage of local wifi details on the device will be needed
OP
OP
Ashbo
Site Supporter
For the attention of @Pick Holder and anyone else who wants to follow on at home (lol, as if  ) I have started sharing the very much unfinished code, schematics et all on GitHub.

 github.com
) I have started sharing the very much unfinished code, schematics et all on GitHub.GitHub - pinballash/ESP32-Pinball-OS: Simple Pinball Machine Operating System, designed for the ESP32 chip
Simple Pinball Machine Operating System, designed for the ESP32 chip - GitHub - pinballash/ESP32-Pinball-OS: Simple Pinball Machine Operating System, designed for the ESP32 chip
github.com
OP
OP
Ashbo
Site Supporter
OP
OP
Ashbo
Site Supporter

OP
OP
Ashbo
Site Supporter
Boring code update number 51.....
This weekend I have been working on what happens when the Wi-Fi can't connect. Inspired by playing with WLED - I realised I needed the ESP32 to startup a "Soft Access Point" with its own Wi-Fi enabling settings to be changed when WIFI is not accessible. Once I'd done that, the next light bulb moment that it should be a captive portal so phones and devices connecting to the soft AP get automatically redirected to the webpage. Thanks to loads of resources a Google away, this was pretty simple to implement.
From this, the sore point of settings comes into play. At the moment everything is hard coded in the software that gets compiled and uploaded to the device. Great for me as I get to quickly race towards getting playing again on my new board, but this isn't great as two scenarios come to mind that would make this problematic.
- Incremental changes to small things, I would want to make these changes on the fly without having to code, compile and upload. An example is modifying the pulse length of a coil or tweaking the debounce time of a switch, but later on I would want to be changing rules and mode config in the browser not the source code.
- Thinking of anyone else using the system, not everyone is going to want my config and asking them to do it in code, compile and upload is a bit much. Also, new versions will fix bugs, but the config of coils, switches and rules will want to remain on the device.
Save all the settings in a config file. You can store the config file in spiffs file system on esp32s, its amazing!!!!
OP
OP
Ashbo
Site Supporter
Thats the plan sir. Your code achieved this expertly, i'm pushing myself to access and edit these settings from the web console. Should be a simple change, page reads json from spiffs and displays settings on within inputs on a web page. Action button in the web page gets the inputs and packages a json to save back to spiffs... If only it worked as quickly as that. First I need to define the config data structure, then the webpage to display and save it, then get the program to config settings not the hard coded settings. Give it a few weeks, hopefully I'll get some clear time to executeSave all the settings in a config file. You can store the config file in spiffs file system on esp32s, its amazing!!!!
I have some code that does webpages but it’s static webpages, but you are welcome to it. i really need to learn how to do better more responsive web pages ………
OP
OP
Ashbo
Site Supporter
Thanks mate. The web coding used to be my job a long time ago, it's amazing how much you forget.I have some code that does webpages but it’s static webpages, but you are welcome to it. i really need to learn how to do better more responsive web pages ………
I have some code that does webpages but it’s static webpages, but you are welcome to it. i really need to learn how to do better more responsive web pages ………
Quick and easy route for that is just to use the old school Twitter bootstrap and the grid system. If I need something very basic then I will just bring in bootstrap. For you to learn that it shouldn't even take an evening.

Bootstrap
Powerful, extensible, and feature-packed frontend toolkit. Build and customize with Sass, utilize prebuilt grid system and components, and bring projects to life with powerful JavaScript plugins.
 getbootstrap.com
Grid Template · Bootstrap v5.3
getbootstrap.com
OP
OP
Ashbo
Site Supporter
Wow...that looks pretty awesomeQuick and easy route for that is just to use the old school Twitter bootstrap and the grid system. If I need something very basic then I will just bring in bootstrap. For you to learn that it shouldn't even take an evening.
Bootstrap
Powerful, extensible, and feature-packed frontend toolkit. Build and customize with Sass, utilize prebuilt grid system and components, and bring projects to life with powerful JavaScript plugins.
Grid Template · Bootstrap v5.3
 cheers
Wow...that looks pretty awesome
You posted a template earlier on in the thread from W3 schools? They also have their own grid system which I used once somewhere.
W3.CSS Home
W3Schools offers free online tutorials, references and exercises in all the major languages of the web. Covering popular subjects like HTML, CSS, JavaScript, Python, SQL, Java, and many, many more.
OP
OP
Ashbo
Site Supporter
Spot on, yes, I'm using their css at the moment. Spent hours trying to work out why my captive portal looked dreadful until I realised I had linked the css directly to their source, when the captive portal kicks in it's because there is no wifi so references to code on the net will not resolve...doh!You posted a template earlier on in the thread from W3 schools? They also have their own grid system which I used once somewhere.

W3.CSS Home
W3Schools offers free online tutorials, references and exercises in all the major languages of the web. Covering popular subjects like HTML, CSS, JavaScript, Python, SQL, Java, and many, many more.www.w3schools.com
Rookie mistake, roll on next weekend where I can find new ways to confuse my aging mind 
looked dreadful until I realised I had linked the css directly to their source
Easily done! I was racking my brains to where I had used it before, I seem to remember it was more than good enough and lightweight for I needed.
I was going to build arcade pedestal with small touchscreen to be able to quick change game / search from there and the W3.css was used for all styles and the grid.

OP
OP
Ashbo
Site Supporter
Spending far too much time messing with the topper before the game....oh well....
Had a play with some acrylic paint last night. A bit rough and ready but I'm happy with how this may turn out.
Got some further 3d and led ideas I'll be working through very soon.

Had a play with some acrylic paint last night. A bit rough and ready but I'm happy with how this may turn out.
Got some further 3d and led ideas I'll be working through very soon.
Last edited:
OP
OP
Ashbo
Site Supporter
Just a bit of tweaking today...
Managed to get some config variable from the SPIFFS to the web page, then update the config from the webpage back to the SPIFFS.
So, web form adding to a new config page...


The key thing here is the onclick event being handled by a JavaScript function at the foot of the page.

All this is doing is getting the values from the form, creating a json and sending it to another page.
I added a handler for the page it was being sent to like this...

And the function it calls looks like this.

Basically, if a file is received in the request, it gets parsed and global settings are updated. We then call a function to update the config file saved in SPIFFS.
So rounding the circle, here is that function.

Now all I need to do, is to do the same to display, update, add and delete switches and coils...that's work for another day.
Managed to get some config variable from the SPIFFS to the web page, then update the config from the webpage back to the SPIFFS.
So, web form adding to a new config page...
The key thing here is the onclick event being handled by a JavaScript function at the foot of the page.
All this is doing is getting the values from the form, creating a json and sending it to another page.
I added a handler for the page it was being sent to like this...
And the function it calls looks like this.
Basically, if a file is received in the request, it gets parsed and global settings are updated. We then call a function to update the config file saved in SPIFFS.
So rounding the circle, here is that function.
Now all I need to do, is to do the same to display, update, add and delete switches and coils...that's work for another day.
