What's new
Pinball info

Register a free account today to become a member! Once signed in, you'll be able to participate on this site by adding your own topics and posts, as well as connect with other members through your own private inbox!

Complete Fish Tales shop log

Today I have installed all the electronics in the back box to keep em safe and the head is now ready for the decals.

P5130014.JPG

Also gave one side of the cab an initial rub down starting with 80 grit working up to 180 grit, and already before even filling its taken on a glass 'touch' !!

P5130015.JPG
 
Looking forward to seeing how this turns out. I contemplated re-decaling my FT but those decals are so expensive and mine is not faded too badly. GI connector looks good for a FT!
 
OK so first decal on the head - gotta say very pleased with the result and the quality of these decals compared to the RFM ones I had!! Its weird how the cut white edge shows up so much in the photo, you can hardly notice it when looking with the naked eye. Wonder if the flash is picking it out ? I have gone around the edge with a paint pen as well. Here is the before first so you can see the difference!!!
P5090056.JPG

And after!!!

P5150016.JPG


More to follow later!!!

Cheers Kev
 
Ok so now the other side of the head is finished and the cab is nearly ready to start to decal just needs a few more coats of paint and good to go.

One lesson I have learned today with the new random orbital sander - never start the sander then put it onto a surface as it is so good it will dig in and leave a curved groove. I found this on the front panel so I had to start again right back from 80 grit up to 240 to flatten it out!!! every day is a learning curve ( or is that a winding road as Sheryl crow once said!!)
Cheers Kev


Just the before, to remind you againP5090056.JPG
And after the same side this time!
P5160020.JPG
I should polish before I take a pic!!!

and progress on the cab so far

P5160021.JPG
 
Few pics of the head now complete and re-assembled.

P5160024.JPG

and the inside
P5160025.JPG

And finally for today I have stuck the coin door decal on the cab. A before and after pic - bit of a difference !!!!

P5090055.JPG

And after!!!!

P5160026.JPG
 
And today finally the decal job is finished - not looking too bad even if I say so myself !! :)

Here is the usual before and after to remind you!! First Before :-
P5090054.JPG

And after !!!

P5170030.JPG

You may notice on the front an old leg mark - I filled that and sanded the shi!* out of it till I couldn't feel a thing with my palm and yet is still faintly shows up when the light catches it. Just goes to show how smooth these cabs need to be before applying the decals. At least the leg will still hide it !!!

That's it for today folks time to watch the FA cup with a nice cold beer!!

Cheers Kev
 
thanks for the kind comments guys - one thing about the FT a re-decal job certainly does transform it !!!
 
So starting to look like a pinball machine again!!! need to paint the coindoor and inside of cab again but have run out of paint!!!
P5180034.JPG


Now its nearly time to start on this lot next!!!

P5180033.JPG
 
Playfield teardown has begun - boy is it a mucky one with nearly all of the rubbers perished!!!

I just put a few pics on for the comparisons later as I have took tons of every nut and bolt as they come off

The start!!
P5200037.JPG

apron off
P5200039.JPG

Muck becoming evident!!!!

P5200040.JPG

Oh yes that's says it all!!!!
P5200042.JPG

perished rubbers
P5200048.JPG

Antone know what should be under that scre on the plastic on the right - a post perhaps ?

P5200051.JPG

P5200058.JPG

Wondered why bumps weren't very good !!

P5200079.JPG

more muck!!
P5200096.JPG

last shot for tonight of progress so far - M for muck!!!!

P5200099.JPG
 

Attachments

  • P5200063.JPG
    P5200063.JPG
    324 KB · Views: 8
  • P5200066.JPG
    P5200066.JPG
    270.5 KB · Views: 8
  • P5200072.JPG
    P5200072.JPG
    287.9 KB · Views: 7
Continuing tonights teardown
P5210115.JPG
P5210149.JPG
finally a pretty much stripped playfield
P5210154.JPG

then 5 mins first clean with some foam cleaner and already looking a lot sweeter but a way to go yet !!

P5210155.JPG

This lots ready for the tumbler!! surprise dhow many bits there is to the FT seems quite a lot!!!
P5210153.JPG

P5210156.JPG

The mini playfield is all cracked is this just the clearcoat that's cracked ie is this planking - can this be sanded flat and just re clearcoated ?? I have another mini PF for it anyway so this one would be good to experiment on and then put it up for grabs for someone else ?
P5210146.JPG
P5210147.JPG

That's it for tonight folks!!!!

Cheers Kev
 
If you've got some Naptha (or lighter fuel) wipe it over the cracks on the mini pf. If they disappear while the lighter fuel is wet then it's in the clear coat, if not then it's likely gone through to the wood.
 
So Mr ronsplooter we are talking some solvent that dissolves clearcoat to determine what it is - yes ?

Anything else other than lighter fuel as I don't have any ?
 
So Mr ronsplooter we are talking some solvent that dissolves clearcoat to determine what it is - yes ?

I don't think so although I'm not 100% sure. I think it's more that it makes the pf wet (but will dry quickly without doing any damage) and cracks in the clear coat blend in when wet. If the crack has gone through the clear then you'll still see it.

I only know to use Naptha (which is a US thing) or lighter fuel because that is basically what Naptha is. There's a very interesting article on repairing pf planking right here:

http://pinballrehab.com/1-articles/...205-repairing-clear-coated-playfield-planking
Good article I no henrik at pinball dreams fixes playfields with planking as I have talked to him before about it
 
Shame there's planking on the mini field as the main one is in great shape.
 
Shame there's planking on the mini field as the main one is in great shape.
So not that bad though sax as I have another one so I would like to attempt to repair this and re clear coat it so where do I start?
 
Playfield teardown has begun - boy is it a mucky one with nearly all of the rubbers perished!!!

I just put a few pics on for the comparisons later as I have took tons of every nut and bolt as they come off

The start!!
View attachment 7449

apron off
View attachment 7450

Muck becoming evident!!!!

View attachment 7451

Oh yes that's says it all!!!!
View attachment 7452

perished rubbers
View attachment 7453

Antone know what should be under that scre on the plastic on the right - a post perhaps ?

View attachment 7454

View attachment 7455

Wondered why bumps weren't very good !!

View attachment 7459

more muck!!
View attachment 7460

last shot for tonight of progress so far - M for muck!!!!

View attachment 7461
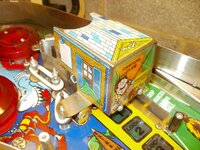
Kev did you find the answer to what goes under that screw on the right plastic ? Are you on about what goes under the plastic ?
 
Back
Top Bottom