What's new
Pinball info

Register a free account today to become a member! Once signed in, you'll be able to participate on this site by adding your own topics and posts, as well as connect with other members through your own private inbox!

Today I worked on......

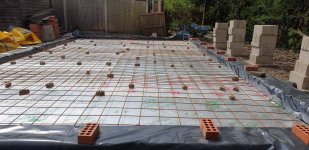
not pinball - working on this today. 18 year old hot tub, needs some love. the lovel canadian redwood has eventually succumbed to the yorkshire weather.

F2633176-F5AC-4AB8-9965-EE42D9056A04.jpeg7F914DAC-AC5A-4D7B-922E-87A5084927CB.jpeg05BCC170-1FEF-47C7-9894-46ADEB0D1B81.jpeg6CE24D77-0CF0-4FB3-ACBE-CE615F49871F.jpeg4B11D6BC-98C4-43FC-BEEB-D04FED3873FD.jpeg6301C942-F9C0-4241-A4BF-F33D03751C1C.jpeg1B4C904F-9749-4286-955C-8815FDD46014.jpeg3E830039-DEAD-4693-8C80-53CDE9FFF574.jpeg6E537812-E25F-41E6-B2CB-BD56365B1423.jpeg60E78DCE-2514-4E9D-91DC-F2414E14D33A.jpeg6EAAFE55-10DD-47E9-81E6-6324F5536AF5.jpeg
Loose fitted it all then treating it with the nasty creosote type stuff. still stinks like fcuk.

hoping to get the frame secured in tomorrow and the wood panels cut and installed too.

Also installed a new 2 speed circulation pump and new wet end.

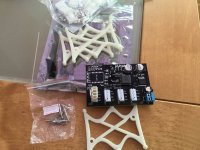
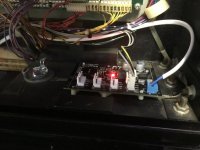
Also ordered a new control panel and various other bits i need.

now........back to pinball
 
Today I finished the repair and clean of Operation Thunder, it was filthy and no doubt never had a proper clean.
Had a few solenoids not working, needed new mosfets and coils, switch matrix faults causing weird issues which was the board on the coin door so just disconnected it and all good. Rebuilt all the flippers, new flipper switches/buttons, new lamps, rubbers and a proper strip down and clean.
Cabinet and playfield is really good and now plays as it should, great sound and lights on this. Something a bit different.
A7EE764F-D6F0-4567-8219-84AC15793808.jpeg
B522C99D-AA64-4638-8584-91AE2FAF3824.jpeg
 
F7F290BA-A555-46D3-BA9E-6D60821E712D.jpeg
Been tinkering with my new arrival over the weekend. Blood red flipper bats, new sheet of glass in, new coil sleeves to flipper coils and castle lock.

Still need to strip and clean it properly, but I just can’t get off it at the moment! Trying to get all 3 multiballs setup and hearing those ‘tthhhiirrttyyy mmmiiillliooonn’ callouts is too addictive 😁
 
Installed a Plastic protector that has been in the coin box since I first got the game.. the Rocket protector.. what a ball ache to get that plastic out!

1802103C-5AE4-4D1F-9742-0121A0D39DB1.jpeg285CA4F3-B224-495C-8627-92F44A0EA9B9.jpegFD9DB65D-1540-4D20-B0CE-37BA7A4417C8.jpeg

Yup.. I know I need a tidy up!
 
I've only come across terrorist sleeper cells in films and books but now I've come across a terrorist sleeper coil for real.....as I'll explain!! Recently I fired up my RCT to get rid of the cobwebs as its had a sleepy lockdown. First couple of games were fine but on the next one the game start seized......no ball trough eject. Quick fuse check showed F21 (3a slow blow) had burnt. Hoping it was a random glitch from is recent hibernation, I replaced the fuse and then prayed and played at the same time! Well, it nearly lasted a game before F21 cremated itself again. F21 covers the ( low voltage) coil circuit so I put in a new fuse and went straight to the coil diagnostic check in the hope I could pinpoint the problem. Obviously a foolish choice as the random fault left me clueless and with 2 more toasted fuses. So I went back to basics and started testing the resistance of individual coils/diodes. Now the surprise.....tracked the fault to the UK centre skill post coil. The weird thing is that I've owned the RMT for a good 2 years and the UK skill posts have never been activated. On closer inspection the coil was clearly fried in the distant past and left as a sleeper terrorist coil!! Stripped, cleaned and rebuilt the assembly with new coil and diode. I activated the UK skill post option and it plays fine.... problem solved. The UK skill posts are an interesting piece of history but when activated on RMT it means you have 4 playfield flippers plus 3 skill posts to control via 2 pairs of buttons.......a mental challenge but obviously long games if you get it right.
 

Attachments

  • DSC_0297.JPG
    DSC_0297.JPG
    222.9 KB · Views: 25
  • DSC_0285.JPG
    DSC_0285.JPG
    70.3 KB · Views: 24
  • DSC_0292.JPG
    DSC_0292.JPG
    130.4 KB · Views: 21
  • DSC_0283.JPG
    DSC_0283.JPG
    77 KB · Views: 23
Today I worked on#
STTNG / H20 / JD ... Installed 12v / 5v boards supplied by Madnat nice compact board allowing me to connect my colour DMD and any future mods, the transformer I bought from Amazon £19.95 which is mounted below allowing me to also supply a dimmer switch for my homemade flood lighting costing about £25
12 volt Transformer I tapped into the 240v plug of the pinball transformer using 0.093 female pins x2 plus 1 earthing clip.
Big thank you to Mike (Madnat) very fast delivery and for the freebies definitely getting more of these.
 

Attachments

  • E766A819-EFC6-439E-A046-AB7314385B13.jpeg
    E766A819-EFC6-439E-A046-AB7314385B13.jpeg
    133.2 KB · Views: 44
  • CAD340CF-DCC6-4000-8385-570E4EA356E8.jpeg
    CAD340CF-DCC6-4000-8385-570E4EA356E8.jpeg
    109.9 KB · Views: 37
  • 3F557FFF-1E72-4E63-AC02-186493869C46.jpeg
    3F557FFF-1E72-4E63-AC02-186493869C46.jpeg
    126.1 KB · Views: 32
  • 6B682B39-1CB5-4651-8A81-2EC5CC9C1282.jpeg
    6B682B39-1CB5-4651-8A81-2EC5CC9C1282.jpeg
    108.9 KB · Views: 41
Today I worked on#
STTNG / H20 / JD ... Installed 12v / 5v boards supplied by Madnat nice compact board allowing me to connect my colour DMD and any future mods, the transformer I bought from Amazon £19.95 which is mounted below allowing me to also supply a dimmer switch for my homemade flood lighting costing about £25
12 volt Transformer I tapped into the 240v plug of the pinball transformer using 0.093 female pins x2 plus 1 earthing clip.
Big thank you to Mike (Madnat) very fast delivery and for the freebies definitely getting more of these.
Looking good Alan 👌
Can’t wait for you to work your magic on my pins 😀
 
First time in many many months I have time to look at some issues on some of my machines, one job was BW, connector issue to the DMD and an adjustment to the ball launch coil.

As the machines are in a row I pull them out with a hydraulic lift trolley, just had to admire the artwork, and on that I thought I should share it...

7D3FF2C8-7633-4C02-A95E-19A0DDCE59C0.jpeg

😎

Chris.
 
Managed to get some time in the games room today, Rotation VIII was the patient, all three flippers rebuilt as they just weren’t how they should be, all sorted now. Also sorted the one pop bumper that wasn’t working, coil would permanently lock on, traced it to one of the UDN2981 driver IC’s a long long time ago, so with that replaced it’s now back in full working order. Also replaced the memory backup NiCad so it’s now also keeping its settings 🙂


Altogether a very successful day.

B3677B18-0023-45F2-9B2B-B2A7676A8F76.jpeg

Love this machine, just so different and cool 😎

Chris.


Edited to add :- A huge thank you to @Banzaipinabll for assistance in identifying the flipper parts, those Midway part numbers are really odd (to me) and that great link you sent me to Bally part number equivalents was a god send, many thanks 👍
 
Last edited:
CSI makeover completed recently and I've posted so can also thank @Collywobbles for another great job cutting protectors for almost all the plastics (especially the really large ones over the centrifuge, microscope lane and entomology side bar). As well as the protectors and a deep clean/polish, I've put on all new plastics, a full Cliffy set, installed colour matched LED supabrights under playfield, had wire ramps re-chromed, all new rubbers (prefer white even though norm is black), installed blue pop bumper caps with LED rings in place of the (dull) standard Stern plastic disc inserts, added invisiglass, new Polaris balls, side panel/rails painted, lock bar and legs powder coated and new replacement DMD screen (line out on the old one).
 

Attachments

  • DSC_0301.JPG
    DSC_0301.JPG
    226.5 KB · Views: 34
  • DSC_0300.JPG
    DSC_0300.JPG
    214.7 KB · Views: 32
  • DSC_0298.JPG
    DSC_0298.JPG
    223.7 KB · Views: 37
  • MOV_0321.mp4
    21.8 MB
More Deadpool Love and Speaker Light upgrades.

After making a member a few sets of custom one piece speaker lights using 10mm Acylic to fit their Bally/Williams pins it got me thinking if I could fit something similar to my DPLE.

Bally/Williams version
71873E09-02EB-431B-ADA4-04042F51CC4F.jpeg

I was never happy with Sterns ****e ones which was basically 4 **** poor LEDs pointing at some pink Flourecent Acrylic plates but at least it was better than my BKSOR LE as they removed the LEDs altogether!
BTW I’m not sure if this is the same deal with all new LEs going forward from BK anyone know?
Anyhoo this could be a cheap easy solution if they have.

Sterns ****e effort
CAEDF8E5-9233-4797-A299-9E9DC81D9131.jpeg

So today I set about making a set to see how they faired and after several prototypes came up a great solution.
Just like my Bally/Williams ones they are a simple one piece design letting you mount any LED strip of your choosing but unlike the aforementioned do not require any extra hardware.

Mine with replacement red front plate
ACC9EA59-EB1B-40B5-874F-9E40E8261585.jpeg

020E9CD6-4D8B-410E-8D96-19D01D995069.jpeg

The difference is literally a night and day comparison so I intend to go a step further and fit one of Mike’s Feed Feenzy boards and make them all singing & Dancing.

Taaaaa Daaaaaaa! Like always they far better in flesh.
2E918E5F-77B9-497F-ADB5-2E8AB1986E35.jpeg

I’m just waiting on a board from Mike to test how it looks with trick effects so I’ll post a little video of them once it’s here and I get a little free time to fit.
 

Attachments

  • BC068950-739F-4F43-9629-ED5ED953D790.jpeg
    BC068950-739F-4F43-9629-ED5ED953D790.jpeg
    81.8 KB · Views: 20
That is really good, nice solid speaker plates too😎
Yep I should have gone this way from the start it was making some BOP face guides out of 10mm acrylic that got me thinking and I had just had a request for the Bally custom ones I thought I’d give it a go.
They look super clean too like they meant to be there from factory. Well happy and I will eventually get round to replacing my 14 piece ones on other pins when I find some much needed time👍
 
Back
Top Bottom