Pinball info
You are using an out of date browser. It may not display this or other websites correctly.
You should upgrade or use an alternative browser.
You should upgrade or use an alternative browser.
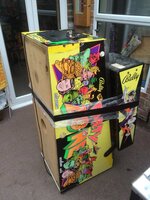
Complete The Party Zone
- Thread starter Mooseman
- Start date


First job strip of stuff from the playfield, I like to use my phone and take lots of pics, I write the steps of removal down and I bag each step up as I go. I dont clean anything I take of yet but I do take a note if anything need replacing so i can get my orders off.
New plast from arounf capt b zarr needed. They seem to be in short supply, but available at the moment. Ive ordered a new plastic and a protection plastic for it too.

The yellow target switch is beyond it life span I would say, so 2 new ones on order and an orange one in the same state for left ramp entrance.
New plast from arounf capt b zarr needed. They seem to be in short supply, but available at the moment. Ive ordered a new plastic and a protection plastic for it too.
The yellow target switch is beyond it life span I would say, so 2 new ones on order and an orange one in the same state for left ramp entrance.


Looks good... you going for a deep clean or just a mini shop?


Looks good... you going for a deep clean or just a mini shop?
Well its getting a bit more than a damp rag. I will strip it back as far as I need to clean everything. I dont have a tumbler so tend to clean screws, posts etc with a fibre stick, they are great tools.
Im just after a clean working machine as my goal
Ive not taken a clean playfield shot atm but it has come up well. Today Ive been changing idc connector for molex crimp type The first time Ive done this. Went quite well, but I am an electrician so should be cable of operating a ratchet crimper.


Pop that in the post to me and I'll weld that for you if you like? No charge of course 
Shocked at how fast you are getting through this
Shocked at how fast you are getting through this
No problem mate, Sounds like you have all the toys you need at your disposal. Going to keep an eye on this thread


Come up a treat that Moose
Nice and Sparkly there Mister Moose ") Do they do some kind of cliffy protector for the VUK (the one that looks like it has a pint of beer next to it)...???
Do they do some kind of cliffy protector for the VUK (the one that looks like it has a pint of beer next to it)...???
Do they do some kind of cliffy protector for the VUK (the one that looks like it has a pint of beer next to it)...???Shiny shiny , looks like all that muck was hiding a great condition playfield.
Looks like it's going to turn out peachy.
Looks like it's going to turn out peachy.

Heated up each pin individually then pull out with pliers, They tend to come out quite easily.


Holes 10 - 12 have some major damage with missing traces. I have some copper foil for making decorative stained glass and it has adhesive on one side so Ive stuck down new traces and soldered them to the old.
Holes 10 - 12 have some major damage with missing traces. I have some copper foil for making decorative stained glass and it has adhesive on one side so Ive stuck down new traces and soldered them to the old.


Nice work Moose.
Coming along nicely.
Coming along nicely.
