What's new
Pinball info

Register a free account today to become a member! Once signed in, you'll be able to participate on this site by adding your own topics and posts, as well as connect with other members through your own private inbox!

Complete Terminator 2 Restoration

Ant-H

Site Supporter
Joined
Oct 17, 2020
Messages
1,281
Location
London
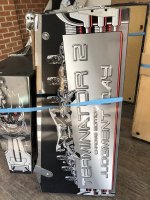
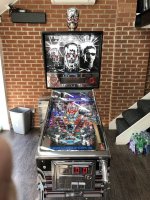
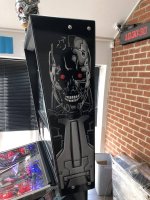
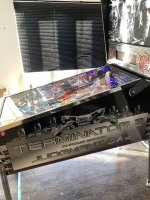
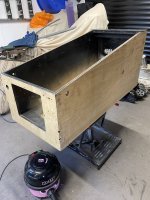
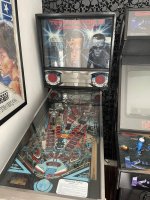
I finally got round to starting the restoration of my T2 this past weekend, and i thought I’d start a build log as it’s my first time attempting to restore a pin and thought it would be a good idea to share my build with you guys and to get some advice if and when I get stuck.

I’ve restored a few arcade machines in the past and with this being only my second pin, which I purchased at the tail end of last year, my initial intention was to do a full playfield strip down, fit some mods and basically use it as a way to learn more about the up keep of these machines and the hobby.

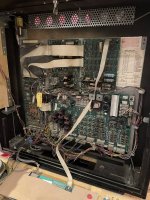
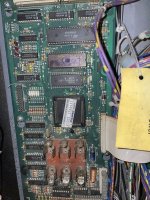
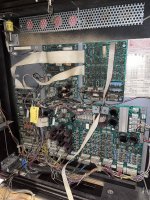
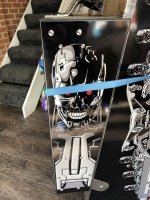
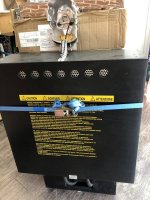
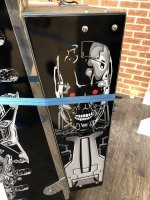
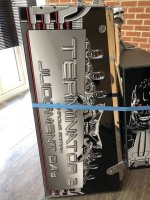
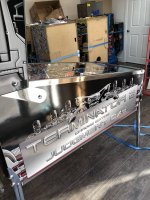
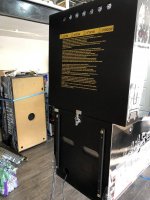
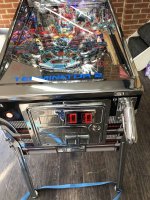
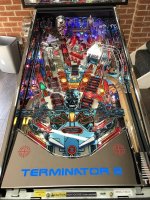
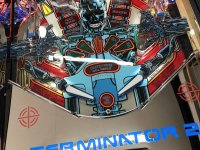
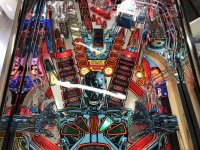
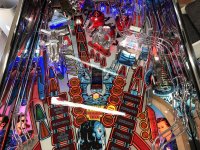
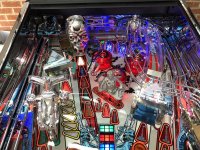
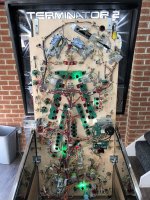
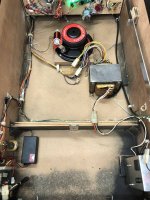
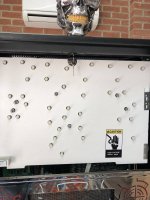
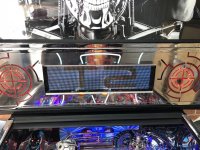
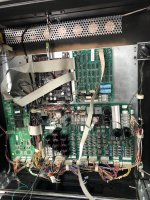
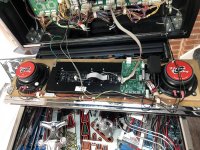
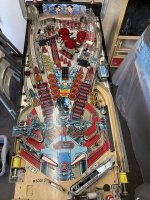
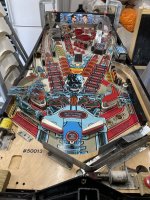
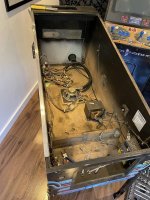
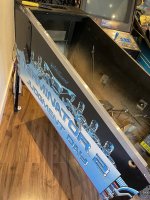
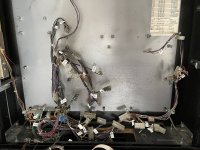
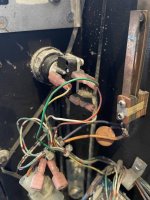
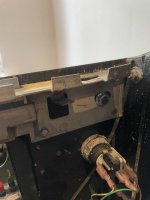
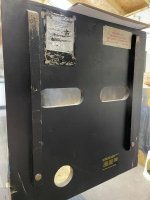
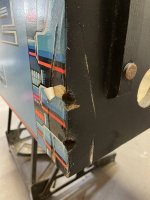
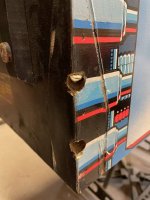
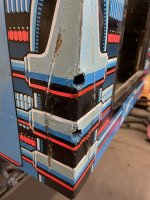
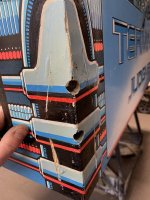
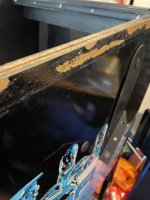
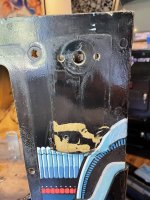
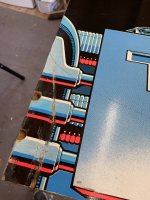
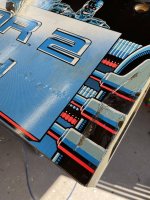
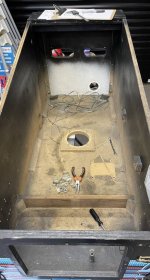
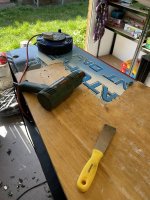
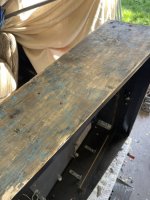
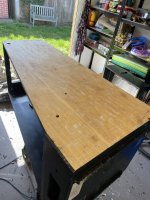
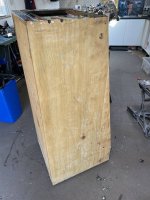
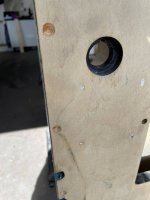
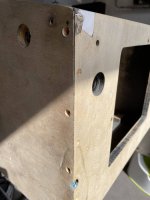
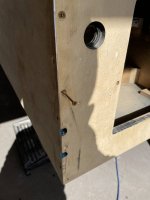
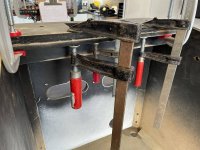
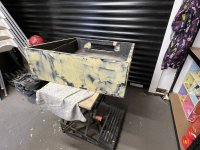
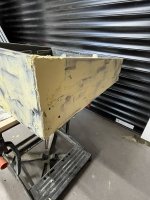
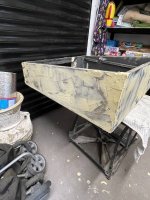
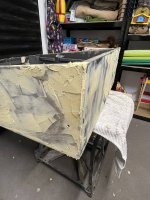
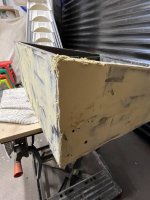
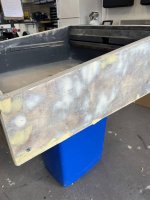
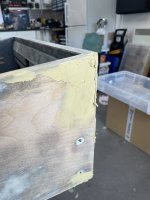
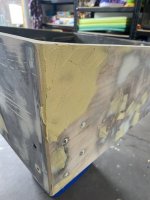
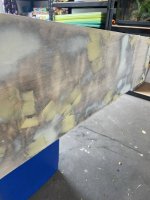
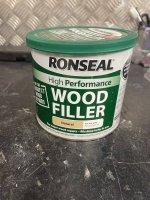
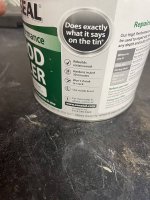
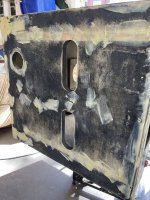
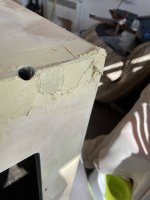
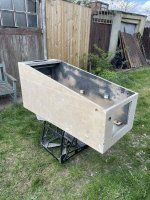
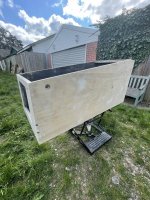
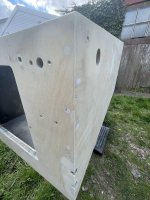
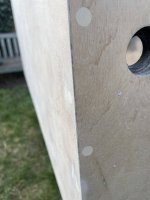
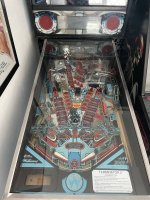
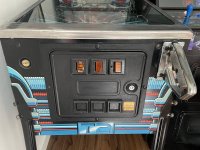
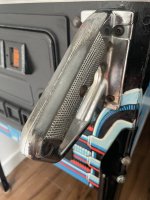
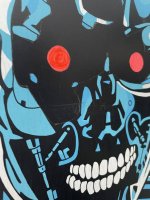
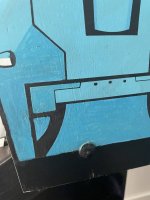
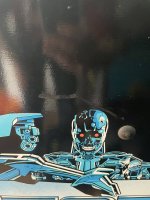
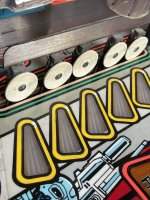
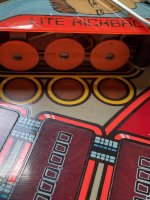
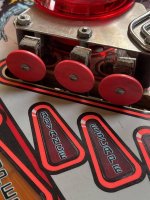
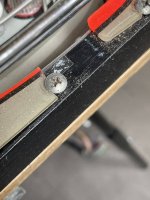
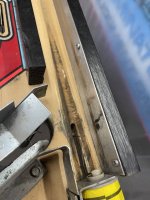
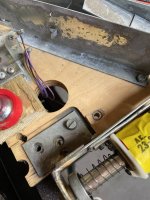
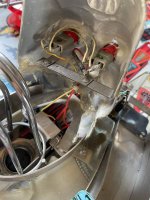
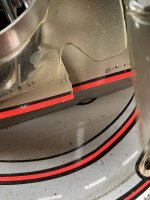
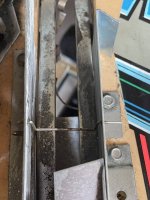
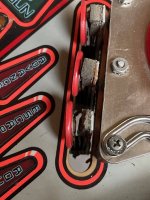
Overall the game was in ok playable condition when I got it. The cabinet had obviously had a hard life, and it had the usual broken plastics, damaged side rails and general heavy wear and tear. So the plan was to strip it down, install new art work, give the playfield a good clean, some powder coating and to replace the plastic/rubbers etc.

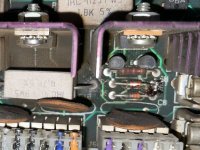
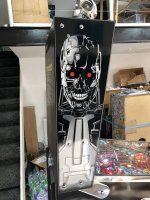
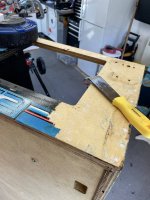
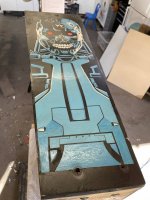
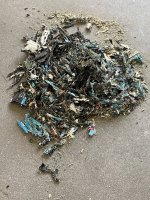
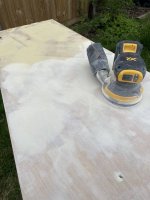
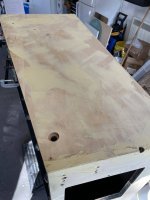
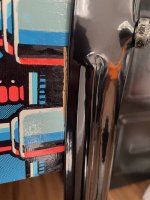
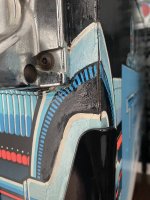
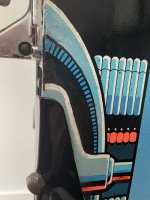
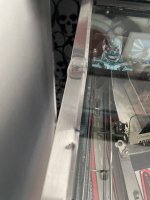
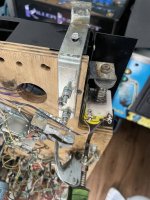
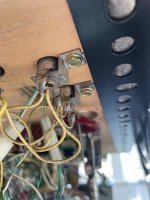
Upon closer inspection that plan has slightly evolved since then. There are a few areas on the playfield that has some heavy wear and damage to the clear coat and artwork underneath. So I thought I’d jump right in the deep end and decided I might as well do a full playfield swap as well.

Im estimating this will take me a few months and plan to keep adding updates here, on how it’s coming along and any problems , so any advice would be greatly appreciated.
 

Attachments

  • B35775B4-CBB4-4029-9783-12B0ED189F07.jpeg
    B35775B4-CBB4-4029-9783-12B0ED189F07.jpeg
    147.9 KB · Views: 149
  • 4AD22713-9F1D-4368-B71E-252CA7FCDA72.jpeg
    4AD22713-9F1D-4368-B71E-252CA7FCDA72.jpeg
    169.6 KB · Views: 145
  • 1A14D735-9894-42EE-B4A2-FDB06D9C3FD9.jpeg
    1A14D735-9894-42EE-B4A2-FDB06D9C3FD9.jpeg
    144.7 KB · Views: 130
  • 4CBB0D5D-E81E-478E-966E-4B94C62E0DA1.jpeg
    4CBB0D5D-E81E-478E-966E-4B94C62E0DA1.jpeg
    92.3 KB · Views: 121
  • 544B4EF7-1809-44F1-8095-7D537EDCCD9F.jpeg
    544B4EF7-1809-44F1-8095-7D537EDCCD9F.jpeg
    110 KB · Views: 121
  • BF5FB565-AC37-49EF-A7B7-E46B59B5CC47.jpeg
    BF5FB565-AC37-49EF-A7B7-E46B59B5CC47.jpeg
    96.4 KB · Views: 117
  • 3B3994B9-8956-4E1B-A734-65076AABEB5C.jpeg
    3B3994B9-8956-4E1B-A734-65076AABEB5C.jpeg
    91.8 KB · Views: 116
  • B9C5B547-BE6B-4170-A6B4-24DCCB16C98D.jpeg
    B9C5B547-BE6B-4170-A6B4-24DCCB16C98D.jpeg
    82.4 KB · Views: 118
  • A0E15178-2E5C-45F3-81ED-BEB9C3D5B575.jpeg
    A0E15178-2E5C-45F3-81ED-BEB9C3D5B575.jpeg
    63.5 KB · Views: 112
  • AA512E6E-3DC7-46BA-B2F3-258823994ABA.jpeg
    AA512E6E-3DC7-46BA-B2F3-258823994ABA.jpeg
    73.6 KB · Views: 109
  • 5FE4CF2C-23D7-48D8-9945-E3F785E7C5FB.jpeg
    5FE4CF2C-23D7-48D8-9945-E3F785E7C5FB.jpeg
    101.9 KB · Views: 106
  • 7E24738F-A27D-4A9C-93A4-4FF002209E6A.jpeg
    7E24738F-A27D-4A9C-93A4-4FF002209E6A.jpeg
    129.6 KB · Views: 106
  • B84B6D8D-CE26-4521-AD5A-B48205A82092.jpeg
    B84B6D8D-CE26-4521-AD5A-B48205A82092.jpeg
    103.7 KB · Views: 102
  • 60AEDC81-761D-4C8D-A328-7AEC7880DDC0.jpeg
    60AEDC81-761D-4C8D-A328-7AEC7880DDC0.jpeg
    106.3 KB · Views: 94
  • CE7779FB-A760-4B90-9AB9-9EBFD2A7E0E9.jpeg
    CE7779FB-A760-4B90-9AB9-9EBFD2A7E0E9.jpeg
    120 KB · Views: 95
  • 1064AABA-12EB-4338-AE20-B6AE91735707.jpeg
    1064AABA-12EB-4338-AE20-B6AE91735707.jpeg
    89.3 KB · Views: 92
  • E38E9DAE-61DC-41A7-9B23-9D76AEA229B5.jpeg
    E38E9DAE-61DC-41A7-9B23-9D76AEA229B5.jpeg
    100.9 KB · Views: 92
  • 754B9064-A313-45EC-AB14-F2CB2E774FA6.jpeg
    754B9064-A313-45EC-AB14-F2CB2E774FA6.jpeg
    110 KB · Views: 88
  • 16F0F12C-DA09-47AA-BD7C-074BBD81034A.jpeg
    16F0F12C-DA09-47AA-BD7C-074BBD81034A.jpeg
    81.6 KB · Views: 88
  • 90A75F0F-6D8C-46F3-9348-FC34CCA907DB.jpeg
    90A75F0F-6D8C-46F3-9348-FC34CCA907DB.jpeg
    114.1 KB · Views: 89
  • FC9BB340-22EB-4CF0-966D-B6DAEA766C44.jpeg
    FC9BB340-22EB-4CF0-966D-B6DAEA766C44.jpeg
    104.8 KB · Views: 87
  • C7EB4D29-C88F-4395-8835-5D67178BE638.jpeg
    C7EB4D29-C88F-4395-8835-5D67178BE638.jpeg
    95.9 KB · Views: 81
  • 1F90C99E-E435-4C5D-90BC-D646515E99B2.jpeg
    1F90C99E-E435-4C5D-90BC-D646515E99B2.jpeg
    102.2 KB · Views: 80
  • F25C6F83-90C0-4C34-953F-5781857872DC.jpeg
    F25C6F83-90C0-4C34-953F-5781857872DC.jpeg
    110.8 KB · Views: 83
  • 902C8290-7B44-48DD-8E9A-D2B2F53FC515.png
    902C8290-7B44-48DD-8E9A-D2B2F53FC515.png
    144.1 KB · Views: 146
Last edited:
Before I started I wanted to make sure everything was working as it should and enjoy the games for a few months while I also start to a mass all the parts I’ll need.

My knowledge on the boards was very limited at the start of the year but I could tell some things just didn’t look right. There was also some issues with the canon and a few targets.

Over its life it had clearly had some “quick fixes” in order to get it working again when on location. So I asked Bob @pinballtoys to go through all the boards and fix any of the bodges.

Overall there were around 15 blown fuses that had been hot wired instead of actually fixing what was causing them to blow.

Got everything back and have been playing it daily for the past 6 months whilst also learning loads due fixing, soldering and replacing bits and bobs. Which brings me to this past weekend where I started to take it apart 😬
 

Attachments

  • 35DC8AF2-9A6D-4A42-921F-04B09D73BDF2.jpeg
    35DC8AF2-9A6D-4A42-921F-04B09D73BDF2.jpeg
    165.6 KB · Views: 80
  • 4F0D1493-909E-4CDA-8E96-FC2B9F18855C.jpeg
    4F0D1493-909E-4CDA-8E96-FC2B9F18855C.jpeg
    107.9 KB · Views: 77
  • E39DBB8E-9E92-49AD-9B54-4D7E32854DFB.jpeg
    E39DBB8E-9E92-49AD-9B54-4D7E32854DFB.jpeg
    109.8 KB · Views: 69
  • F8E7F13D-1534-4DBE-B21A-2533907248C9.jpeg
    F8E7F13D-1534-4DBE-B21A-2533907248C9.jpeg
    94.9 KB · Views: 67
  • F725E42E-9005-4910-8502-756EAEA8BD16.jpeg
    F725E42E-9005-4910-8502-756EAEA8BD16.jpeg
    93 KB · Views: 61
  • C0374276-AECF-4345-A919-3C1B343BE527.jpeg
    C0374276-AECF-4345-A919-3C1B343BE527.jpeg
    85.3 KB · Views: 59
  • 1DEC7EC7-3751-4801-B7C1-2D8C872B202F.jpeg
    1DEC7EC7-3751-4801-B7C1-2D8C872B202F.jpeg
    141.2 KB · Views: 60
  • E249D072-7ACE-4B9D-9431-D3740D3C9567.jpeg
    E249D072-7ACE-4B9D-9431-D3740D3C9567.jpeg
    138 KB · Views: 59
  • E6F1990F-C250-41D7-B951-3D5F9AFE22F0.jpeg
    E6F1990F-C250-41D7-B951-3D5F9AFE22F0.jpeg
    72.2 KB · Views: 62
  • DF1D8550-1AAD-4BB6-A97A-57EC17246DC1.jpeg
    DF1D8550-1AAD-4BB6-A97A-57EC17246DC1.jpeg
    126.3 KB · Views: 61
  • 8D117E27-80BF-41E0-A6FE-CC200E94A28C.jpeg
    8D117E27-80BF-41E0-A6FE-CC200E94A28C.jpeg
    136.6 KB · Views: 60
  • B63F19FE-2D48-4B7E-A9AA-F79E34F91472.jpeg
    B63F19FE-2D48-4B7E-A9AA-F79E34F91472.jpeg
    165.9 KB · Views: 59
  • F450F39E-9C0B-4E1C-B3D0-5D44535ED073.jpeg
    F450F39E-9C0B-4E1C-B3D0-5D44535ED073.jpeg
    166.1 KB · Views: 62
  • B204AE71-EE53-4377-93A6-FB72D1ADC7D7.jpeg
    B204AE71-EE53-4377-93A6-FB72D1ADC7D7.jpeg
    197.4 KB · Views: 63
  • D92FFA6F-C3F0-4CD4-92F8-FEFF200AEADA.jpeg
    D92FFA6F-C3F0-4CD4-92F8-FEFF200AEADA.jpeg
    149.1 KB · Views: 74
Last edited:
T2 is a fantastic game, and looks great with everything down in Chrome if you did decide to go down that route.
 
3-4 years ago here are some pics
 

Attachments

  • 150F72D6-A3E7-467F-83ED-12BB5947DA61.jpeg
    150F72D6-A3E7-467F-83ED-12BB5947DA61.jpeg
    135.1 KB · Views: 100
  • 5F08DA2C-C3E4-4D5D-8A20-602E0463C1A6.jpeg
    5F08DA2C-C3E4-4D5D-8A20-602E0463C1A6.jpeg
    144.2 KB · Views: 102
  • B00F1D3B-B1F9-4AD7-B538-1AC6160DDAAC.jpeg
    B00F1D3B-B1F9-4AD7-B538-1AC6160DDAAC.jpeg
    115.7 KB · Views: 94
  • 86A3501C-04FC-48AF-8F11-2B07BF877486.jpeg
    86A3501C-04FC-48AF-8F11-2B07BF877486.jpeg
    108.3 KB · Views: 89
  • DD861FC7-7F17-4B5D-80EE-459B3A1E90D6.jpeg
    DD861FC7-7F17-4B5D-80EE-459B3A1E90D6.jpeg
    125.9 KB · Views: 90
  • 3FE0847B-4192-424F-B6C5-5489CA467028.jpeg
    3FE0847B-4192-424F-B6C5-5489CA467028.jpeg
    127.8 KB · Views: 94
  • 8C6C9027-67D1-403D-891A-AB8F6CCB5AF3.jpeg
    8C6C9027-67D1-403D-891A-AB8F6CCB5AF3.jpeg
    169.2 KB · Views: 98
  • FF000704-3449-4778-88BB-CCEC97677183.jpeg
    FF000704-3449-4778-88BB-CCEC97677183.jpeg
    122.5 KB · Views: 98
  • D43125BC-A9F9-44A7-B7DF-988AD9D2F959.jpeg
    D43125BC-A9F9-44A7-B7DF-988AD9D2F959.jpeg
    133.5 KB · Views: 96
  • C4109159-6BF3-46E5-9A8D-DC87D2D3716F.jpeg
    C4109159-6BF3-46E5-9A8D-DC87D2D3716F.jpeg
    96 KB · Views: 102
  • 23370A33-1E75-4E1F-9A42-073F66473134.jpeg
    23370A33-1E75-4E1F-9A42-073F66473134.jpeg
    173.3 KB · Views: 102
  • A656B38B-0FDB-4A28-ACD7-24B3B4ED9F3B.jpeg
    A656B38B-0FDB-4A28-ACD7-24B3B4ED9F3B.jpeg
    122 KB · Views: 100
  • 00EE5232-F144-440C-B688-135C12175343.jpeg
    00EE5232-F144-440C-B688-135C12175343.jpeg
    139.8 KB · Views: 91
  • 4CD59E9E-A5BF-4D82-85E8-862FEA6E00DE.jpeg
    4CD59E9E-A5BF-4D82-85E8-862FEA6E00DE.jpeg
    95.8 KB · Views: 91
  • 76D7BBF6-B469-4C47-82BA-98180ECB3201.jpeg
    76D7BBF6-B469-4C47-82BA-98180ECB3201.jpeg
    143.3 KB · Views: 98
  • 04D8BC0D-C162-475E-9DB8-477F735FF968.jpeg
    04D8BC0D-C162-475E-9DB8-477F735FF968.jpeg
    183.4 KB · Views: 96
  • 1FF0A868-4467-4EB2-BBFF-B8A8CA2565A0.jpeg
    1FF0A868-4467-4EB2-BBFF-B8A8CA2565A0.jpeg
    218.9 KB · Views: 98
  • E39A8680-B418-4906-B79A-9D88A71816BA.jpeg
    E39A8680-B418-4906-B79A-9D88A71816BA.jpeg
    289.3 KB · Views: 90
  • 1171DC4B-E025-4F9C-A1FC-F47F7FAA8145.jpeg
    1171DC4B-E025-4F9C-A1FC-F47F7FAA8145.jpeg
    288 KB · Views: 91
  • CA9F23C7-65DF-4AA3-B335-7B98A017B623.jpeg
    CA9F23C7-65DF-4AA3-B335-7B98A017B623.jpeg
    272.1 KB · Views: 95
  • A7137F1A-D54F-4140-A12E-DE3625BEBBDD.jpeg
    A7137F1A-D54F-4140-A12E-DE3625BEBBDD.jpeg
    173.6 KB · Views: 94
  • B34AF0A1-F3FA-4AF4-B590-2D9A62EF1FB7.jpeg
    B34AF0A1-F3FA-4AF4-B590-2D9A62EF1FB7.jpeg
    131 KB · Views: 82
  • 0F8257A8-22CA-4C75-A60F-38F083F57FFA.jpeg
    0F8257A8-22CA-4C75-A60F-38F083F57FFA.jpeg
    129.4 KB · Views: 77
  • 4F0C890C-377B-483C-A064-399762189471.jpeg
    4F0C890C-377B-483C-A064-399762189471.jpeg
    172.6 KB · Views: 69
  • BA95C7FC-068F-445D-8F6B-73BB8A77A7AE.jpeg
    BA95C7FC-068F-445D-8F6B-73BB8A77A7AE.jpeg
    88.6 KB · Views: 71
  • 2782C0BA-29AB-484C-A5E2-5BE41971A466.jpeg
    2782C0BA-29AB-484C-A5E2-5BE41971A466.jpeg
    216.6 KB · Views: 67
  • C16B9069-D571-4B2A-82DF-0A9B93C343EF.jpeg
    C16B9069-D571-4B2A-82DF-0A9B93C343EF.jpeg
    172.1 KB · Views: 65
  • 4CC60F22-9C3C-4015-94FB-50D9C85262CE.jpeg
    4CC60F22-9C3C-4015-94FB-50D9C85262CE.jpeg
    238.8 KB · Views: 107
3-4 years ago here are some pics
Thanks Chris. I found your shop log when I was doing some research a couple of months back. It looks awesome.

Are those chrome aprons still available anywhere? As I couldn’t see any in stock online.
 
Last edited:
T2 is a fantastic game, and looks great with everything down in Chrome if you did decide to go down that route.
I agree, T2 is a great game. It’s the one my wife always plays.

I think I’m going to go with the standard artwork but plan to Chrome quite a bit of it.
 
No most of the parts are no longer available
That’s what I thought, which is a shame, as I think the whole set up looks great.

Thats the main reason why I’ll go with the original style decals instead of the chrome edition.
 
So this past weekend I managed to disconnect the harness from the back box and remove the playfield.

It actually went better than expected, and following some advice, I took a ton of reference photos.

My plan is to work on the cabinet and back box first, then move onto the playfield swap.
 

Attachments

  • 387FFAAD-6A5E-4C49-BF72-D85A286E6829.jpeg
    387FFAAD-6A5E-4C49-BF72-D85A286E6829.jpeg
    178.6 KB · Views: 68
  • ED8DD4F8-5484-4D2D-87A6-F38E73602D4E.jpeg
    ED8DD4F8-5484-4D2D-87A6-F38E73602D4E.jpeg
    169.6 KB · Views: 69
  • DA75B820-C93D-4CCA-AEF4-EBD03053C128.jpeg
    DA75B820-C93D-4CCA-AEF4-EBD03053C128.jpeg
    137 KB · Views: 65
  • 0DA38A55-BB69-43BC-A153-2EE0F239774E.jpeg
    0DA38A55-BB69-43BC-A153-2EE0F239774E.jpeg
    135 KB · Views: 66
  • C6DAC9D2-2389-4783-A11E-6EF95CF0F10D.jpeg
    C6DAC9D2-2389-4783-A11E-6EF95CF0F10D.jpeg
    144.2 KB · Views: 61
  • B4A37DAA-43D5-4C51-ACCE-4E398C41C522.jpeg
    B4A37DAA-43D5-4C51-ACCE-4E398C41C522.jpeg
    167.6 KB · Views: 63
  • F6222374-C0FA-4641-8F26-88AC45222FFD.jpeg
    F6222374-C0FA-4641-8F26-88AC45222FFD.jpeg
    138.6 KB · Views: 57
  • 2C95F379-9F73-4521-BC15-C62CB4F21FC1.jpeg
    2C95F379-9F73-4521-BC15-C62CB4F21FC1.jpeg
    100.2 KB · Views: 53
  • 46389C23-E06B-4947-9282-FEBAE9D9CA3C.jpeg
    46389C23-E06B-4947-9282-FEBAE9D9CA3C.jpeg
    66.7 KB · Views: 51
  • 57BE849E-A007-429D-B136-7D4B33AA1D8A.jpeg
    57BE849E-A007-429D-B136-7D4B33AA1D8A.jpeg
    81.6 KB · Views: 55
Managed to get a bit more done today. I removed the legs, side rails and all other metal work from the cabinet, which really shows the damage to the decals. The plan is to strip all the decals this weekend so that I can start the filler work next week.

I also decided to completely strip the inside of the cabinet instead of masking it all up. I made sure I took a ton of photos so that I know how it all goes back 😂
 

Attachments

  • C1A91E3D-E742-457C-AB22-6DD5988733A9.jpeg
    C1A91E3D-E742-457C-AB22-6DD5988733A9.jpeg
    83.5 KB · Views: 53
  • C252066A-50EA-4985-87B5-7ED2CC7C2E94.jpeg
    C252066A-50EA-4985-87B5-7ED2CC7C2E94.jpeg
    89.8 KB · Views: 47
  • DCA6390C-765E-4D0C-A8AE-0AB86870832B.jpeg
    DCA6390C-765E-4D0C-A8AE-0AB86870832B.jpeg
    113.1 KB · Views: 45
  • 9B392F31-D968-4971-9664-7A30B896B4F3.jpeg
    9B392F31-D968-4971-9664-7A30B896B4F3.jpeg
    111.9 KB · Views: 43
  • CDA50951-9A0C-4048-90B6-269E9A8CA421.jpeg
    CDA50951-9A0C-4048-90B6-269E9A8CA421.jpeg
    78.9 KB · Views: 42
  • 7F19400B-15C7-458D-8A23-036E6E2ADEB3.jpeg
    7F19400B-15C7-458D-8A23-036E6E2ADEB3.jpeg
    134.5 KB · Views: 43
  • B42B65B8-2614-4CEC-9311-62D6177FF256.jpeg
    B42B65B8-2614-4CEC-9311-62D6177FF256.jpeg
    151.5 KB · Views: 47
  • FF2FCF98-5829-409D-AD2F-78792E0CB45A.jpeg
    FF2FCF98-5829-409D-AD2F-78792E0CB45A.jpeg
    120.6 KB · Views: 48
  • D8AB8F9A-1701-4ABF-A9E5-477FBC090BF8.jpeg
    D8AB8F9A-1701-4ABF-A9E5-477FBC090BF8.jpeg
    136.8 KB · Views: 51
  • 8C05E85A-2383-4F63-BCE8-93CAE250D547.jpeg
    8C05E85A-2383-4F63-BCE8-93CAE250D547.jpeg
    95.6 KB · Views: 47
Last edited:
I started early today and managed to get all the decals removed from the cabinet. What a slow job!

Ive just finished sanding down the back box which actually took longer than I expected. I think this was due to the years of touch up paint all over it.
 

Attachments

  • E206123D-82D9-48A3-930E-9B990956E0BD.jpeg
    E206123D-82D9-48A3-930E-9B990956E0BD.jpeg
    126.6 KB · Views: 71
  • F49038DD-62BA-4FF2-A075-21CA2CB4F29E.jpeg
    F49038DD-62BA-4FF2-A075-21CA2CB4F29E.jpeg
    108.8 KB · Views: 56
  • 9C8BA1A2-22CF-4E3B-BA32-D9FAAFA394A0.jpeg
    9C8BA1A2-22CF-4E3B-BA32-D9FAAFA394A0.jpeg
    95.6 KB · Views: 52
  • 46259094-0201-4477-9FA7-84992996C659.jpeg
    46259094-0201-4477-9FA7-84992996C659.jpeg
    95 KB · Views: 47
  • EF1CF712-3A73-4F8A-8731-78C7F669407E.jpeg
    EF1CF712-3A73-4F8A-8731-78C7F669407E.jpeg
    90.6 KB · Views: 46
  • 6E5BC917-12A4-4A39-9C4F-1C9CC2111E34.jpeg
    6E5BC917-12A4-4A39-9C4F-1C9CC2111E34.jpeg
    96.3 KB · Views: 48
  • B7EFEC32-15C4-4C08-BCB3-C3E340ECEE0B.jpeg
    B7EFEC32-15C4-4C08-BCB3-C3E340ECEE0B.jpeg
    117.4 KB · Views: 45
  • FA71604F-C3F6-4103-A40A-7E6A346D3940.jpeg
    FA71604F-C3F6-4103-A40A-7E6A346D3940.jpeg
    113.6 KB · Views: 43
  • 42377370-7D3B-4B1C-AFF0-8B382BB9C6EF.jpeg
    42377370-7D3B-4B1C-AFF0-8B382BB9C6EF.jpeg
    116 KB · Views: 44
  • CB04B9D6-7C79-43F9-B072-C11DFE834B78.jpeg
    CB04B9D6-7C79-43F9-B072-C11DFE834B78.jpeg
    104.9 KB · Views: 58
  • F5FE97CE-9523-4252-8947-91553D8533F7.jpeg
    F5FE97CE-9523-4252-8947-91553D8533F7.jpeg
    239.3 KB · Views: 71
After I removed all the decals, it revealed past filler work on the top corners of the back box as well as some previous repairs to the corners at the front of the cabinet.

I’ve re-glued and pinned the piece of wood to the inside of the cabinet where the the rear glass rail fits as it had come away.

At some point someone has tried to pull the corners in with screws, however both sides have opened up. After doing some research, I read that it’s really important to get the corners nice and square so that when it comes to install the new side art, both sides line up with the front decal.

So I run some wood glue down each corner and countersunk 70mm screws in, which has done the trick.

Ive had enough for today though as it’s roasting, but the plan is start the filler work tomorrow.
 

Attachments

  • 9BB0A7EC-CDD7-42AD-A385-34B18FA17D71.jpeg
    9BB0A7EC-CDD7-42AD-A385-34B18FA17D71.jpeg
    70.9 KB · Views: 43
  • 70A9B798-83D3-4D25-BF3B-11BEB84B9002.jpeg
    70A9B798-83D3-4D25-BF3B-11BEB84B9002.jpeg
    72.1 KB · Views: 42
  • 7BAB69CF-9D6D-49D0-AAB9-899DE837000E.jpeg
    7BAB69CF-9D6D-49D0-AAB9-899DE837000E.jpeg
    57.9 KB · Views: 44
  • 5BD69FFC-4FE5-4E00-99E6-3CEFEB8790A3.jpeg
    5BD69FFC-4FE5-4E00-99E6-3CEFEB8790A3.jpeg
    162.1 KB · Views: 48
I finished scraping off all the left over glue last night with a Stanley blade and white spirit followed by a quick sand over.

For the filler work, I decided to start with the back box as it had the most damage, especially to the top corners. I went pretty thick with the wood filler for the first run as I found from using it on another project it sands off nicely. I’ve been using 80, 120 then 240 grit sanding discs to get a smooth finish.

Im probably going abit OTT with it as I’m going over it with a fine tooth comb to make sure there are no little holes or nicks that will show through when the new artwork is applied.

So far I’ve done 4 rounds of filler then sanding on the back box and I’m pretty happy at the way it’s looking.

Once I’m happy with this I’ll crack on with the main cabinet.
 

Attachments

  • E9309DD5-7D33-4C64-AABD-830A573713D1.jpeg
    E9309DD5-7D33-4C64-AABD-830A573713D1.jpeg
    175.4 KB · Views: 60
  • F110A163-E8CF-4E65-BCEA-CA3D568A1257.jpeg
    F110A163-E8CF-4E65-BCEA-CA3D568A1257.jpeg
    102.3 KB · Views: 55
  • 53E06076-6AA7-44F9-B09E-9C91D558C07B.jpeg
    53E06076-6AA7-44F9-B09E-9C91D558C07B.jpeg
    116.1 KB · Views: 54
  • 3BC9A3FB-CB4E-445F-9359-F39B9C62EBAB.jpeg
    3BC9A3FB-CB4E-445F-9359-F39B9C62EBAB.jpeg
    123.8 KB · Views: 52
  • 90FDE8A8-A85B-433B-8B57-02DD00E7ABC1.jpeg
    90FDE8A8-A85B-433B-8B57-02DD00E7ABC1.jpeg
    95.9 KB · Views: 52
  • 9378DD62-1880-4AF5-BD08-E7F68039297D.jpeg
    9378DD62-1880-4AF5-BD08-E7F68039297D.jpeg
    84.2 KB · Views: 51
  • B382BECF-D780-4E74-B06E-D7E32FFA8A18.jpeg
    B382BECF-D780-4E74-B06E-D7E32FFA8A18.jpeg
    84.1 KB · Views: 49
  • 1018FFFC-D2FD-4C9C-8905-D26B4C42AF5A.jpeg
    1018FFFC-D2FD-4C9C-8905-D26B4C42AF5A.jpeg
    75.4 KB · Views: 49
  • 8320AE1E-7C69-4BF0-8B04-70FC50F665EB.jpeg
    8320AE1E-7C69-4BF0-8B04-70FC50F665EB.jpeg
    78.7 KB · Views: 58
what’s your filler?
Its Ronseal 2 part wood filler. I’ve used it before on some of my arcade restorations and I find that it doesn’t shrink or crack, you can build it nicely if needed and sands really easily.

Usually sets in about 20 to 30 minutes but with temperature today it was more like 2 to 3 minutes :oops:
 

Attachments

  • 3EDA4D4E-15B6-4A6C-91CB-0ACE33536591.jpeg
    3EDA4D4E-15B6-4A6C-91CB-0ACE33536591.jpeg
    131.4 KB · Views: 21
  • 211F2999-53F6-44CB-A96B-87EC74DDADD9.jpeg
    211F2999-53F6-44CB-A96B-87EC74DDADD9.jpeg
    124.9 KB · Views: 14
Yeah I went OTT on the back box. Those front top corners were really bad.
 
Fill, sand, repeat……..that’s been my entire day o_O

Really pleased though with how the main cabinet is looking. The corners are now looking nice and sharpe.

I used the same method of 120 grit followed by 240 grit sand paper, then run my hand over it, and if I could feel a slight dip, I added a thin layer of filler and sanded again! :oops:

It now feels super smooth. I’m going to give both the back box and cabinet a final sand with 400 grit paper before I start painting.

The artwork has been ordered and the black paint should be here on Monday, so the plan is to get everything painted this week so that it has plenty of time to dry, and then I can crack on with the new artwork when it arrives.
 

Attachments

  • 9AC79BC6-F3E3-4843-B209-11AAE9F16F67.jpeg
    9AC79BC6-F3E3-4843-B209-11AAE9F16F67.jpeg
    78.7 KB · Views: 42
  • 9773AE29-378B-48DA-8ED9-B982BC5ADF69.jpeg
    9773AE29-378B-48DA-8ED9-B982BC5ADF69.jpeg
    141.9 KB · Views: 42
  • E4640AAC-D94A-4400-AE3B-5F3BA5CBA3E5.jpeg
    E4640AAC-D94A-4400-AE3B-5F3BA5CBA3E5.jpeg
    71.3 KB · Views: 40
  • 1CD6290E-2EB0-4283-A818-79AC7301ACA6.jpeg
    1CD6290E-2EB0-4283-A818-79AC7301ACA6.jpeg
    66.9 KB · Views: 40
  • B54845EC-372D-4685-AF8F-6B934A333055.jpeg
    B54845EC-372D-4685-AF8F-6B934A333055.jpeg
    68.2 KB · Views: 37
  • 1966385C-9968-4BBF-9915-AC9D2777AC82.jpeg
    1966385C-9968-4BBF-9915-AC9D2777AC82.jpeg
    188.8 KB · Views: 40
  • B480479E-7B84-4717-886F-2232D3872362.jpeg
    B480479E-7B84-4717-886F-2232D3872362.jpeg
    177.9 KB · Views: 40
  • DA4F8347-A5F8-4095-9D87-6B794E9E9B0A.jpeg
    DA4F8347-A5F8-4095-9D87-6B794E9E9B0A.jpeg
    128.8 KB · Views: 36
  • E17E6071-698B-4217-95FE-77BEBD9B19C4.jpeg
    E17E6071-698B-4217-95FE-77BEBD9B19C4.jpeg
    66.1 KB · Views: 40
Next job on the list was to replace the rear sliders/skid rails on the back of the cabinet as the ones I took off weren’t great but obviously served there purpose.

I found the closet sheet of timber in regards to thickness and then cut it down into 2 lengths. I then cut the same angles at either end so they matched the originals.

I glued and pinned them in place and then undercoated the areas that will be painted with a black primer.

The black topcoat paint that I ordered for the cabinet arrived this week. Ive never used this particular brand of paint before so not sure how it’s going to look.

A4F34356-695A-44E8-A105-A4C02C05F9BB.jpeg5460B1F6-9A14-4123-A5FF-8FF5E21225AA.jpegB03F5274-C08A-45B9-BF9A-C1DA8EDB5D6B.jpeg4BF723FF-1481-447D-92F8-A9A6DCA0C93B.jpegE08F29B1-A793-466C-BEC1-9A1B32F8C0B7.jpeg8EAF3E25-F4A1-4115-B451-C06BB5C85BD3.jpeg5D4E72B6-6EEB-478F-8643-5F6B0BFF284C.jpeg492FDF0A-3076-4D8C-9769-BD97CB1030A8.jpeg
 
I used wudfil as it has served me well on guitar repairs. It doesnt move much even after spraying over and time sets in....

Cabinet is all prep and a couple of hours fitting the decals.

Take your time.

I would personally do the front door first then match the sides when decaling.

Again - take your time. I would recommend doing decals the wet method.

The whole pinball machine has had a hard life. The boards are hacked but a lot of operators did this - and once you start the home repairs then its not going to improve.

If you sent me those boards for repair I probably would just say buy a new DMD board (you wont need the HV section IF you put in a colordmd/pin2dmd)..... Buy a new CPU board..... Do what you can with the power driver.

Or if it all actually works - just replace the bad header pins and keep using it until it messes up and then replace.

Myself and the other engineers on here all prefer to repair boards that have not been bodged! Sometimes bad repairs cause more issues.
 
I would personally do the front door first then match the sides when decaling.

Again - take your time. I would recommend doing decals the wet method.

Thanks for the advice on doing the front door first. I really want the lines on the decals to line up as much as possible.

Yes my plan was to give the wet method a go. I’ve not done this method before but have done a previous arcade cabinet in the dry method and to be honest it was not a good experience :oops:.
 
Last edited:
The whole pinball machine has had a hard life. The boards are hacked but a lot of operators did this - and once you start the home repairs then its not going to improve.

If you sent me those boards for repair I probably would just say buy a new DMD board (you wont need the HV section IF you put in a colordmd/pin2dmd)..... Buy a new CPU board..... Do what you can with the power driver.

Or if it all actually works - just replace the bad header pins and keep using it until it messes up and then replace.

Myself and the other engineers on here all prefer to repair boards that have not been bodged! Sometimes bad repairs cause more issues.

Yes the machine had clearly had a hard life.

I know what you mean about boards being butchered. As you can see below my Judge Dredd cpu had been hacked to an inch of its life and wasn’t worth fixing.

0E1D48B9-2251-41C0-BA01-9540758665CE.jpeg
View attachment 143287
All the boards were working when I got the T2 but I sent them to pinballtoys
and Bob did a great job in sorting out the previous hacks.

Everything has been working great for the past 6 months but I’ve got a spare new cpu board should the original fail.

I’ve a pinsound board to install and the plan is to get a colour dmd as well.

Thanks again for the advice

1D050DF6-87E3-47B9-9D7F-B263842EE3E0.jpeg902C1552-FD29-4939-B339-2DF226878A69.jpeg
 
I finished painting the cabinet and back box last night. The new art set was delivered as well, and the colours and quality seems really good. I suppose I won’t know for sure until I see if the sides line up with the front.

I’m going to let the paint fully dry today and then fit the new decals tomorrow.

658EC828-B32A-4879-BEC6-420BBF89862B.jpegE2AB4FA5-1D3D-4954-A5F4-2A02B15DDA09.jpegCB18E2BA-C80E-4AA5-A961-AE26E3A037D9.jpeg58320DB1-E84B-4B12-87C0-C98D256A9E7B.jpegF4580A00-7E8E-4DD9-854A-E487A580767C.jpeg387EF205-2F90-47F6-9FDE-24A1BF782CDB.jpeg5CDFE52A-F8CF-4EF5-ADF1-5C95D681CB16.jpegE7663C92-8691-4D6A-BC36-B93F61A7BC8D.jpeg
 
Looks like you need the warning text screened on that back box.
Don't get to involved in getting the front decal matching up with the sides most just don't match up at all, the biggest culprit being Indy Jones.
 
Looks like you need the warning text screened on that back box.
Don't get to involved in getting the front decal matching up with the sides most just don't match up at all, the biggest culprit being Indy Jones.
Yes, my plan is to screen print the warning text on the back box, once I’ve finished the decals, though I’ve done tried it before so I’m not sure how it will go.

Thanks for the advice on lining up the decals, I didn’t know this was a common issue. As long as they are not miles out, I’ll be happy.
 
Back
Top Bottom